Some beginner photographers continue to shoot in JPEG for a reason. They are a bit afraid of the raw file format. But shooting raw is easier than you think. If you want to get started with raw photography but don’t know how, I’ll show you how.
If you are taking pictures in a raw file format, then this article is not for you. It’s intended as a simple guide to photography beginners who still use JPEG in-camera for one reason: the idea that the raw file format is hard to use.
The idea is easy to understand. After all, a raw file is raw sensor data that must be edited before it can be used. This means a difficult workflow and a lot of knowledge beyond the capabilities of a beginner photographer.
This is not true, of course. Everyone can take raw photos without any problem. Raw editing software is doing the hard part for you. In this article, I want to show five simple steps on how to get started with the raw file format. If you already have experience with raw workflow, feel free to add any tips in the comments below to make it easy for anyone to capture raw.
JPEG is not wrong
Before we start, you should know that taking pictures in jpeg format is not wrong. The software that camera manufacturers have installed in cameras is very sophisticated. This means that a jpeg from a camera can be as good as a manually edited raw file.
The most important difference is the camera’s ability to take advantage of the maximum dynamic range. That means you can correct the photo in the post by correcting the exposure or enhancing the shadows. There is also the benefit of changing the color balance if needed.
If you edit a JPEG image in the same way as a raw image, the quality will degrade very quickly. That doesn’t mean you can’t post-process JPEGs; you can’t go that far.
Shooting JPEG may be an option. If you’re happy with the JPEGs from the camera, there’s probably less of a reason to change to the raw file format. But if you’re having some issues with exposure and dynamic range, stepping into the world of raw photos can be a good option.
Things to consider
There are a few important things to keep in mind. The raw file is the larger file. This means you need more memory to save the image, especially if you decide to shoot both raw and JPEG images.
You also have to realize that you need to use a raw file editor before you can use photos. It allows you to edit or retouch the image as needed. You must export the raw file as a JPEG to use it on social media, to send it to a print store, or to share it with others.
You can use Lightroom, Lightroom Classic, Capture One, ON1, Affinity Photo, Luminar, or one of the many others available. Camera manufacturers also have specialized raw editing software that you can use.
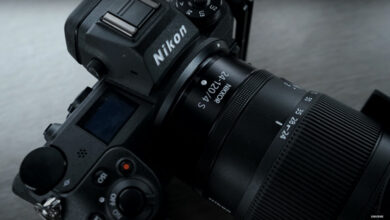
Step 1: Set your camera to raw file format
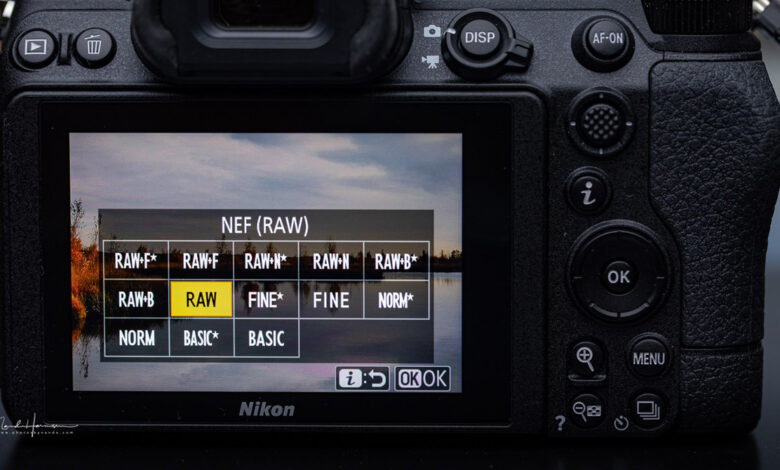
The first step is to set your camera to the raw file format. Each brand of camera has its own file extension. Nikon raw files are called NEF, Sony ARW, Canon CR2 or CR3, Olympus ORF, Panasonic RW2, and sometimes, it can be a DNG file. Regardless of the extension these files have, they are raw files.
Cameras sometimes provide different types of raw files, such as compressed or uncompressed files. Most of the time, compressed raw files are perfect to start with. If necessary, you can always change the setting later.
If you are unsure about the raw file processing, you can always record both raw and JPEG images. But in the end, just a raw file is enough, unless there is a special purpose for additional JPEGs.
Step 2: Take a picture of everything as usual
This is an important step. A lot of beginner photographers think they need to do something completely different when taking photos in raw file format. This is not the case. There is almost no difference between shooting in raw or JPEG format.
If you prefer shooting in manual mode, continue shooting in manual mode. If you shoot in aperture-priority or shutter-priority mode, continue to do so. Just keep in mind that the loss of some in-camera settings is only for the JPEG file format.
A good example is the HDR setting, which is usually available when shooting in the JPEG format. Most cameras don’t offer that setting with raw photos. But that’s where the benefits of the raw file format come in. You can use shading in post-processing. Or you can create your own HDR by exposure bracketing.
Step 3: Open your image in editing software
Raw files can usually be viewed from within Windows Explorer or Apple Finder. But some editing is needed to use the image for general purposes. That’s why you must first import your images into the editing software. With that said, there are many different brands of software, but all of these will allow for the basic editing needed for a raw file.
If you’re not sure which software you’ll like best, simply download a trial version and use it for a trial period. In case you are new to it, for this article I used a software made by Adobe called Lightroom Classic. It has its benefits and drawbacks, like all the others available.
Step 4: Simple editing if needed
This is where the power of raw editing comes into play. You can adjust exposure, contrast, color, etc. But you are not required to do so. All raw editing software will read the camera’s settings in the information stored in the raw file. This way, the image you see on the monitor will be almost the same as on the camera’s LCD monitor.
If the look of the image is the way you like it, just skip to step five. If you see something you want to change, change it using the available tools. Make it lighter or darker. Add color saturation or reduce saturation. If you become familiar with the capabilities, you can make both global and local adjustments. But don’t worry about that if you’re just starting out. Just basic adjustments can be enough to make a difference.
The beauty of raw editing software is the ability to change things without changing the raw file itself. This is called non-destructive editing. As long as you don’t delete the raw file, you can always go back to the original image, even if you’ve fully edited it. Just reset editing and start over.
Step 5: Export to JPEG
This is the final step to do. You need to create a JPEG image from a raw file for use online, on social media, or if you want to send the photo to friends and family.
Since the raw file won’t be affected, you can export as many JPEG files as you need, each with a different edit or at a different size. You can save these JPEG images next to the raw file. If you decide to change the edit at a later stage, just reopen the raw file and make the changes.
Just remember, use the sRGB color space when exporting JPEG images. Normally, this is done automatically when exporting JPEG, but you should check it out. If it is not the sRGB color space, the image may have strange colors after export.
Keep raw files safe
After you’ve exported the raw files as JPEG images, don’t throw the raw files away. These are the original files, which can be used more than once. If something goes wrong with the exported JPEG, you will have the original image.
There is absolutely no need to fear the raw file format. You won’t have to do some tough editing. But don’t be afraid to try everything. There’s nothing wrong with the picture, as a simple reset is enough to go back to the original.
If it turns out that you don’t like shooting in raw format and you don’t feel the need to edit your photos yourself, just go back to shooting in JPEG. Like I said, it’s not wrong. That is a choice. I would like to ask all experienced raw photographers if you have any additions for the beginner raw photographer. Feel free to add tips in the comments section below.