CGI is often associated with film, but it also has its place in photography. In fact, you create complex and creative backgrounds for your footage using CGI software.
Create Everything for Free (Almost)
Looking for a creative tool to add to your photography without spending a fortune? CGI might also be for you. During the Covid shutdown, I began to explore the strange and wonderful world of CGI (Computer-Generated Imagery). This is not because I think the development of technology is about to kill the photography industry. Instead, I want something that I can add to my toolbox to create images. After discovering that the software Grinder offered for free, I think it’s worth investing some free time to see what it can do for me. Yes, there are other plans out there, but you have to be willing to pay to sign up for those and there’s no way I want to part with some serious cash before I know if it really pays off. for your business or not.
I’m not going to lie, it wasn’t as easy as I expected, but with a bit of work and some guidance, I’ve started to get the hang of it. There are 3 main steps you need to learn for CGI – modeling, textures and lighting for rendering. At the modeling stage, you build the various items you need in the 3D world. Then you add materials to objects (textures) with controls for things like surface gloss or opacity, color, transparency, etc. Then you build a luster setup. as bright as you would in the studio. You add a camera with focal length and depth of field to the render point. For those of you working with CGI, you’ll know this is a bit of a simplification and the steps are not always separate from each other. However, hopefully this gives you a rough idea of what you need to deal with if you want to get started with CGI.
Why CGI?
There weren’t any tutorials I could find at the time specifically about building the context. You need to learn the tools to create an audience and then figure out the audience you want to create. But it’s well worth it because with a lot of practice you can really do almost anything. Or, if you’re a bit lazier, you can buy ready-made models to include in your scene. From furniture to fruit to people and properties, there are plenty of 3D models available to save you time if needed. But why bother with all this in the first place? Well, for me there are a couple of main reasons:
- If you can’t go anywhere (e.g. lockdown!), you can still create photo sets
- You don’t create any waste by building sets and throwing things away
- If you want to go back, the footage can be saved and you can come back at any time
- You can create things that can be difficult in real life or too expensive
- No gravity! Lights and objects can be suspended in space without cables or wires
CHOLD background
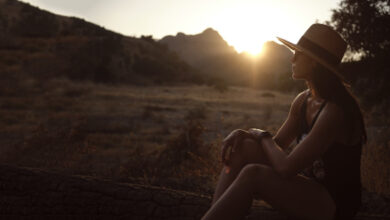
So when I got to the point where I could render the scene in 3D and render the scenes in high resolution, I could finally use it for what I wanted in the first place. While I’ve done some pre-build visualizations for purely CGI businesses, I mostly tend to use it for compositing for product photography. For example, in the image below, you have a scene created in Blender with a dummy placeholder object where the product is going. This allowed me to see how the scene would fit together and also created some reflections in the bubbles of the product to make the product look more realistic. Yes, I know it doesn’t work 100%, but at least you have to look closely to see the error!

The shower gel was filmed in the studio. I recorded the light so I could match it in the 3D scene (as close as possible). Proper lighting adjustment is an important aspect of any composite image if it is to look realistic, so don’t skip this step and do any old fashioned things in your 3D scene. I cut out the bottle and overlayed it on top of the rendered background in Photoshop. With a little extra tweaking, it’s done.
Can I use real bubbles? Of course they do, but they don’t always behave the way you want them to. In the 3D scene, I can put them where I want and they stay there. Other than that, it’s a quick and easy scene to make. The bubbles are just basic spheres slightly adjusted, so there aren’t any detailed models to make. For commercial projects, it’s a matter of balancing the time and cost of doing something in 3D. It wouldn’t always make sense to do so. However, for a personal project, it’s fun and exciting to have the occasional weird challenge.
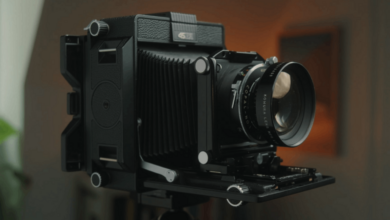
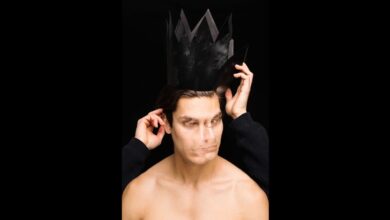
Cosmetics With CHOLD Wallpaper
I also use Blender to base my nail polish and lipstick images. In these cases, there won’t be any interaction with the scene from the object, so I can freely create the scene without the mock object in place. Obviously, you still have to plan ahead.

Here are some behind-the-scenes shots of the 3D environments I created for these shots.
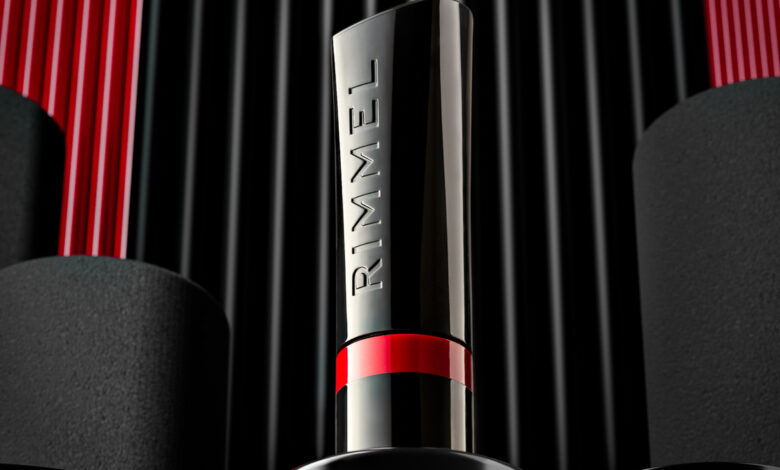
Render with shallow depth of field
In this next image, I used the depth of field control on the CGI camera to add blur to the more distant spheres. While it can sometimes be beneficial to have infinite depth of field in CGI, you probably still want some control to give the image more of a photographic feel. Also, having everything super sharp can of course make it harder for the subject to stand out.
Your photography knowledge gives you a good foundation for CGI. However, there is still a lot to learn to get the most out of it. For product photographers, there’s the ability to animate 3D products and pre-production renders of products, and use renderings for composites with studio photos. Portrait photographers may find it helpful to be able to create scenes that they incorporate people into, especially for the worlds of sci-fi and aliens. CGI is a useful addition to a creative toolkit, and it can really be a photographer’s friend.