In the past three years, I’ve built four new photography studios, and each time, I find better and better ways to streamline my space. In this video, I want to share with you one of the coolest ways to apply seamless paper or Gravity backdrops.
One of the best decisions I’ve made when designing my last few studio spaces has been to hang my backdrops from the ceiling or wall. This eliminates all the cumbersome stands and lampposts that become a trip hazard or just take up a lot of space. Obviously, if you only rent out one space, you may not be able to permanently drill into your ceiling, and if that’s the case, check out the video below, where I show you how we temporarily attach our rolls of paper in our last rental premises.
While fixing paper and canvas backdrops to the ceiling is a great way to save space and quickly change your backdrop, it’s still not perfect by all means. Once your support system is screwed onto small paper J-hooks, you can’t easily adjust the position of the backdrop as you roll it down.
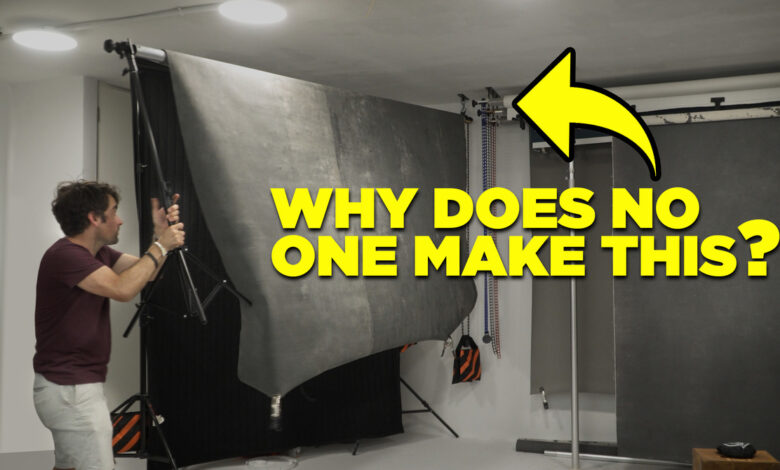
While designing my new small studio, two-car garage, I started thinking “how can I creatively mount some Gravity backdrops on the ceiling to allow me to move them around?” around to create a wider and tighter shooting space?” The idea of having a rotating backdrop seems simple, but what I quickly discovered is that no major photography company makes any sort of modular backdrop or stand. If I wanted to create a system to make my backdrops as flexible as possible, I would have to do it myself.
I won’t outline the entire process in this article because I think the video above does a great job of showcasing some of the challenges and concerns I faced while building a single backdrop stand. this. However, if you don’t have time to watch videos or just want a quick reference of each item I’ve used, I’ve listed them below with an overview of what I’ve used each item.

Main components of my Articulated Platform Bracket
first) Gravity backdrop: These are beautiful and hold very well. I wish all my backgrounds were canvas. I wonder if a solid colored canvas backdrop with some decorative paint is a thing… might have to consider that too.
2) 10 ft Fotoconic background bar for the background: These are great ways to attach your canvas backdrop or even add reinforcement to your Savage Paper Backdrop rolls. I cut the beaks into different sizes to suit my specific use but they are split into 3 small 3′ pieces for easy movement and transport.
3) Neewer . Single Roller System“Tons of companies make these roller systems, but for my rotary system you’ll definitely need at least one roller and one of the smaller J-hooks to attach to the system’s rotary face.
4) Impact three-hook platform system: Similar to the Neewer version above, this gives you the ability to attach three rolls of paper, or in this case, I cut the longer hooks to use on the opposite side of my swivel stand. If you cut off the longer hook like I did, you can also attach the other two hooks in a more traditional way, which is what I plan on doing right away so I can hide all the chains and make a system. The wall is completely invisible.
5) Baby cradle with Kupo paper drive: This is used to create an adjustment column that allows me to move my paper background to different positions without using a ladder. If you need to set up a mobile platform that you ship to a customer’s home or remote locations, having a set of these systems on hand is always a smart move.
6) Manfrotto . metal chain: I didn’t specifically mention this in the video, but I wanted to change all the plastic necklaces that come with the base kit above into these sturdier metal chains. They look better, feel sturdier and stronger. They’re not necessary, but I definitely prefer metal chains over plastic chains.
7) Step Up Bit Drill: If you need to drill through steel or aluminum, these little pyramid drill bits are great. Since the head is small, it’s easy to start your hole without jumping all over the place. And because it’s tapered, you don’t have to figure out the exact size you need for your hole; instead, you can easily increase the hole diameter precisely without changing bits.
8) Screw and Lag Shield: Hopefully you can just use the hardware that came with the mounts above, but if you really want to reinforce your hangers or have to attach them to concrete, be sure to pick up some sort of screw system extended delay.
and finally…
9) Bag punching price: This is the best solution I have found to attach the paper roller while still allowing it to rotate and tilt down for easy adjustment. The one I recommend can hold 600 lbs, gets really heavy if mounted properly, and because it’s made to allow for a large punching bag and allows for 360-degree rotation, it’s more than smooth enough to rotate the font occasionally. your background .
Improve?
So it’s a rotating base that I made myself. I’d be curious to hear what you guys think and if you can suggest anything that could make this more powerful, more flexible, or more practical. Obviously, a big part of this was hanging a second large Gravity Backdrop in front of the scrolls which would allow all the strings to be hidden and make my “room” orientation look more structured with a hard or semi-hard corners.
If you like these photography studio hack videos I made YouTube playlists There will be more tips to make your studio space more practical, cleaner and more organized.