The focusing ring on my favorite lens had been stiff for a while and finally, it failed completely. I decided to take the lens apart and see if I could fix it myself. Of course, it wasn’t that easy.
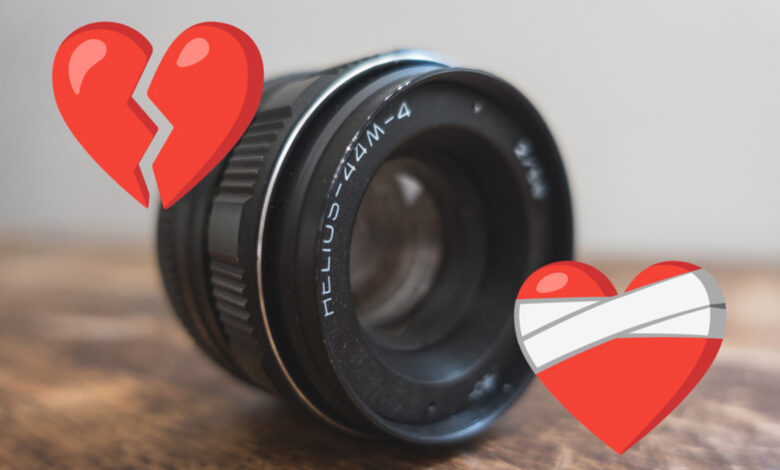
My most treasured lens is a Helios 44M-4, a slightly less desirable member of the Helios 44 range, a series of 58mm f/2 lenses designed and manufactured in Russia and Belarus going as far back as 1958. Somewhat counterintuitively, rather than improving over the years, scaling up production to meet demand tended to reduce quality. Different factories had different standards, and while it’s a solid performer given the price, the variation between copies of the 44M-4 made during the late 80s and early 90s can be quite extreme. It’s not unusual to find optics that are poorly aligned, and excessive lubrication of the aperture blades can result in oil sneaking into the elements, reducing contrast and creating hazy images.
From Beyond the Iron Curtain

Somehow, I got lucky. Born in Warsaw in the mid-80s, my partner used a Zenit camera as a child which disappeared into storage about 25 years ago. After it was dug out for me to play with, I harvested the glass and quickly bought myself an M42 adapter ring for my Sony a7 III.
I was surprised by the sharpness of the lens, especially as research suggested that it probably shouldn’t give such good results. The variance in quality is vast and this was a relatively rare find, though you can track them down on eBay and snag a handful of them for not very much money if you’re feeling keen.
The other thing that got me excited was the distinctive feel of the images. The swirly bokeh and low contrast — especially when wide open — were magical.
Sharpness Is Overrated
Prior to this lens, pretty much all of my forest photography had been shot at 35mm, and I was sure that 58mm was going to be a challenge. That did not prove to be the case. I’d played with 50mm and 75mm but using modern, comparatively boring glass; the Helios was a different beast.
Since I started photographing the forest a few years ago, I’ve developed a pictorial style, probably inspired by fairy tales and the heroic fantasy novels that fed my childhood. The Helios leans into this heavily; I shoot pretty much everything wide open, using the softness to reduce the chaos of the trees, leaves, and branches that are all competing for attention.
No One Likes a Stiff Ring
When first I began using the lens, the focusing ring on the 44M-4 was quite stiff, and in recent months it started to struggle, clearly clogged by years of dirt gathering in the grease that lubricated the threads of the focus helicoid. My knowledge starts to drop off quickly at this stage: as I understand it, there are three sections that screw together, and twisting them moves the optical block within the barrel of the lens, changing the distance between the rear element and the sensor, thus allowing the lens to focus.

Top Tip: Document Everything
The most important thing when disassembling the lens is to leave a trail of breadcrumbs for reassembly. With the helicoids, being able to reverse your steps with precision is crucial; from my experience, the rest is like a jigsaw puzzle that you can figure out eventually. By contrast, the sections that twist together are exponentially more complex. If you don’t reattach them at the same point and then rotate them together to just the right distance, your lens will either not focus to infinity, or go way beyond it. I like soft images, but there is a limit!
Before sitting down to make my first attempt, I gathered some tools, bought some very obscure grease that had to be shipped to France from the U.K., and watched a load of YouTube videos. Being a much more popular lens, there is a wealth of resources for the 44-2; by contrast, there’s not much out there for the 44M-4. Feeling brave, I hoped that the videos I’d watched for the 44-2 gave me enough insight that, with enough time and careful attention, I could get through it.
Starting off was easy; I unscrewed the back and slid some rings off, being careful not to lose the tiny ball that makes the aperture ring click. Eventually, the front came off and things started to get a bit more interesting. My screwdriver was a hair’s breadth too large for the screws (apparently a JIS set is the best option), and there was a discovery: the screws had been glued into place. Apparently, this is not unusual; manufacturers and repairers use a tiny drop of shellac, nail polish, or threadlock to ensure that screws do not work loose. (Do not use superglue, I’m told! It releases a gas that can slowly fog the elements.)
A replacement set of screwdrivers was acquired, the optical block emerged from the housing, and suddenly I was into the bowels of the lens, ready to start unscrewing the helicoid sections.
What Not to Do
Things were going well. I scraped markings and took photos to tell me how things should realign. The first two parts separated and the fumes from the 99% isopropyl made cleaning very enjoyable. Then I was ready for the second of the two threads, this time requiring far more turns.
I could try blaming the fumes for what happened next but I know that the real cause was a heady blend of excitement, overconfidence, and stupidity. I remember reading that it was crucial to note where these sections separated so that, once cleaned, you could then start screwing them back together from exactly the same place. Suddenly, the sections popped apart and I put them down to clean my hands of grease.
It took a moment, but then I realized. In one stroke, I had made an error that was going to lead to hours — if not tens of hours — of extra work.
Unless I was incredibly lucky, the helicoid sections were no longer going to align correctly. After many obscenities, I resigned myself to my fate. I cleaned, greased, crossed my fingers, and screwed the three sections back together. Everything looked fine. Almost an hour later, reassembly was complete and it was time to put the lens back on my camera to discover if I’d been lucky.
Disaster. I had a lens that had a much closer minimum focusing distance than before, and no longer focused to infinity. Oops.
The prospect of repairing it correctly was daunting. As far as I could tell (and the internet seemed to agree), the only way to get this lens working was to spend 45 minutes stripping it, 10 minutes guessing where the helicoid should thread back together, and then 45 minutes reassembling it to test whether I’d got it right. Potentially, this could be an endless process unless I could find a way to mark each effort so that I could avoid repeating each erroneous position. And even then, I didn’t know how many possible attachment points I was facing.
Double Zenits
Fortunately, I remembered that my partner didn’t unearth one Zenit from Warsaw, but two; there was a second 44M-4 in our attic, one that I’d rejected because a part of the frame was constantly soft. I could try to use it as a guide for the helicoid section that I’d messed up.
I sat down to disassemble two lenses, trying to stay sufficiently organized that I had both sets of parts separated and laid out in the right order. Eventually, I reached the helicoid sections and made doubly sure not to move anything on the second lens for fear of losing my one chance of not having to repeat this process for the rest of my life. After a little trial and error, the guts of the two lenses looked the same and it was time to put them both back together. Again.
Success. Having broken my favorite lens, it now works beautifully thanks to its buttery smooth focusing ring.
If you ever decide to strip a vintage lens and you want to avoid my various errors, here’s a list:
- Track down some JIS screwdrivers
- Photograph every step of the process whether you think you need to or not
- Don’t let the isopropyl fumes get you too excited
- Make sure to mark the lens so that you know how it should be aligned
- Don’t forget to note where the helicoid sections separate from one another when taking them apart
- Keep an identical lens to hand to act as a guide for when things go wrong

The Helios 44M-4 is a fantastic lens, made even more wonderful by virtue of the fact that you can track them down for less than $50, with many of them shipping from Ukraine. Plus, if you’re careful, cleaning a lens and returning it to its full glory is intensely satisfying. Good luck!