Flying with camera gear can be intimidating. Airports, security checks, will you get your bag on the plane or will someone try to make you check it, and more sources of stress. I have some tips that have helped make the experience easier for me.
I’m a nervous flyer. The experience often causes some mild form of anxiety, though it does get easier the more I fly. These days, it is just the hassle of getting through security that is annoying and less fear of the plane falling out of the air.
But, to make the most of the time we have away from work, flying is often the best means to make the most of it. As a landscape photographer, many trips involve flying to new locations or old favorites to photograph and because of that, I have a few tips to make flying with camera gear less stressful.
All of my flying experience is within the United States and my tips are based on that. But almost all of the same applies to International flights — just double-check airport security rules and bag sizes, which might vary.

What I Carry
Let’s talk about what I typically take on airplane trips. Gear can change depending on the length of the trip and my destination, but I have carried some variation of these items at some point.
- Main Camera Body
- Backup Camera Body
- Up to Three Lenses
- Tripod(s)
- Filters
- Video Camera
- Action Cam
- Drone
- Audio Gear
- Batteries
- Chargers
- Camera Cleaning Gea
- iPad or Laptop
I have a YouTube channel and my trips often include some form of video, so I have an extra camera for video, an extra tripod, and so on.
Camera Bag
The camera bag is an important choice if you are flying. My current bag of choice for travel is a Shimoda Designs Explore 35L v2. Though it won’t fit under the seat, it doesn’t take up too much space and doesn’t attract too much attention going through security or when boarding the plane.
You want your camera gear to be carry-on, so make sure your camera bag fits the necessary size requirements for your airline. A 30L to 40L bag often works well for this – regardless of the camera bag brand.
![]()
Packing the Camera Bag
I have a general strategy for packing the camera bag in case I am forced to check the bag.
On the outside of the bag, I attach my tripod. The Shimoda Designs bag can easily accommodate a tripod on either side of the bag. I use a tripod well suited for travel, an FLM CP30-S4. The FLM tripod isn’t the tallest, but it is lightweight and collapses to approximately 19”, allowing it to snug up against the camera bag and not draw too much attention. I remove the ball head and keep it inside the camera bag – this helps keep anything from sticking above the top of the camera bag.
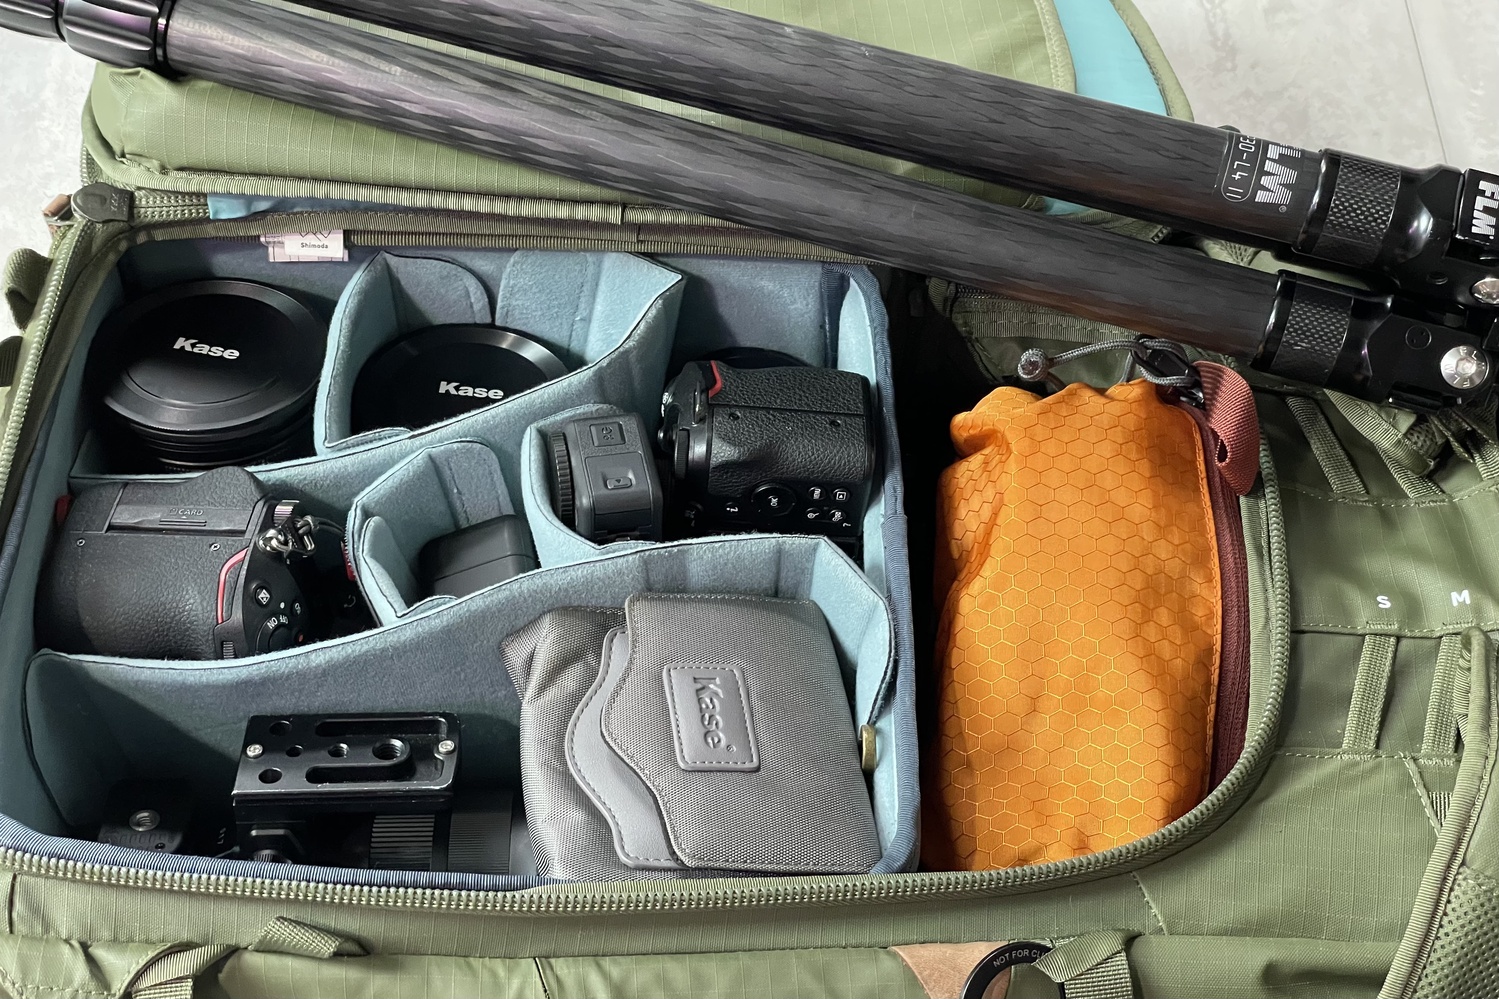
Inside the camera bag, I use a medium core unit and my camera bodies and lenses go in it. I make sure anything I consider valuable fits in the core unit of the camera bag.
My spare batteries, chargers, memory cards, filters, and audio gear go in the flex space above the core unit, and use tech pouches to help organize things inside the bag. My laptop or iPad goes in the laptop sleeve in the camera bag.
Airport Security
The most stressful part of flying for me is going through the airport security line. Firstly, read the rules for security checkpoints for the airports you will be traveling through. In the US, that will be the TSA. Within the US, there are three items I keep in mind when planning what I pack.
Batteries: Lithium batteries cannot be checked, they belong in your carry-on. Camera batteries, drone batteries, action cam batteries – they all go in your carry-on. I also keep my batteries in cases (plastic or battery bags) as recommended, though this has never been checked by security.
Tripod feet: I use the foot pads and not spikes, but if you use spikes on your tripod legs, remove them and put them in your checked luggage.
Finally, I tend to carry a knife, either on my person or in my camera bag. Remember to remove any knives and make sure they go in checked luggage. I dread the day I forget to do this.
Once you get to the checkpoint, the rules start to vary depending on which scanning machine they are using for your line. This can vary by airport and even by line at the airport.
If you get lucky, they use a machine that doesn’t make you remove your laptop or iPad from the camera bag. Other times, you have to remove them for scanning. Pay attention to the security agents as you approach, they are typically announcing it frequently as you wait your turn. I have never had to remove any camera gear from the bag, regardless of which scanning machine was used.
Boarding the Plane
You’ve made it past security and now the plane is boarding. For carry-on items, there are two options for where you can put the camera bag. One is under the seat in front of you and the other is in the overhead compartment.
There isn’t much room under the seat in front of you. My current camera bag will not fit there, so that is not an option. Using a smaller camera bag under the seat might make this part of the process less stressful, as that spot is always available.
My bag, the Shimoda Designs Explore 35L v2, fits in an overhead compartment. The key is boarding the plane early enough that there is still room in the overhead compartments for your camera bag. When those are full, the gate operators will start making people check their carry-on items.
The easiest way to avoid that situation is to be sure you are an early boarder. For some airlines, that means checking in at a specific time or paying for an early pass. I always do that to ensure an early boarding position. This has always worked for me and there has always been room for my camera bag.
But what if something causes me to board late and they want me to check my bag? I have two contingency plans for that.
![]()
They Want Me to Check My Bag
If a gate operator or flight attendant asks me to check my bag, my first strategy will be to explain that I have camera gear that is expensive and fragile. I will also note that I have several lithium batteries scattered through the bag, which should not be checked.
Be kind. There is no reason to get mad if this happens. Try to explain your situation and see if they can help you. Maybe they can get someone else to check their bag to make room for yours or have a spot where they can stow it.
If this doesn’t work, my plan relies on how I packed my bag initially. All my valuable and potentially fragile items are packed in my core unit. I keep a dust cover bag in my Shimoda. This dust cover has a zipper and in this type of situation, allow me to remove the core unit, put it in the zippered dust cover, and let them check the main camera bag while I keep the dust bag-covered core unit with me.
Wrap Up
With proper planning and preparation, flying with your camera gear can be minimal stress. I’ve used these suggestions outlined here many times and have not experienced issues getting my camera gear from one place to another.
How about you? Do you have some additional tips for flying with camera gear?