Recently I had the opportunity to be followed by Taylor Jackson spin while in Sony Kando event.
I’m not often tracked and recorded while filming, so when Taylor contacted Sony Kando in advance to set this up, I was definitely intrigued. As a longtime viewer of his YouTube channel, I am a big fan of his humor mixed with educational content and I want to know what his process is like, along with the excitement when shared some of my work and process with his audience.
To start the session, we met in the area where our models were located. From here, the original idea was to go to an interior location that I wanted to shoot. But, as predicted at times, the area ended up being the venue for a last-minute event. So I scrambled to find some other areas to work on. In addition to the last-minute jockeying for places, we also only had about 30 minutes to work on our models.
Position one
For the first setup, I was intrigued by this square cutout that is part of the entrance to the building. Here, I want to try with the framing elements of the square, as well as using Flashpoint 1200 Pro to add some light and drama of my own. The key with this first setup was that I was using natural light from a covered balcony to illuminate my subjects and I was simply using flash to add a bit of interest to the scene. To do this, I have light behind the wall, shining through the bushes on the other side. This gives the leaves a nice sheen as well as a bit of color and flare on the square.

For the next setup at this location, I wanted to dominate the surroundings and simply use the flash to illuminate the subject. To do this, I have placed the light right inside the window. So the light is still coming from behind the pair, giving him a good edge glow while also reflecting off his face to give her a nice soft glow. I also had the happy accident that the light completely illuminates the inside of the square, which I really like.

Second position
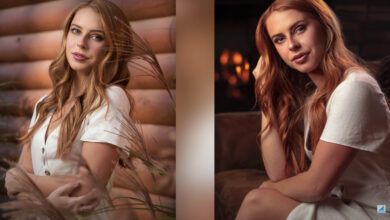
This next setup produced the only natural light images from the session. The sun is quite high and not amazingly beautiful. But it did create some fun shadows on the walls. So I decided to take a few individual portraits of each subject. For situations like this, I try to make sure that where I want the viewer to look is in some bright part of the frame.


Location Ba
In this location, I’m looking to recreate the sunset style. When I do this, I try to find a spot where they can be in the shade, but also where I can let the light interact with the scene. So I found this little cave-type space inside a nearby tree and put them inside that area. Then I put my light on the other side of the branches with a full CTO gel attached to it. This gel is what gives the light that warm sunset look.

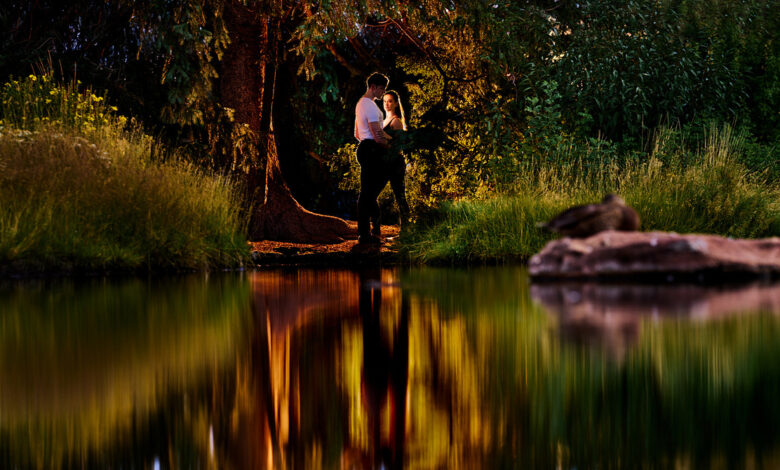
Position Four
For the last position, I left them in the small tree cave from the previous location. While we were there, I noticed a nice gap in the branches overlooking the water. So the idea here is to use the same dramatic light from position one but to photograph them from across the pond. This allowed me to frame them in the void while also getting nice reflections along the surface of the water.

More details
This whole setup is done on Sony a1 with either Sony 14mm f/1.8, Sony 24mm f/1.4or Sony 135mm f/1.8. At the beginning of the video, I talked about usability Stella Pro Reflex WILL, Flashpoint 200 Proor Flashpoint 1200 Probut in the end I only used 1200 Pro except for two images which are natural light.