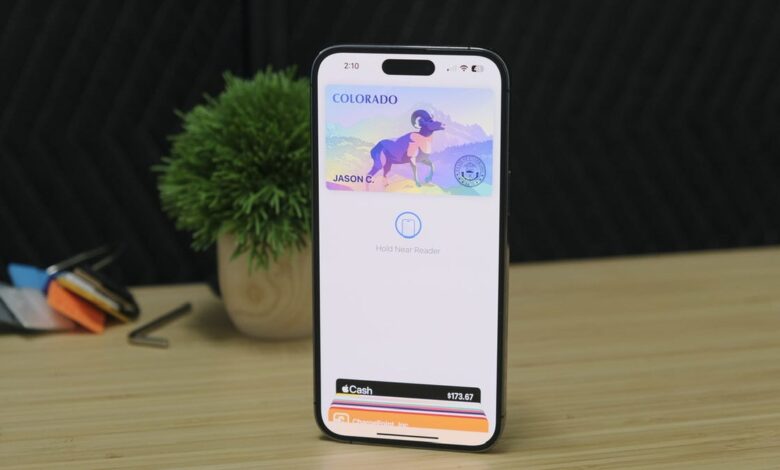
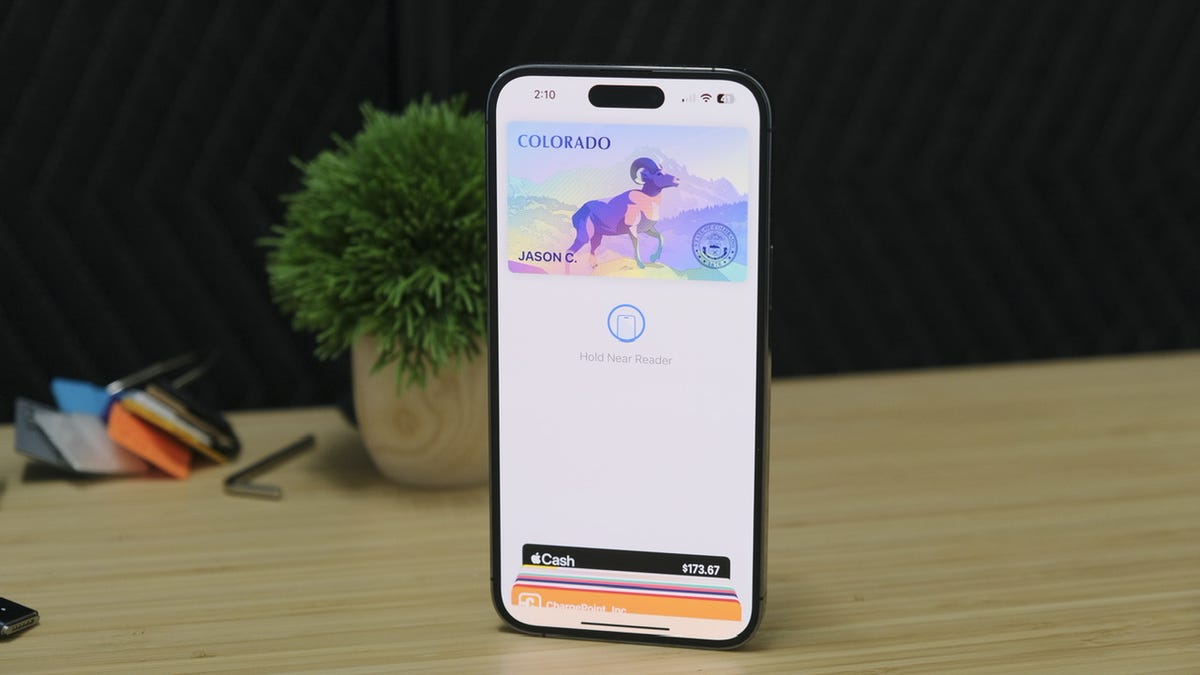
Colorado driver’s license in the Apple Wallet app. Jason Cipriani / ZDNET
We are slowly moving towards a The future is only for mobile devices where we can leave our wallets and wallets.
I use Apple Pay or Google Pay every day to pay for practically anything, as well as use these options at ATMs. Colorado has long supported a digital version of your state ID or driver’s license myColorados appbut as of November 9, the state now allows residents to add their ID to the Apple Wallet app on their iPhone or Apple Watch.
Immediately after Notice to go outI immediately started the process of adding my driver’s license to the Apple Wallet app on my iPhone and Apple Watch.
The process took less than five minutes for me.
Below, I’ll walk you through the states that currently support adding your ID to the Apple Wallet app, how to add your own ID to your iPhone, and finally how and when you can use the session. digital version of your ID.
Also: How to use Apple Pay in-store and online
Which states currently support adding your ID to the Apple Wallet app?
The list is not very long. Right now, if you live in Arizona, Colorado or Maryland, you’re in luck.
In March of this year, Hawaii, Mississippi, Ohio and the territory of Puerto Rico announced the plan to add support for the feature. Colorado was also included on that list, but the state officially rolled out support in early November.
There is no clear timeline for when the assistance will be available to the states that have announced these plans.
It was slow, but at least it was… something?
How to add your driver’s license or ID to the Wallet app (and why you should)
Before you begin the process of adding your ID to the Apple Wallet app, you’ll want to make sure you have a driver’s license or physical ID nearby – you must scan both sides throughout the process.
The rest of the sign-up process includes scanning the front and back of your existing ID, verifying that the scan is correct, and then going through the really weird Face ID setup process.
I was asked to hold my iPhone steady, with the front camera looking at me, then turn my head to the left until my phone vibrated. I was then asked to open my mouth, smile, close my eyes and then turn my head to the right. If I move my phone, the process starts again.
It’s strange.
In the end, I had to take a picture of myself with the front-facing camera and then submit all of this information to the state DMV. The final screen tells me the DMV will approve my request and that I will receive a notification when it is done.
I really expect this process to take several hours, maybe a day. But a few minutes later, I got a notification that my Colorado Driver’s License was ready in the Wallet app.
The license itself does not look like your current license or ID. There’s a placeholder image – for the Colorado, it’s a stick of ram – that shimmers and changes color as you look at it and move your iPhone. Looks like Arizona’s has a cactus on it, and Maryland has a crab. Your first and last name will also be on the card.
Also: Don’t waste your money on these Apple products
When viewing your card, you can tap I icon followed by Driver’s License Information to see all the same information on your current ID, including a thumbnail of your scary driver’s license photo.
Image of placeholder for Colorado driver’s license. Screenshot by Jason Cipriani / ZDNET
I have my ID in the Wallet app. So what now?
Great question. And honestly, I’m still trying to figure that out myself. According to Colorado’s DMV website, dedicated to the new feature, the only use case currently is for use at TSA checkpoints in airports equipped with the necessary readers. Denver International Airport is one such location that has readers.
Apple and the state of Colorado have released a video showing how the process takes place at the airport. In a nutshell, you’ll unlock your iPhone and tap the top of your phone on the reader (just like you’re using Apple Pay). A camera on the reader will take a picture of you and then, on your iPhone, you will approve the information being requested by the TSA.
The same process on Apple Watch.
Also: Prevent your Apple Watch battery from dying with this trick
The most important part to note here is that even if someone tried and forced your iPhone to transmit your personal information, it wouldn’t actually happen until you consent to the use of Face ID or Touch ID on your phone.