Now in its seventh year and incarnating as Luminar Neo, Skylum’s editing software may suit the needs of some photographers as a standalone application or as a plugin for Photoshop and Lightroom. But what if you want to push your creative limits with it? That’s when you have to think outside the box.
When it comes to image editing, everyone has their favorite software and there’s a lot out there. You can choose to pay a monthly subscription or purchase a standalone product, whichever suits your needs. Each has its caveats, whether it’s the aforementioned rotating subscription or perhaps some somewhat limited editing capabilities. Luminar Neo can do a lot with your images and doesn’t have a steep learning curve like some other software, so you can get the perfect result relatively quickly.
Luminar Neo isn’t on the market to compete with the likes of Photoshop or Lightroom, although it has many of the same features and some features it doesn’t. Some sliders are programmed in such a way that by simply adjusting them, sharpness, contrast, and tonal balance are applied. This may or may not be to your liking, but there are plenty of people out there who want quick results and play fair with them. It’s any process that makes you more interested in photography.
Working with layers
Luminar Neo is constantly being updated and we are currently using version 1.0.7, with more features being added and a future schedule of more additions. Since it’s primarily an image editor, which means you open your raw file and process it as you normally would, it also has a layer function so you can add even more to your original edit. through these layers, but only on top of the original image, and this can be a bit limited depending on what you’re trying to create. So what if you could solve this problem?
In this article, I’ll show you very quickly how this can be done and also provide you with a do’s and don’ts guide to save you the pain after making an edit, just to see it. disappear right before your eyes.
Thinking beyond the framework
Since its main function is to edit photos and any image you open is locked at the bottom of the Layers panel and cannot be unlocked, how do you unlock it so it can be unlocked? Well, you just add a gray base layer, as I’ll call them. 
Think of this layer as your blank canvas. Your canvas can never be moved, but you can add multiple layers above it and rearrange them in any order to achieve your final image. I use gray as my base layer due to the blend modes when compositing in Photoshop, but you can also use an image; it totally depends on you.
If you decide to use an image that you won’t use for anything else, I recommend adjusting the image to black, white, or gray through exposure and other settings so that the base layer Your base is flat and doesn’t have any colors, as this will affect some blend modes you’ll probably use later. It will also be your background color if you choose to use Mask AI on the upper layer to isolate the subject. However, keep in mind that you can change it at any time during the editing process via the Edit panel on the right side. First, select the layer and then go to the edit panel to make your adjustments, then continue your editing.
With the added gray layer, you are now free to edit the image any way you want, and have the freedom to rearrange your image layers, using Mask AI to isolate objects. statue or person and add as many layers as you like to create your image.
What to consider?
One of the main considerations you must make when creating this type of image is the blending options you will use. This is based on what’s below the layer to which you’ve applied the layer blend, as it reads all the information of those layers. At this point you might want to change the color of your gray layer to something else.
For the image below, I really don’t need the gray background layer, as I leave the background of the second layer as it is and use screen blend modes on the layers above to achieve the final effect. However, with the gray background layer, if I wanted to add a background to the image behind this girl, I could simply use the Mask AI to select her and then add an image layer below her. That’s why you should start with a gray background, in case you change your mind during the editing process.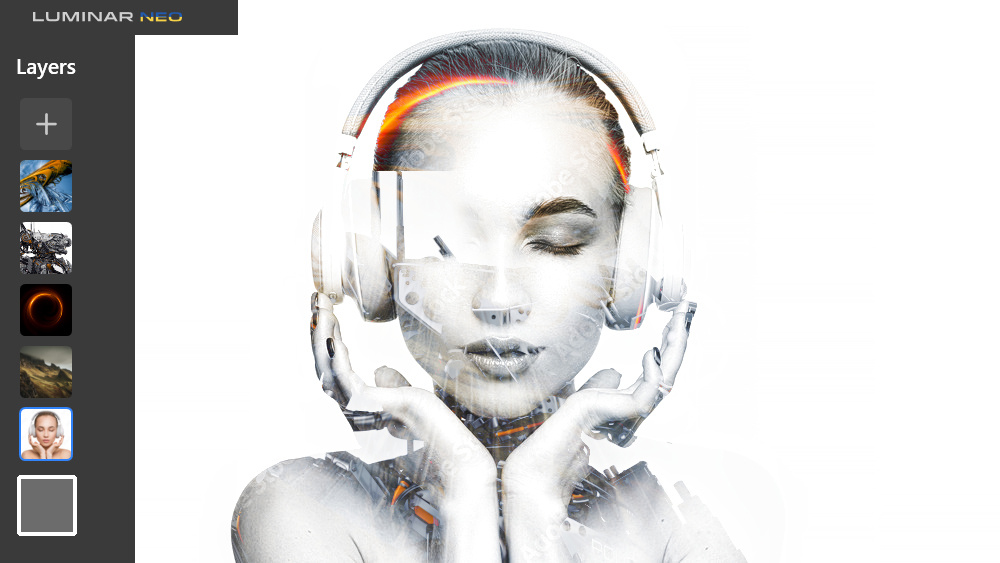
What could go wrong?
As with all software, there are many things that can go wrong during the editing process. A few of them that I discovered through trial and error based on the above are:
- Do not add a preset until your editing is complete. Luminar Neo puts a preset on your base layer, in this case grayscale and not final edits. So all the work you put into your image disappears before your eyes and returns to the base layer with the preset applied.
- The solution to this is to save your image as a JPEG and then import it again to apply the preset. Luminar 4.3 can gather all your tweaks into one layer, so perhaps that will be a feature in future releases.
- Create multiple gray or background layers with different names – gray1.jpg, gray2.jpg, etc. The reason for this is that Luminar caches the image so that when you start a new edit with the previous name is gray1.jpg, it will open that image to show the last image you edited. Yes, that seems logical and it is, but I’m just showing you how to work around it by creating multiple named gray layers.
- The solution to this would be a possible update to include new document creation functionality, similar to Photoshop and other image editors.
 As you can see in the image above, when I first did this type of edit and removed all the layers, dropped the base, to make another edit I lost the editing steps for this . Luckily, I exported the complete JPEG file first.
Inference
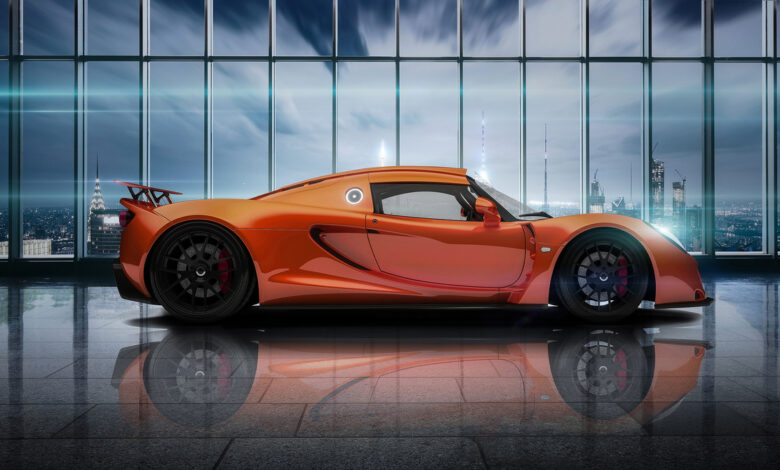
Luminar Neo is not a compositing editor, although it does have layers, so in the end it has its limitations when trying to do this kind of work. In fact, it crashed when I was cutting out the finer details of the car when I zoomed in. As for myself, I’m not annoyed by this, since it’s a photo editor. It’s exciting to see what software can do for you and your images, and sometimes, you have to think hard to get the results you’re looking for.
I hope that this thought process and example allows you to push the Luminar Neo and be able to create images that you wouldn’t normally be able to.