How many megapixels do we need? What do we have to consider outside of the venue that we can then print large? How do we choose the right media, and how can we be sure to get the best possible print result in the end?
In my latest video on YouTube, I showed you some of my recent special edition prints, which I printed larger than A0. As photographers, we are used to putting a lot of work into our photos, and since printing costs a lot, we want to make sure we get the best results possible. . So how did I get my prints to the right point?
Suitable material
Printing material is an important thing to me. It has to match the scene I’ve shot, it has to support the story or message my images tell, and most importantly, it also has to match the interior of the house or apartment where the image is being made. Climb up. So how can we achieve that?
There are many different materials and in general, there is no right or wrong answer. We should consider different behaviors. Metallic surfaces look great, I really like them. But on the other hand, you are very limited with Dmax. Therefore, it is not possible to print each photo well on metal. Acryl glass looks great, but it doesn’t suit every room or every interior. I’m not saying these materials are bad, but it’s something I’d like to consider. But, there is one material that works best with almost any type of interior in my experience: canvas. And this is why I decided to choose canvas for my special edition prints this year.


Differences between printing labs
I am quite pleased with the Espon SC-P900 printer that I use for my open and limited edition prints. But with this printer, I cannot print larger than A2. So whenever I want to print larger, I print at the print lab.
It is important to consider that there are quality differences between all laboratories. This is why price has never been a top priority for me. I could have put in a lot of effort to get the shot in landscape photography – it’s often difficult to get to the point where the photo was taken – so I’m definitely not interested in saving a few bucks. I am more concerned with getting very good quality for my prints.
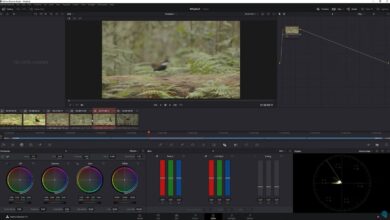
What I do is: I download ICC profiles from different print labs and compare the behavior while I soft test them in Lightroom or Photoshop. This gives me a pretty good idea of the possible dynamic range – Dmax – of the material. For me, Dmax is even more important than print resolution, as this has a greater influence on the results in my experience. And a good tip here is to not just look at the big print labs. Might as well look at a small one around the corner in your local area. It is possible that they are a bit more expensive, but it is also possible that they offer much higher quality.

Printing has started at position
I don’t think it’s a good idea to bring the printer to your shooting location, though, but what I always do before pressing my camera’s shutter-release button is to check that everything is in place. focus or not. This may not be the most important thing, if you are only sharing your photos on Social Media, but if you want large and high resolution prints, you need to focus. If your photo is slightly out of focus, you may need to print smaller or have a low resolution. But when it comes to XXL printing, you want to fight for every pixel.
How many megapixels do we need?
I use one Sony a7R IV, which gives me 61 megapixels, and since I don’t tend to crop too much, I usually don’t have any megapixel difficulties. But for some of the images I printed for my special editions, I just used the Sony A6500 with its 24-megapixel sensor. And the shocking truth is, this suffices in most cases. But we need to be sure. Large printing costs money, we wanted to do it right.
What I always do is divide the horizontal pixels of my digital image by the desired width of the print in inches. This gives me dots per inch (DPI). Your print lab will give you details on their print resolution for each material, but in my experience labs tend to print canvas at around 200 dpi. So when you get 200 or so for your image, you’re good to go. If you’re a little shorter, that’s not the biggest issue either, as viewers are further away from the larger print than the smaller print, which makes up for the loss in quality. But you shouldn’t go too low, of course.
If you’re not sure, you can simply enhance your images with any AI upscaling software. Topaz Gigapixel is a great piece of software, but Adobe Photoshop also offers an upscaling tool.

Don’t rely on your soft proofing talent
First of all, it is important that you work with a calibrated monitor. I calibrate mine every few months, using Spyder X Elite. This is important because your monitor will display an image that is pretty close to the final result on paper or canvas; In the end the print always looks a little different. This is why I also prefer to verify my images.
This may mean that you order a smaller version of the final print first, just to make sure there is enough detail in the shadows, textures of the material to interact well with the image and experience. How does the final product feel? For canvas, for example, it’s a big difference which stretch bars you use. If they’re too thin, the whole print looks cheap to me. If they are too thick, it can also look weird, but it can work if it fits the image and the room. I decided on a depth of 4 cm (1.6 inches) for my XXL prints, about A0. This type is not too thin and not too thick so it is suitable for most living rooms.
More tips on big print are revealed in the video above. And let us know your preferred media and printing habits in the comments.