We look at what makes a successful backup system, the components, the ideal results, and how we test it all working before the inevitable happens.
As a creator, one of the worst and most frustrating ways of hindering our journey is to lose files, whether it’s due to a faulty memory card taken on the day of the shoot or during the import of the photos. after shooting and before post-production. Quantity.
So what makes a backup reliable?
I recommend starting with three copies of your data stored on two different source media with at least one additional being hosted off-site. Three backups? Why need three backups? Surely, this is not only time consuming, but also costly? Read on, and I’ll explain.
Are you surprised to learn that most commercial disaster recovery (DR) plans include three levels of backup security? On-premises, offsite, and cloud. See the steps we need to take to make sure your data is safe and backed up regularly.

The diagram above is an example of a standard enterprise backup solution. It seems complicated. Let’s break it down into seven simple and easy steps.
Starting with photography, I would ideally recommend using a camera with two card slots, which provides a degree of redundancy. Use a high-quality, high-capacity card with fast read and write speeds, and ideally shoot using raw format for both cards at once, or raw and JPEG if you only provide JPEG. Copying images to both cards reduces the chance of you losing files due to card failure, and capturing raw and JPEG images allows for more efficient post-production if you accidentally overexpose or underexpose an image. mine. Brands like Lexar or SanDisk is brilliant and has an extremely low failure rate.

Step 2: In-place backup
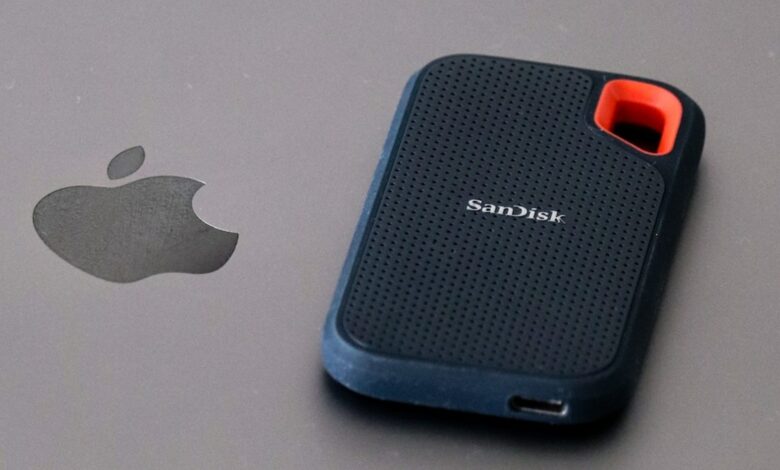
A drive as rugged as SanDisk Extreme Portable Hard Drive Attached to a computer or iPad is ideal if it is used outdoors or if you are accident prone! These types of drives can be used for backups while you are working. Weddings are a great example where you might want to back up part of the day. The internal SSD makes it an incredibly fast, lightweight, and versatile backup option.

Step 3: Import to Working Drive
What is a working drive? Well, before backing up your finished images to cloud storage, NAS, or on-premises storage, you’ll probably want to do some level of retouching on your photos. Importing your images from your camera card to a fast-moving drive attached to your computer solves two problems. First, it doesn’t clog up your computer’s internal hard drive with lots of pictures and slow down the operating system.
 Second, having a high-speed SSD for editing means that programs like Adobe Lightroom can render previews more efficiently, helping you get work done faster.
To use your work drive, import your files to your computer from your camera card or make an on-site backup by dragging your file in the file finder or browser from the memory card to a new folder without you created on the attached working drive, or import them and use the copy option at the top of Adobe Lightroom. This workaround uses an app to transfer files instead of doing it manually. I prefer to do it this way because it saves you a step of having to import first and then add it to Adobe Lightroom.
Step 4: Edit your content
Complete your edit in the app of your choice.
Step 5: Send it to your customers via your Website or Online Gallery
If you are offering images to paying customers or selling them through your online gallery or website then you should include this in your workflow. i am currently using investment portfolio, as it allows me to build my website and include an online store that works for me. Alternatives include Bulletproof or Pic-Time. These allow me to not only sell my images, but also store JPEGs and raw files for a small additional fee. Exporting from Adobe’s Lightroom to Zenfolio means that customers can view the images on the site, but they’re also securely stored online in a separate location away from my home or work. This can be considered an additional offsite backup.
Step 6: On-premises Backup (Synology NAS or other similar RAID Redundancy System)
Literally, wherever you store photos on a permanent device at your work location, this is your local backup. You can use a network storage drive (NAS) plugged into your broadband router or an external drive attached to your computer. The NAS enclosure will be set up with a RAID (redundant independent disk array) configuration, essentially using two or more disks in a single box for more flexible backup creation. With the different types of RAID available, you’ll need to choose the right one that’s right for you and your way of working. Copy finished images to your local storage drive. Do this in Adobe Lightroom (preserving the storage location in your catalog files, avoiding broken links) or by moving the files and then using the sync feature in Adobe Lightroom to display them. Show all your images in the new location. I suggest Synology DS1821+ for its simplicity of use and key features such as scalability and reliability. Plus, it has great mobile apps that let you view and share your files or any movies stored on the device while out and about. You can also get this to transfer using super backup to another Synology NAS on the internet or another large external drive plugged into the front USB port that you get from the primary location. This will then become your offsite backup.

Step 7: Cloud Backup (Backblaze B2)
carboniteIncident plan and Backblaze are all examples of cloud-based backup services. Accessible from almost any internet-connected device, they require one large backup, and smaller incremental backups add as you work, meaning you can access the new version of the file or the previously edited version. I recommend Backblaze B2 cloud storage service because of its reasonable, fixed and transparent costs. It also integrates seamlessly with Synology, making online cloud backup a seamless and convenient experience. It also has a great mobile app, allowing you to view all your files online.

Remember, with all these options, make sure to check that your backups are happening regularly and also do a test restore. Having the magic triangle of periphery, on-premises, and cloud is great, but by just choosing one or two out of the three, you still have a single point of failure.
The cloud will only deliver as fast as your internet will download. On-site is great until someone breaks into your studio and everything is taken away. Peripheral may not be available immediately; you may have to drive somewhere to get it. All of these solutions will be somewhat helpful to you. Some may not be suitable, but this article will give you an idea of what it takes to create a robust backup system from camera to client.
Title image by thiago japyassu, courtesy of Pexels under a Creative Commons license.