One addition to LuminarAI is the flexibility to create and apply Templates to your photographs. In case you are aware of earlier variations of Luminar, this part has changed the Seems to be classes. (And, if that is your first time utilizing Luminar, you’ll be able to consider Templates as a kind of preset.)
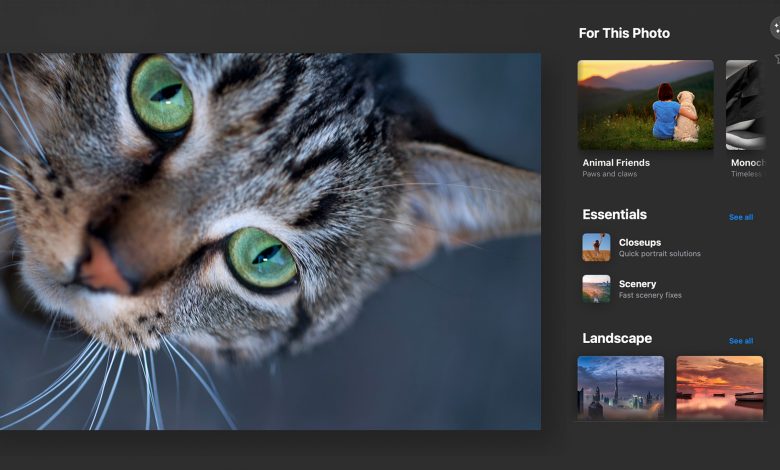
Templates in LuminarAI could be accessed utilizing the Templates tab within the high Toolbar. Every template is a set of instruments throughout the Edit tab, packaged collectively to simply be utilized with one click on. And never solely that, Luminar will use AI to have a look at your photograph and counsel templates it thinks can be match. That is discovered within the For This Photograph part throughout the Templates tab. For instance, in case you deliver up a portrait on this tab, Luminar will counsel templates which might be made particularly for photos of individuals. The identical goes for panorama, animals, meals, and so forth.
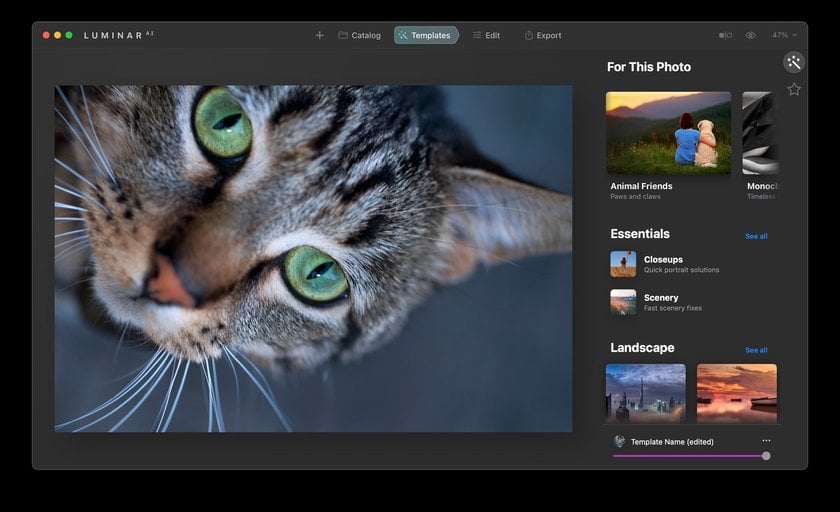
After I entry the Templates tab with this photograph of a cat, the primary template Luminar recommends is the “Animal Mates” assortment.
Tip: To use a Template, merely click on as soon as on it so as to add the impact to your photograph. Understand that your current edits can be changed by the Template’s instruments and results.
There are additionally a number of classes to select from, which you’ll be able to entry by scrolling down the best facet of the window. You’ll see many of those classes seem with thumbnails, and in case you scroll all the best way down it is possible for you to to view all classes of templates out there in LuminarAI.
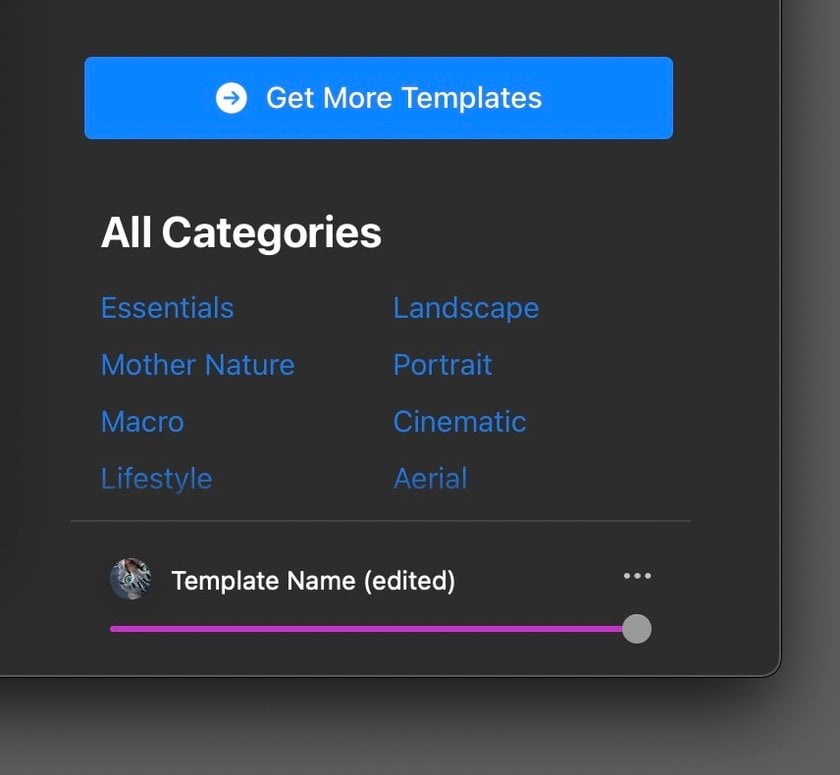
You may view all Template classes by scrolling all the best way down on the best facet of the window.
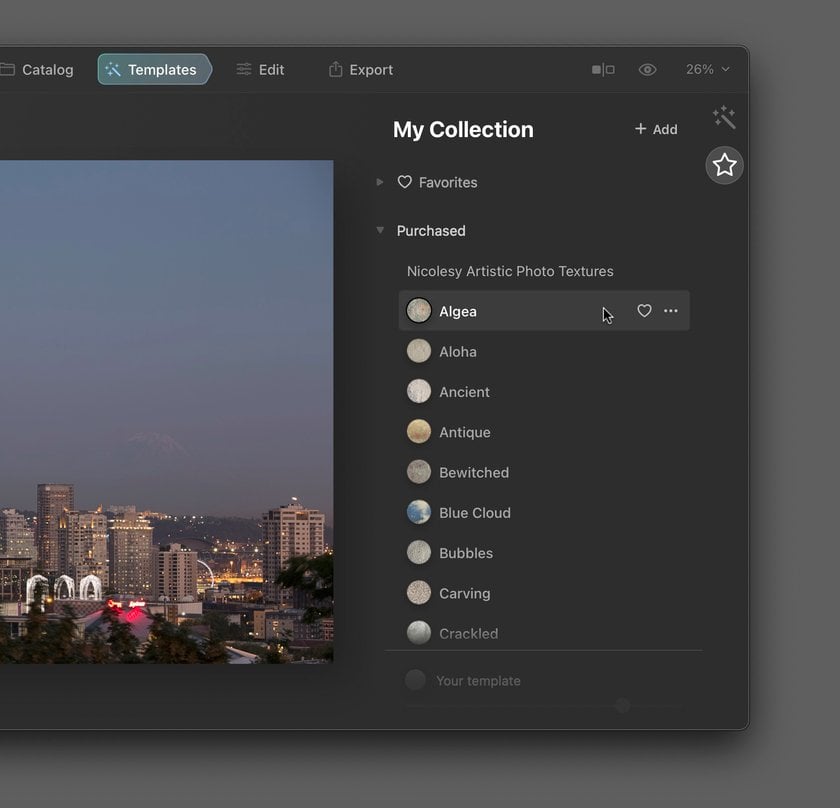
On the far proper, in case you click on the star icon it is going to take you to the My Assortment tab. That is the place you can find any templates you’ve favorited, which you are able to do simply by clicking the center icon to the best of any template throughout the Templates tab. And, if you need to take away a template from the Favorites part, merely click on the center icon once more to un-favorite it. You can also entry any bought or downloaded template packs on this part within the Bought Assortment, in addition to your personal customized templates (Consumer Templates Assortment), and in case you had any Seems to be migrated from a earlier model of Luminar, there could be some templates within the Legacy Assortment as nicely.
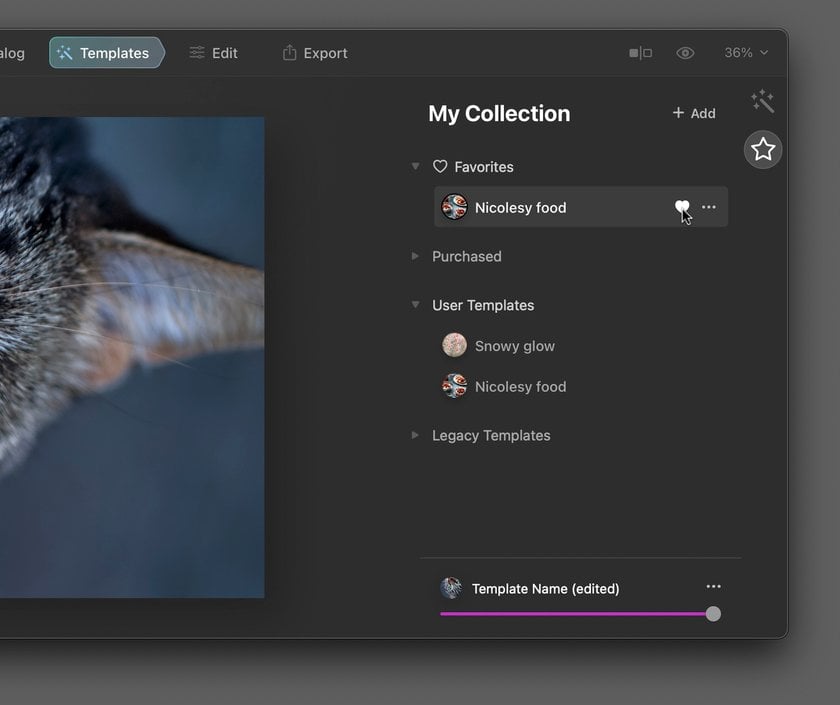
You may favourite or unfavorite templates by clicking the center icon on the best of the template (hover over the template to entry this icon).
Creating your personal customized templates is a good way to hurry up your workflow and apply the identical settings to a number of photographs. Templates in LuminarAI work nicely as a result of the AI instruments you utilize will apply to every photograph independently, relying on what it requires. For instance, in case you create a template with portrait edits, however apply the template to a picture with none individuals, the AI will ignore these edits and solely apply the relevant instruments to your {photograph}.
Right here’s the right way to create your personal customized templates in LuminarAI:
Step 1: First, open a photograph and use the Edit tab to use instruments to your photographs. (Understand that cropping and the Erase instruments won’t save to a customized template.)
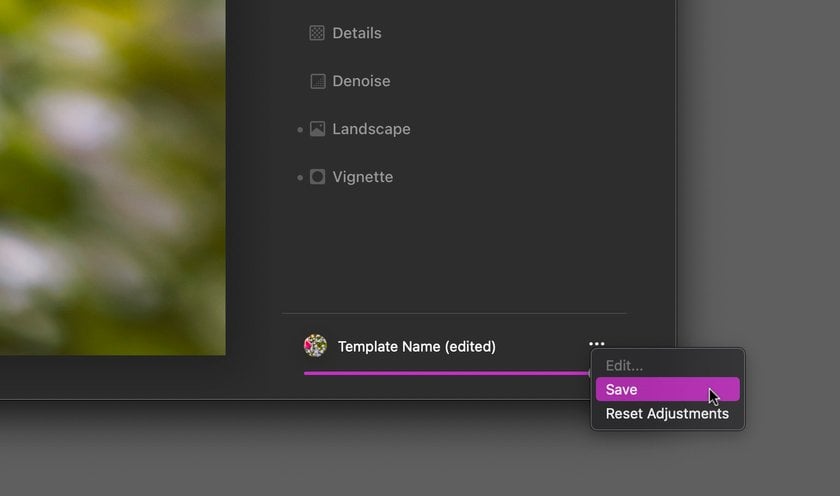
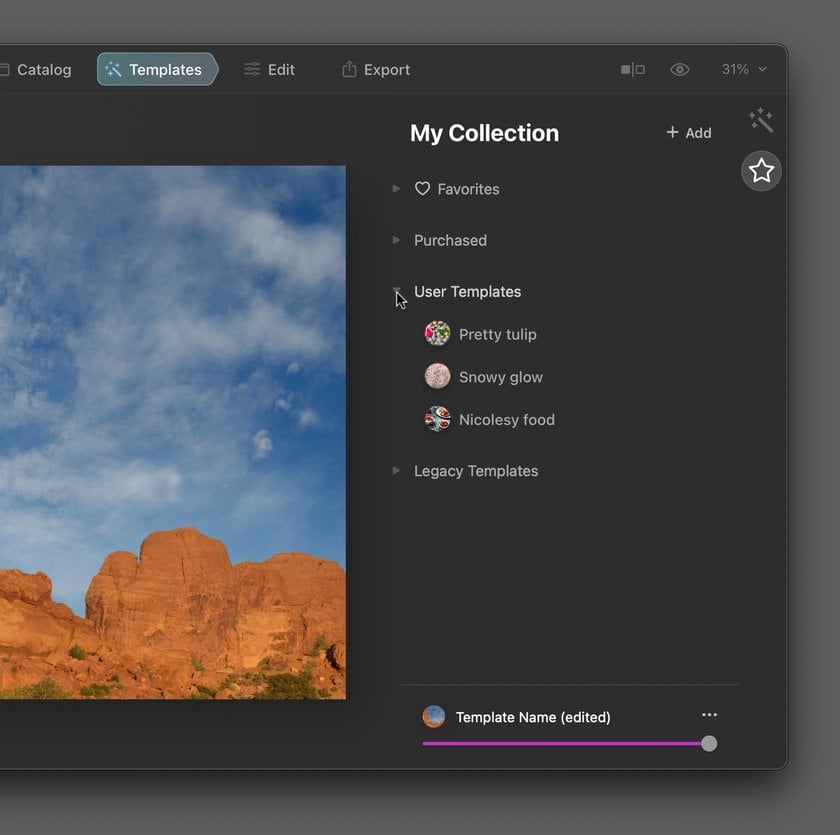
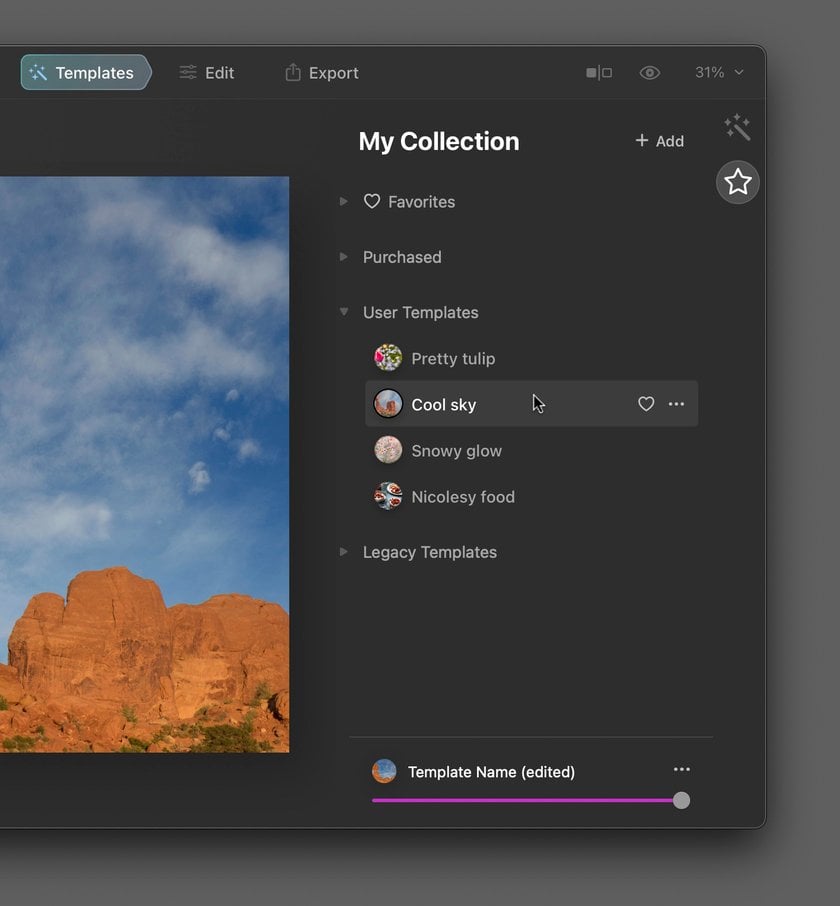
Step 2: Now, on the bottom-right of the window, click on the three dots subsequent to the place it says
“Template Identify (edited)” (this textual content could also be totally different relying on the way you created your template). Then, select Save from the drop-down menu.
Step 3: The template is saved, however you’ll most likely need to rename it. To do that, entry the Templates tab, go to the My Assortment tab, and entry the Consumer Templates assortment. Click on the three dots and select Rename from the drop-down menu. Now your template is saved and able to use on different photographs!

Importing a brand new Template Assortment is a breeze in LuminarAI.
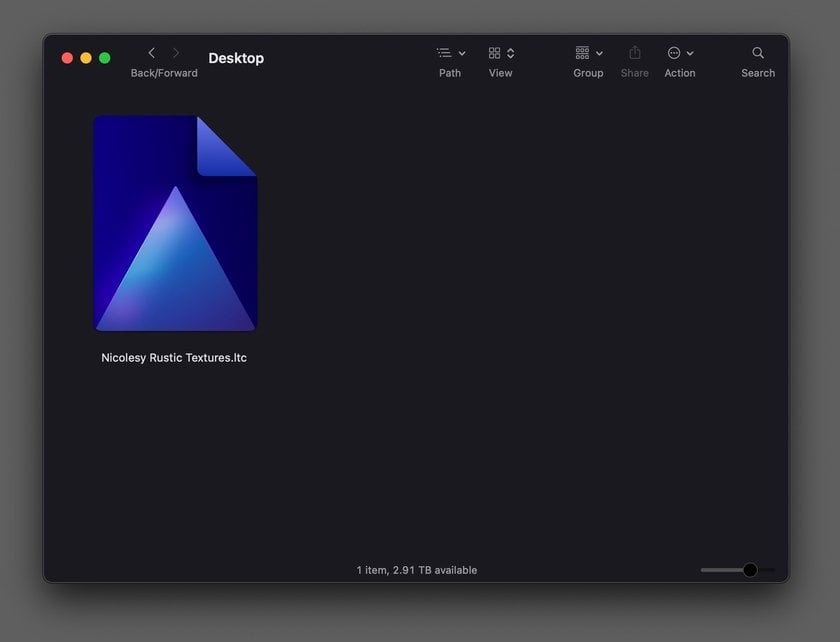
Step 1: First, you’ll need to be sure to have the proper file to import. The file kind that imports into LuminarAI is .ltc.
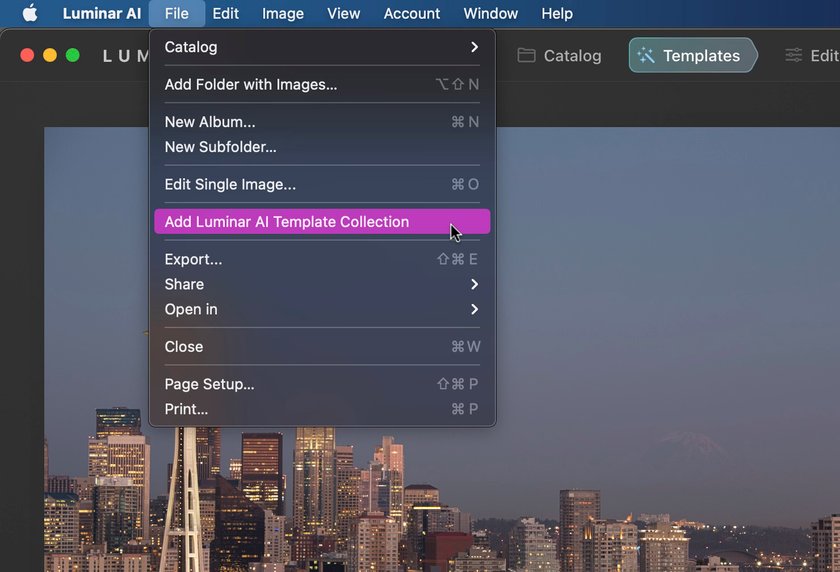
Step 2: Now, open LuminarAI and go to File > Add Luminar AI Template Assortment.
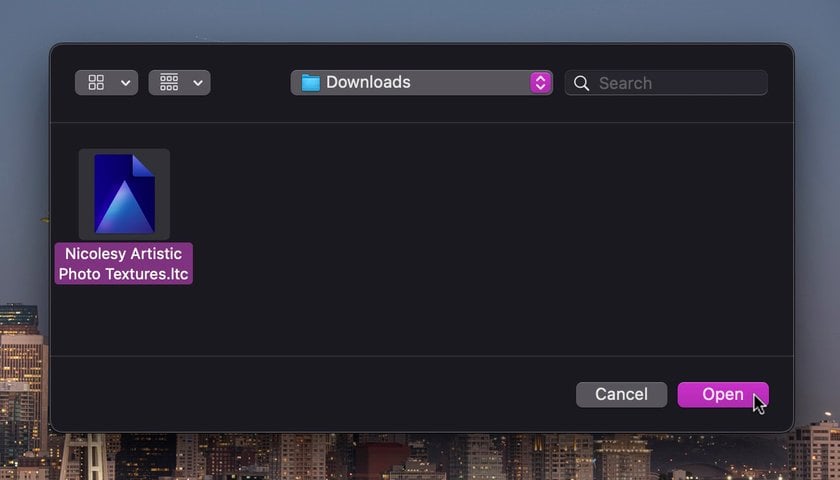
Step 3: Find the .ltc file you downloaded, choose it, and click on Open.
Step 4: To entry this newly-added Template Assortment, first entry the Templates tab on the high. Then, click on the My Assortment tab and go into the Bought part. Your Template Assortment will now be listed in that drop-down.
If you happen to don’t have a packaged Template Assortment that you just want to import, you’ll be able to nonetheless share and add particular person templates into LuminarAI.
Step 1: Go into the Templates tab, and entry the My Assortment tab on the best. Then, view the Consumer Templates part.
Be aware: You have to to have at the very least one Consumer Template in an effort to do that step. If the Consumer Templates part is empty, first make a fast template (it doesn’t should be something fancy) so you’ve one template on this part.
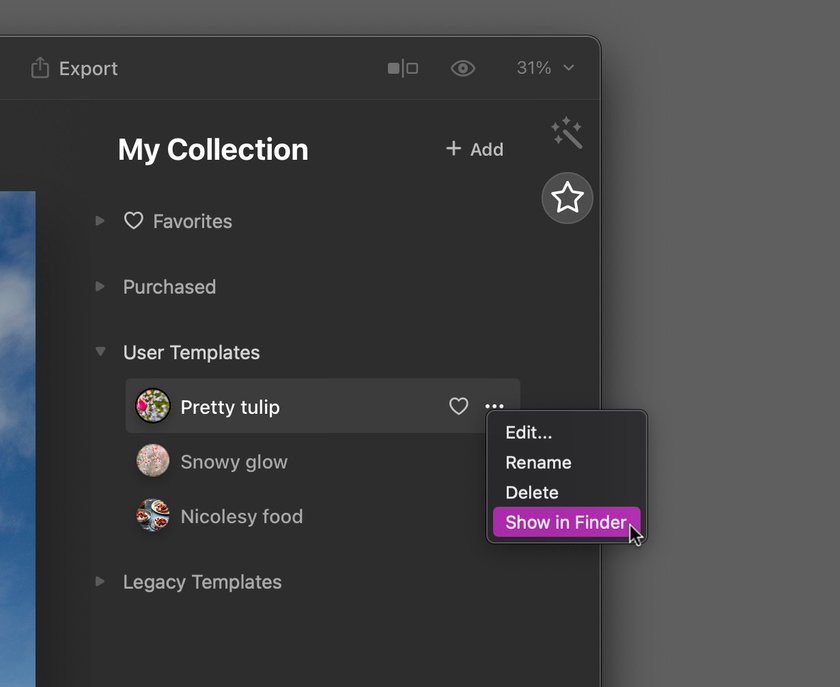
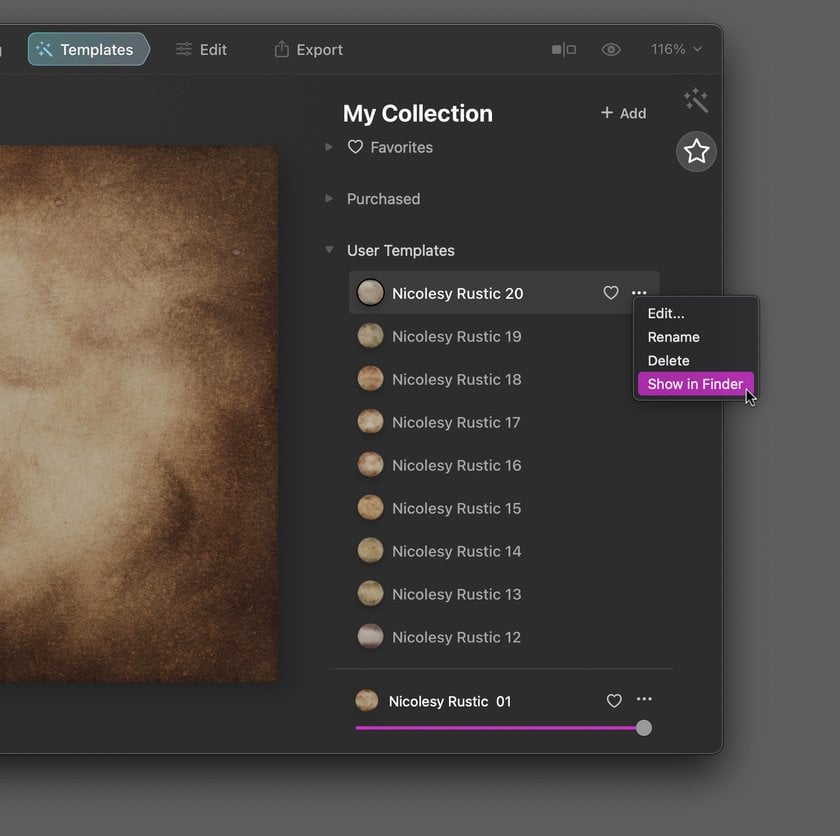
Step 2: Click on the three dots to the best of one of many templates throughout the Consumer Templates part and select the choice that permits you to view the template in your pc’s folder.
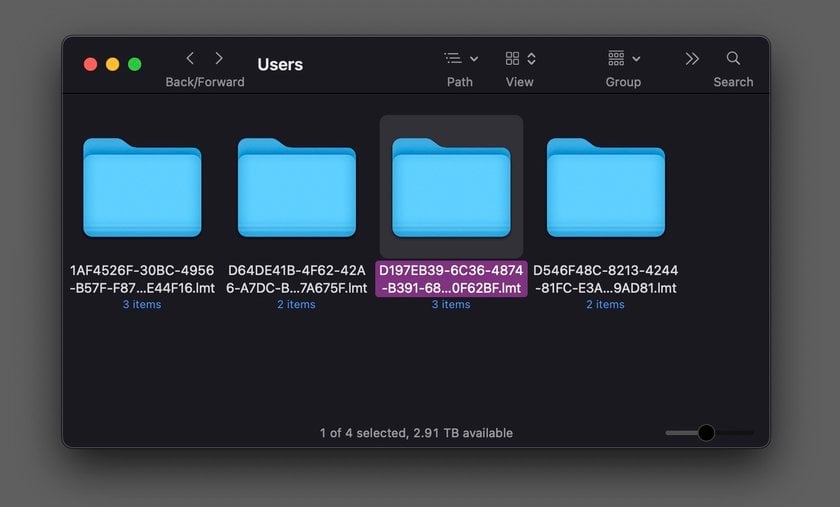
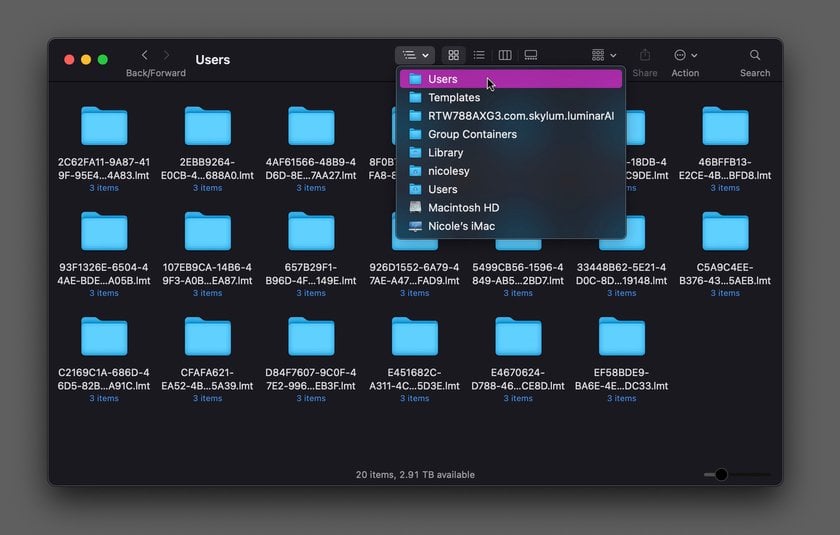
Step 3: Your pc folder will open and reveal the contents of the template you had chosen. Again-track one stage within the folder to get to the Customers folder.

Step 4: You probably have a template you need to share with others, it would be best to share all the folder of that template. (You’ll want to recollect the folder identify, since it is going to be a singular ID that distinguishes it from different templates and never in an easy-to-read format.) If you wish to import a person template, the Customers folder is the place you’ll place the template folder. Copy and paste all the folder into the Customers folder.
Step 5: If you happen to added/imported a template into the Customers folder, reboot LuminarAI. Then, reopen LuminarAI and entry the Templates > My Assortment tab, and you will note this new template within the Consumer Templates part.
If you wish to share LuminarAI Templates with different customers, or are like me and create digital presets and textures and want to embody a simple means in your clients to import the recordsdata into Luminar, then it would be best to bundle your templates.
Step 1: Obtain the Template Packer.
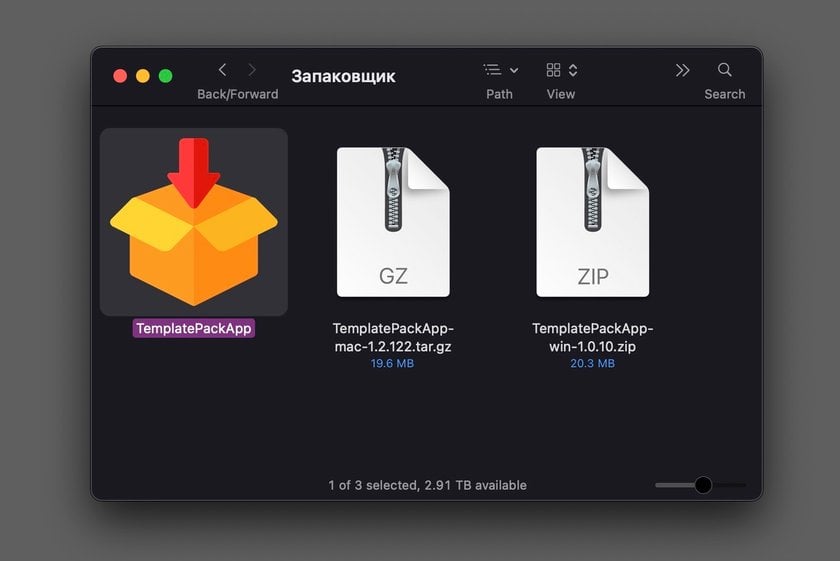
First, obtain the LuminarAI Template Packer and unzip the file (add obtain hyperlink right here). Then, within the folder that seems, unzip the file that’s particular to your working system (Mac or Home windows). When you do that you’ll have entry to the TemplatePackApp software. Open the
TemplatePackApp file to start working with the LuminarAI Template Packer.
Step 2: Put together your template and jpeg recordsdata.
Subsequent, in Luminar, create the templates you need to bundle collectively. Upon getting all of them created, go to the Templates > My Assortment tab and entry the Consumer Templates part. Click on the three dots on one of many templates and select the choice to indicate the template in your pc folder.
Additionally, you will need to create a cowl picture for all the pack, in addition to instance photos for every template. Save these in a separate folder for simple entry (you will have them in future steps).
Step 3: Entry the templates in your pc.
Now, backtrack one stage of folders till you get to the primary Customers folder. This can present you all the customized templates you’ve created.
Tip: When creating your customized templates for a pack, I wish to briefly take away all different customized templates. This makes it simpler to solely work with the templates I need to add into my packaged assortment.
Step 4: Open the Template Packer and start creating your assortment.
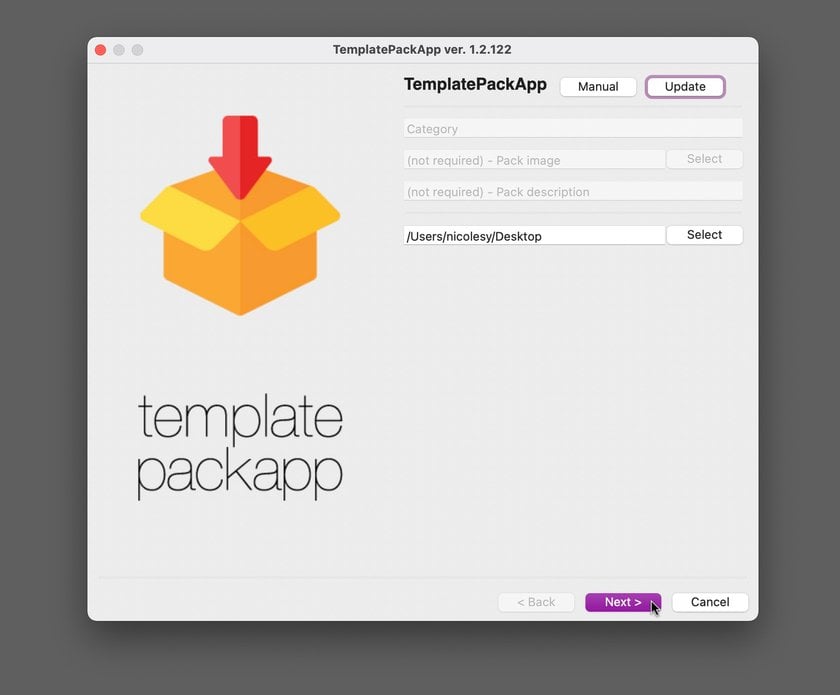
Now, entry the TemplatePackApp software (open it in case you have not already accomplished so) and within the house the place it says Save path, click on the Choose button. Select a location the place you need to save the ultimate .ltc template file. Then click on Subsequent.
Step 5: Enter details about your assortment.
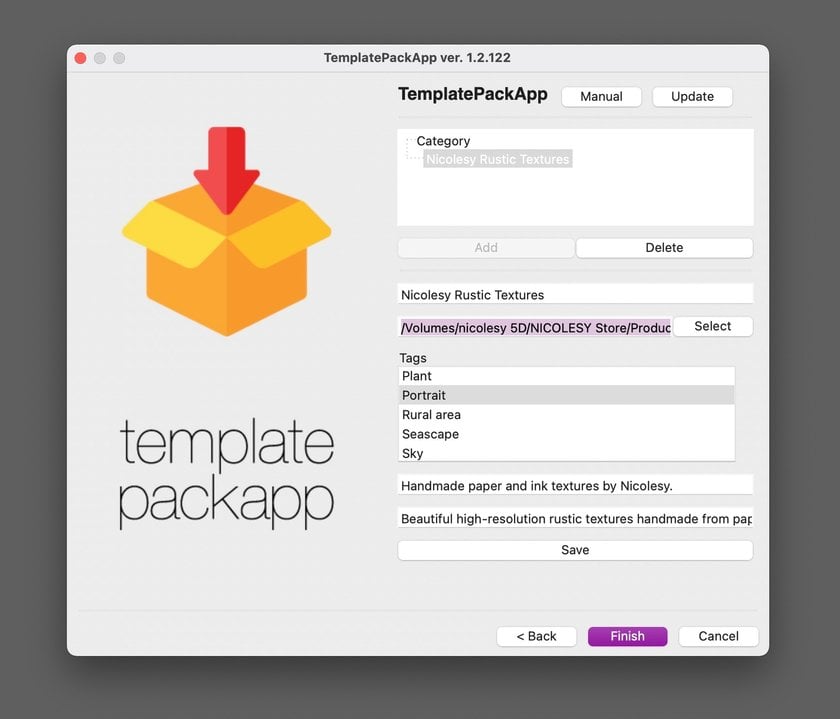
Click on Add, and a brand new “Untitled assortment” will seem underneath the class part. Click on on Untitled assortment to deliver up the settings for this assortment. Give your assortment a Identify, Quick description, and Lengthy description. Then, select the tags that apply to your template pack. To decide on a couple of tag, maintain Cmd (Mac) or Ctrl (PC) and click on on a number of choices. If you find yourself completed, click on Save.

Step 6: Add the quilt picture.
Within the part that claims “Picture”, click on Choose and find the quilt picture in your template assortment. You can even drag-and-drop the picture file straight over the trail field so as to add it extra simply.
Step 7: Add the templates.
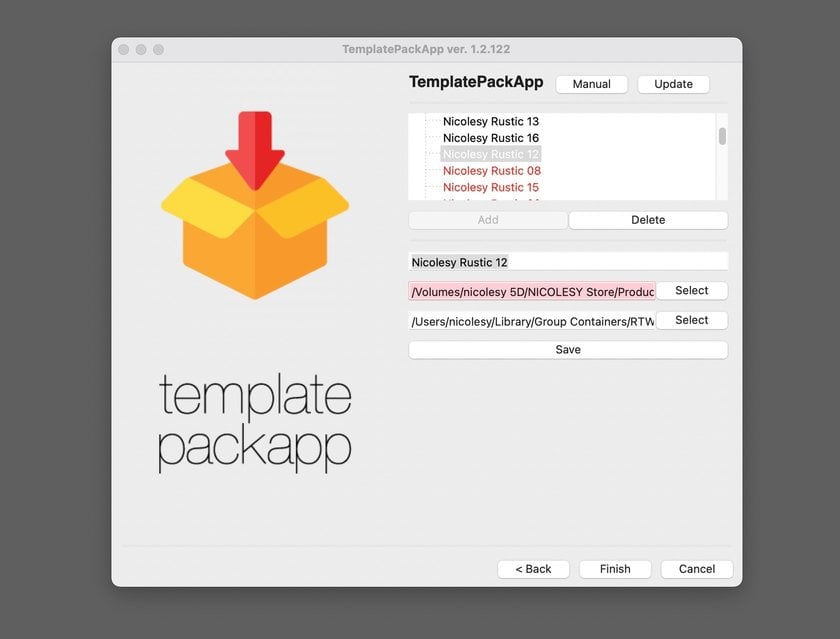
Entry the folder containing the person template recordsdata, spotlight the templates you need to add to this assortment, after which drag-and-drop the templates into the Class part on the high. The photographs can be crimson, which implies they nonetheless want their template picture recordsdata added (we’ll do that within the subsequent step).

Step 8: Add the template picture recordsdata.
So as to add an instance picture file to a template, first click on on it within the listing. Then drag-and-drop the picture file over the Picture space (or click on Choose and navigate to it in your pc). Proceed doing this for all templates till all of them have photos related to them. If you find yourself completed, click on Save.
Step 9: Create the ultimate template assortment file.
As soon as the whole lot is accomplished crammed out, click on End on the backside. Within the window that pops up, click on OK and your template assortment can be saved to the placement you laid out in step 3. Now the brand new template pack could be imported into LuminarAI and show within the Bought part of the My Assortment tab.
Vital: Ensure you have enter the whole lot appropriately earlier than clicking End! The Template Packer will shut after it creates the gathering so you can’t return and make modifications.