When we take pictures, we may or may not want to increase the depth of the photo. More tools than depth of field are available to us. Here are a few things we can do to add or reduce perspective.
Photography is changing a three-dimensional scene into a two-dimensional image. Usually, we want to give a sense of depth in that 2D world and show that some subjects are closer to us than others. At other times, we may want to flatten the scene, making the subject appear closer to the background. There are different techniques we can use to achieve these.
Very brief history of opinion
The ancient Egyptians were relentless in their views. Instead, their paintings are flat. They developed a technique that shows the person in a twisted form, with the subject’s body facing the viewer and the face and feet pointing to the side, showing as much of the figure as possible. Their image has no depth at all, and it’s a style that’s been around for more than 3,000 years.
Then, in 300 BC, Euclid noted that more distant objects would adjust to a smaller angle. In other words, if you have an object close by, the angle your eye forms between the top of the object and the bottom will be larger if the object is farther away. The ancient Greeks produced art depicting scenes with objects appearing to recede from the visual plane. In Roman times, artists incorporated Euclidean, or natural, perspective into their work. However, it doesn’t seem very good.
The problem with Euclidean perspective was solved by the Italian Renaissance architect Filippo Brunelleschi (1377-1446). He showed how objects and lines change shape when viewed from different distances and angles. He developed the idea of the vanishing point. This is called a linear perspective.
This is, of course, a very Western view of history, and the ancient Chinese devised a perspective system, known in the West as axonometry, about 1,500 years before Brunelleschi.
Using Perspective in Photography
Just like in drawing and graphics, perspective is an important factor to consider in photography. There are things we can do to alter both the physical appearance and create the illusion of a larger or smaller angle of view, adding or subtracting depth to the image.
The first is the effect of the lens. The telephoto lens reduces the angle of view, flattening the perspective; Distant objects appear closer and larger than those in the foreground. We’ve all seen images where planes appear to be flying right over rooftops or with a giant sun or moon hovering over the horizon.
When used carelessly, people can also get flat, look like cardboard, and even the face can be flattened by the long lens. Unless you have a nose like Cyrano de Bergerac, this is not too flattering.
The opposite is true for wide-angle lenses. The foreground items that appear in the frame are much larger than those that are far away. Getting close to foreground subjects will accentuate that. Therefore, taking close-up photos of people with a wide-angle lens is not a good idea as the nose will enlarge and the back of the head will shrink. The popular cute pictures of kittens and puppies with big noses and eyes were taken this way; However, close-up with the wide-angle lens is not a pretty view for humans.
Therefore, for portraits, if shooting with a 35mm sensor or film, we generally consider a focal length of 70mm to 135mm to be ideal, depending on the composition and proximity of the subject. For crop frame sensors, the focal length will be reduced. For example, with Micro Four Thirds, the focal length is halved to create the same angle as the top and bottom of the subject from the sensor.
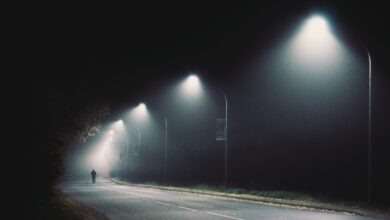
The camera height can also change the viewing angle. Parallel lines, like the edges of a road, seem to converge to a vanishing point. With the camera set low, that convergence angle is the obtuse angle. Coupled with the horizon appearing closer, this makes the image appear less deep than the horizon placed higher.
Compare the following two images: the first image is a worm image while the second image is taken at knee height. The angle of the converging fences is sharper in the second image, which is higher and the vanishing point is further away. Therefore, the latter seems to have much more depth.


If the camera is set very high, the lines converging to a vanishing point are still much sharper.
Take advantage of our way of thinking to see depth
There are other things we can do that, while not physically changing the perspective, will make distant objects appear closer or further away from the foreground. This has to do with how our brains process visual information from the world around us.
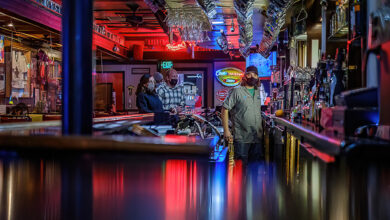
Placing a subject with a warm tone – yellow, orange or red – against a cool blue background will make the background appear further away; Our minds are used to seeing a distant blue horizon. The reverse is also true, a blue subject against a warm background will make the image look flattering.
Likewise, and as I mentioned in my post about low and high precision photosA light object on a dark background will have a sense of depth compared to the opposite direction.
Having similar objects at different distances can bring out depth. For example, a tree in the foreground that appears in the frame much larger than trees further away adds depth. Of course, knowledge of this can allow photographers to experiment with forced perspective, where the size of the subject and the person may look disproportionate to each other.
In contrast, pictures with minimal content may not look pleasing to the eye, as there is little suggestive information about distance. Abstract photographs also seem to look better when there is nothing to define what we are looking at. We don’t know how far apart the objects are or how far away the camera is.
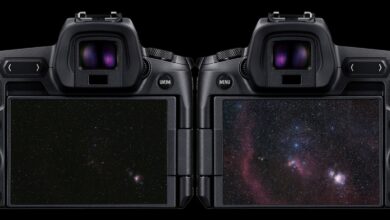
Of course, photographers blur the background of their subject using a long, close-up lens and wide aperture. That reduces the depth of the image but creates separation of the subject from the background. (Read about the law of segregation in my previous post.) Meanwhile, landscape photographers often shoot with wide-angle lenses and take advantage of maximum depth of field, making images more depth and three-dimensional. Careful control of depth of field, such as letting the background gradually lose focus, can also increase the sense of distance behind the subject.
Similarly, subjects in the foreground with lots of contrast placed against a slightly blurred or foggy background can also help show depth. Meanwhile, dense fog that obscures everything in the background can make images appear shallow, especially if accompanied by particularly soft, even lighting.
Such diffused light can work well for portraits, as Cyrano’s blemishes, acne and big nose also become less pronounced, while strong light with deep shadows increases the apparent angle of view. . So a landscape photographer might look for clearer light with pronounced shadows to create a more sense of distance.
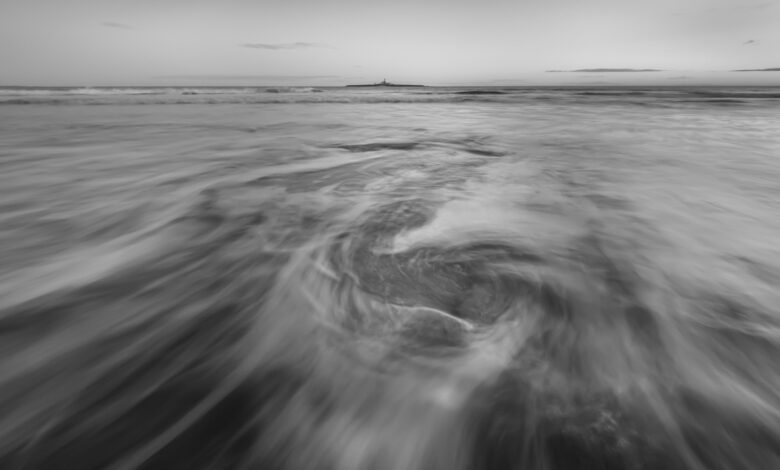
Finally, showing movement close to the camera can also increase the depth of a photo. When you look out the side window of a moving car, passing near objects appear blurred, while distant objects appear to move more slowly. Using a slightly longer shutter can give the same effect, making the mind think that the foreground is closer than the motion stops in the background.

There is no right or wrong way to use perspective in a photo. It is a decision for the photographer to make. However, being aware of these techniques can help reinforce the choices we make when composing photos.
Of course, there are exceptions to all of these examples and there are other methods as well. Being aware of what can clearly increase or decrease perspective can help add impact to a photo, especially when combining these techniques. But that doesn’t mean you can’t experiment with opposite methods to show or hide perspective in images like I did with the yacht in the foggy photo above; proximity often works in photography.
I hope you find that useful. Take a look at some of your photos and see how you might have subconsciously discovered techniques for creating depth or shallowness in your images. I look forward to seeing some of the posts below with examples of both. Please also include your explanation of how some of the perspective techniques you have used.