Have you ever scrolled through all your fonts and simply couldn’t find the right font for your work? When creating a visual project, finding the right font is key to what you want to convey with your design. For example, nobody uses Comic Sans unless they don’t want to be taken seriously. And you may remember Times New Roman as the go-to place for compositions and Arial as the default for website creators.
But with the unlimited fonts available online, it’s only a matter of time before you find yourself wanting to add new options to your repertoire.
How to Add Fonts to Photoshop
There are two ways needed to add fonts to Photoshop, you can either download and install the fonts on your computer and use them on Photoshop or you can go through your Creative Cloud account and add them through Adobe fonts. We will cover both methods here.
Download and install the font:
This is probably the best method as you can do it without logging into your Creative Cloud account, it’s free and you will have the font at your disposal to use for any program. any other program that uses fonts, not just Photoshop.
Step 1: Choose a font to download
Dafont.com and 1001Fonts are just a few examples of where to download free fonts
I can’t stress this enough: always choose a reputable site to download files from. I’ve been using Dafont for over a decade now, but there are plenty of other apps you can use like Envato, 1001Fonts, Google Fonts, Creative Market, and many more.
Step 2: Click Download
I will choose “Somebody Else” to add to Photoshop. If you want to see the font family, click on their name on the left. To download the font, click Download on the right.
Step 3: Find the downloaded font
Your new font will be in a zip file in your Downloads folder. After you locate it, double click it to open it and find the actual font files inside.
Fonts usually come in TTF or OTF file formats. Both can be installed in Windows or Mac once downloaded. TTF or TrueType font files are an older format and are what you’ll likely see more often if you’re used to working with fonts. OTF or OpenType font files are a newer format with more extensible options, but to the average user both files are equally usable.
Step 4: Install the font
When you double click on the font file, a new window will appear Image: Maria Diaz / ZDNet
When you double click on a font file in your Downloads folder, a new window appears where you can preview the font and then click the Install Font button.
Once installed, your new font will show up on your computer.
Step 5: Use your font
You can easily find new fonts in Photoshop Image: Maria Diaz / ZDNet
Once installed, your font is ready to use immediately. Just open Photoshop and find your new font using the text tool.
Since you’ve downloaded and installed a font on your computer, you can now use it in Photoshop or anywhere you can. This includes Pages, Word, Excel, etc.
Using Adobe Fonts:
In addition to downloading and installing fonts, you can also add fonts directly in Photoshop using your Adobe Creative Cloud account. Here’s how to do it:
Step 1: Go to Adobe Fonts
Using the text tool in Photoshop, go to your font drop-down menu and click the Creative Cloud icon to browse Adobe fonts.
Step 2: Choose the font
Search fonts quickly with filter options on the left Image: Maria Diaz / ZDNet
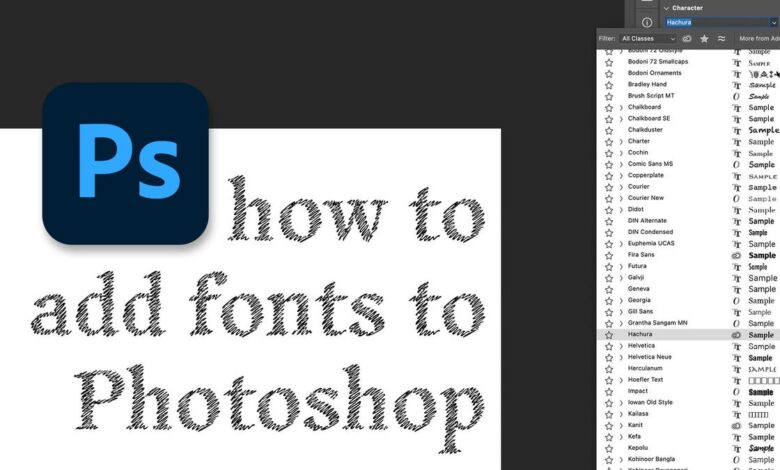
This will open the Adobe fonts website, where you can search for fonts that meet your criteria. I chose a name called Hachura, the purple one with the words “All that snakes melt into the air”.
Step 3: Activate the font
Click the toggle next to Enable Font to add it to Photoshop. This will immediately add it to Photoshop and it will be ready to use in no time.
Some useful information from Adobe, you can ignore this message in the future. Image: Maria Diaz / ZDNet
Just a helpful message from Adobe when you activate your font.
Step 4: The font is ready to use
The added Adobe fonts will be available immediately in Photoshop using the text tool and will go with you wherever you sign in to your Creative Cloud account.
Frequently asked questions
Many fonts are available for free use on many websites, just be sure to read the description before downloading them. Adobe fonts are free with a Creative Cloud subscription.
Fonts are licensed for various uses such as personal and commercial use, or other fonts are 100% free or obtained through contributed software. When you’re looking for a font to add to Photoshop, think about what you’re going to use it for. If you are using it for personal use, you will easily find many free fonts available. However, if you need a font for commercial use, make sure that the font is licensed for it or in the public domain before using it.