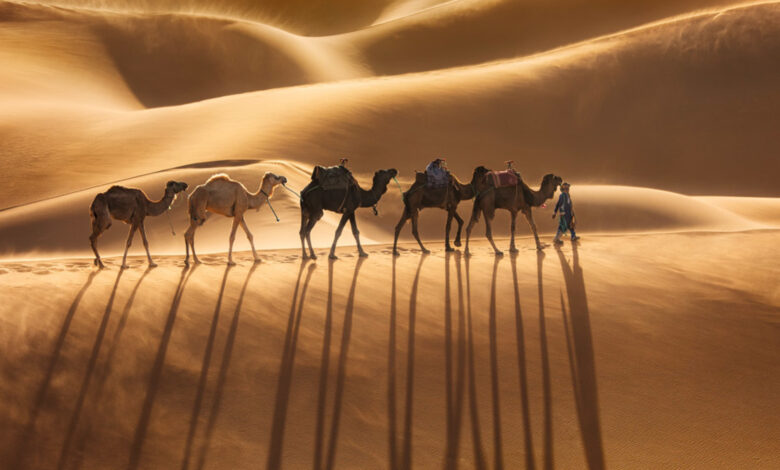
In this article, I share some of the techniques I used to edit my most popular pics here on Fstoppers. With 4.36 points from 95 votes, it has attracted a lot of you. But aside from the great subject matter with Mohamed and his foils and the beautiful, golden evening light, the final image took quite a bit of work to achieve this pristine look.
When I take pictures in the desert, I try to find areas where there are no footprints. But even in places as remote as Erg Chigaga in Morocco, it’s not an easy endeavor. I would have to walk very deep into the desert, away from the camps, to find a clean sandbar. And then there’s the desert weather. Usually, I come across a clear sky, then I try to exclude the sky from my photo. But depending on the audience, this is not always possible.
With some nifty photo-editing techniques, I was able to solve both problems.


Advanced cloning techniques
First let’s tackle the footprints. With the Healing Brush Tool, you can sample a patch of sand near any area you want to duplicate by holding Alt and left clicking. After sampling your pattern like this, release the Alt key and draw over the footprints.
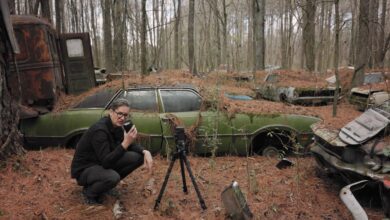
In the screenshot below you see the structures in the sand. Those little ripples are typical, and they require close attention. After sampling an area, try to align the ripples while painting through the footprints to produce a convincing result. Also, choose from different areas to create a random sample so viewers won’t notice the editing.
While the healing brush is more advanced than the Clone Stamp Tool in creating seamless tones and colors, it has its limitations. After cloning, the residue of the old tones is visible. Notice how beautiful the structures in the sand look in the following screenshot; The healing brush did a good job for those. But the sand seems very translucent. The goal is to clean up residual spots while maintaining ripples. You can consider ripples as high frequency elements while blurs have lower frequencies. With a technique called frequency separation, you can divide them into different classes:
-
Create a merged copy of the current edit by holding Ctrl/Cmd + Alt + Shift + E and renaming it “low”. Later it will be the low frequency class.
-
Duplicate this layer and rename the copy to “tall”. It will then contain fine details.
-
Select the low layer and go to Filter – Blur – Gaussian Blur … Dial in a radius, blur only the details you want to separate. For the sand, use something between 5 and 15 pixels. With that, you’ll still see smudges in the sand.
-
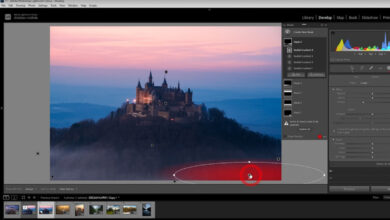
Select the high layer and go to Image – Apply Image and dial in the exact settings I show in the following screenshot. Note that the lower layer is the source. These settings only work for 16-bit images. If you work on 8-bit materials, you’ll need different adjustments: uncheck the Invert box, set the Blending to Subtract instead of Add, and insert an Offset of 128 instead of 0. Scale stays at 2.
-
Finally, set the blend mode of the tall layer to Linear Light.
After performing these steps, the photo will be exactly the same as before. The beauty of this technique is that you can now do cleanup and cloning on the low and high layers separately.
To remove stains from the sand, make another copy of the lower layer and fade it until the marks are no longer visible. With the black mask, you can hide the effect and selectively paint it with a soft, white brush.
For more instructions, follow as I clean up my desert photos in the featured video.
Selective image conversion
The before and after comparison at the top of this article shows a white sky in the original image. It draws the viewer’s attention away from the main subject. Since I couldn’t get rid of the sky by changing the aspect ratio to 16:9 or 2:1, I used selective image transformations.
Why be selective? Stretching the entire image to exclude the sky will cause the convoy to distort significantly. Restricting transformations to areas that do not contain reference elements makes the results much more realistic. I can get away with a stronger transformation. In the screenshot below you see how I selected only the upper part of the photo above the caravan. I stretched it to remove a large amount of white sky.
If you are going to do such transformations in your own image, don’t stretch the pixels too much. You will lose sharpness and introduce artifacts if you go too far. Selective image transformation works best for the sky and for areas of your image that don’t contain too much detail and don’t have perceptible elements of distortion.
In the following video, I show more ways to use selective image transformations. Let’s say you took a photo where the horizon line is right in the middle. For some images it may work. For others, you may wish it was a little higher in the frame. You can stretch the landscape and compress the sky to achieve this. Another use case is centering an element. In the video, I show you how with an example from New Zealand.
Creative Perspective Correction
Perspective correction is often used to remove distortions from an image. Especially for architectural photos that show keystone, they are very important. But they can also be used creatively, again working best for images, containing no reference elements that would allow editing.
Take my desert photo as an example. In the original photo, the ridge on which Mohamed is walking is horizontal. In the last image, he is walking slightly upwards. Converting this horizontal to a diagonal makes the animation much more dynamic.
To make such adjustments, you can work on a flat copy of your image or create a Smart Object from all the layers in the layer stack. Then press Ctrl/Cmd + T to bring up the freehand transform tool. By holding Ctrl/Cmd, you can click the corners of the transform rectangle and move them independently. In the featured video, I show how I transformed my caravan photo that way.
Inference
The techniques I shared above are not for purists. But if you don’t go too far with these edits, you’ll still be able to maintain results that are true to the scene you captured. Removing footprints from a photo may be the least significant change in representing the landscape in a realistic way.
Stretching parts of an image and changes to perspective go beyond basic editing. When I make such changes, I ask myself: Will people who have viewed my photos who have been to this landscape notice the changes? For photos taken in the desert, that usually doesn’t happen and I have more room to mess around because they don’t contain special landmarks. You should be more careful with mountain landscapes because people will know if you stretch them too far.