Over the past few years, LEDs have become a popular choice among stills photographers, and with good reason. While LED light sources have their limitations, there are clear benefits to using continuous lighting for portrait photographers. In this article, I’ll detail five ways I use LED wands to create captivating portraits, both inside and outside of my studio.
I recently reviewed Lumecube Mini Tube Lamp, a compact and powerful LED light bar designed for photographers and videographers on the go. (If you are interested, you can check out my review of the Tube Light Mini This). While I’m excited to use this light for video work, my main interest is trying it out for portrait photography, both inside and outside of my studio. Here are five ways I’ve used this small, versatile lamp to create eye-catching portraits in my studio and on location.
1. As a border light
One thing I like to do in my portraits is adding colored border lighting. Rim light (or kicker) is a strip of light that runs across the side of a subject’s face or body and it adds depth to the image. In the past, I would use 8 1/2 x 11 gels and clip them to the light board, but this is inconvenient and limited by the amount of gel I have on hand. However, using the Lumecube as a rim light was easy, and it allowed me to flex the dial in the exact color I wanted. This early shot was lit with the Westcott Flex Control Panel as the key and a tube light directly behind the subject to create border lighting.
2. As a fill light source
Next, I used a tube light as a fill light, which not only added to the shadows of the face, but also added tint. In the shot below, I used a Nanlite light as the main light and moved the tube light in front of the subject to fill in the dark part of his face. Since my subject has an earthy tone, I chose a background that is also red and brown, and also used a warm color on the tube lights. The image is obtained without editing, with color correction effects in-camera without the need for color correction in post-production. I am pleased with how it came about and how easy it was to achieve this effect.
3. As a main light
Next, I wanted to find out if the Tube Light Mini could be used as the sole main light for portraiture and provide enough light for at least half the portrait length. I was impressed with how the light performed in this role, and the ability to adjust the color temperature made it easy to dial in the desired white balance. Not only can the light provide enough brightness for portraits, but the quality of the light is soft and pleasant, without any harsh glare, like a light that is lit with a regulator. For this image, my photographer friend placed the light out of the frame at an angle of about 45 degrees, with the white wall in my studio helping to reflect the fill light back to the subject.
4. For light painting
Give me an LED wand and I’ll definitely want to do some light painting with it. In my final studio test, I let my subject pose with an old photo frame, then my partner waved the glow stick around him while I shot a roughly five-second exposure. The tube light was set to automatically rotate between colors, and by using the flash as the main light, I was able to stabilize the subject while adding a nice background effect.
5. For spot portraits
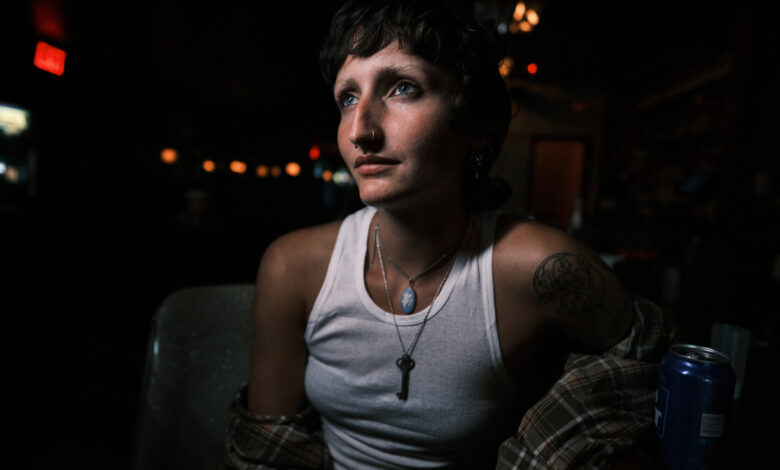
When I first received the Tube Light Mini, I immediately wanted to try using it as the main light for spot portraits. As a musician, I always bring my camera with me to my concerts, and one of the things I love to do is record other bands in between playing with my own group. The venues we perform are often very dark with poor stage lighting, and because our gigs are often late, there is little or no natural light. Since this particular LED light stick is compact, I decided to take it with me to one of my favorite places in New York and try it out as my main light for night portraits. I held the light in one hand, the camera in the other, tilting it to get the exact blur I wanted. If I had a friend, they would hold the light for me, but it’s actually easier for me to just hold it myself and place it exactly where I want it. I also used the same method in a dark bar (actually, it was the darkest bar I’ve ever been to!) and the lighting worked as I expected, helping me achieve satisfying results.
As I mentioned, LEDs have their limitations, but they’ve come a pretty long way. As a portrait photographer, I use LED lighting for most of my work. An LED wand like the Tube Light Mini is easy and convenient to use because there are no cables, no sync speeds, and a long-lasting battery. Since you can “see” exactly what effect the light will have on your subject, it will be very intuitive to position the light exactly where you want it. I also enjoy shooting in extended mode, and by using the LED I don’t need to be tied to the camera’s flash sync speed. If you want to see the background of the settings above, check out my video review This or my Viltrox 13mm review video This including the scene where I took the street portraits above. I hope you enjoyed this article and that it inspired you to try LED lighting in your own work.