There is an often misleading rule cited that amateurs use automatic mode and professional photographers use manual mode. Balderdash! Professional photographers should be able to use manual mode instead, but many use the mode most likely to help them get the photo.
What is shooting mode?
Above most mirrorless and DSLR cameras there is a dial with many different shooting modes. These typically include modes B (bulb), M (manual), S (shutter priority), A (aperture priority), and P (program). For unknown reasons, Canon made the special choice to label the mode as Tv shutter priority (time value) and Av aperture priority (aperture value). But for this article, I will focus on what the majority use. If you have a lower-end camera, you may also have auto and scene modes. Most cameras will also have movie recording settings on the dial.
Auto and scene modes
Auto mode does exactly what you would expect, the camera will take care of all the in-camera settings and will take photos using the settings it thinks are best. Simply put, it’s awesome and it means anyone can hold the camera in this mode, point it in the right direction, press the shutter button and end up with a photo. The downside is that it can make mistakes and there is also less room for creativity.
Scene mode goes a step further as it adjusts the camera settings to whatever settings you choose within the available scene range. Scenes will typically include landscapes, portraits, nighttime, fireworks, etc. They are more likely to get the results you expect than automatic modes. They are a great learning tool because one can see from a photo the settings that were applied to take the photo. You can then use those settings as a starting point to adjust the camera in one of the other modes.
Program mode
Program mode is very similar to automatic mode. However, it allows you to change a wider range of settings. This may vary by camera. Typically, you still have control over ISO, focus mode, exposure compensation, etc. On most cameras, you can change the aperture and shutter settings together and it will keep the exposure the same . Once set up, it goes very quickly and I know a professional photographer who uses it for wedding documentary photography.
Manual mode
This is the other extreme of automatic mode. You have full control over aperture and shutter speed. When you take your time and focus on every little detail to create a photo, manual mode is perfect. I used it for landscape and seascape photography, where I placed the camera on a tripod and took my time to create the image.
I always use manual mode in the studio and when using flash. Therefore, I can maintain a constant exposure in all my photos. I was able to adjust all the exposure controls, including the flash output, and achieve the desired results.
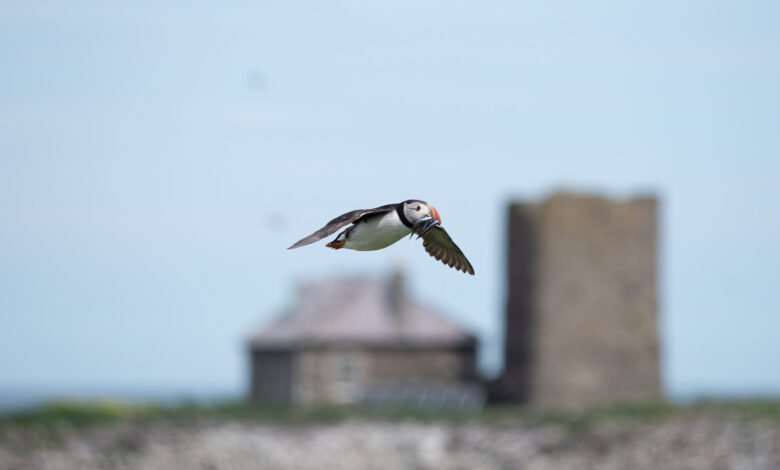
While I may use manual mode at other times, I usually don’t, and for good reason. For example, when I photograph birds in flight, they fly in a brightly lit sky and then swoop down in front of a dark background. If I were in manual mode, I would never be able to change the exposure fast enough that it would ruin the exposure.
Similarly, when taking documentary and wedding photos, I can stay indoors and observe the action outside. Rushing out, I don’t need to waste precious seconds changing exposure settings. Also, when I’m out taking photos, I want immediacy and not having to fiddle with exposure settings. So I see no reason why I shouldn’t forget about manual mode and let the camera do the heavy lifting instead.
Shutter priority mode
Many wildlife photographers will use shutter priority mode because they can preset the shutter speed to match the speed of the moving subject. The camera will then adjust the aperture accordingly.
However, there are problems with shutter priority.
If this mode is used to capture bright scenes, the camera may reduce the aperture too much. Therefore, you will lose image quality due to diffraction.
Furthermore, your camera may have a shutter speed range from 30 seconds up to 1/8000 second. In normal lighting conditions, accidentally choosing either extreme will leave your photo completely white or black. With shutter priority, you must manually keep the shutter speed within parameters appropriate to the available light, otherwise the photo will be overexposed and unrecoverable. Even when using auto ISO, photos can still be overexposed on bright days or become too dark and noisy when shooting in low light conditions.
Aperture priority mode
Most of the time, this is the mode I use. Shooting in aperture priority mode, I can go into the menu and set the camera to the minimum shutter speed I want. To photograph birds in flight, I needed a much faster minimum shutter speed than I needed to photograph people walking around at a wedding. In cases where there isn’t enough light to achieve that minimum shutter speed, I set the ISO to increase automatically.
I used to worry about increasing the ISO because noise would show up in the photo. However, modern camera sensors are so good that increasing the ISO is rarely an issue. Furthermore, the latest versions of noise reduction software remove noise and leave a clear image, unlike the muddy results one often gets from pre-AI sliders in development applications. rough.
With the camera positioned that way, I could select the aperture and thus control the depth of field by turning the rear dial (thumb). If I want to adjust exposure, I turn the front dial (index finger) to change the shutter speed. So I still have full control over the exposure. On many low-end cameras, there is only one dial. Therefore, one has to press the +/- button first to change the exposure compensation level.
By letting the camera do most of the exposure work, I can focus on composition and what’s going on in the viewfinder. I’m not good at multitasking, and the fewer things that need to be thought about at once, the better. For me, framing the image correctly is the most important factor.
In aperture priority mode, exposure is limited by the maximum and minimum aperture of the lens. Therefore, unlike shutter priority, accidental misexposure that cannot be corrected is almost impossible. Like I said, with shutter priority and manual mode, that window is a lot wider and I can choose shutter speeds from 60 seconds to 1/8000 second and so it’s easy to overshoot. or lack of light for a long time.
Bulb mode
Bulb mode is my favorite mode for long exposures. Although my camera’s 60-second exposure time in manual and shutter priority modes was steep – most cameras are limited to 30 seconds – with bulb mode I was able to shoot much longer. I use this feature on a tripod, often using the remote shutter button via the phone app to minimize camera movement.
Variations of Bulb Mode
I would be remiss if I didn’t include two variations of bulb mode, although it will only apply to OM System camera users. What’s unique is that they include a system called Live Time. It is found in the camera’s bulb mode. That way, one can watch the image gradually develop on the rear screen and watch the histogram move to the right. The camera will refresh images up to 24 times and can be set to refresh anything from every 0.5 seconds to once every minute. You stop the exposure by pressing the shutter button a second time. (Direct bulbs work similarly but the shutter button needs to be held in place throughout the exposure and released afterward.)
Even if the exposure hasn’t gone far enough in 24 minutes, you can see how far the histogram has moved to the right during that time and multiply to figure out how much exposure you need. For example, if after 24 minutes the exposure has moved only 1/4 of the way to the right, you know that you need another 24 minutes to get the correct exposure.
In addition, in Bulb mode there is also Live Composite. The camera took the original long exposure. That can be set from 0.5 to 60 seconds. Then you press the shutter button a second time and the camera will just add new light to the photo. This can be used to paint with light, star trails, lightning, etc. I recommend you look at Hannu Huhtamo’s work to see how it can be used to great effect.
Which mode do you use the most and why?
This article is written as an introduction for those who haven’t pushed their cameras beyond the basic settings. What I write about is how I use my camera but not necessarily how everyone else does. As I suggested above, other photographers take a different approach. I’m sure some of our experienced photographers will use their camera modes very differently than I do. It would be great to hear about their approach and why. There are many ways to take photos.