
While Slack facilitates a more collaborative, adaptive, and inclusive work environment for you and your team, the ClickUp integration will increase your productivity even further. It allows you to do more than talk to your colleagues. You can maximize your team’s productivity by taking actions like creating your documents without leaving Slack. It’s as simple as sending a message to everyone in your company via Slack.
You can create marketing plans, reports, strategies, and other documents in rich text format right in Slack using the ClickUp integration. Follow these tips to see how you can leverage the productivity inherent in these two tools to create a seamless workflow.
UNDERSTAND: Feature comparison: Software and time tracking system (TechRepublic Premium)
Things you will need
- Your email account
- Slack account
- Click account
Note: You can only access the Slack integration through Slack’s online app. Additionally, you can only integrate Slack with ClickUp if you’re on the admin group or the owner of a Slack channel.
How to Integrate Slack with ClickUp: Step by Step Tips
The first step involves downloading the latest version of ClickUp on your phone or as an extension to your PC. Then log in to your ClickUp account (Picture A), and add it as an extension on your desktop.

After logging into your account, you will receive a confirmation email with a code that you can use to verify your ClickUp account (Figure BUG).

Find this email and verify the code is the same as the one shown in ClickUp (SIZE).

Activate the ClickUp add-on
Once verified, ClickUp will open, allowing you to create tasks and lists and configure other settings according to your needs. Now, to authorize Slack, navigate to the Settings menu and select Integration (Visualization).

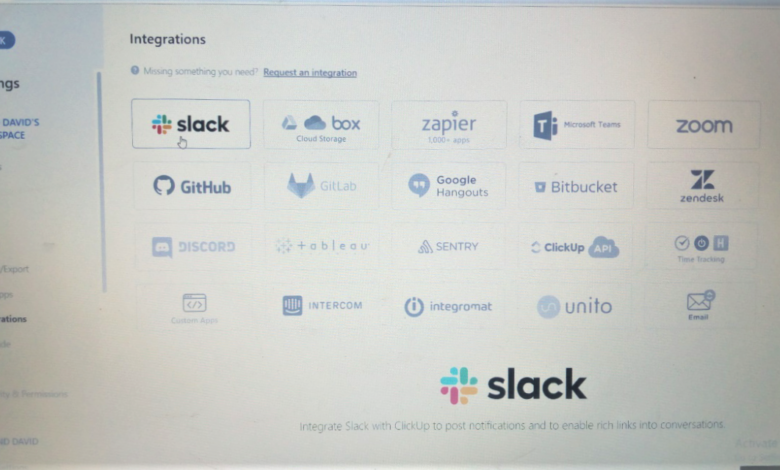
Select Slack from the list of integrations, then click Add to Slack (Figure E).

This will make a popup from Slack appear indicating that ClickUp is requesting permission to access Slack workspace. It will also summarize some of the other features available with the ClickUp integration. Review these and select Grant ClickUp Access (Figure F).

Your Slack has been successfully linked to ClickUp after following this step.
Using ClickUp in Slack
ClickUp integration with Slack lets you create and organize tasks, create message-free tasks, and more.
Create a new quest
In any Slack channel, type / New ClickUp to create a new task immediately (WOOD Figure).

Organize the work to be done
In Slack, links to tasks are supplemented with information, context, and task opportunities as your team submits them. This information may include who gave the task and when, project title, brief task description, work in progress, who was assigned the task, priority of the task, tags, the task’s parent directory and lists, sub-tasks, and who commented as soon as it was published.
Accessing these links also allows you to perform the following actions:
- Change the current status of the job
- Effects of change
- Reorganize your goals
- Rename tags
- Adjust the deadline for completing tasks
And using Slack’s drop-down actions, you can keep track of important details like upcoming deadlines, priorities, and more (Family picture).

Create tasks and comments from sent messages.
Messages can be used to create tasks and comments. A new window will open with other options for you to choose from.
Get notifications
You can choose which Slack channel you want to receive task notifications from ClickUp. You can create actions, post comments, and even change your status by customizing your notification preferences.
How to add Slack notifications to ClickUp tasks
By attaching Slack notifications to ClickUp tasks, the Slack message will be pasted into ClickUp comments in a quote style. It will also provide a link to the comment Slack has made.
To add a message, hover over the message for more information about it, or click the meatball menu to access other message shortcuts. Select Add Comment, enter your comment and click Add (Figure I).

Enable Slack notifications in ClickUp
Slack alerts cannot be enabled until the workspace owner or admin has enabled the Slack integration. To enable Slack connection, follow the steps outlined in this article.
ClickUp currently only supports integrating one Slack workspace at a time.
Notifications can be enabled once Slack integration is set up for the workspace.
- Using the Workspace avatar in the bottom left corner, select Integration from the drop-down menu.
- Select connect to Slack.
- Decide on a work area.
- Optional: Select a folder and a list of files within.
- Make sure you have selected the Slack channel where you will receive notifications.
- To change notification types, click the Settings menu.
Some of the notifications you may receive in Clickup include:
- Set up a notification to be notified as soon as a new task is created.
- Status Changed: You will be notified when the status of the task changes.
- New Comment: Get notified when a task’s comment is updated.
- If the assignee changes, you will be notified by email.
- This option includes all private tasks, lists, and folders.
Remember that the only way to get Slack notifications for tasks that span multiple Lists is if the task’s master list is put in the desired location. Tasks in multiple Lists will only generate Slack notifications if their Home List is included in the selected location.
Turn on personal Slack notifications
Personal Slack alerts can also be tailored to your preferences. The process is similar to enabling generic Slack notifications. To customize your Slack alerts:
- Select My Settings from the drop-down menu that appears when you click your workspace avatar in the bottom left corner.
- Click Slack Notifications in the sidebar to enable them.
- Decide on a work area.
- Optional: Select a folder and a list of files within.
- Select the Slack channel to which you want to publish the notification message.
- To change notification types, click the settings menu.
Some personal announcements in ClickUp include:
- Get notified every time a new task is created.
- Status Changed: You will be notified when the status of the task changes.
- New Comment: Get notified when a task’s comment is updated.
- New attachments: Get notified when attachments are added to a task.
- If the assignee changes, you will be notified by email.
- This option includes all private tasks, lists, and folders.
By setting up personal notifications, you can be notified any time a task is assigned to you.
and that’s all of it. You have finally integrated Slack with ClickUp. So go ahead and customize it to your needs.