If you’re into astrophotography, drones are usually not your camera of choice. That’s why I was surprised to see Haida release a light pollution reduction filter for the new Mavic 3, which they call NanoPro Clear-Night Filter. Does this filter change the drone shooting experience at night?
Drones and low-light photography have never been a perfect match, especially when shooting with smaller, consumer-grade drones. Between the smaller sensor sizes required by the platform, the inherent stability challenges that make long exposures difficult, and the messy regulatory environment surrounding any night flight, photo last night drones were less common. Each of those points has changed dramatically over the past year or two, especially with the release of the Mavic 3, in my opinion. I started shooting at night and tested extensively Haida .’s Transparent Night Filter.

A quick note on regulatory matters: rules, restrictions, and laws will vary depending on where you fly. Always ensure that you comply with all relevant restrictions and always fly safely. Night flights are especially challenging for visibility and require the highest standards of care.
Back to the fun: the Mavic 3’s camera was the first drone I’ve used, it’s a competent nighttime photography tool. Before sunset and even after blue hour, the Micro Four Thirds sensor is capable of producing clear images with good detail. However, when you push the camera to its limit, the files get a bit more “crispy”. That means it’s harder to make a big change in exposure, and it’s not easy to rebalance the colors either.
This is where the Clear Night Filter comes in. Fstoppers have previously reviewed Clear-Night filters in the format used with regular DSLRs and mirrorless lenses, while Nando concludes that filters are more useful when photographing mostly transitional skies, specifically those of the lateral skies. outside the city, but not in a location that is completely free of light pollution. Additionally, he found that he was able to recreate the effect in the city with some careful Lightroom tweaks.

For the Mavic 3, I think those characteristics mean this filter will be useful. Many of my intended compositions for nighttime photography with a drone will inevitably feature a lot of sodium vapor lights, which this filter’s precise colors can degrade. Also, as mentioned before, the drone images don’t need much editing in the post, such as the files from my Z 7. That acumen makes the idea of “getting it right” all the more important, and filters can be an important part of that concept. Finally, I don’t expect to shoot in any really dark sky conditions with a drone, as the technology is unfortunately still not at the point where you can get really long exposures.
Using
Getting an accurate parallel test of filters on a drone is a bit of a challenge. There’s definitely a big difference in both time and location between filtered and unfiltered photos, as you have to land, swap filters, relaunch, and line up. Therefore, I will focus on the photography experience with the filter in place, rather than trying to make exact comparisons.
I ran into a problem before the broadcast, but it’s not Haida’s fault. Instead, it’s from DJI. The mount system, at least on my copy of Mavic 3, sucks. Attaching and removing the filter is a pain to deal with, requiring it to feel like there’s a lot of pressure on the camera and gimbal, which is a delicate mechanism. Haida completely recreated the DJI mounting system, even down to the magnets, and had no problems with their filters; it’s the whole mount system that I don’t like. With that in mind, I’d love to see a clip-on or magnetically attached filter in the future that only goes through a DJI glass filter.

After turning on the filter, I used it on many flights to take photos at both blue hour and sunset, in both areas with significant amounts of light pollution and some areas with a suburban feel/ more rural. In both places, I felt like the filter made a difference in reducing the intensity of the yellow sodium vapor lamp, reducing exposure only moderately. It also leads to significant color changes in those lights. It seems to shift the sodium vapor lamp from that stereoscopic yellow to a more orange, almost salmon color.
This reduction in exposure that the filter causes comes from the fact that the filter is blocking some amount of light from entering the lens, and although this reduction can vary depending on the light that makes up your scene, but I guess it’s the pause. It’s not huge, but can affect photos taken in windy conditions.
This color change is not annoying and almost makes the resulting image closer to what you see directly than shooting with an unfiltered drone. However, I would not describe this effect as a reduction in light. Instead, it appears to be almost entirely a color shift.

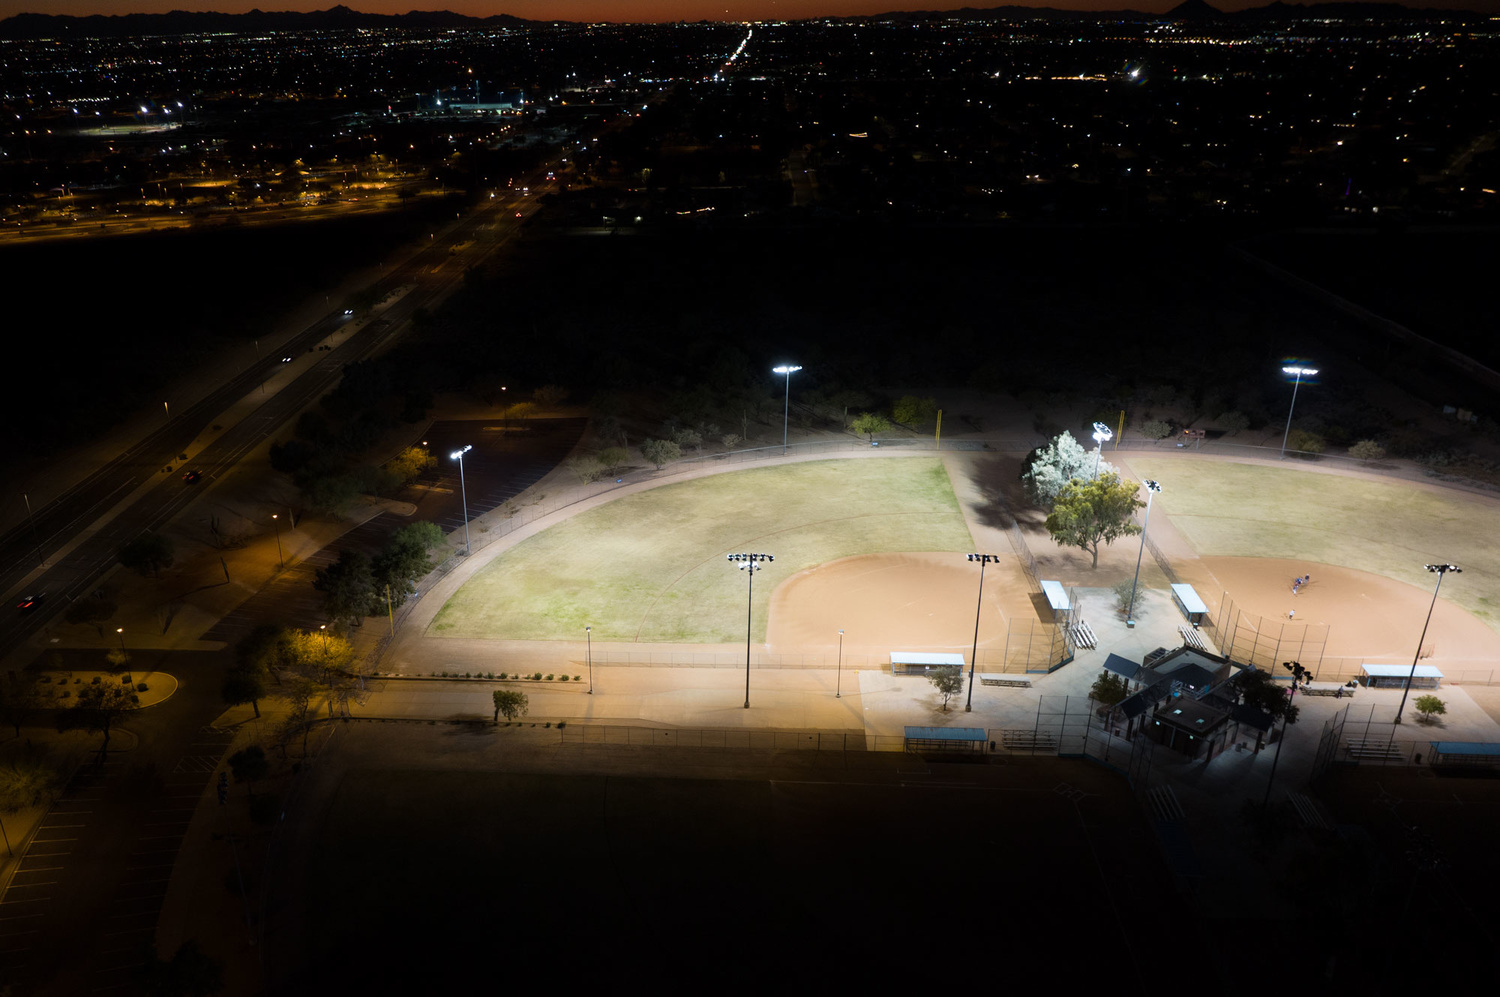
Another point of note, as shown above before and after, is that the filter has no impact on light sources not within the 589 nm band occupied by the sodium vapor lamp. Here, metal halide stadium lights are mostly unaffected, as are LED or fluorescent street lights in offices. The “before” is filter-free, and these photos are processed through Lightroom, with cropping to make them better overlap.
However, I did not notice a significant difference in the sky. I’m not sure if the camera is sensitive enough to change, the exposure isn’t configured to fully reveal any difference, or if the location I’m in doesn’t create much light pollution in the atmosphere or not. I did some additional testing with the sky-centered photos, but couldn’t find a meaningful difference in the images. Throughout the test, the main difference between the photos with and without the filter was limited to the area directly around the sodium vapor lamp; The drone’s camera may not be sensitive enough to pick up light pollution.
This reduction and variation of light makes using this filter a deliberate choice. You are trading off some exposure latitude for a slightly different color scheme. Since both the amount of color shift you can get from the camera, as well as the extent to which you can increase the exposure, is limited, I think this filter is a useful tool, albeit a very useful one. specific tools. It’s also a particularly useful option if you’re shooting video with a drone but aren’t comfortable with color grading. Here, it can provide a different and more pleasing look without requiring video editing expertise.
If you want to take photos in an area with lots of yellow light and especially no wind, you can trade off a slightly longer exposure for more pleasing colors. On the other hand, if you’re looking to maximize the light available to your drone, leaving the protective glass available may be a better option. Overall, the filter is a cheap and interesting option for drone photographers shooting after sunset. The Clear-Night filter is now available for Mavic 3and also Available for Mavic Air 2though that model was not tested in this review.
What I like
- The effect is pleasant, if small
- The price is very reasonable, especially for a drone accessory
- Generate quality matches with first-party filters
- Useful for both photos and videos
What can be improved
- Marketing may not be clear on the impact this filter has on photos
- Attaching any kind of filter to the Mavic 3 is annoying – a “click” or magnetic version would be even better