I usually only capture BTS footage from one or two sets in a session, so I thought I’d try showing footage from the entire session.
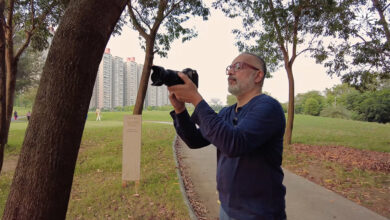
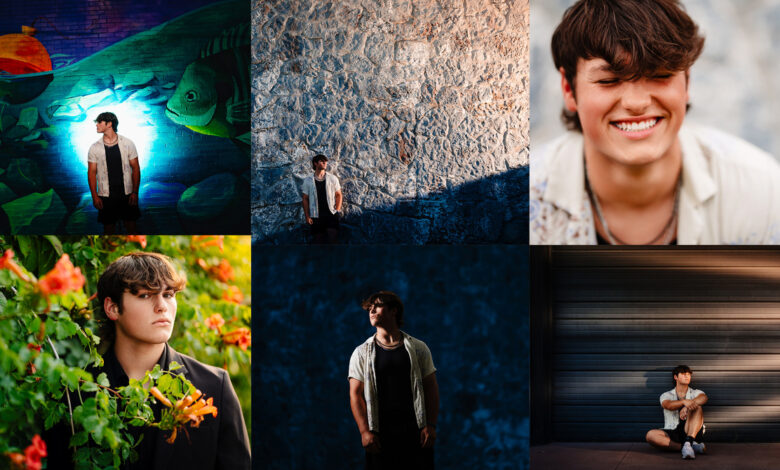
For the process testing the new Godox AD600 Pro III needed some test shots and images. So I took some flash photography during a recent high school senior session. But instead of taking a few clips the traditional way during the shoot, I decided to capture a glimpse of each setup. So that’s what you’ll see in the video. But for those of you reading my group, don’t worry, because I’ll include some screenshots for you to see. Obviously, though, you’ll get a better idea when you watch the full BTS clip. In addition to the flash example images, I’ll also show some examples of what the scene looked like without the flash. As for the camera settings, all images were taken with Sony a9 III with global shutter and 35mm or 85mm lens.
Location One: The Art Wall

I haven’t had a meeting in this area in a while, so I just gave them the general meeting location and then got there early to look around and plan. But since I didn’t want them to show up and then immediately move locations, I decided to use this art wall for some images. Here, I used AD600 Pro II as a main light combined with Magmod XL Reflector on mine Cheetah C10 Mount. I made sure the light was away from the wall to help prevent light from bouncing off the wall. I still had some spills that I had to clean up in post, so I would have been better served if I ran to my truck and just grabbed my net.


I then mounted a light between the subject and the wall to create a highlight on the wall behind the subject. My original idea was to have the subject as a silhouette on the wall, but then I decided to push my dynamic range in post so that the subject was only lit by ambient light.
Second location: The Stone Wall

In this location, I was drawn to the large wall with no windows or doors. I thought it would make a great texture while also giving me enough space to get some wider compositions. For this scene, I used the Godox AD600 Pro II inside a Magmod Pro 24 Box. I also turned off the lights in some of the shots to get some natural light shots.
From here, I moved my light to the other side of the fence along the back of the wall. I positioned the light so that the fence would block some of the light. The angle of the light brought out a lot of the texture from the wall, and the fence added some shadows to help draw the viewer’s eye and add interest to the frame.


After this setup, I wanted to get a more standard look at the type of camera images. While not overly “creative,” I felt these images were necessary. To keep things simple, these images were also taken using only natural light.
Third setup: Garage

At the back of the building, where I found the stone wall, I noticed this garage door area. But what drew me to this location wasn’t the garage door, but the fence along the side of the door. I liked how the fence had some gaps between the wooden planks, so I thought I could insert lights in between those gaps to create some interesting lighting patterns. For the modifiers, I used Magmod XL reflectors with full CTO gel. The gel gave me the look of the light coming from dusk.


When I was done here, I just told the old guy to stand against the fence. This was a temporary stop since he had to go that way anyway for my next setup, and the lights were right where I wanted them.

From here, I stuck to my original idea of shining the light through the fence, but this time at a different angle and onto a wall instead of the garage door. In both cases, however, I made sure the light went through the subject’s eyes.

Finishing this place, I decided to go with some more traditional style images. I saw a beautiful white door on the wall we were using, so I used it as a framing element and got some variations.
Fourth location: Ivy wall

By this time, it was time to get dressed, so while he was getting dressed, I found this ivy wall. What I liked was that there was a huge green wall, but the ivy had been cut away around the entrance gate. So I used this gate as a framing element. Then I just used the ivy background and tried to find things to add some interest in the foreground.
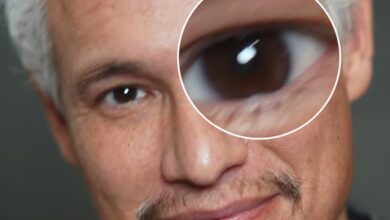
Another part of this location that I like is the section of the ivy covered wall with flowers. I like the contrast of the handsome guy mixed with the beautiful flowers. The only problem I had with this was that for certain composition angles, I could see the clutter of the alley (power lines, parked cars, etc). So instead of giving myself more strict angles, I used the convex lens as a foreground element to cover these areas when needed. This gave these shots a slightly more dreamy feel, which I really liked.
Fifth place: The Red Wall

This is another in-between area. I had another alley in mind that I wanted to use, but it was a bit far away. So instead of walking all the way to the new location, I used this as a halfway point to stop and add some variety to the gallery. Since this was just a quick stop, I only used natural light here.
Sixth location: Alley

Here, what I wanted to use was the brick wall and trees in a similar way to the fence in the garage location. So I set up the AD200 II with a Magmod XL reflector and a full CTO gel. I then positioned the light to shine through the tree and into the wall. This created the illusion of the sun setting and created some interesting light and shadow. I then turned the light off and got some natural light images. Here, I used the tree as a foreground element and played with my aperture to experiment with depth of field. This allowed me to play with how much or how little of these foreground elements were in focus.
I then went to another wall in this alley and took some more basic natural light shots. Here I again used a door on the wall as a framing element.
Back to the tree, I wanted to use my light as a rim light while shading the subject against the sky. I then used the tree to fill the frame. The backlight also helped to highlight some of the flowers on the tree against the dim sky.


Seventh Location: The Stone Wall Again

To end the shoot, the senior wanted some pictures with his baseball bat, glove, and ball. So we headed back to the rock wall (which was the easiest spot for us to park to get our baseball gear). Here, I decided to take Magmod Pro 42 Box for a larger and softer light.
For the final setup, I threw in a few Pavo Nanlite 4 foot tube into some C8 Cheeta Bracket and get some headshot style portrait shots.

Conclusion
And that’s a quick look at the entire senior high school class! Obviously I’m not sharing every image from the gallery, but enough to at least give a glimpse of what each setup would look like. If you like this style of post, let me know in the comments and I can try and do more like this.