The Northern Lights season is now over. However, the next few seasons could actually be very special for aurora chasers. Join me as I discuss the beauty of the Northern Lights, some of the science behind them, and how I captured this magical experience.
Back in October last year, I visited Iceland for 10 magical days, traveling the country in a camper van, chasing the aurora borealis. In 10 days I saw the aurora seven nights, which is quite special for Iceland. The weather in Iceland can be quite unpredictable, but I’ve had good luck on my journey.
What is aurora?
Auroras are caused by the collision of charged particles from the sun with the earth’s atmosphere. Depending on the gas with which the particles collide, this can determine the colors we see in the night sky, such as oxygen making green and nitrogen producing red and blue. . Particles from the sun collide with our planet all the time. Occasionally, however, we are struck by large bands of particles, usually caused by CMEs (Coronal Mass Weapons) or smaller, solar flares. When we are hit by CMEs or solar flares, it can cause geomagnetic storms and sometimes, although rare, you can see aurora boreal from more mid-latitudes if we get hit. direct touch. Earlier this year, during a major geomagnetic storm, auroras were seen in countries such as France and Germany, which is very rare.
Be prepared
When pursuing the aurora, the two most important things first and foremost are good weather with clear skies and good space weather. After those two steps, you can start looking at other conditions, such as moon phases. Are you far from light pollution? However, those two points are not paramount in finding the aurora. You can still see the aurora borealis in the middle of Reykjavik as they are dancing and even on a full moon you can still have an incredible experience. Some photographers prefer to photograph the aurora or film the aurora during a full moon or earlier phases, as it can really help expose the foreground for a clearer image.
Many of the apps that you can download focus on the KP Index, which is a scale of 0 to 9, 0 being quiet and 9 being a strong geomagnetic storm. However, the KP Index is not a reliable method for chasing the aurora because of the extremely slow data latency, usually three hours, while an active storm can last for several minutes. The best data we have for tracking the aurora is from the Deep Space Climate Observatory (DSCOVR) satellite and can be found by searching for “Space Weather” on Google. The DSCOVR satellite records valuable information such as solar wind speed, density and other amazing information.
My next app is the Glendale app (not available on the app stores but you can find it on Google search). The Glendale app has a great variety of information from the DISCOVR satellite and its data to help you hunt, as well as a live registration system to show where people around the world are seeing the aurora borealis.
maximum solar energy
A solar maximum is when the solar cycle reaches its peak and can cause significantly increased activity, such as flares and eruptions, which, for us on Earth, can cause Auroras are stronger and appear brighter at different latitudes. Solar cycles typically last about 11 years, and the last Solar Maximum is around 2013, which occurs in the middle of the cycle. The current cycle we are in has now begun in 2019, which means we are rapidly approaching the Solar Maximum, which is predicted to take place between 2023 and 2026.
We can’t predict exactly when the Peak will be reached, but what we can see is that as we get closer to it, the Sun’s activity continues to grow stronger. We currently have much stronger aurora displays, so it’s a great time to plan your trip to Alaska, Canada, Iceland, Norway etc in the winter for the next few years. For most places in the Aurora Oval, September through early April is a great time to chase the aurora borealis. Just make sure you wrap warm!
Gear
When preparing to photograph aurora borealis, the equipment you choose is crucial if you want to get the most out of it. The basic equipment will be the camera, lens, and tripod, so let’s break these down in more detail.
You can take photos of the aurora with almost any camera, and even newer phones these days are capable of taking good pictures of the aurora. I am currently shooting with a sony a7 IV, has excellent noise performance for a 33-megapixel sensor. Typically, the higher the megapixel count, the more noisy the image at higher ISOs. The Sony a7SIII designed more for low-light shooting due to the low megapixel count and sensitivity. The Sony a7S III is absolutely on my list of favorites, as it is a low-light monster!
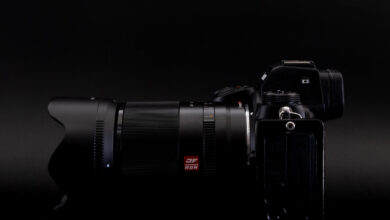
The lens you choose is important, and while you’re fine with using a kit lens, you’ll want to capture as much light as possible. On this basis, I recommend lenses with an aperture of f/2.8 or wider. For Sony users, I love taking pictures with 20mm f/1.8 W lens and on my next trip I plan to use Sony 14mm f/1.8GM, this will allow me to capture more of the sky. Other brands will have equivalent lenses available to you.
Finally, we have a good, strong tripod. I captured the aurora between 1 second at shutter speeds up to 30 seconds, so the tripod is a very valuable piece of equipment. When visiting countries like Iceland, it can be very windy, and since you’ll be there in the winter, be as sure as possible.
Additional items for aurora photography that aren’t strictly necessary are a rangefinder (some cameras have this built in), a lens heater to prevent your lenses from freezing in extreme cold temperatures. and gloves for yourself.
Take photos of the aurora
Now that we have the most important equipment items, let’s talk about the camera settings. Auroras, when active and dancing, can move very quickly. This is when you’ll want to limit your shutter speed to between 1 and 5 seconds, because any longer than that can make the sky look like a blob of green. The aurora can show beautiful moving halos and curtains, so you definitely want to use a faster shutter speed. If the aurora moves more slowly or is quite static like an arc in the sky, you can choose a longer shutter speed like 10 seconds or more.
As for ISO, this can really depend on your scene, such as whether the moon is setting and the brightness and speed of the aurora. For bright and fast aurora, I aim for between ISO 800 and 3,200. For weaker auroras, or if you have a lens slower than f/2.8, you may need to go higher than that.
Apertures will usually be as wide as possible, such as f/1.4, f/1.8, etc., although sometimes it’s better to narrow the aperture down a bit, so if you have an f/1.4 lens, you can shoot the aurora borealis at f/2.0 instead so you can capture the stars and foreground more sharply.
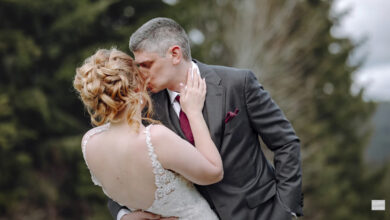
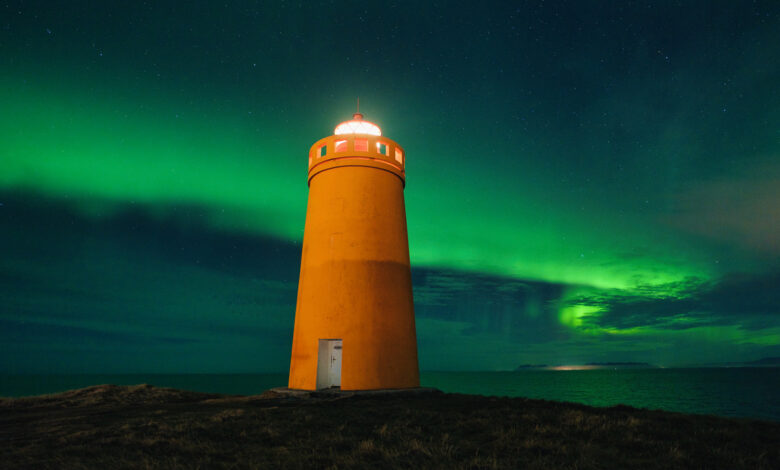
Composition is the key to a great aurora image, plan ahead and find an interesting foreground subject before you head out in pursuit. Find a beautiful waterfall, tree, lighthouse, etc and use it as a foreground so you can combine a beautiful landscape with a beautiful aurora. I see many images of aurora where the foreground has not been considered, so this is something that can separate you from the rest. I recommend using tools like Google Street View or Google Earth to find nice foreground subjects.
Have fun
The last and most important part of aurora photography is having fun. The Aurora Borealis is a majestic and beautiful experience to witness. While capturing them is very special, being able to let the camera run and then witness them with your own eyes is another. Here’s a video of the aurora I shot last year:
Have fun hunting!