Sorting through a mountain of unprocessed photos can be overwhelming. You may find yourself with hundreds, even thousands, of images sitting on your hard drive, each one just waiting for your attention. The challenge of finding the best photos in the clutter is real.
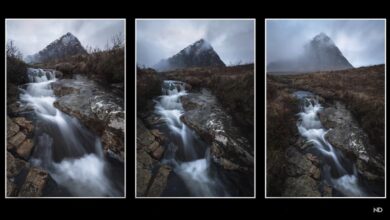
Coming to you from Adrian Vila with OhThis hands-on video walks you through a methodical process for sorting through and selecting your best shots. This is an essential skill, especially after a productive photo shoot, when you may come back with hundreds of images. Vila illustrates his approach with a recent photo trip where he captured 800 images in less than three hours. The conditions were perfect—low fog, a rapidly changing landscape, and a golden opportunity to capture the towers of the Golden Gate Bridge jutting out from a sea of clouds. It’s the kind of situation where you can’t help but shoot a bunch of shots, but it also means a lot of work when it comes time to sift through them.
The process starts in the field. Once you know you’ve taken a good photo, tag or rate it in your camera. This small step can save you a lot of time later because Lightroom and similar software can read these tags. You’ll quickly find these standout images when you start the editing process. Don’t delete photos in the camera, though. Mistakes happen, especially when you’re in a hurry, and you don’t want to accidentally delete something valuable. Save deleting photos until you’re back on your computer, where you can take your time.
Vila recommends processing your photos in multiple passes. For your first pass, rely on your instincts—if an image catches your eye, tag it. Don’t overthink it at this stage. Each subsequent pass will further narrow your selection. The goal is to go from a large, unwieldy batch of images to a cohesive collection of your best work. Take breaks between passes to keep your eyes fresh and your mind clear. When you’re done, you’ll have a manageable number of images ready for post-processing.
Post-processing is where you might notice things you missed initially—little flaws, out-of-focus areas, or objects in the frame that distract from your subject. This is where you’ll be glad you took more than one photo. Sometimes a slight change in composition or timing can make all the difference. If you’re stuck choosing between similar images, just pick one. You haven’t deleted the others, but you need to make a decision to move forward.
After this process, Vila narrowed his 800 images down to six that he liked. These were the images that captured what he envisioned when he set out that morning. The final step involved a second master scan after some time had passed. This helps you look back at your work with fresh eyes, less influenced by the emotions of the shoot itself. If a photo didn’t resonate with you then and still doesn’t, it’s probably time to let it go. Watch the video above for Vila’s full rundown.