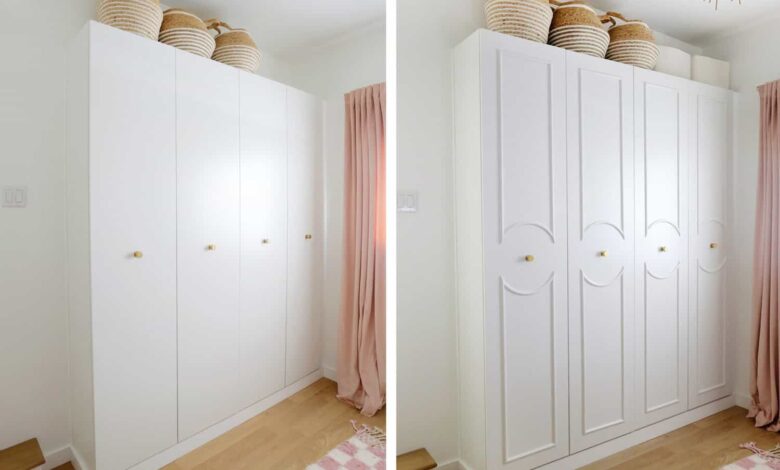
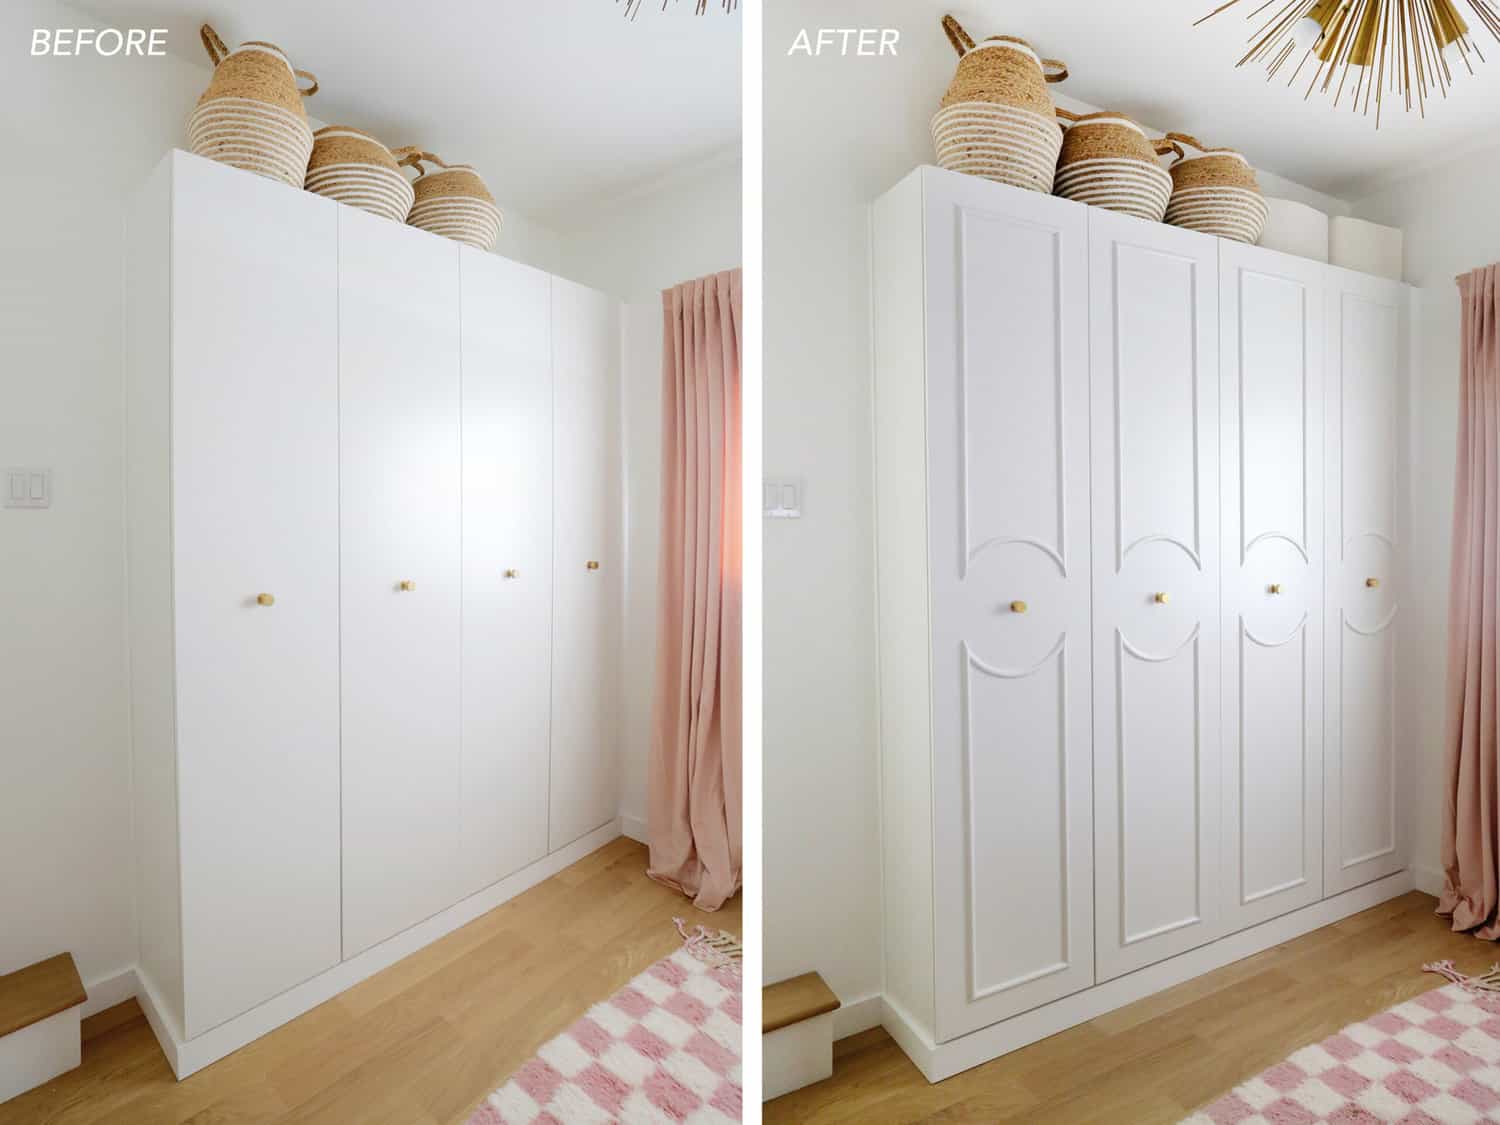
If you’ve bought an IKEA Pax wardrobe and are looking for ideas or tips on how you can make them look a little more custom and expensive, look no further than adding custom trim to your wardrobe doors!
Adding trim is a quick way to take a set of Pax wardrobes from looking stock to chic, and you can customize your doors to fit your home’s personality.
Love a good IKEA hack? Check out:
Supplies:
–drill
–painter’s tape
–level
–14″ wooden circle
-straight half round molding (I did a 3/8″ x 3/4″ size moulding)
-half round flexible molding (I did this 3/8″x 3/4″ size flexible moulding)
–miter saw or hand saw and a miter box
–craft saw
–finish nail gun (I love that battery one but this one is a little more budget friendly) and 3/4″ brad nails
–wood filler and fine sandpaper
–caulk
-paint primer (use this one so you don’t have to sand the laminate doors first)
-acrylic paint (with a spindle brush if you can as they are super helpful for painting moulding)
*Note: I like this site a lot for flexible moulding, as they have lots of sizes and you can get it pre-bent into a circle, which is really helpful since the material can be tough to bend from straight.
If you get confused on how to order it, they are really helpful over the phone.
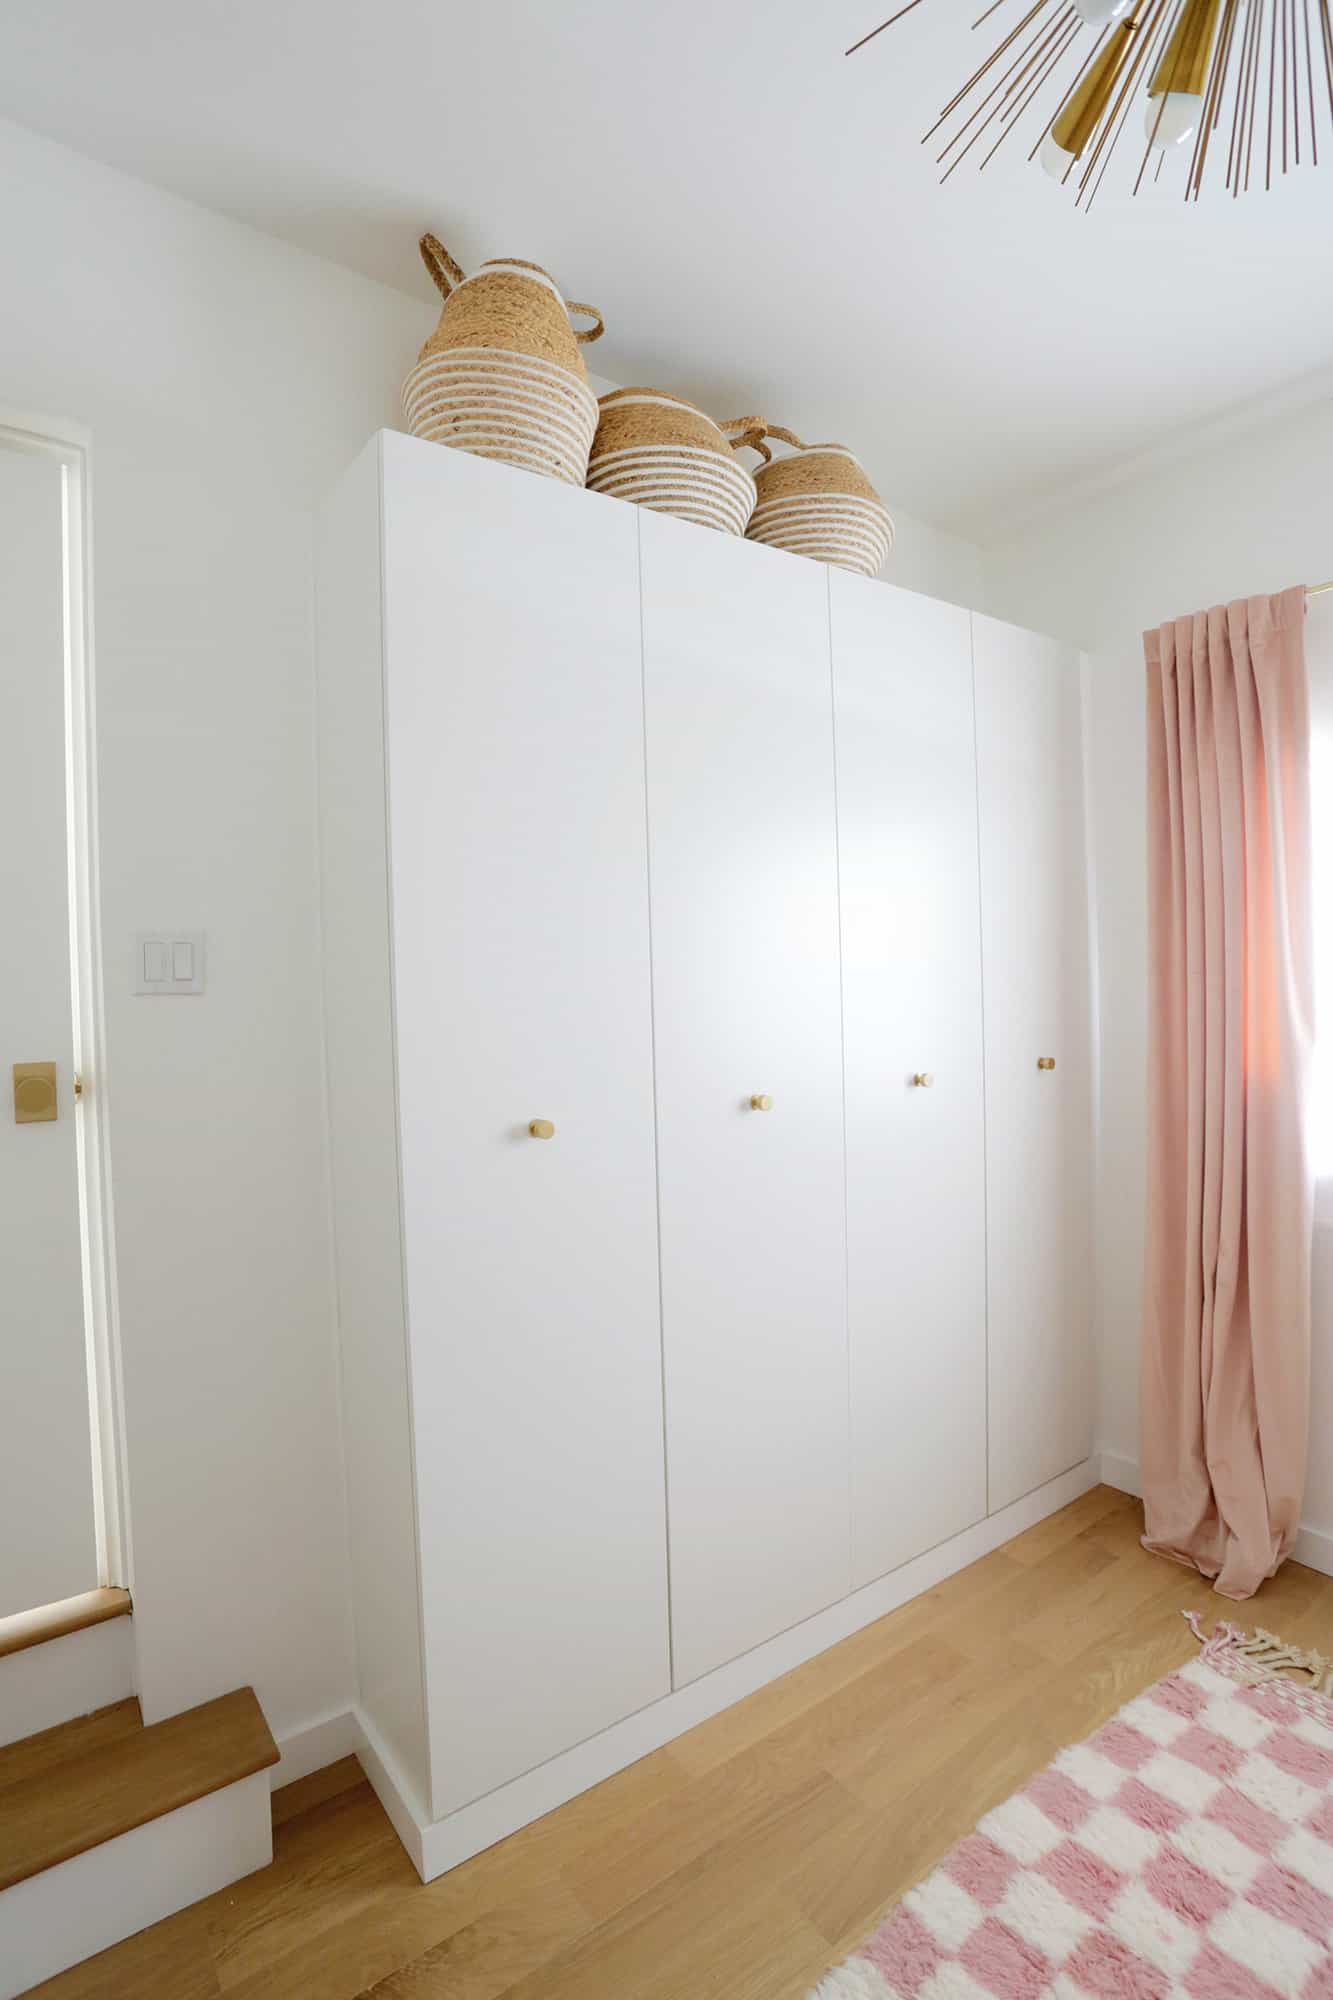
This type of door style works best with a single knob for your door hardware, and it’s usually placed in the middle of the door. So add your hardware first so you can build around it. Knobs like this work great!

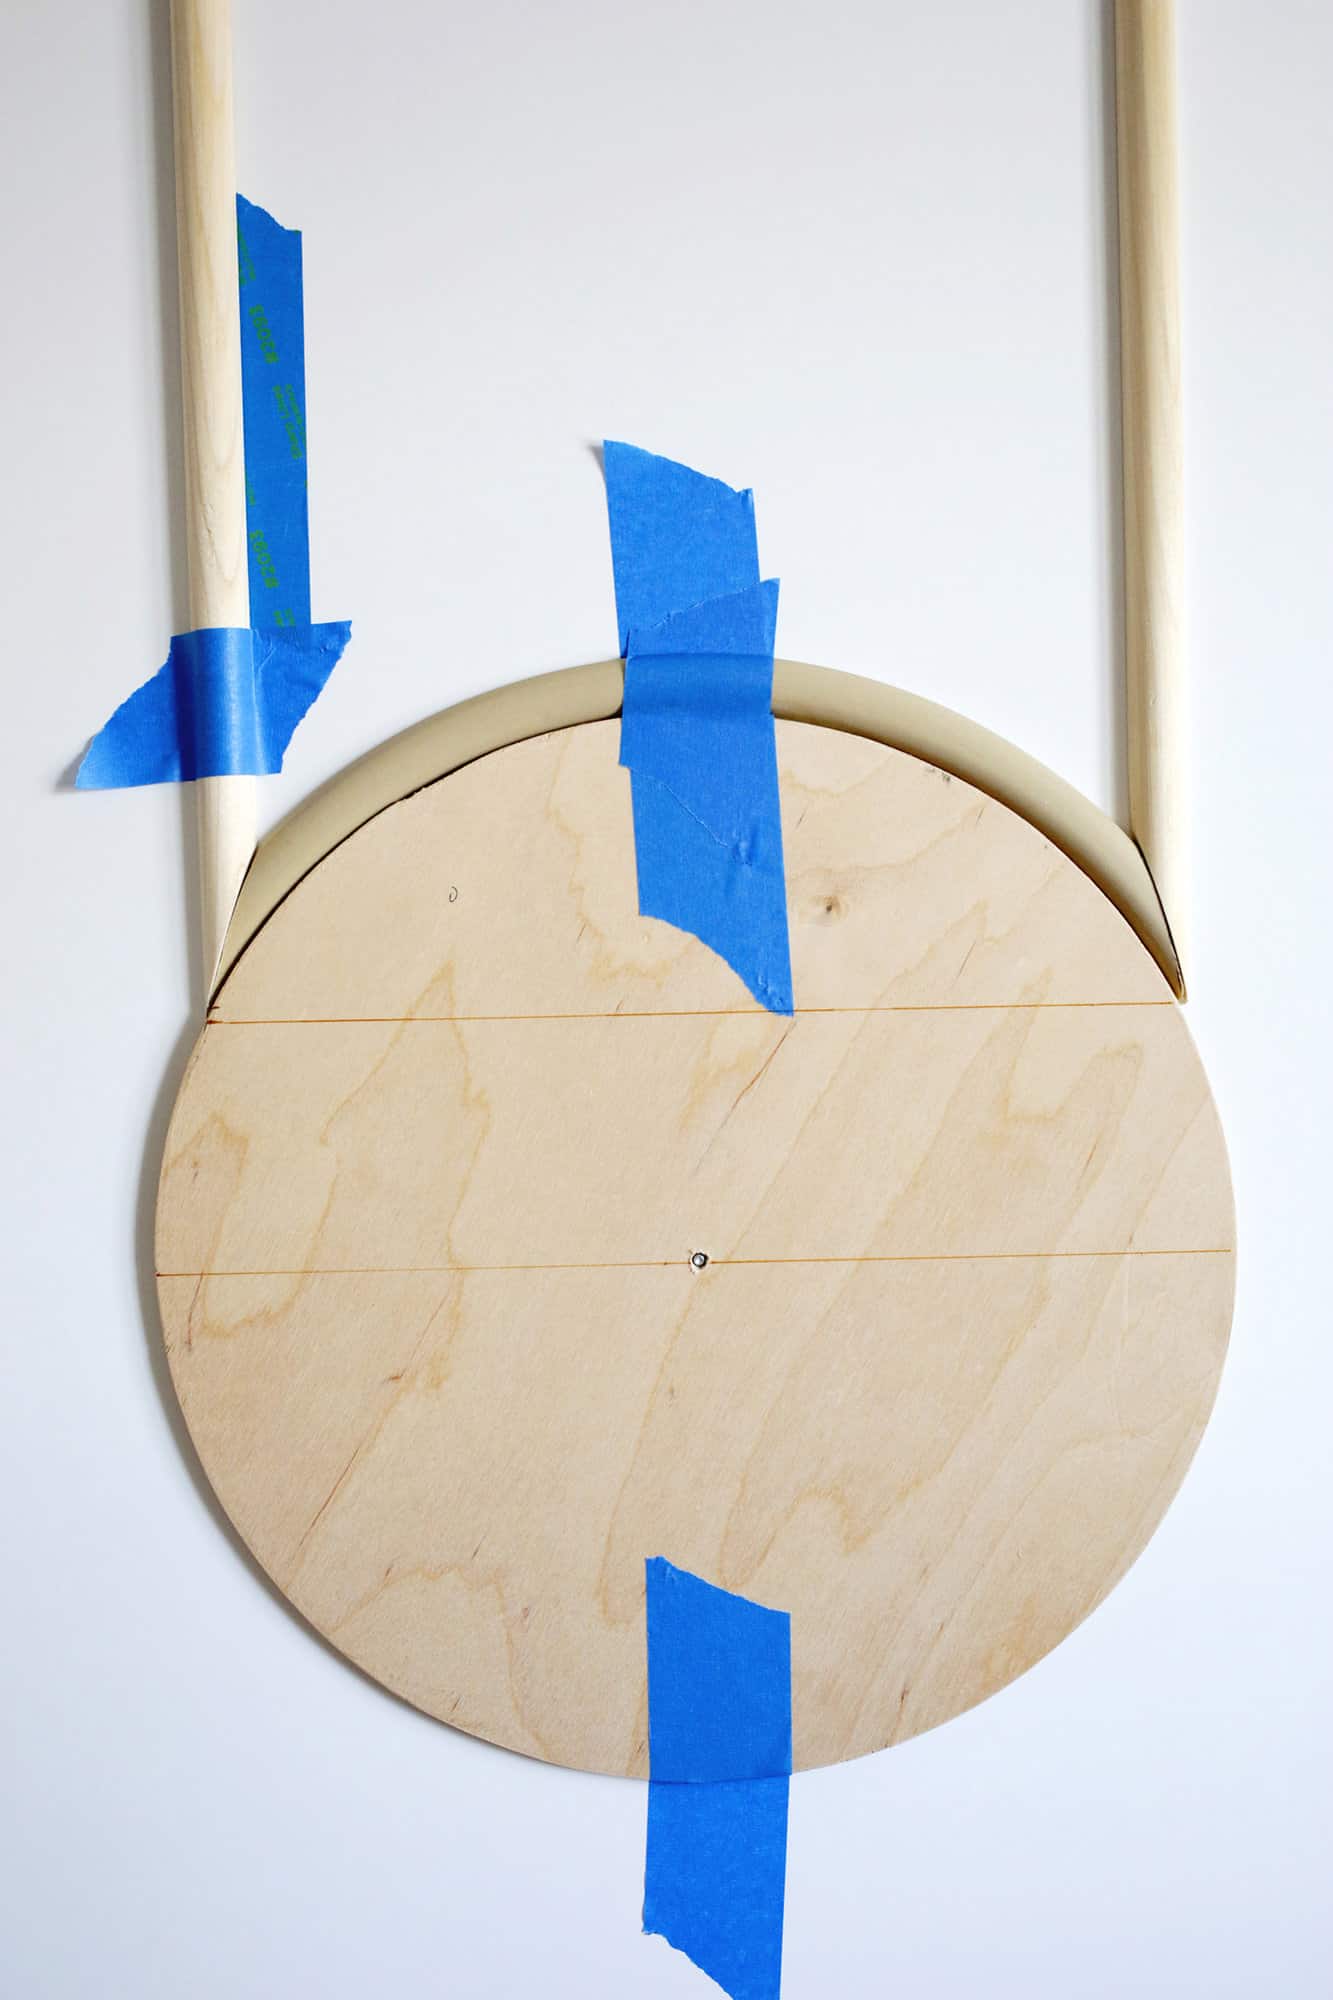
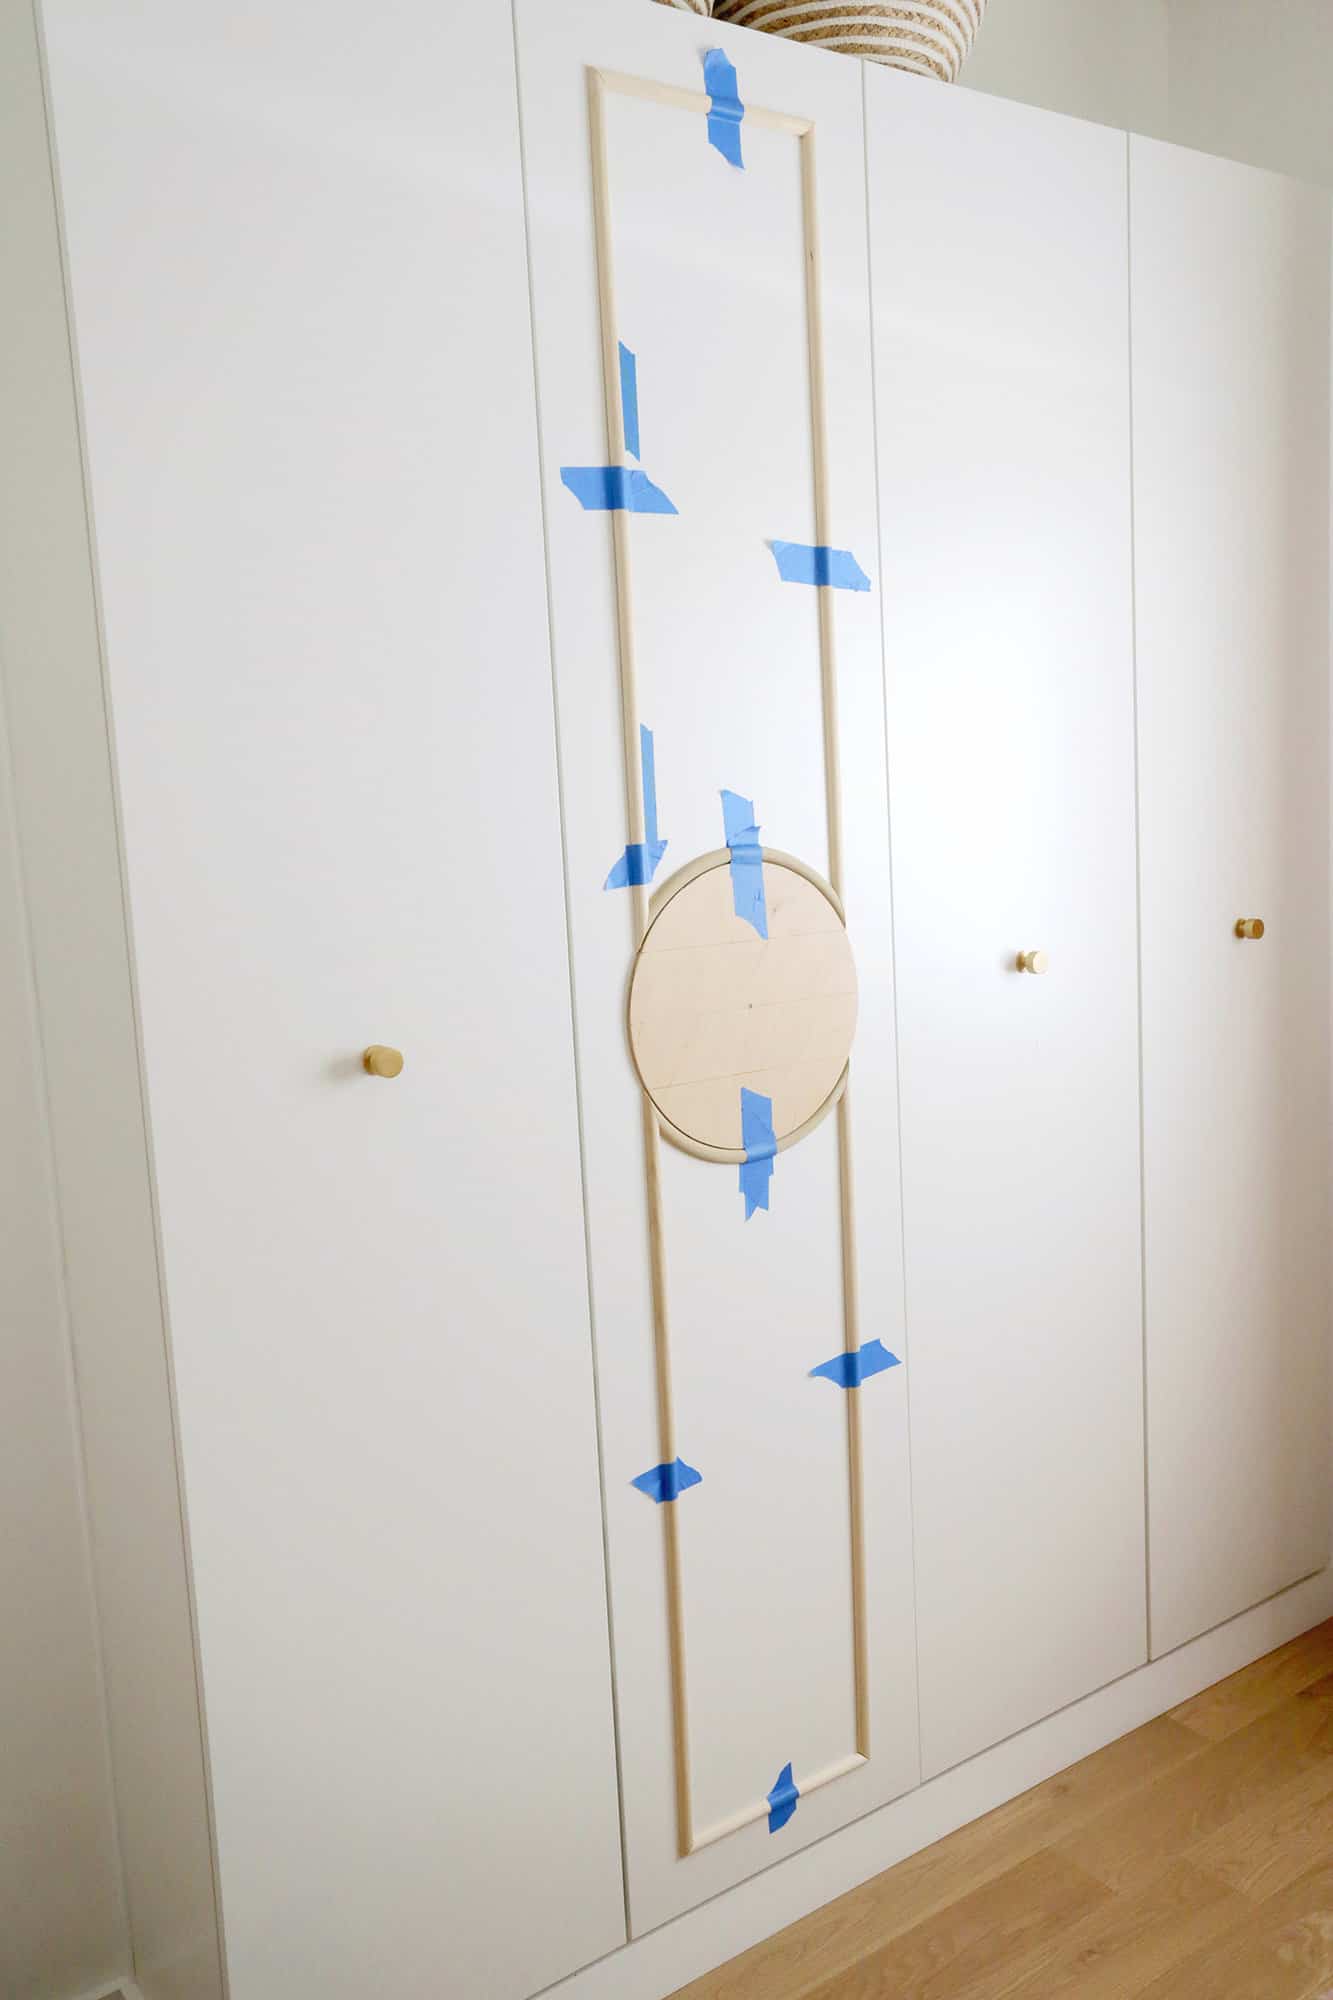
Now, we’ll want to use our wooden circle for our arch guide. Drill a hole in the middle of your circle that’s the same size as your door handle screw, so you can take the door handle off and kind of hang the circle on the screw. Use some painter’s tape to keep it from rotating.
Drape the start of your flexible trim over the top of the circle (you can tape it in place if you want to) and line up and tape your first straight trim piece for the top left side.
It should be 3.5″ in from the edge of the door and the end of the trim needs to hang all the way down to just touch the wooden circle.
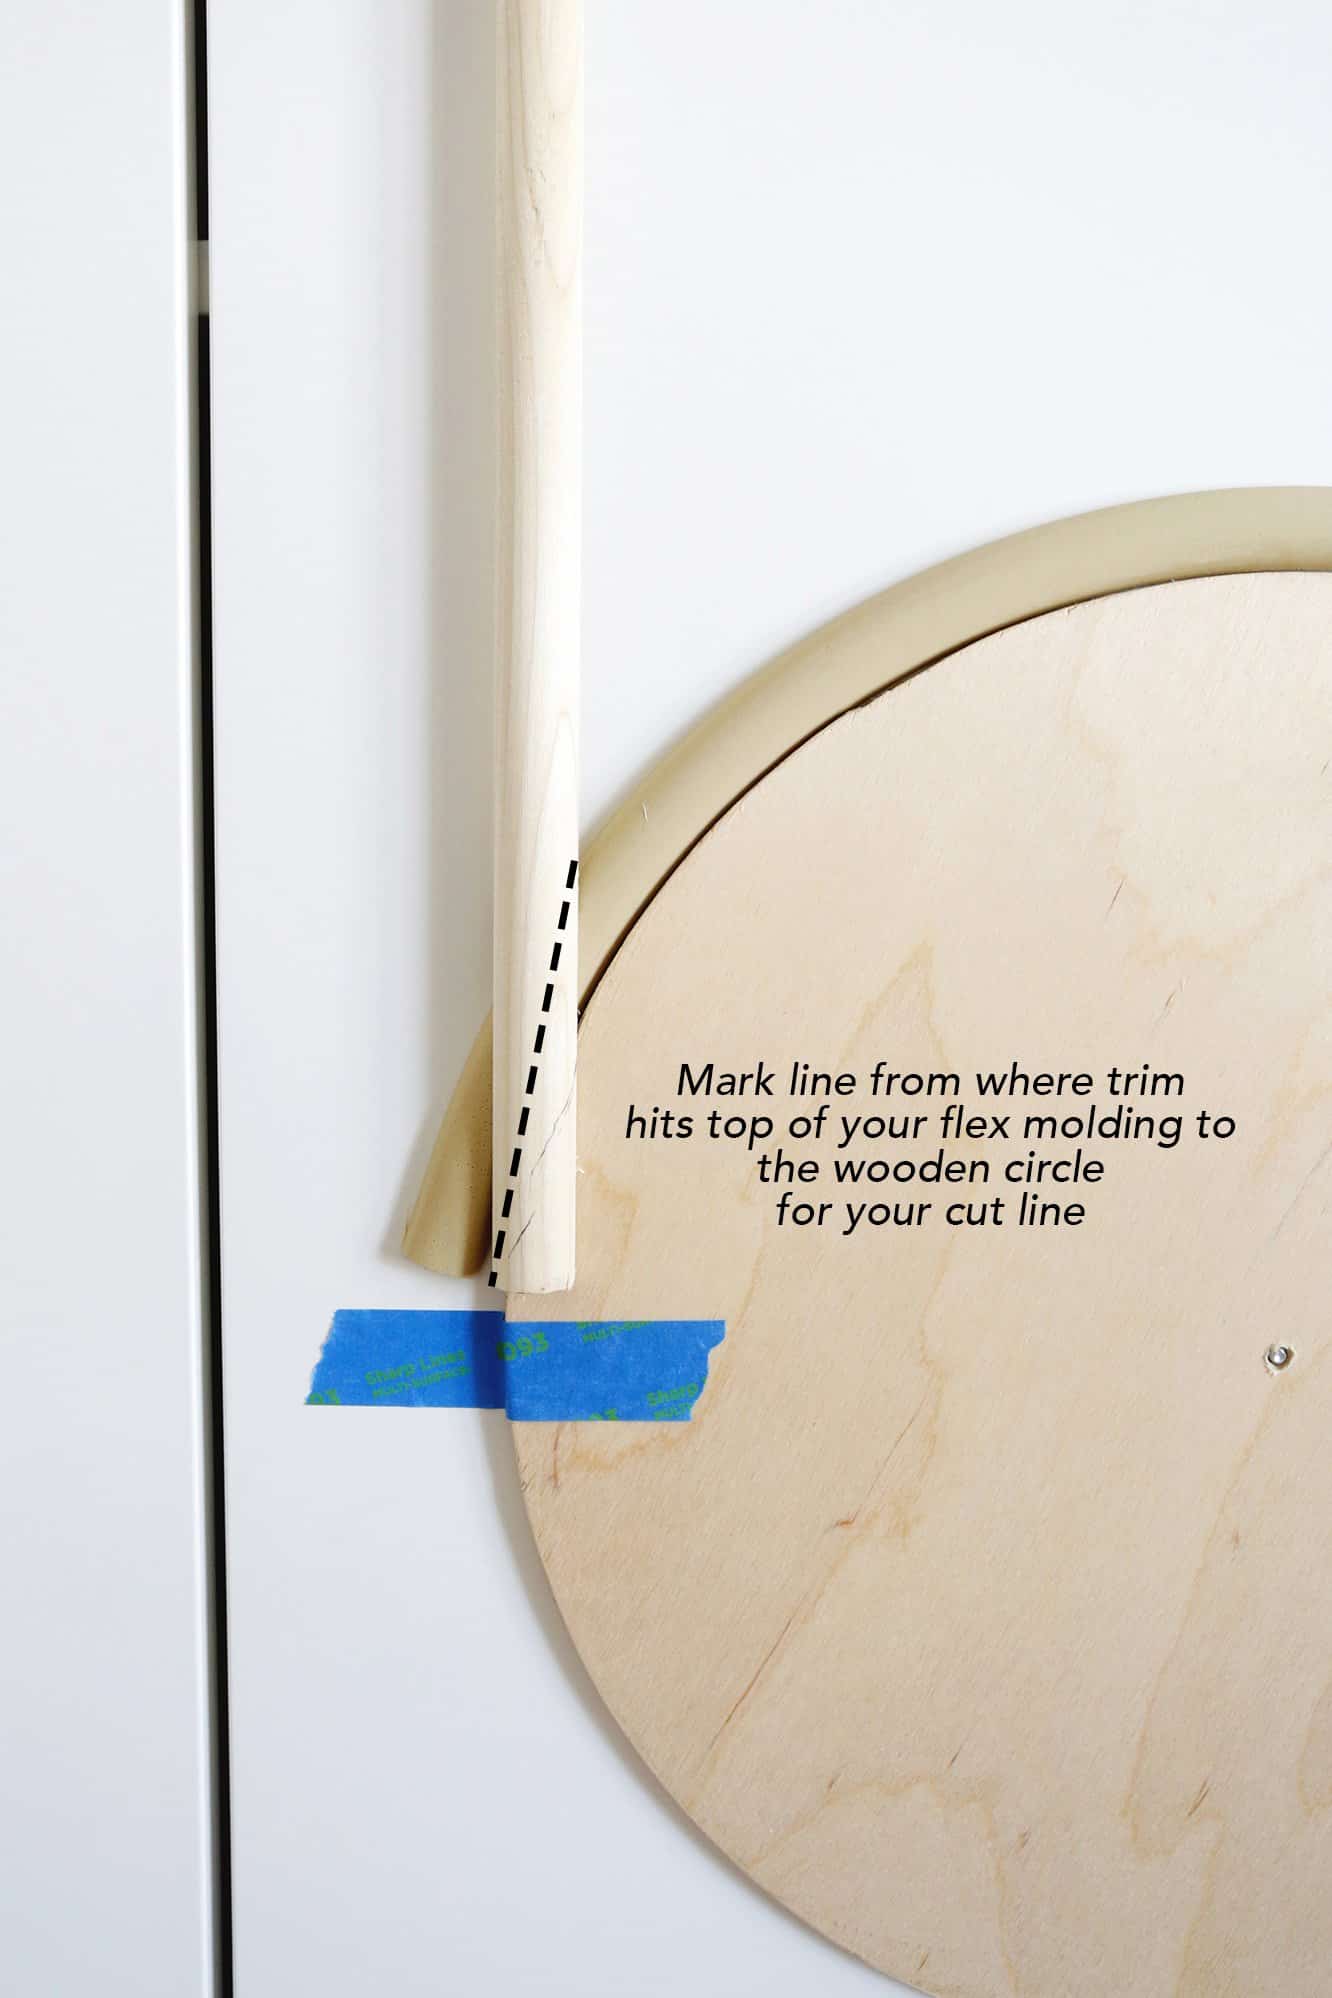
Now that your straight and flex trim are lined up on the circle, mark a straight line with a pen or pencil where the straight trim hits the top of your flex molding, all the way down to where it hits your wooden circle. Now you have your angle to cut!
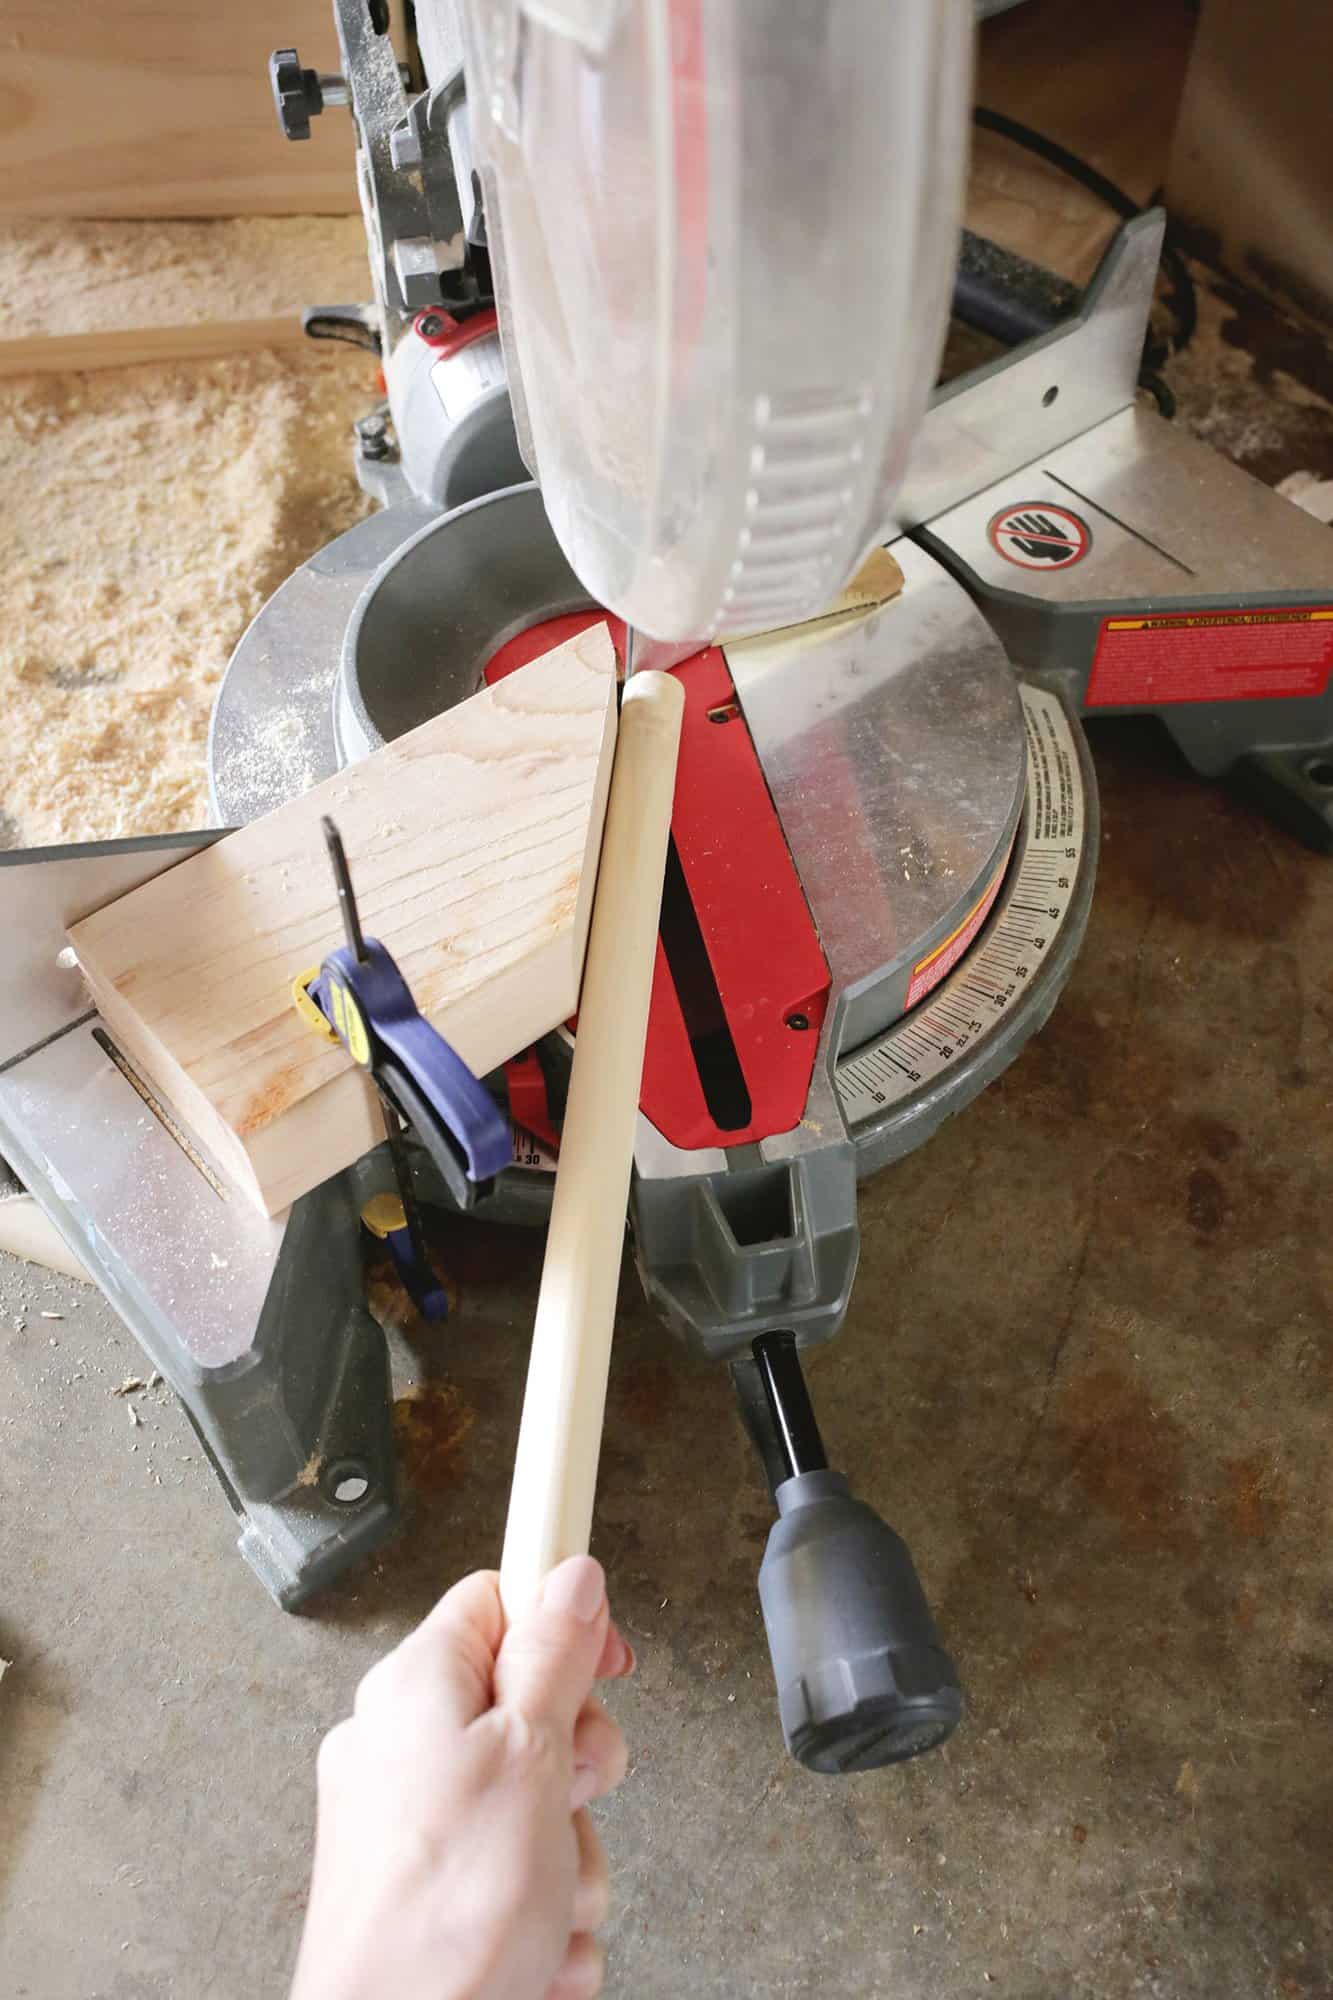
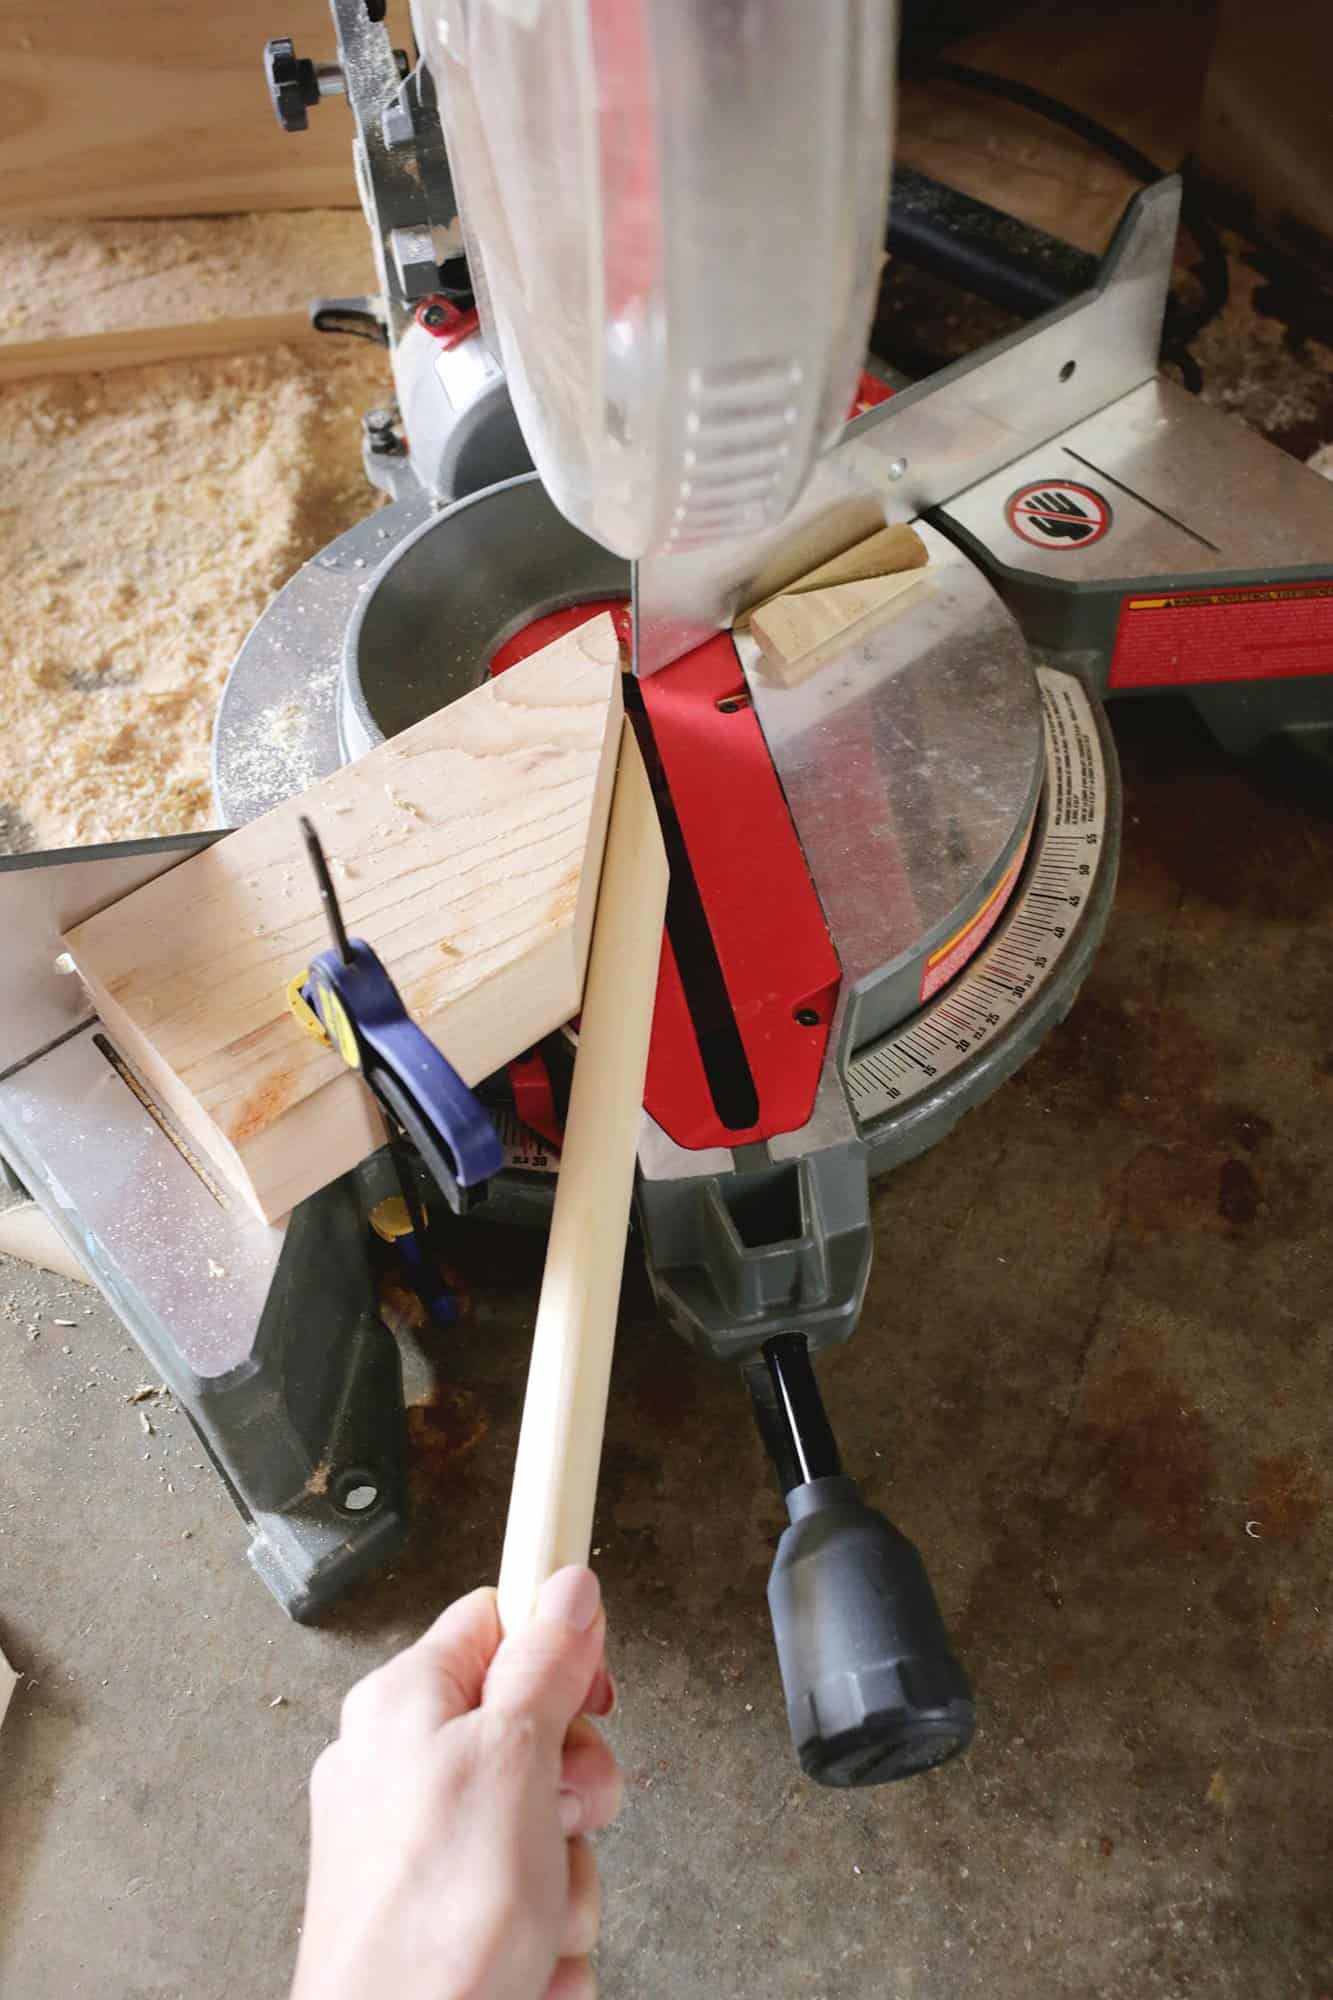
When I went to cut the straight trim on my miter saw, I realized pretty quickly that the angle I needed to cut was greater than 45°, which is the max angle for most miter saws. Fortunately, there’s a trick to get your saw to cut more than 45° (which you can fully see in this video).
But, you basically clamp or glue a scrap piece of wood onto your saw, make a 45° cut, and then keep that cut board clamped in place like you see above and you use that as your new guide.
When I rotated my saw angle back towards the middle to the 25° mark, that gave me a 70° angle (45° + 25° = 70°) which lined up with the angle I had drawn and that’s how I found what angle I needed to cut.
To cut the reverse angle for the other side, you can either cut another 45° to mount to the other side of your saw and reverse the process, or you can flip the trim upside down and it will cut a mirror angle.
Want a super simple (no power saw) way to do it? All you have to do is use a hand saw to eyeball it and saw straight across the line you drew the best you can.
Will it be perfect? No, but it will be pretty close and you can use wood filler to fill in any areas where it didn’t perfectly line up.
Now that you have your deep angles cut on your straight sides, tape them back in place while your flexible trim is still draped over your circle and mark with a pen/pencil where the straight trim overlaps the flex trim (so you know where to cut your flex trim).
It is possible to cut flex moulding on a miter saw, but from experience, I would only do that with straight pieces. Sometimes, you can buy them pre-bent like I did, which makes handling them around the circle easier.
Cut it very slowly and carefully—it has a tendency to move or bounce back since it’s kind of a rubbery material.
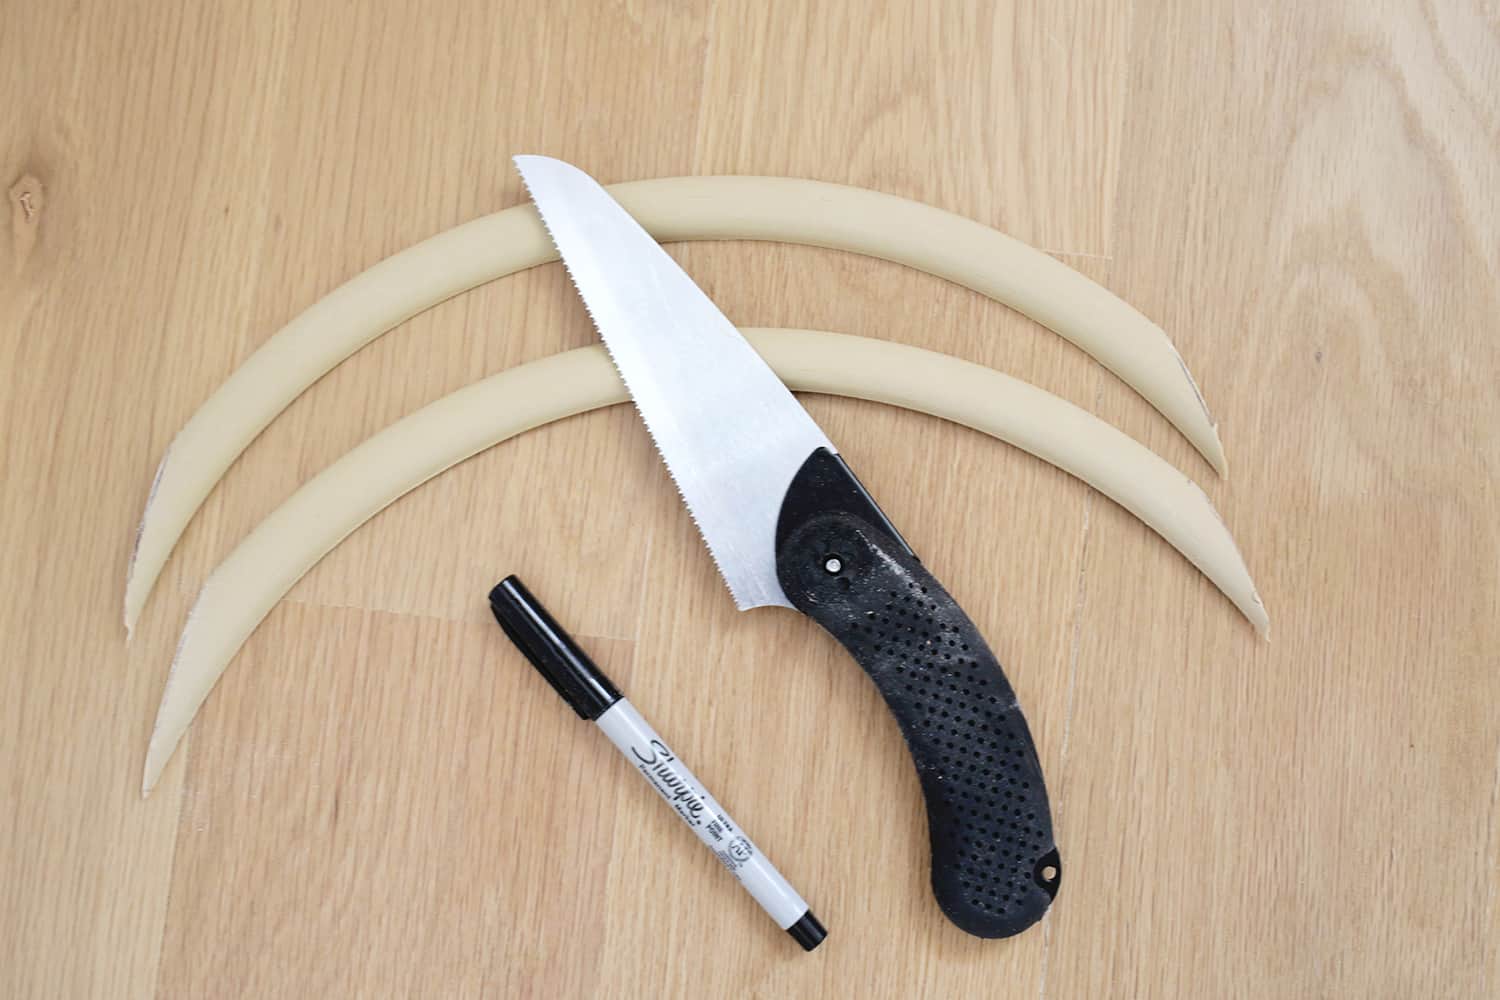
Overall, I would recommend buying pieces pre-bent like mine and using a craft or hand saw to make the cut since it’s such a steep angle and that material is finicky with a miter saw. Just eyeball the line you made and saw through it to make the cut.
You can also use a heavy duty X-Acto knife and make lots of cuts, but be careful not to cut yourself since the material is rather dense.
Once your flex moulding is cut, you can put your puzzle pieces together as shown to make sure they fit! Now repeat for the bottom section of trim.
Once you are happy with that, you can cut the height of your straight pieces to also hit 3.5″ from the top and bottom of the door at mirroring 45° angles so you can add a smaller piece of straight trim to connect them.
Repeat the process with each of your doors—you can use the pieces you already cut as a template to make it go a lot faster).
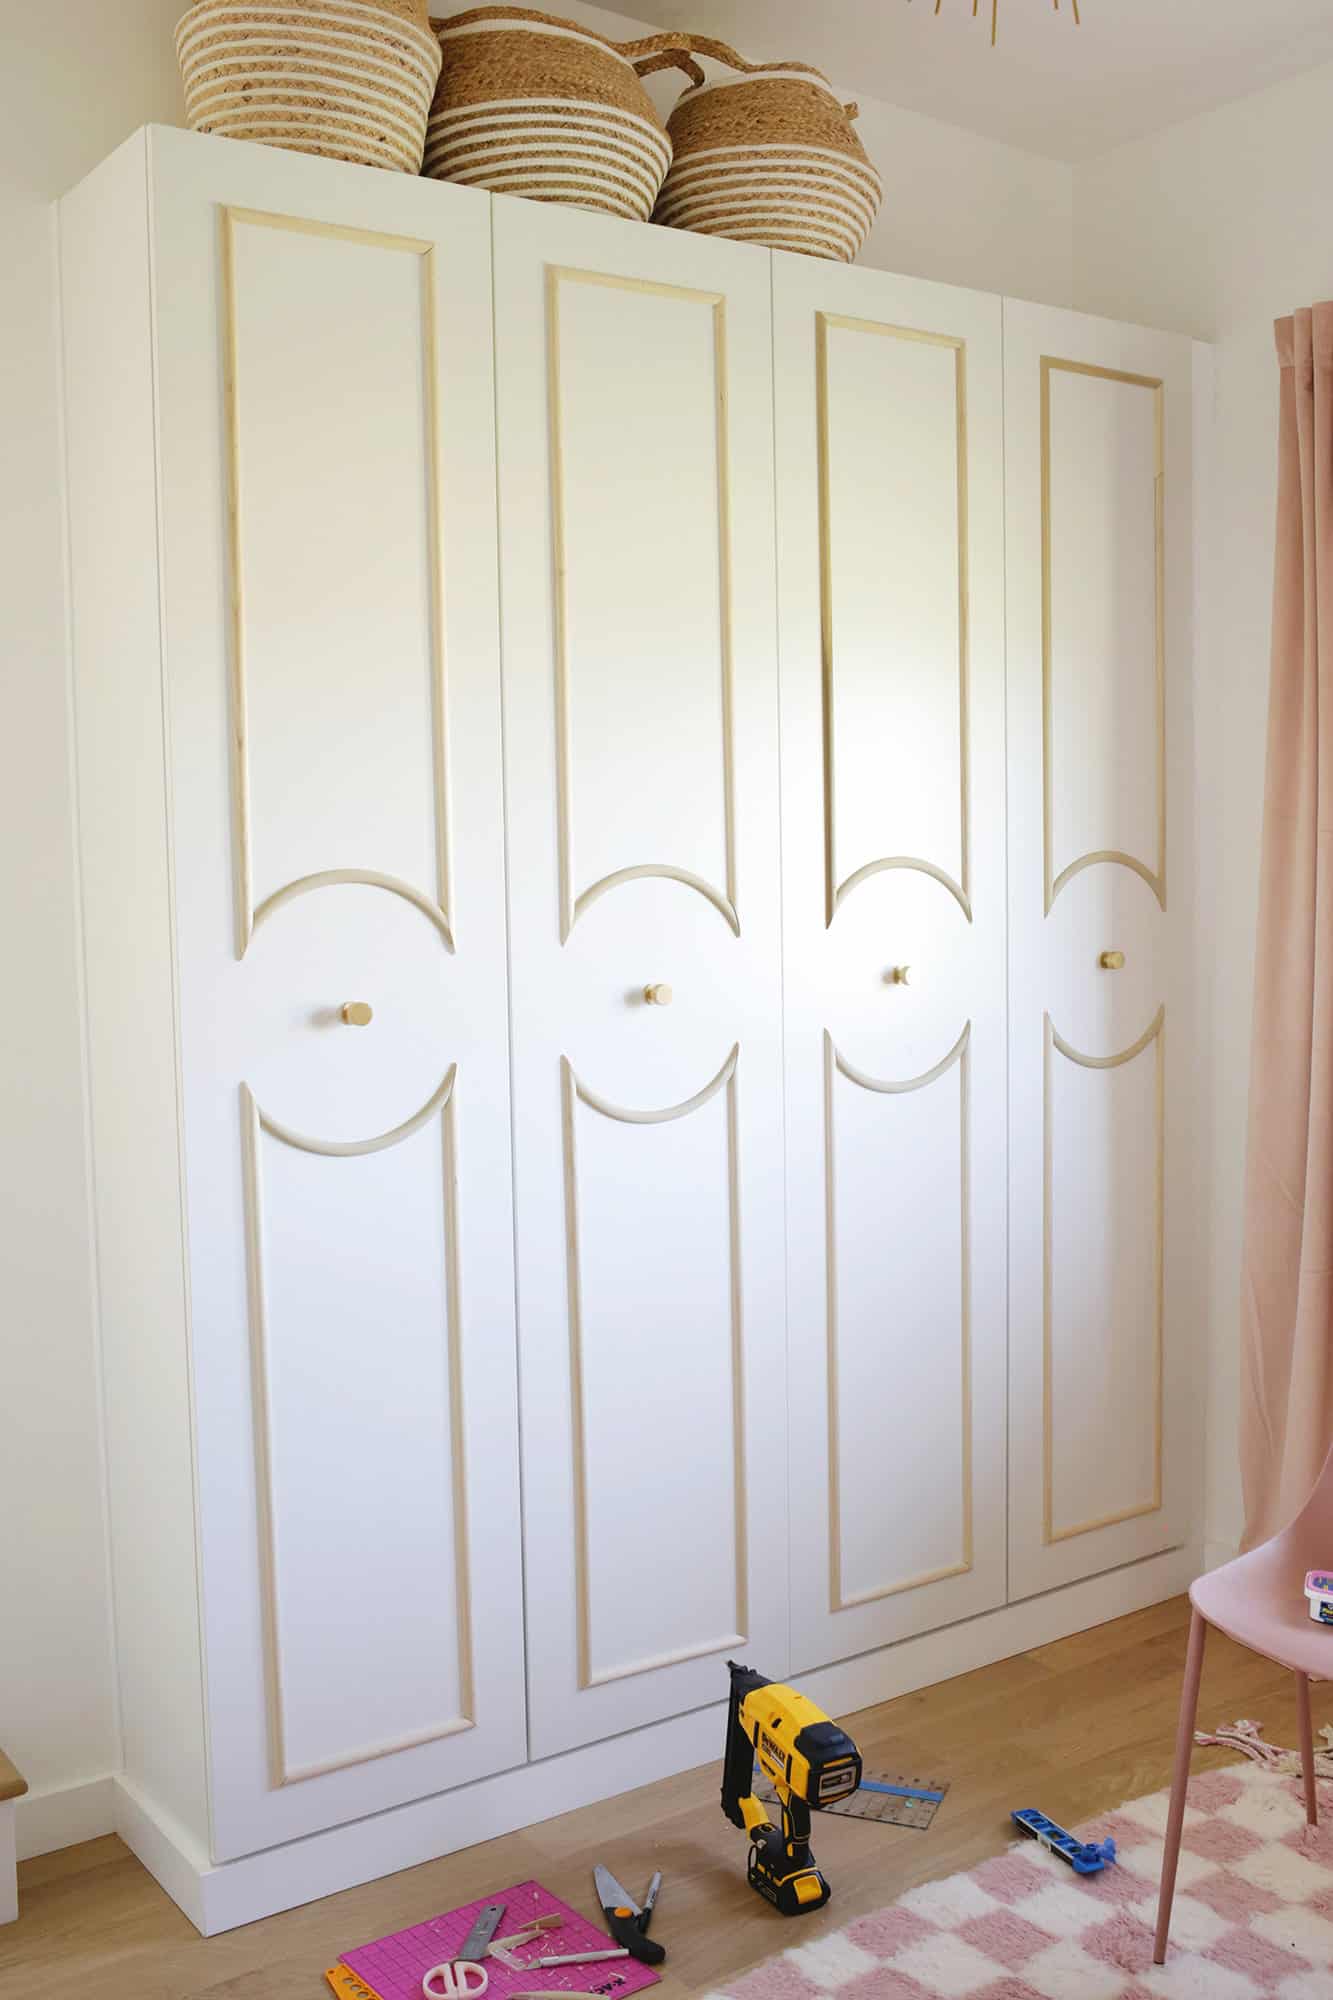
Once they are taped in place and you make sure they are all level with the door edges, use a finish nail gun to attach the trim to the door. You can also put down a little wood glue first between the trim and door if you want for extra hold.
Once your trim is attached, it’s time to fill any nail holes with wood filler and sand smooth when dry, caulk where the trim meets the door for a seamless look, and paint the doors so it all matches.
You can also use the wood filled to fill any gaps where your trim didn’t line up perfectly, and that helps it all look like one unit as well.
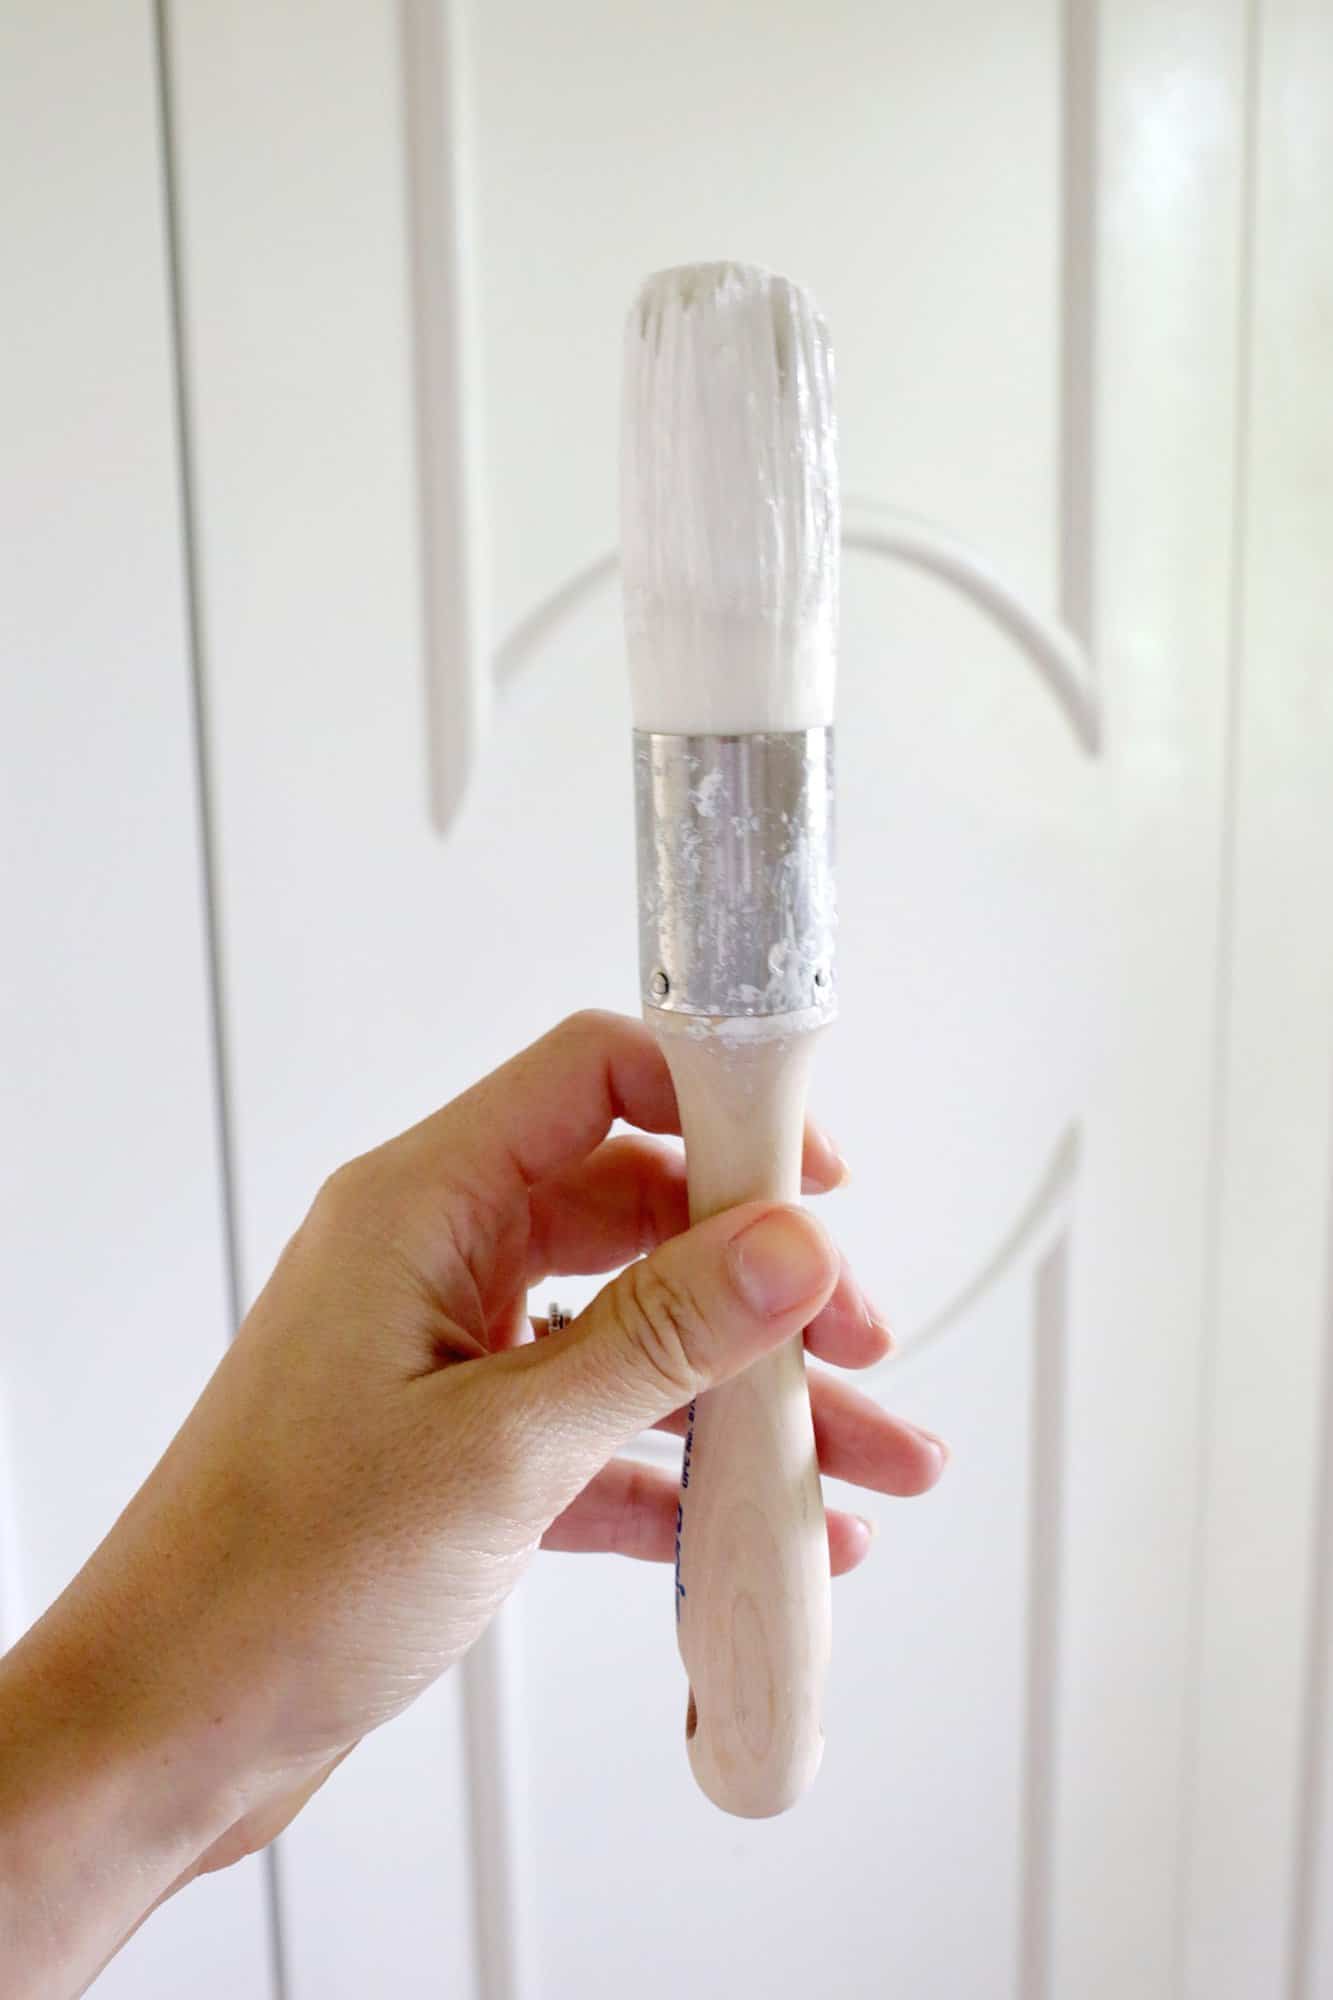
Since the IKEA doors are laminate, you’ll want to use this primer before you paint. It will help the actual paint stick to the laminate, and you won’t have to sand the doors before painting.
I used Melting Icicles by Behr to match the white that IKEA furniture comes in, and it’s a really great match for your final coats of paint. I used a spindle brush for the trim parts and a small roller for the flat areas.
Once your paint is dry, your customized IKEA Pax cabinets are ready to fill and use!
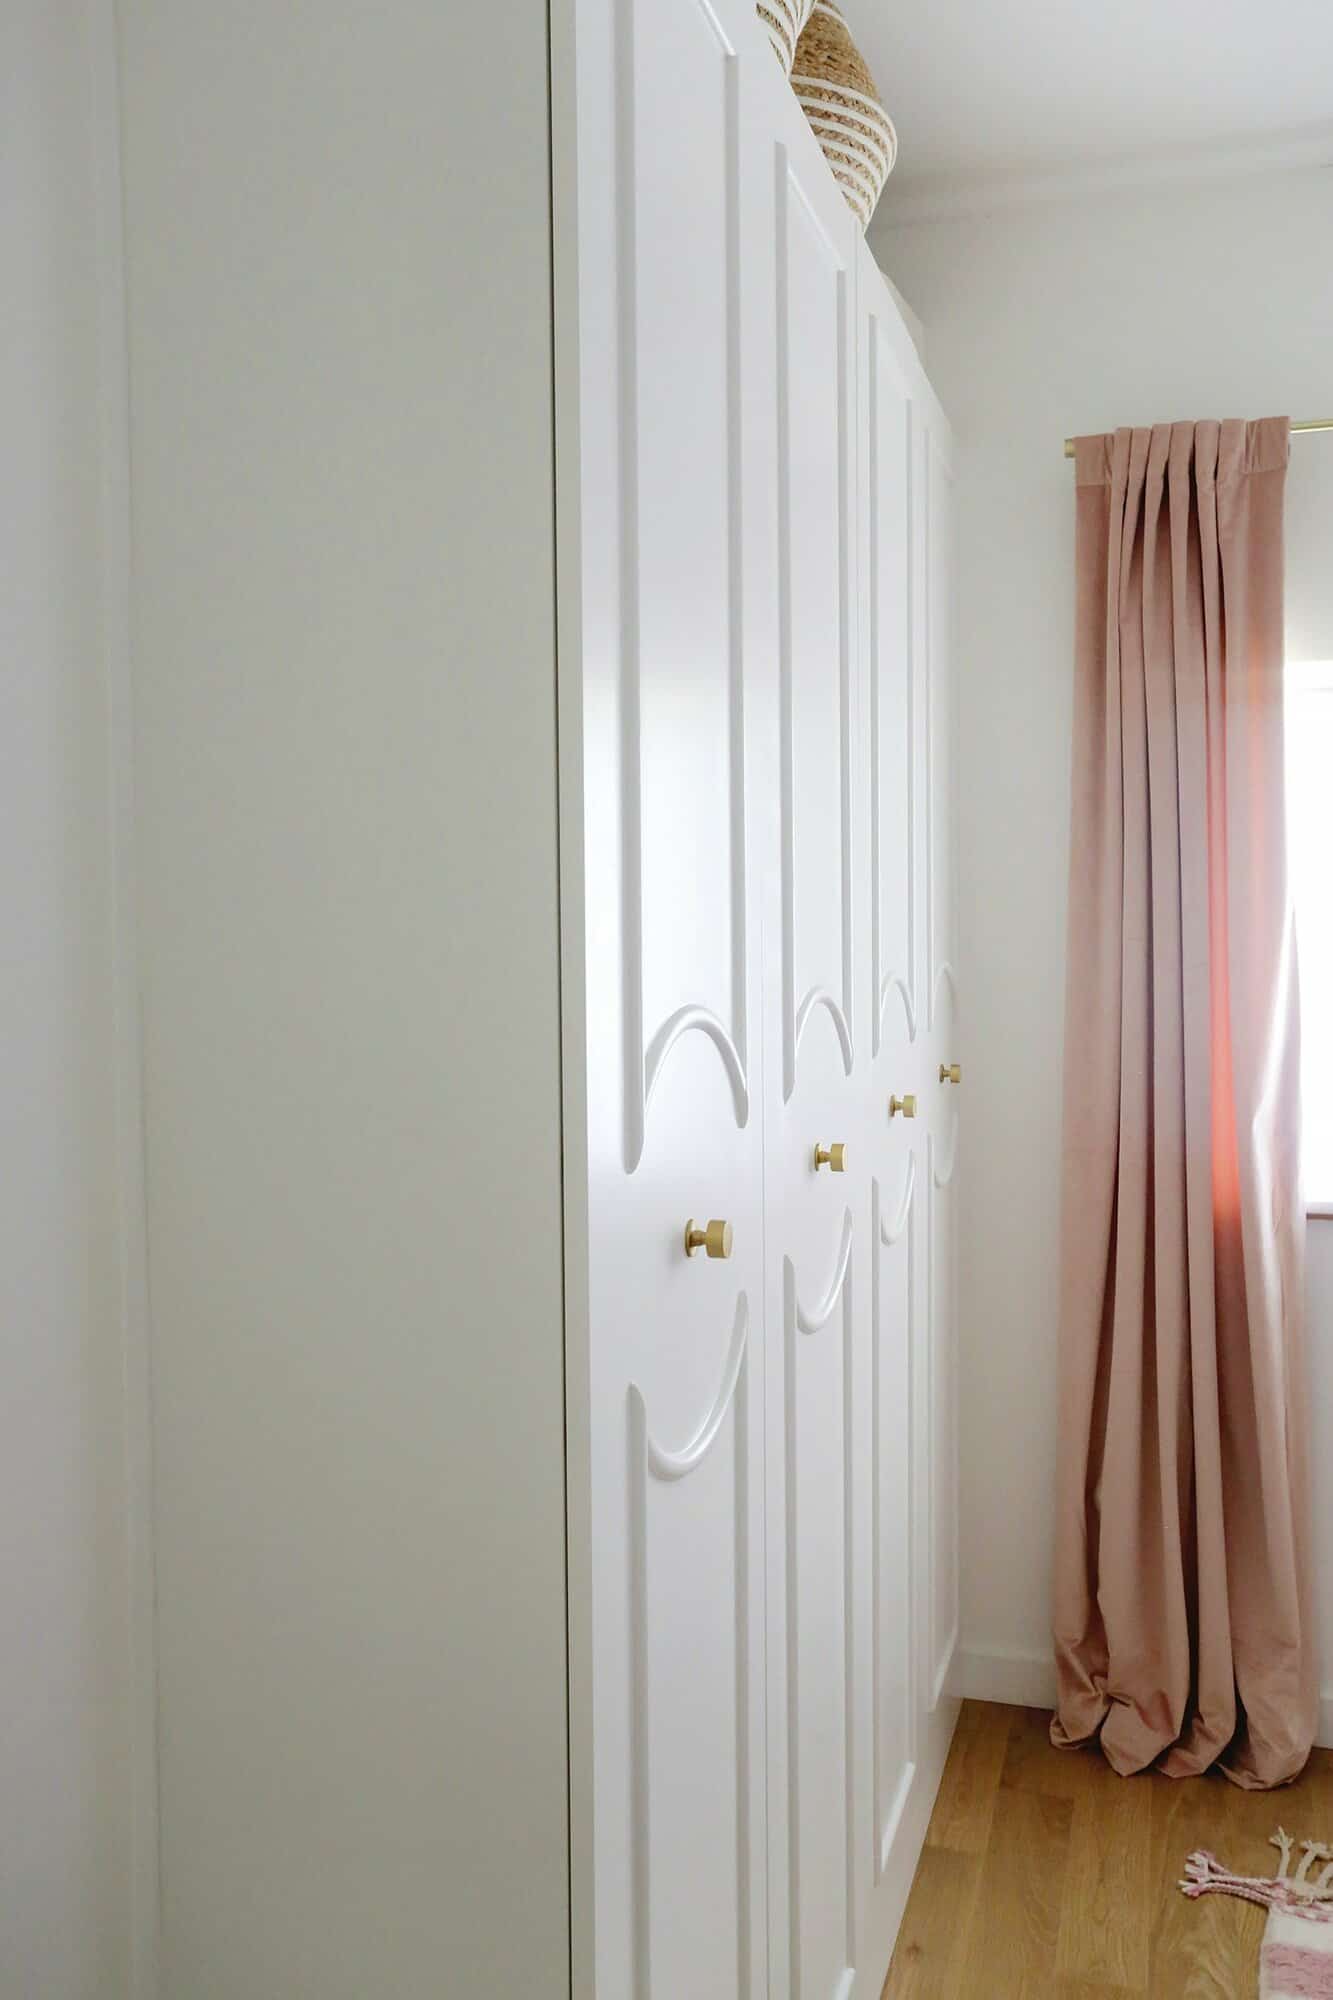
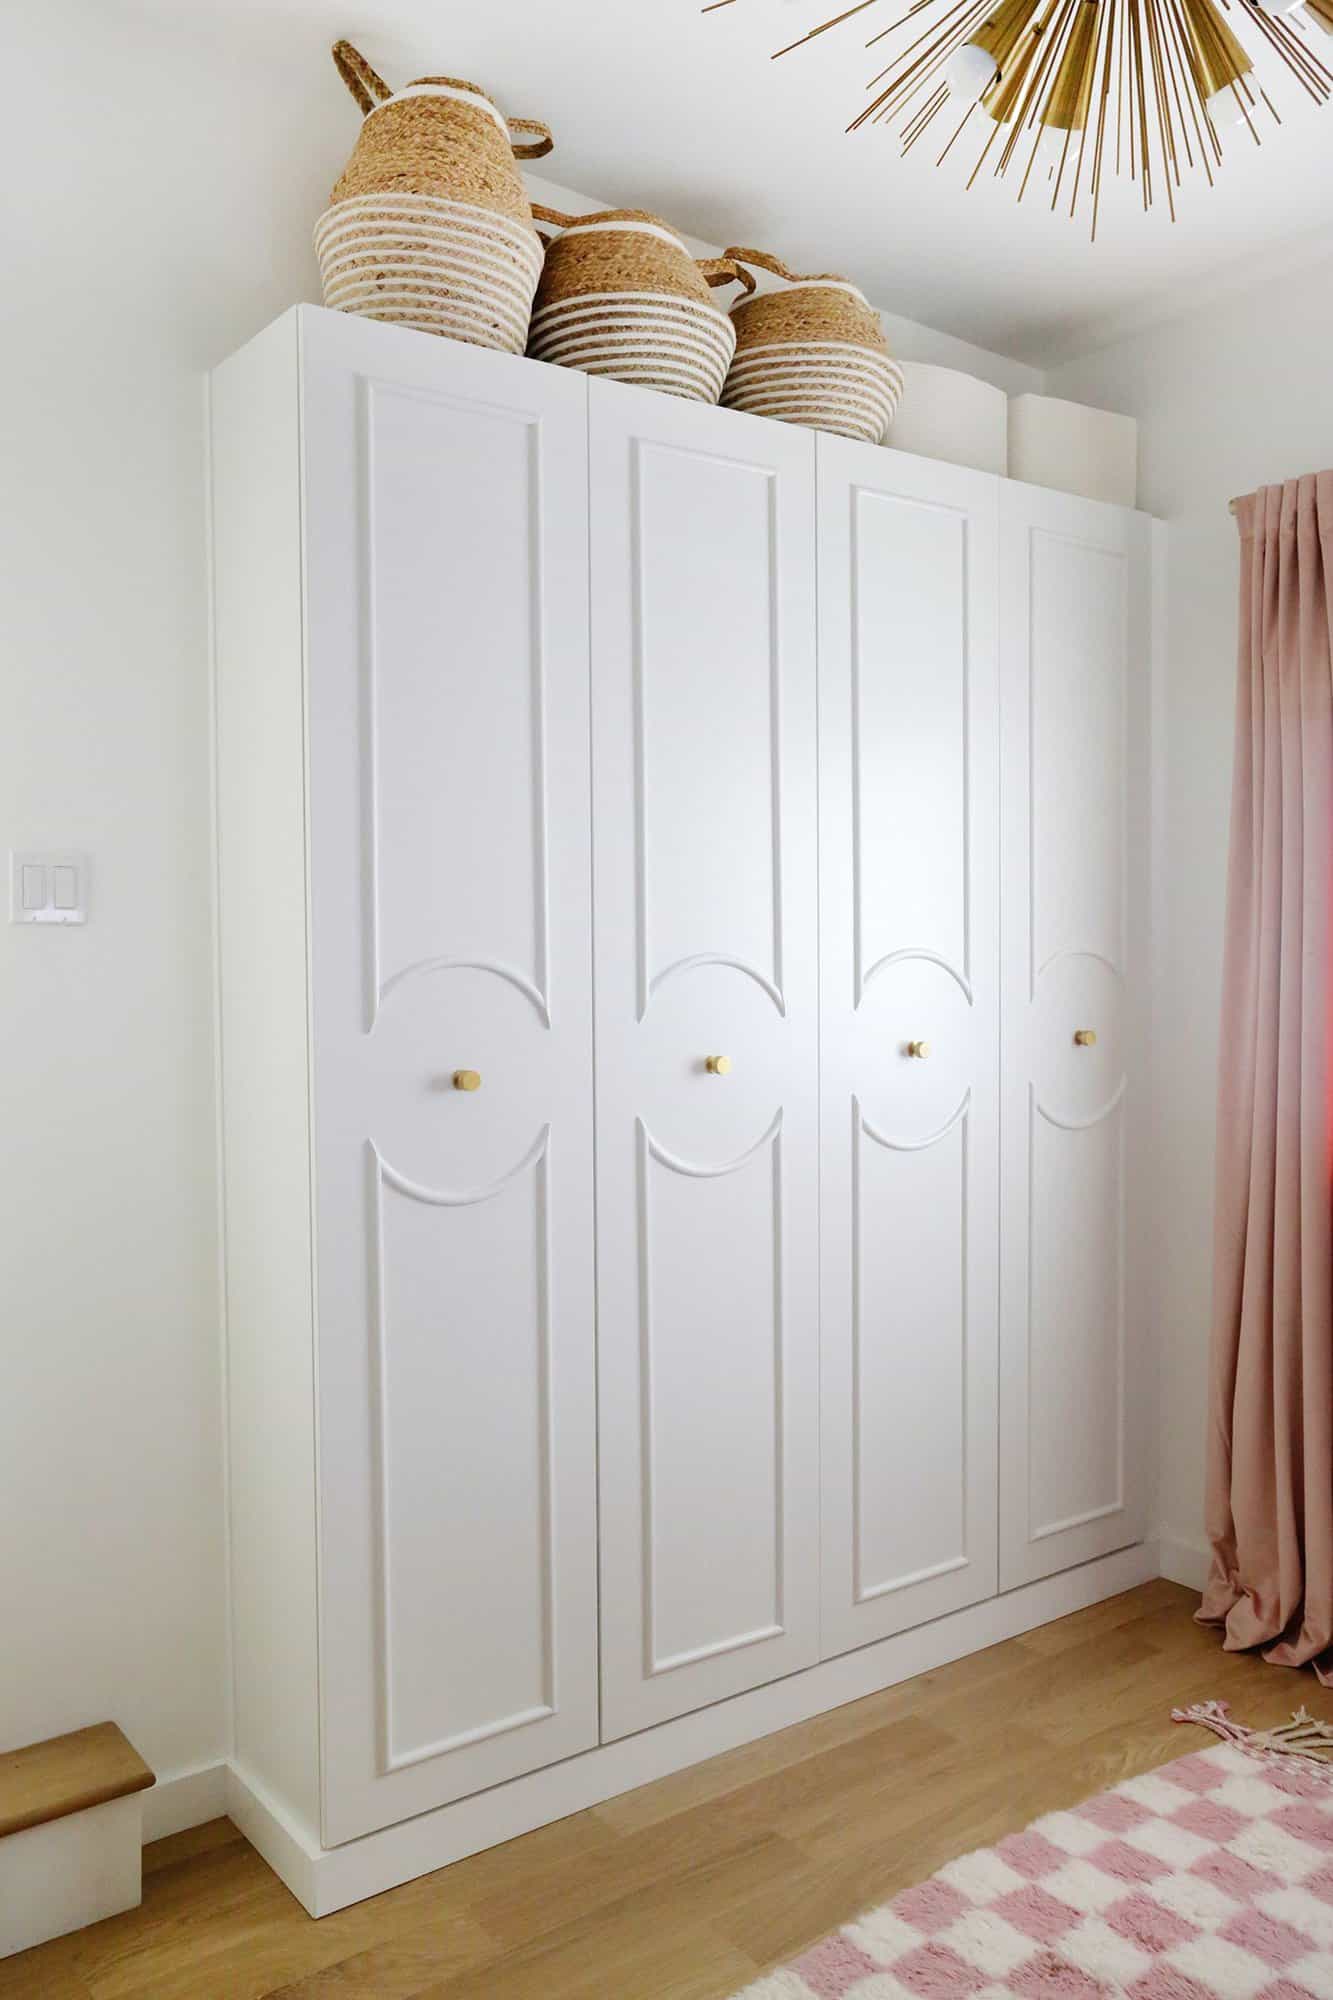
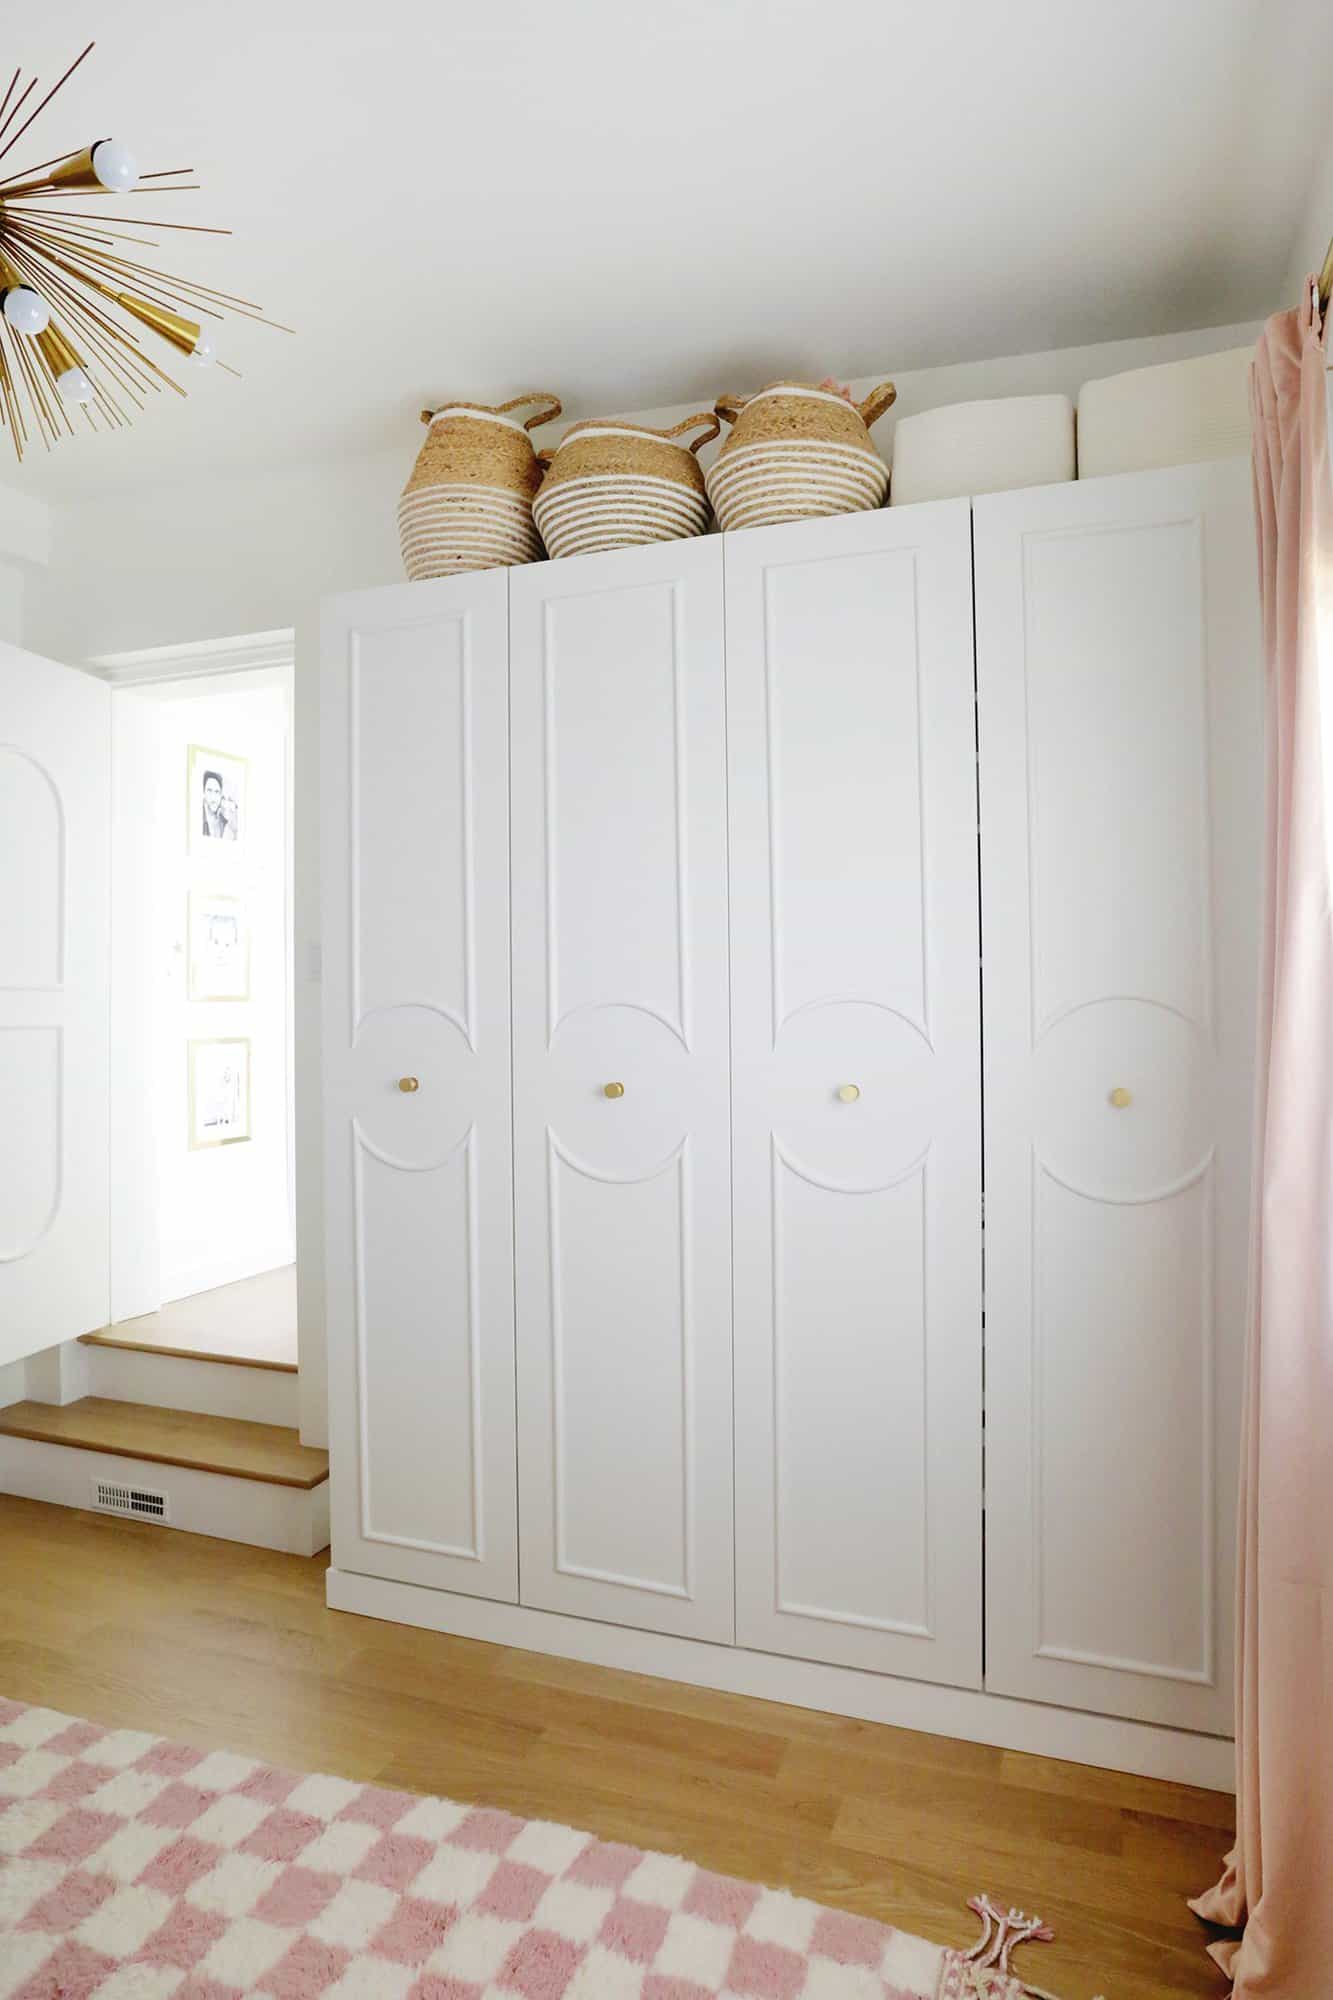
I really feel like adding the trim to the doors brings the whole wardrobe up to another level. It makes it look so custom and luxe and I absolutely love it.
You can customize your trim to be whatever shape you want, but this Parisian feel fits my home perfectly. If you are about to add an IKEA Pax wardrobe to your space, try this custom trim idea to make it a little more chic and I think you’ll be so glad you did. xo Laura
For more door ideas, check out:
Tips to Customize an IKEA Pax Wardrobe
Customize IKEA Pax Wardrobes with Wooden Trim!
- painter’s tape
- 14″ wooden circle
- straight half round molding I did a 3/8″ x 3/4″ size moulding
- half round flexible molding I did this 3/8″x 3/4″ size flexible moulding
- ¾” 18 gauge brad nails
- wood filler and fine sandpaper
- caulk
- paint primer use Zinsser 1, 2, 3
- acrylic paint use a spindle brush
-
First, we’ll want to use our wooden circle for our arch guide. Drill a hole in the middle of your circle that is the same size as your door handle screw so that you can take the door handle off and kind of hang the circle on the screw. Use some painter’s tape to keep it from rotating.Drape the start of your flexible trim over the top of the circle (you can tape it in place if you want to) and line up and tape your first straight trim piece for the top left side so that it’s 3.5″ in from the edge of the door and the end of the trim hangs all the way down to just touch the wooden circle.
-
Now that your straight and flex trim are lined up on the circle, mark a straight line with a pen or pencil from where the straight trim hits the top of your flex molding all the way down to where it hits your wooden circle. Now you have your angle to cut!
-
When I went to cut the straight trim on my miter saw I realized pretty quickly that the angle I needed to cut was greater than 45°, which is the max angle for most miter saws. Fortunately, there’s a trick to get your saw to cut more than 45° (which you can fully see in this video), but you basically clamp or glue a scrap piece of wood onto your saw, make a 45° cut, and then keep that cut board clamped in place like you see above and you use that as your new guide. When I rotated my saw angle back towards the middle to the 25° mark, that gave me a 70° angle (45° + 25° = 70°) which lined up with the angle I had drawn and that’s how I found what angle I needed to cut.
-
To cut the reverse angle for the other side, you can either cut another 45° to mount to the other side of your saw and reverse the process, or you can flip the trim upside down and it will cut a mirror angle.Want a super simple (no power saw) way to do it? All you have to do is use a hand saw to eyeball it and saw straight across the line you drew the best you can. Will it be perfect? No, but it will be pretty close and you can use wood filler to fill in any areas where it didn’t perfectly line up.
-
Now that you have your deep angles cut on your straight sides, tape them back in place while your flexible trim is still draped over your circle and mark with a pen/pencil where the straight trim overlaps the flex trim so you know where to cut your flex trim.It is possible to cut flex moulding on a miter saw, but from experience I would only do that with straight pieces (sometimes you can buy them pre-bent like I did which makes handling them around the circle easer) and cut it very slowly and carefully—it has a tendency to move or bounce back since it’s kind of a rubbery material.Overall, I would recommend buying pieces pre-bent like mine and using a craft or hand saw to make the cut since it’s such a steep angle and that material is finicky with a miter saw. Just eyeball the line you made and saw through it to make the cut. You can also use a heavy duty X-Acto knife and make lots of cuts, but be careful not to cut yourself since the material is rather dense.
-
Once your flex moulding is cut, you can put your puzzle pieces together as shown to make sure they fit! Now repeat for the bottom section of trim.
-
Once you are happy with that, you can cut the height of your straight pieces to also hit 3.5″ from the top and bottom of the door at mirroring 45° angles so you can add a smaller piece of straight trim to connect them.
-
Repeat the process with each of your doors (you can use the pieces you already cut as a template to make it go a lot faster) and once they are taped in place and you make sure they are all level with the door edges, use a finish nail gun to attach the trim to the door (you can also put down a little wood glue first between the trim and door if you want for extra hold).
-
Once your trim is attached, it’s time to fill any nail holes with wood filler and sand smooth when dry, caulk where the trim meets the door for a seamless look, and paint the doors so it all matches. You can also use the wood filled to fill any gaps where your trim didn’t line up perfectly and that helps it all look like one unit as well.Since the IKEA doors are laminate, you’ll want to use this primer before you paint. It will help the actual paint stick to the laminate and you won’t have to sand the doors before painting. I use Melting Icicle by Behr to match the white that IKEA furniture comes in and it’s a really great match for your final coats of paint. I use a spindle brush for the trim parts and then a small roller for the flat areas.Once your paint is dry, your customized IKEA Pax cabinets are ready to fill and use!