The editing software from Skylum has gone through a lot of changes over the past few years, and with the new Luminar Neo software, there’s still a lot of room for growth in terms of what the software can do for users. HDR Merge was recently added as an expansion to the software and this is a feature that has been requested by users for a while. Another feature that has been requested in the forums quite often is the ability to stitch panoramas.
Skylum may be working on this as an expansion pack in the future, but in the meantime, if you’re a software user and enjoy taking panoramas, perhaps this quick workaround guide will allow you to do so. that.
Establish
Luminar Neo is primarily an image editor that works with images imported into the software and as such you cannot create a blank document, so with this in mind you have to create an empty base layer as a starting point. Since you can’t determine the aspect ratio and size of your final composited panorama, it’s best to create a few blank base images as a template. The one I created for this is 3,500 x 6,000 pixels. Although smaller than the crude yield for Nikon Z 7II the individual images should give me enough latitude to create a final panorama with three or four seams. If you want a more precise size for your base layer, take the size of the camera’s image output and multiply the width by the number of images you need to stitch. This assumes, of course, that you’ve taken your panorama in a vertical orientation.
This will result in a large file size, hence the reason I made my template a lot smaller, so it’s best to judge this for yourself. Also, keep in mind that you can scale your images once in Luminar if you create smaller samples. You must create a new template with a different name for each new panorama because of the way Luminar imports and collates images.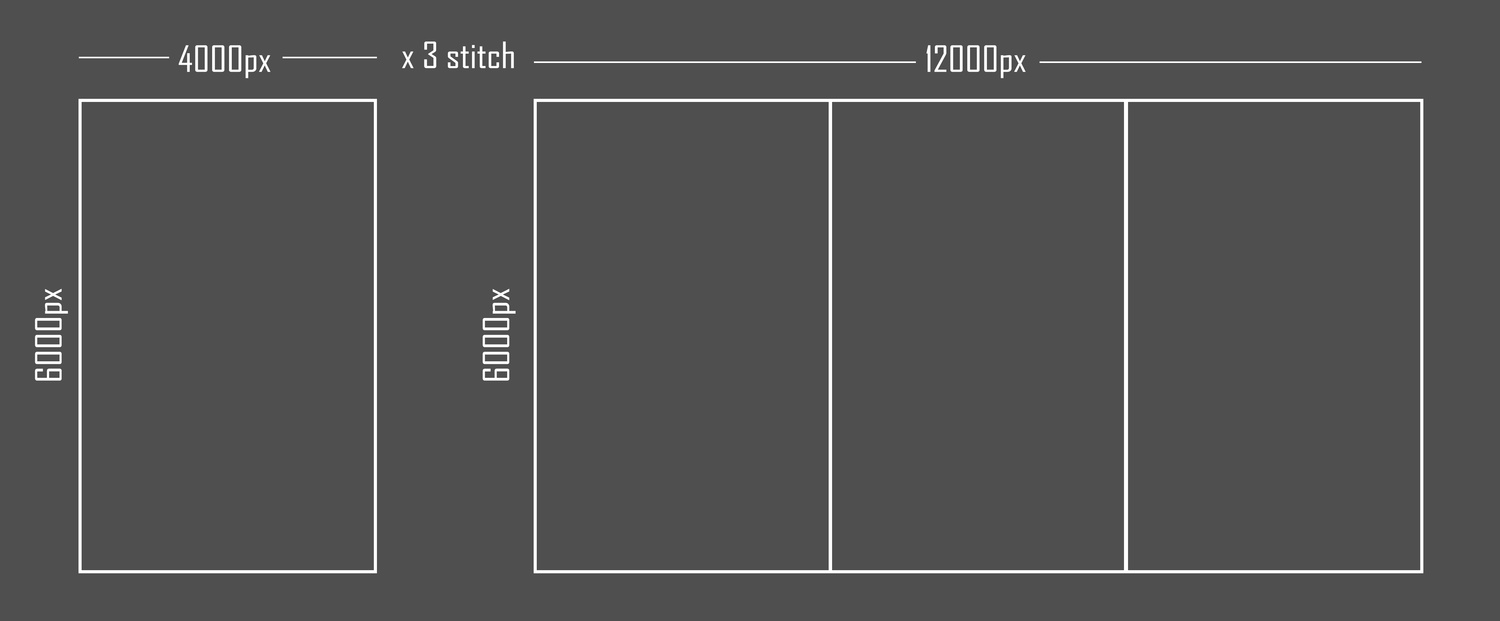
Step one
With your new template imported into Luminar, go to the editing panel and start adding your images via the Add New Layer option. Do this sequentially until all required images are loaded. 
Step two
Start by adding the first image to a new layer and increase the opacity of that layer up to 100% .5
Third step
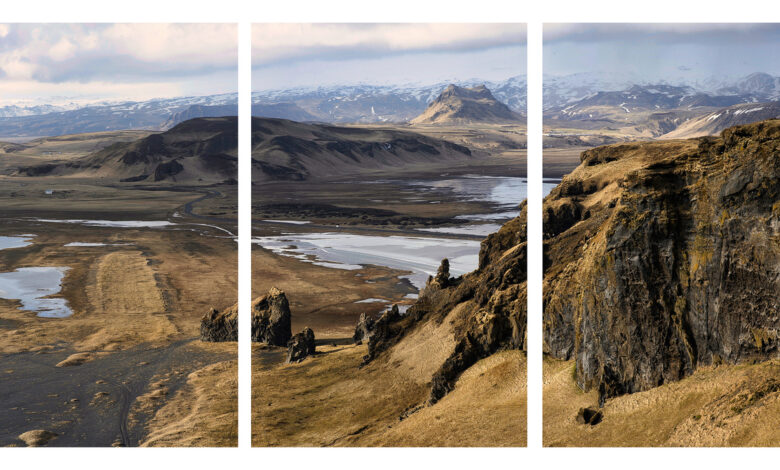
Repeat the process and add your second image, just this time, leaving the opacity at the default 50%. Select a dominant item in your scene and move the new layer over the same area on the previous layer and combine them as best you can; opacity at 50% also aids this process. When overlaid, the joint areas will appear sharper, indicating a good match. If unsure in this step, adjust the opacity from 50 to 100% to keep checking how it looks. I selected the angle of the cliff edge and the high contrast overhang represented in red for this image. Once I was happy, it was a match, so I turned the opacity slider down to 100%.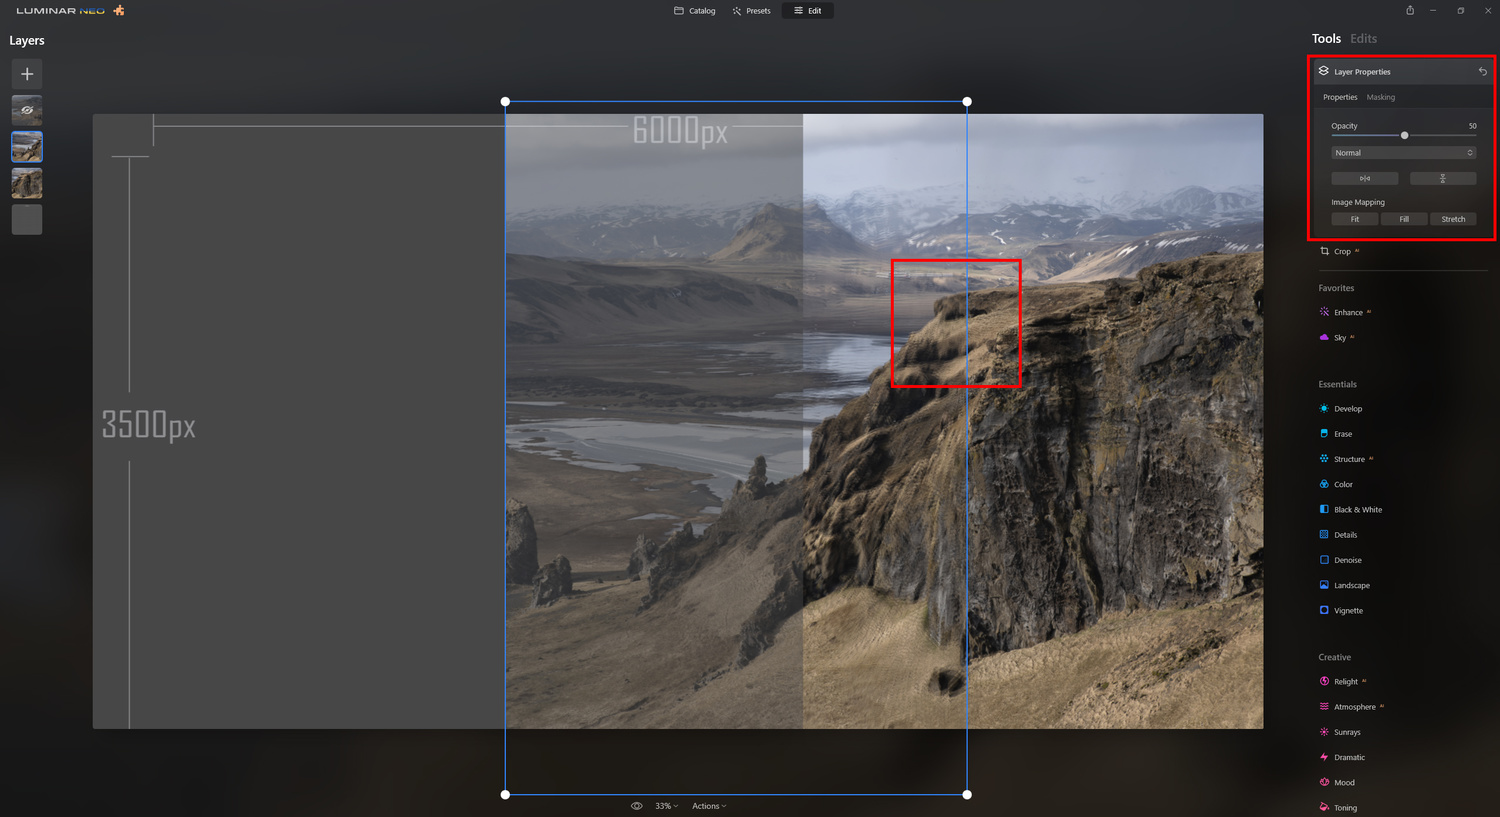
I’m sure you can now say this is a completely manual process, a bit time consuming, but it pays off. This process can be done in a short or no time with Lightroom or Photoshop, but this tutorial is aimed only at Luminar users who just want to stitch panoramas in the software.
Step four
Repeat the above process for the rest of your images, and in this case, for me, it was just three images. At each time you add a new layer, you can scale the images so they fit together, but I would recommend trying to match them without scaling first.
Step 5
Now comes masking and blending to remove any straight edges that appear from your overlapping images. As I added my image from right to left, I now work backwards with masking left to right using a small brush with a softness of 100 and, in this case, strength at 100. You may want to decrease the strength the first few times you do this until you are comfortable with the process. That way, you can brush over that area incrementally until you get the blend you want. 
Repeat this process with all your overlapping images until you get the desired result. Remember that not every edge will need to be masked. You’ll know what happens if you try it. I also zoomed in on the image at 50% and regularly scaled down the entire image so I could check for any irregularities. 
Step six
Once you’re happy with all your combinations, it’s time to crop and export the image ready for editing. This is the only way you can edit the entire image as currently you cannot combine all the layers into one like you can with Luminar 4.3.
Step seven
Re-import your image and edit.
Inference
For those who do not use Luminar, this will be a long exercise, as there are other software that can do this quickly and without much effort, but there are some users who do not want to use the software. subscription based and happy to have Luminar Neo, Luminar AI or Luminar 4.3 as their sole software. Hopefully Skylum will add this feature in future updates, but for now, this is a way of doing it in current software. Incidentally, if you follow these steps in Luminar 4.3, instead of exporting to re-import for editing, just stamp the layers into a single layer and edit from there.
The whole process for this image from start to finish took just over 14 minutes and I hope for the Luminar users out there this has proven to be helpful to you or has provided you with some guidelines. thought process in the process of combining images. If you want to see the process from start to finish, you can watch the video here.