When I first started shooting portraits in the studio, for some reason, I found beauty to be one of the scariest adjustment tools out there. Maybe it has to do with the unique shape and setup, but for whatever reason, I’ve been avoiding trying one for a long time. In fact, using a beauty dish shouldn’t be a challenge, and in this article I’ll detail three basic ways to use it as well as provide sample images.
Three in one
In this article, I discuss three basic ways to use a beauty treat. First, it can be used without any diffusing material (other than the internal reflector). This is one of my favorite ways to use the beauty dish as it provides harder light and more contrast than the second way, which is using it with the diffuser sock. The sock is an elastic diffusing material that can be quickly placed over the front of the disc and significantly softens the light. The final way to use beauty dishes is my favorite, which is to attach the mesh on the front. I highly recommend experimenting with each of these variations, as this is the only way for you to start discovering the look you like best.
Locate your dish
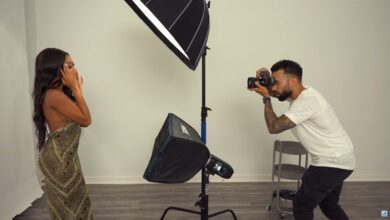
The basic position of a nice dish is right in front of your subject, above their head and down towards them so that the center of the dish is facing their face. The dish should also be pretty close to your theme. I usually place the disc about two feet away from my subject, but sometimes I’ll move the disc further away if I want brighter light. As with everything in the studio, it’s important to experiment with position and angle, as small changes in angle and position will make a big difference in your image. For some of the images in this article, I placed the plate slightly off the center, although I recommend placing it directly in front of your subject as a starting point.
Setup One: Bare Beauty Dish
My second favorite way to use beautifying dishes is without any modifiers (remember the little reflector stays inside the dishes). Using the disc in this way will create deep shadows and plenty of contrast. In Jenique’s sample image below, you can see that the shadows under her nose and chin are quite dark, as well as on the right side of her face, as I’ve positioned the disc slightly off-camera. Not much skin tone is seen in the shadow areas, and the shadows from the dish spill over into her hair. I usually use a setup like this when working with models or actors for the dramatic results it gives, although I would avoid it with some clients because of the hard lighting, although it does accentuate accentuate the jawline, but also magnify any skin imperfections. It’s also not the best choice for corporate clients, so think beauty use is generally best for actors, models, and fashion shoots. In this particular image, I added a Lindsay Adler’s Westcott Optical Spot to create simple circles of light in the background. Like I said, this is my second favorite dish use, as the light spills out quite a bit and I like it more focused around the face. More on that in the third setup.
Set two: Beauty dish with diffuser socks
My favorite way to use a beauty treat is with the diffuser sock. There’s absolutely nothing wrong with using the dish with the sock, as you can see in Jenique’s image below. It produces pleasing results and is a great choice to have in your lightbox, but I found that the image lacked the contrast and drama I look for when choosing to use an instant beautifier. from the beginning. For me, the results are a bit too flat, and since I have several other modifiers that can produce similar results, this is not my setup for the beauty dish. This is, of course, a matter of preference, so as I mentioned above, I recommend experimenting to see what settings speak to your creative eye. In the image of Jenique below, the shadow under her chin is still quite visible, but much more muted, and doesn’t detract from the skin tone. I also had Jenique rely on a white v-flat for this particular image, which fills in the shadows more sharply, and again used the optical point to add some background texture.
Set three: Beautiful dishes with grids
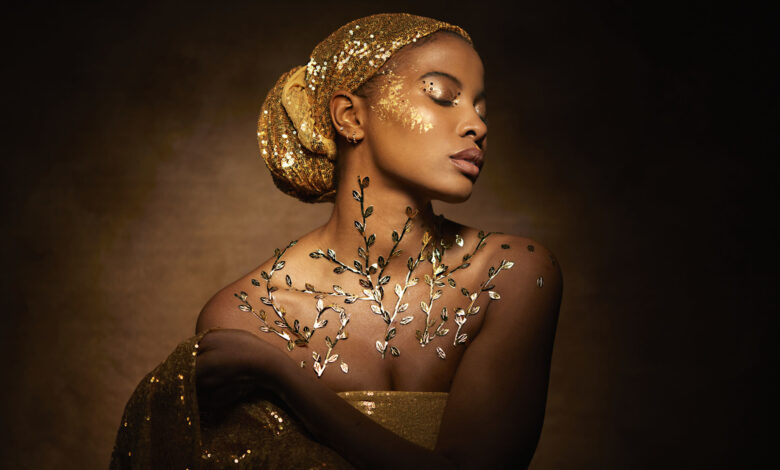
My absolute favorite way to use a beauty dish is with a grid (in all of these images I used a 15 degree grid). Attaching the mesh to the beautify disc dramatically changes the luminance and focuses it on the subject, with very little spillage. For me, this is the most dramatic way to use a beauty item, and since I like rich tones and moody portraits, it best suits my particular portrait style. I. In this image by Jenique, you can see that the dish creates a well-defined circle of light around her head and arms, isolating her from the background, which receives almost no light. any. I let her lean on a white v-flat from V-flat world, serves as a table. I also color graded the photo in the post, which I love to do with my portrait work.
In the image below by musician Jesse, I used a mesh beautification disc again, but this time with a large octave for coloring (mostly to aid in color grading). The fill light was placed directly behind me and set to low power. Again, the light was focused on his face, with less light spilling and a sharp drop. As with the previous image, I did this in part to focus all of my attention on the subject’s face, while removing any distractions. I also color graded this image in the post, choosing a cool tone. Finally, turning the subject’s face away from the camera gives a very different look. Remember that something as simple as turning your subject’s head can dramatically change the lighting and give different results with the same lighting setup.

Finally, in Ashley’s image below, I also use the mesh beauty disc (I told you it’s my favorite use). In this image, I place the dish above her and slightly to the left of the camera and also have her turn her head away from the dish, more or less aiming for her face. In this particular image, it’s simple to see how the grid focuses the light into a circular pattern around the subject, isolating her from the background. She is also placed very close to the background, which enhances the shape of the light.
Practice practice practice!
As always, my advice when learning to use a new complement is to practice with it as much as possible. While I’m comfortable using a beauty product in a few ways now, it’s important to remember that the options with lights and modifiers are nearly endless, so practice is always a breeze. Continuity is the key to success! Small movements in the adjuster distance as well as the angle will really make a huge difference in your image. Plus, once you find a look you love, you can turn it into one of the studio moves and you’ll be able to visualize the results before using the setup.