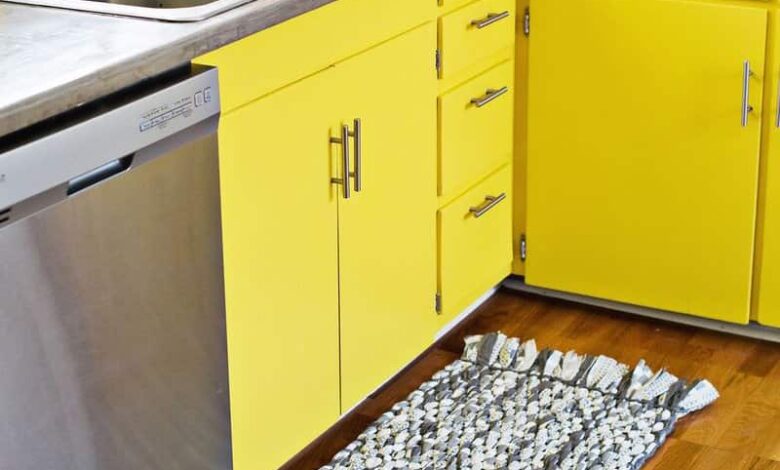
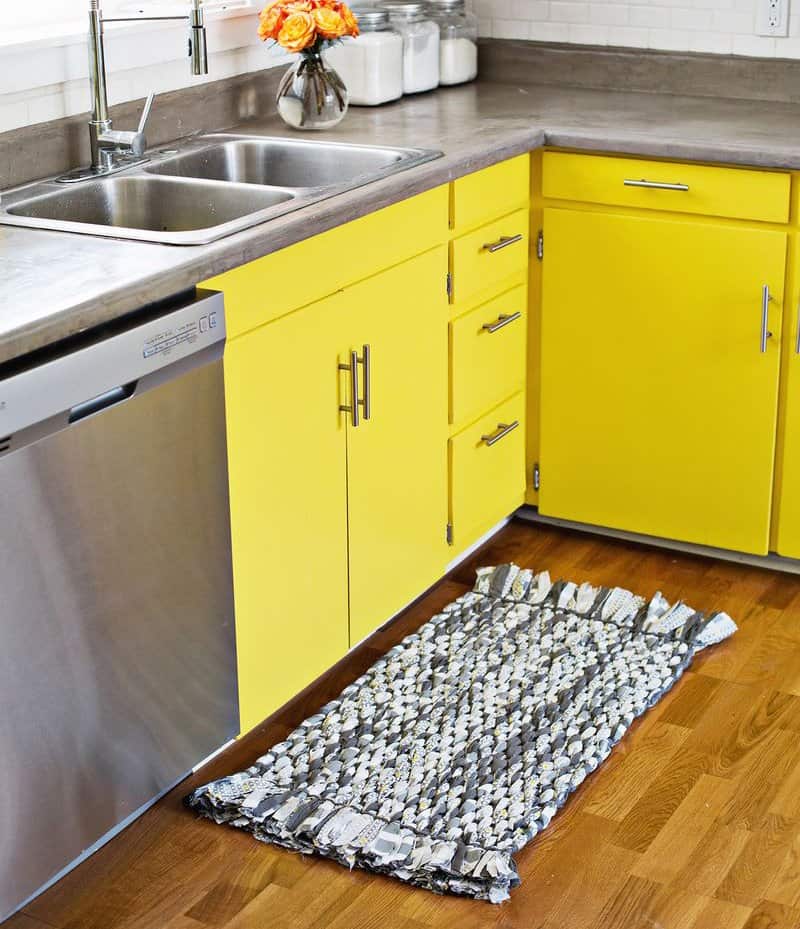

Anyone can make this woven rag rug, and it’s SO easy to customize it to be any size, shape, or color you need for your space.
I wanted to make a woven rag rug that was cute, woven, relatively easy for a first-time rug maker. After a bit of research, I found the perfect woven rug that fits all my needs!
If you have a few old bedsheets around, this is the perfect way to use them (and get an adorable rug out of the process).


-3 king-size flat cotton bedsheets
-piece of cardboard (23″ x 43″)
–fabric scissors
–masking tape
-marker
–clear ruler


Place the other end into the corresponding spot on the opposite side. If you have a lot of strings hanging off the sides of your strips, try and pull the big clumps of strings off before you place into the cardboard slots.
Repeat this process for each strip across the cardboard. It will get pretty full after you have a few groups placed, but just keep going until you are done.


Starting about 2″ in from the end of your cardboard slots, begin to weave the weaving strip under and over each group until you get to the other side.
Make sure to leave a 6″ tail at your beginning spot (you’ll lengthen this at the end). Because the cardboard is so full, the first row of weaving will be the hardest since it’s difficult to tell one group from another.
Just do the best you can—if you get a few strips into the wrong bunch, it won’t make a difference at the end.
Once you get to the other end with your weaving strip, make a U-turn by going over or under the last bunch (whichever is needed depending on where you end up), and weave your way back to the other side (it should be much easier this time).
As you finish each row, straighten out the weaved strip with your fingers and slide it as close to the row before it as you can.
Repeat the weaving process until you’re about 2″ from the cardboard slots on the other end of the rug. Make sure to pay attention to the width of your rug as you go, and keep it as even as you can.
This type of weaving gives you a lot of control over your width since you can simply tighten or loosen your strip as you make the turn at each end.
When you get to the end of your weaving strip, you’ll want to join a new strip to the existing one so you can keep on weaving.
Cut a slot into the end of your weaving strip and the beginning of your new strip, and pull an inch or two of your new strip through the slot on the existing strip.
Pass the tail end of your new strip through the slot on the new strip and pull tight. Now you have a longer strip! Keep doing that each time you need to extend your weaving strip.

Pull tight. Again, cross over to the next exposed weaving and thread down through that section and pull tight. Continue until you reach the end, and tie your weaving strip onto one of the strips in the last group of strips.
Repeat process on the opposite end (you’ll have to join a strip to lengthen the tail of your beginning weaving strip first).

You did it! You just made a rug!


If you prefer to buy a handmade rug, check out Elsie’s favorite rugs on Etsy (or our favorite rugs under $250). xo, Laura
Looking for more DIY rug tutorials?

Woven Rag Rug
How to make a woven rag rug from torn fabric pieces.
-
3
king-size
flat sheets
cotton
-
Use your ruler and marker to make a mark every 2″ across the longest side of each of your bedsheets. Use fabric scissors to make a 2″ cut at each mark.
-
At each cut, rip the fabric apart, and it should tear evenly all the way across the sheet. Repeat process until each sheet is ripped into even strips. Separate strips by color and pattern.
-
On each of the short ends of your cardboard, start 2″ from each end and mark 2″ long lines every 1/2″. Use scissors to cut 2″ slots at each mark.
-
Gather three fabric strips of various colors into a group, fold the group in half lengthwise, and place one end into the first slot (it should hang over the edge a few inches).
Place the other end into the corresponding spot on the opposite side. If you have a lot of strings hanging off the sides of your strips, try and pull the big clumps of strings off before you place into the cardboard slots. Repeat this process for each strip across the cardboard. It will get pretty full after you have a few groups placed, but just keep going until you are done.
-
Designate one color as your weaving strip, and wrap a piece of masking tape around one end to make it easier to weave through the strips. Starting about 2″ in from the end of your cardboard slots, begin to weave the weaving strip under and over each group until you get to the other side.
Make sure to leave a 6″ tail at your beginning spot (you’ll lengthen this at the end). Because the cardboard is so full, the first row of weaving will be the hardest since it’s difficult to tell one group from another. Just do the best you can, and if you get a few strips into the wrong bunch, it won’t make a difference at the end.
-
Once you get to the other end with your weaving strip, make a U-turn by going over or under the last bunch (whichever is needed depending on where you end up), and weave your way back to the other side (it should be much easier this time). As you finish each row, straighten out the weaved strip with your fingers and slide it as close to the row before it as you can.
Repeat the weaving process until you are about 2″ from the cardboard slots on the other end of the rug. Make sure to pay attention to the width of your rug as you go, and keep it as even as you can. This type of weaving gives you a lot of control over your width since you can simply tighten or loosen your strip as you make the turn at each end.
-
When you get to the end of your weaving strip, you’ll want to join a new strip to the existing one so you can keep on weaving. Cut a slot into the end of your weaving strip and the beginning of your new strip.
Pull an inch or two of your new strip through the slot on the existing strip. Pass the tail end of your new strip through the slot on the new strip, and pull tight. Now you have a longer strip! Keep doing that each time you need to extend your weaving strip.
-
To finish the ends, make a U-turn around the last bunch where your weaving ended, and thread your weaving strip down through the first exposed section of your last row of weaving (see above photo). Pull tight. Again, cross over to the next exposed weaving and thread down through that section and pull tight.
Continue until you reach the end, and tie your weaving strip onto one of the strips in the last group of strips. Repeat process on the opposite end (you’ll have to join a strip to lengthen the tail of your beginning weaving strip first).
-
Place a ruler or a piece of cardboard inside of where you want to trim your ends and use fabric scissors to trim the excess pieces. Once the ends are cut, you can remove the cardboard backing.