Night photography can be technically challenging. Even with modern cameras, taking high-quality night photos is not easy. Although photographing the stars required a high ISO combined with a wide aperture, capturing details in the landscape was even more difficult in the dark. In this article, I walk you through my night photography process, which combines image averaging with time blending and focus stacking to achieve high quality results.
I’ve always been fascinated by other landscape photographers’ night shots, but I waited years before embarking on astrophotography myself. I studied it for years but was never satisfied with the results. When I visited Erg Chigaga in Morocco in 2019, I decided to give it a more serious endeavour.
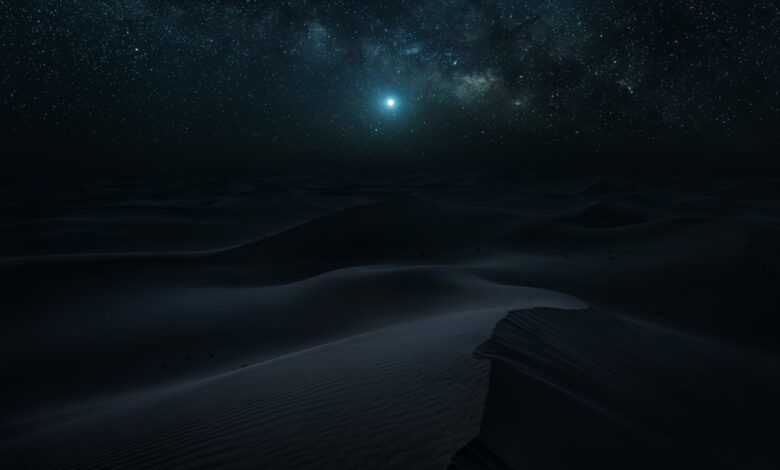
At that time, I took the first night photo, with that picture I was very happy. I used Canon 5DS R with Canon EF 16-35 f/4 . Lens to capture it. It’s not a great night photography pair. But with special techniques, I was able to break its technical limits.
Average image
For a long time, I thought the only way to get noise-free night sky photos was to use a star tracker. While those devices have gotten smaller and lighter over the years, I can never justify bringing one on my photography travels for the few nighttime shots I take. .
Here’s a good thing: results comparable to the image quality of pictures taken with such a device can be achieved with a technique known as image averaging. Instead of having a star tracker that tracks the movement of the stars to keep them from slipping during long exposures at low ISO, you can take multiple medium exposures at high ISO and use the soft to align and blend the image based on the stars afterwards. The resulting image will have a blurred foreground, but the stars will be sharp without much noise in the sky.
You can get such results by applying the following settings:
-
Calculate the maximum exposure time you can use to get the stars without following the so-called NPF . Formula. If you want to print your night photos, forget the often mentioned 500 rule. You won’t be satisfied with the results unless you view your images from a distance. You can use PhotoPills to find the correct exposure times for different focal lengths. For example, following the NPF rule gives me a maximum exposure time of 7.3 seconds at 15mm.
-
Such a relatively short exposure time compared to the 500 rule which requires the aperture to be as wide as possible to let in enough light into the sensor. My RF lens is limited to f/2.8, which is fine but not ideal. If you want to get serious about night photography, consider buying a fixed lens with a wider aperture. But as you can see in the desert photo above, even with f/4 you can still get great results using image averaging.
-
If you use an f/2.8 lens like I do and your calculated exposure time is in the 10s or less range, you’ll have to use ISO 3,200 to 6,400 to capture fine detail in the night sky. .
-
Even modern cameras will give you such a noisy image at ISO. To work around this, take 20 to 40 photos with the same settings. Use your camera’s cable release and burst mode for this. With the release of the cable, you can lock the shutter button and the camera will take a photo until you release it.
-
For this to work, you must disable noise reduction for long exposures. It will create too much gap between individual exposures. To still get its benefits, finish off the sequence by shooting a dark frame with the lens cap attached. You can apply this dark frame to all images to get rid of hot pixels, as I show in the video below.
Now, you might be wondering what to do with all those photos? On Windows, free software Sequence can process image averaging and even consider dark frames. For Mac I couldn’t find a freeware solution, but based on reviews a good option seems to be Starry Landscape Stacker. I haven’t tested it myself, so if you know of a better alternative, do share it in the comments.
To give you an idea of what such software can do, I now show you the 100% cropped image above. You can see what an average of 40 images taken at ISO 6,400 looks like.
Blending time
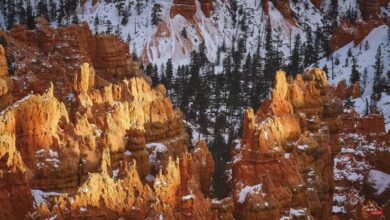
Although it would be much more realistic to leave the foreground black in night shots, I wanted to show at least the subtle details. To achieve this, I can reuse the image averaging, this time for the foreground. An alternative is a multi-minute exposure, shot at medium ISO. In the example above, I have a moon rising in the east, brightening the foreground. But usually I take night photos when there is no moon in the sky so that even more stars appear in the final image. Then even shooting exposures of 10 minutes or more won’t give me the detail I want.
That’s why I recommend the following workflow whenever constellations allow:
-
Take pictures of the stars at astronomical twilight in the morning or evening. It is dark enough that many stars can be seen.
-
Take a foreground shot during the blue hour.
-
Between the two sets, hold the camera in place. I use this time to take a quick nap or listen to a podcast.
-
Combine the blue hour photos with the night sky photos in Photoshop. Depending on the scene, it can be difficult, but with some practice, you can consistently achieve great results.
Here’s a trick: don’t overdo the mix. It is recommended to significantly darken the foreground photos before blending to create an image that still feels like night. The same restrictions should be applied when working on star images to create a natural blend.
Stacking Focus
Most of the time, focus stacking is also part of my night photography routine. When you take a foreground photo during blue hour, it’s easy to take multiple shots that are in focus at different points between the near and infinity foreground. Exposure times usually don’t exceed 30 seconds, and taking all the necessary shots takes up only a fraction of the time of a photo taken at night.
Planning and Scouting
The above procedure deals with the techniques of the shoot. But planning and reconnaissance are also involved. In the intro video, I show how I use the apps Planit Pro and PhotoPills for it.