 While it’s easy to go to the grocery store and buy butter, yogurt, or kefir, making your own products at home can be more rewarding and easier than you think. Making dairy staples at home allows you to control what goes into them, control the process and reconnect with the traditional way of doing things.
Yogurt and kefir are also fermented foods that provide probiotics that are important for feeding the beneficial bacteria in your gut. Instead of relying on store-bought products, which often contain sugar and other additives that you want to avoid, why not make your own at home? Being able to make your own butter, yogurt, and kefir gives you more flexibility. It gives you strength. Most importantly, it gives you self-determination: the ability to control what you provide for yourself or your family.
How to make butter
There are some great butters that are widely available in grocery stores, but sometimes you just want to make something at home. Sometimes you want really fresh avocado.

There are several ways to make butter at home. First, yes food processing butter. You will probably need:
- 2 cups room temperature heavy whipped cream with no additives or binders or stabilizers. The ingredients should read “heavy cream” and nothing else.
- 1 cup of ice cold water
- 1 food blender
Process:
- Fill a food processor about ½ full with cream and blend on medium speed. As you mix, you’ll notice that the cream goes from frothy to frothy to whipped cream to very stiff whipped cream.
- Continue to mix until the mixture “shrinks” and the whipping you enjoyed before returns to a shake. This is butter separated from buttermilk.
- Drain the buttermilk (save for later), then add some ice cold water, mix more and discard the water as it separates.
- Repeat until the water is clear (process known as butter washing). Place butter in a large jar and shake to remove excess water.
- Store in ramekin, butter dish or in waxed paper rolls. Add salt if you like. About a cup of butter should be obtained.
Next, yes avocado tofu. You will probably need:
- Thick cream at room temperature
- A quart jar with a lid
Process:
- Fill the jar about half full.
- Close the lid and shake until the fat has come together and forms a ball, and the buttermilk separates. This process may take about ten minutes.
- Pour the buttermilk into a separate container, reserve the curdled fat (butter) and let the excess liquid drain.
- To remove excess butter for long-term storage, knead the butter under cold running water.
- Salt if you like and store.
And finally, there’s this nifty little vial stirrer. I’ve heard good things from some people.
To spice it up, add a few tablespoons of yogurt to whipped cream and let it sit for a day or two. Once it has a slightly firm or slightly greasy taste, use it to make butter.
How to make yogurt
Yogurt is one of the oldest and most nutritious ways of consuming milk. Good yogurt has little or no lactose (the bacteria that digest it), so even those who are lactose intolerant can enjoy it. If you can tolerate dairy, I recommend making your own and eating yogurt.

What you need:
- One liter of high quality milk. Raw milk is not needed as you will be heating it, although using raw milk will usually ensure you are using high quality milk.
- Cultural opening
- Cooking thermometer
A starter culture is basically any compound that already has active cultures in it. You can buy dry culture at your local health store, or you can use plain yogurt from a previous batch or buy it at the grocery store. When doing this, however, make sure to choose a brand of plain yogurt that clearly states on the label that it contains live active bacteria, or this won’t work. To maintain the culture, store the yogurt in the refrigerator. It’s best to use yogurt that you already enjoy — chances are, the yogurt you make will taste similar.
Process:
- Pour the milk into a small sauce pan and over medium heat, heat the milk until it reaches 180 degrees F.
- Remove from heat and let cool to 105 degrees F.
- Stir in yogurt/starter powder and pour into a glass jar or bowl. Cover it.
- Let the yogurt incubate for at least 6-7 hours at 105-112 degrees F. You can do this by using the “yogurt” setting on your Instant Pot, using a yogurt maker, or setting the yogurt on a simmer. yeast in a hot pan. water whose temperature you monitor and maintain between 105-112.
- Once the yogurt is thick enough that you can push it in with a spoon and see the impression stay, it’s probably ready. Taste and if you’re satisfied, refrigerate. If you want it more sour (indicating more lactose digestion), let it ferment.
To make Greek yogurt, let your finished yogurt drain in a cheesecloth-lined colander. After all the whey has melted into a bowl, you’re left with only yogurt solids: thick, creamy, and casein-y. Stock up on whey to start new batches of yogurt or just to drink straight.
Experiment with different yogurt starter cultures. You can even make yogurt using specific probiotic strains, like Dr. Davis’ L. reuteri.
Free ice cream: Turn your homemade yogurt into delicious, mouthwatering labneh!
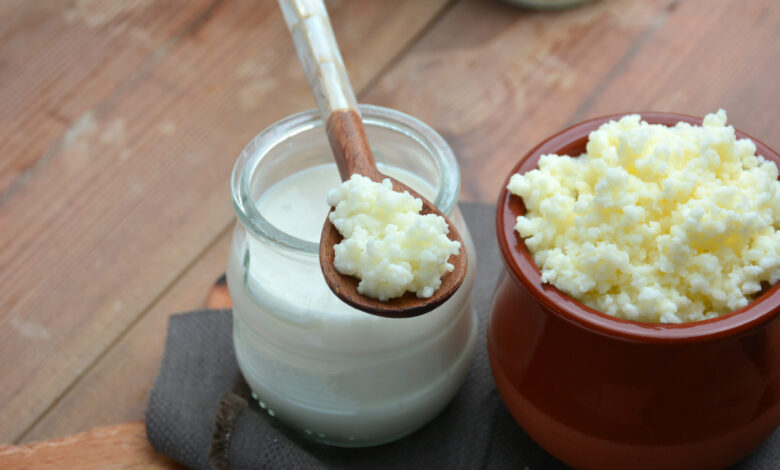
How to make Kefir
Kefir is “super yogurt” – milk cultured with more than a dozen strains of bacteria and yeast. Research shows that kefir is full of unique peptides with beneficial physiological and metabolic effects, most of which are still unclassified but can certainly be said to be “good for you”. Today, you can find kefir at most grocery stores, but the best ones are made at home using raw kefir seeds.

You will probably need:
- 1 tbsp granulated kefir
- 1 liter whole milk, ideally whole and organic fresh milk but otherwise high quality non-homogenized milk will work
- Glass bottle
You can order kefir seeds online. You can also use Craigslist to try to find someone locally who has kefir seeds for sale (or as a gift).
Process:
- Add your milk to the jar.
- Place the kefir seeds in the jar and cover with an elastic band with a clean cloth.
- Leave it on the counter for 1-3 days. The warmer, the faster the fermentation.
- Once the contents have thickened and/or separated into whey and solids, it is ready.
- Pour kefir into a plastic colander placed over a glass bowl. Some say metal will kill kefir, although I doubt it, but let’s use plastic just to be safe.
- Scoop the seeds out of the colander and let the liquid fall into the bowl below, gently pressing the mixture to drain. The particles will feel solid – they are unmistakable.
- Add the nuts to another batch of milk to keep the kefir flowing and place the finished kefir in the refrigerator.
You can also add a quarter to a half cup of finished store-bought kefir to a jar of room-temperature milk and leave it on the counter. It will ferment, although it won’t be quite the same.
That’s it: a few basic ways to make your own butter, yogurt, and kefir. Have you ever made your own? You have? Let me know how you did it below, and thanks for reading!

Information about the Authors
If you want to add an avatar for all your comments, click here!