Photography says as much about what you show in your photos as it does about what you hide. Too much detail can overwhelm the viewer. You can already be selective about what you put into an image when you take it. There are also some techniques to help you simplify your photos in post-processing. One way to do so is to create a more somber mood and cover less important areas in the dark.
The photo editing techniques I show below work best for images taken on cloudy and rainy days. The soft light you receive then provides the background to apply darkening to your image. Photos taken on brighter days can also benefit from these techniques to a certain extent. But I would limit every image to look dark and try to show different atmospheres in your photos.
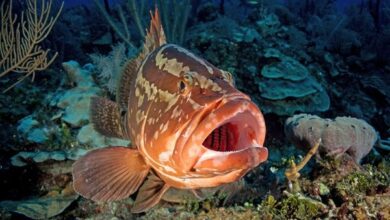
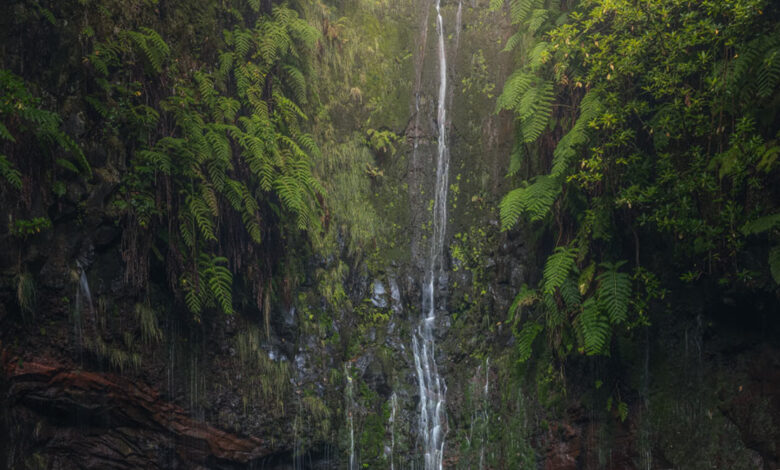
Now, check out the before and after comparison for a photo I took 25 Fonts in Madeira. The original material has been processed in Lightroom to provide an even distribution between details and light. Stacked focus and exposure blending has also been applied. Although the photo captures some of the atmosphere of the day, it still looks pretty flat. This usually happens on overcast days when you don’t have a directional light to work with.
To add dimension and depth to an image while hiding some of the less important details, several techniques can be applied.


Dark mood
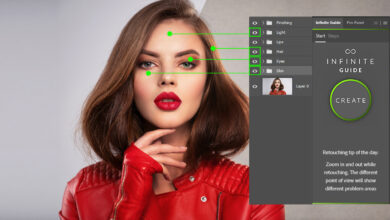
In the featured video you can watch as I apply dark processing to photos from 25 Fonts. My tool of choice for that is the Camera Raw Filter. It allows me to adjust many different settings in one step instead of having to rely on multiple adjustment layers in Photoshop:
- Create a Smart Object from your current edit. Select all the layers in your layer stack, right click on one of them and press Convert to smart object.
- With the Smart Object active, go to Filter – Camera raw filter… or press Ctrl / Cmd + Shift + A. It will open the Camera Raw window.
- Here you can work with many adjustments from Camera Raw if you need to create a more moody version of the photo. I usually lower the Exposure and decrease the Offset. Those two sliders combined make the already much more moody image. You can prevent your shadows from being cropped with the shadow and black sliders. As the overall photo becomes softer, there is some room to add texture, contrast, and clarity. Creation. If the image is oversaturated, reduce the vibrance.
- Those settings are applied to the entire image after you press OK. Since you created the Smart Object, you already have a mask associated with the filter. Invert it by clicking on it and pressing Ctrl / Cmd + I. Then reveal the effect in the areas you want to blur by painting in the mask with a soft, white brush.
In the example shot, I applied this technique mainly to the outer areas to direct the viewer towards the water in the foreground and then to the waterfall in the background.
Ozone
In addition to darkening the photo, you can also add atmosphere. Especially with waterfall photos, it can help to introduce more depth. Usually, near the waterfall there will be a jet of water. If that’s the case, you can enhance it with the techniques I show in the video below. If you don’t have a spray bottle to work with, you can totally do your own makeup. Just don’t go overboard with editing. Try to keep it realistic.
My favorite way to create an atmosphere is to use the Cloud filter. To get started, some preparation is required:
-
Create a new blank layer in Photoshop.
-
Take the rectangular marquee tool and make a small selection in the center of the layer.
-
Apply the Clouds filter in Filters – Render to choose.
-
Press Ctrl / Cmd + T to activate the free transform tool and expand the selection over the entire canvas. You can increase the size of the rectangle outside the image area if needed. Stop when you feel the structures start to look like spray.
-
Go Image – Adjustment – Level… or press Ctrl / Cmd + ERROR and show black in the Levels slider. It reduces the contrast in the cloud sample.
-
Apply a light Gaussian Blur to the clouds to reduce details.
-
In the Channels panel Ctrl/Cmd + Left Click on the RGB channel. It loads the cloud template as a selection.
-
Delete the current cloud layer and create a new empty layer.
-
Apply a mask to this new layer with the selection active.
You can add atmosphere by painting in layers with a soft brush with different shades of gray. Use a low opacity of 10 to 20% and gradually increase the effect. The cloud mask will instantly apply texture to it and make it look more realistic.
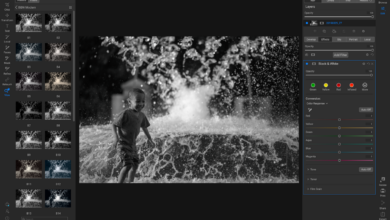
Soft Light Bleed
After making the image darker and adding atmosphere, it helps to create some light. You can achieve this by applying the light bleed technique that I show in the following video.
Here, it is important to practice restraint and not add too much light. Ask yourself: if this light were present in reality, would it create hard shadows? If the answer is yes, reduce the opacity of the effect. The goal is to create a soft light source.
Again, work with the Smart Object and use the Camera Raw Filter. Increasing the temperature and vibration along with reducing the de-fog usually does the trick. For a dark mood, apply the effect selectively to the areas where you want light to enter the frame. In my 25 Fontes photo you can see how I applied it to the top of the frame. The viewer’s eye can scan the image, starting with the darker areas at the bottom, then following the water to the waterfall and light in the background.
Inference
There are many adjustments you can use to give your photos a dark look. And as usual with Photoshop, there are different ways to arrive at the final result. But the basic principles are the same: darken less important areas of the photo while keeping the blacks from cropping, add atmosphere to create depth, and apply soft light to draw people in. view and add dimensions. The extent to which you apply such processing depends solely on your preferences.
Finally, I would like to point out that for dark photo editing you should work on calibration screen. Photographers who want to create a really dark look for their images will often work in a relatively dark room, and the darker the room, the darker the photo will be. For good results, it will help to create a selection of images as a reference. While working on a new photo, check those photos regularly to align your eyes and get a good sense of where you’re headed.