Before becoming a mom, I let my hair down most days, and to be honest, I don’t use or own a lot of hair accessories other than a few headbands.
But now I have to pull my hair up most of the time, so my son doesn’t pull it (lol), I’ve become a claw-clip hoarder. I own a ton of clips, headbands, and hairpins now, and I’d like to organize them a bit more instead of just sitting on my bathroom shelf (or hanging loose in a basket under my sink).
So that was the inspiration behind this DIY hair accessory organizer.
How do you organize hair accessories?
I like a solution where they’re easy on the eyes (so I don’t forget what I own), easy to get when I want to use them, but also organized in a way that’s visually appealing. I don’t want to lose track of what I have or feel like I’m digging around just to find the nail clip I’m looking for.
And I also want the organizer to be simple and feel like decoration in my space. Function and beauty is the purpose.
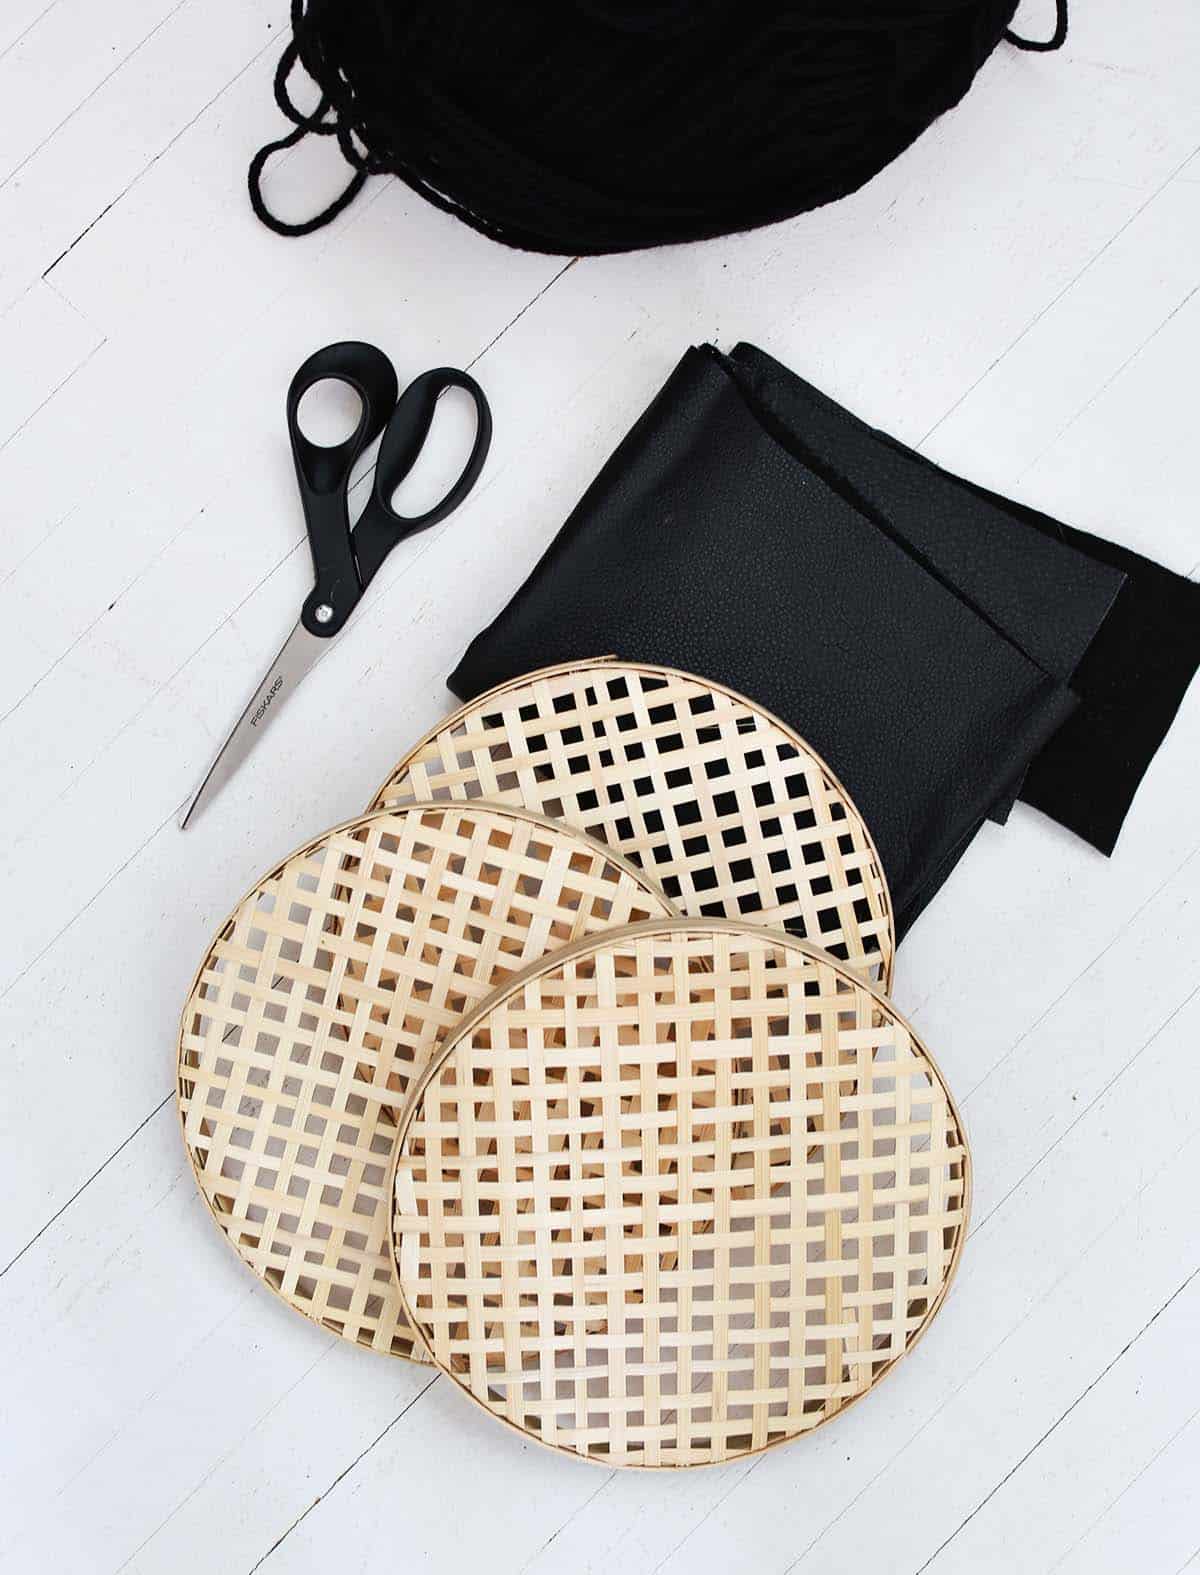
Munition:
–wicker ring
-yarn
-fabric (leather or felt)
– fabric scissors
-Adhesive
–Command strip hook or nail to hang
Wicker hoops are sometimes sold as a wall decoration, and sometimes as a kitchen item (such as a fruit holder). I linked mine above, but if you’re frugal, I’ll be sure to check there as well as I often see this type of item when I’m saving.
Also, I used some scraps of black leather that I’ve had in my fabric inventory forever. I used it for a lot of projects, lol. But you don’t have to use leather, you just need something thick that the nail clipper can hold. You can also use all alternative yarns if you wish.
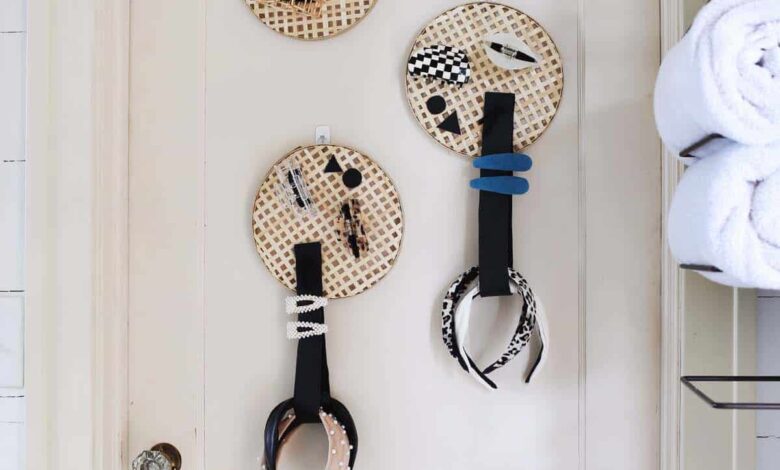
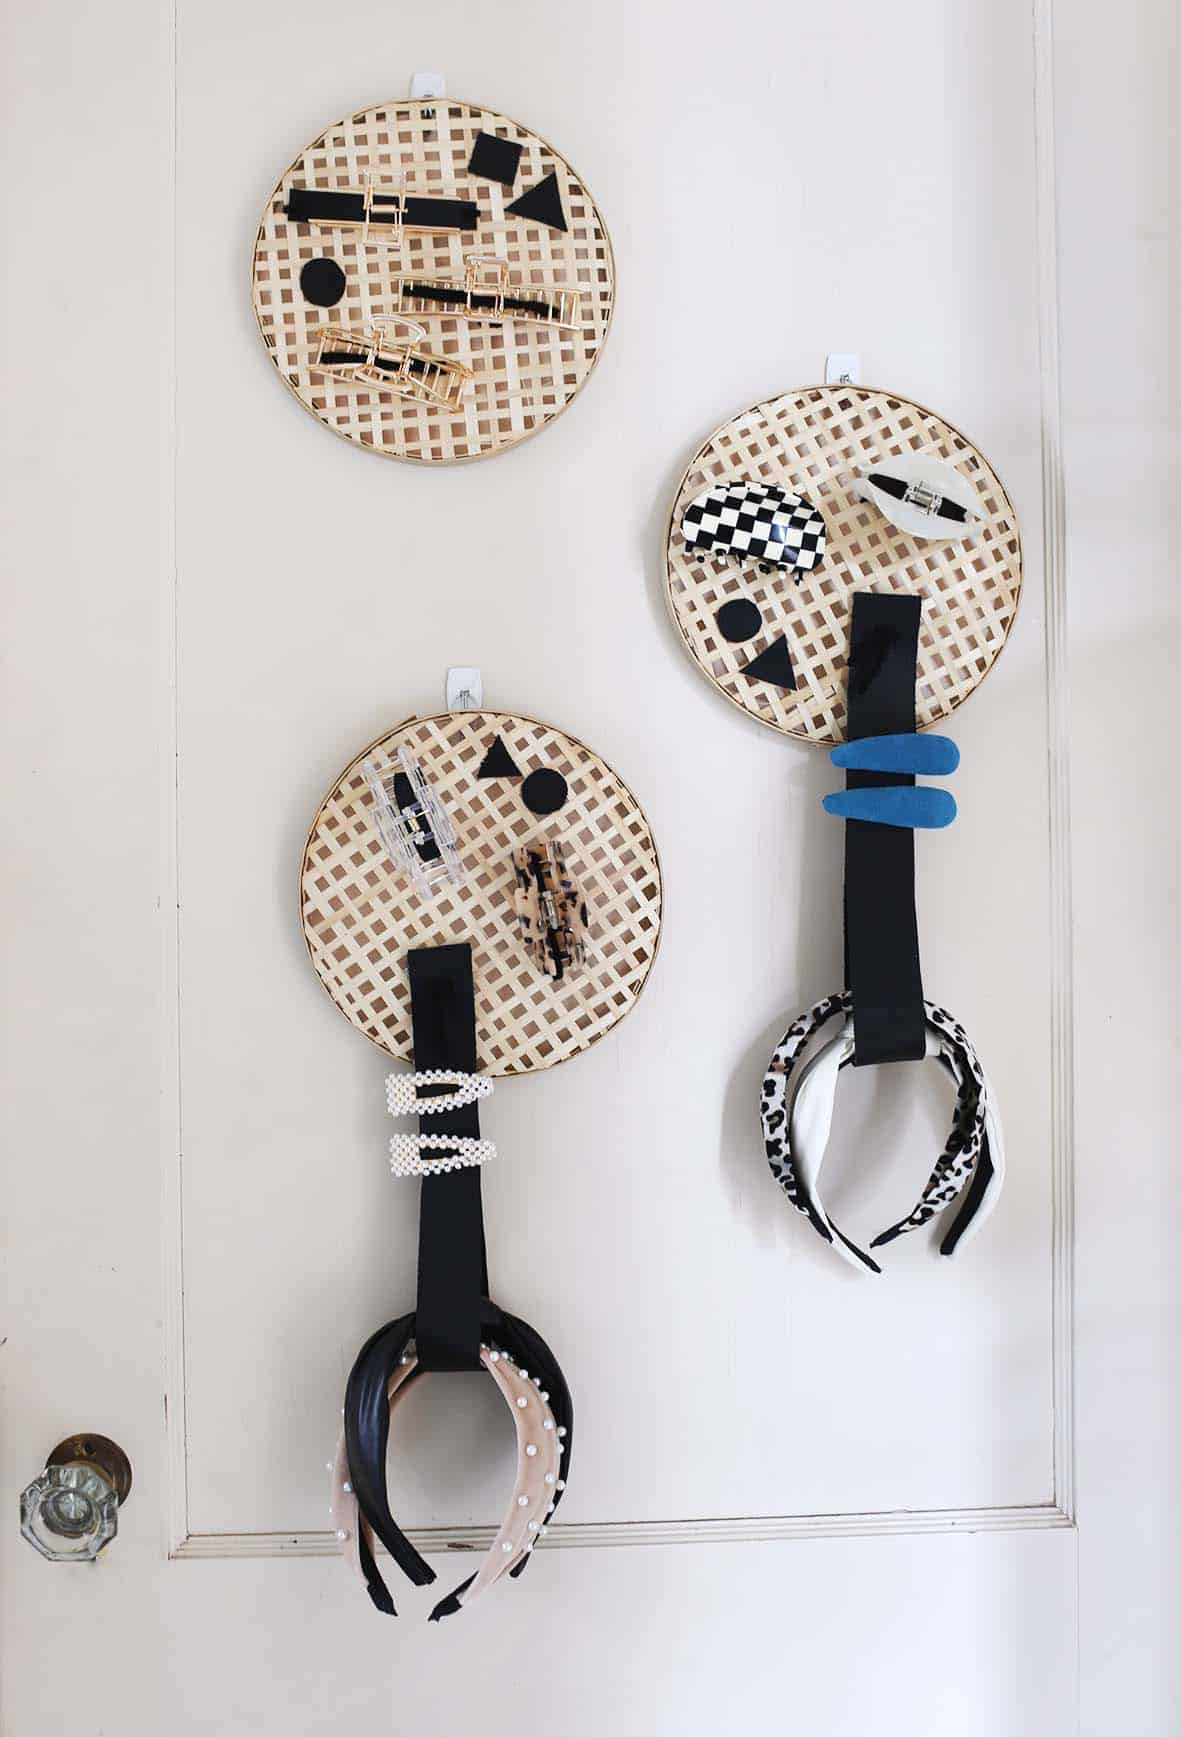
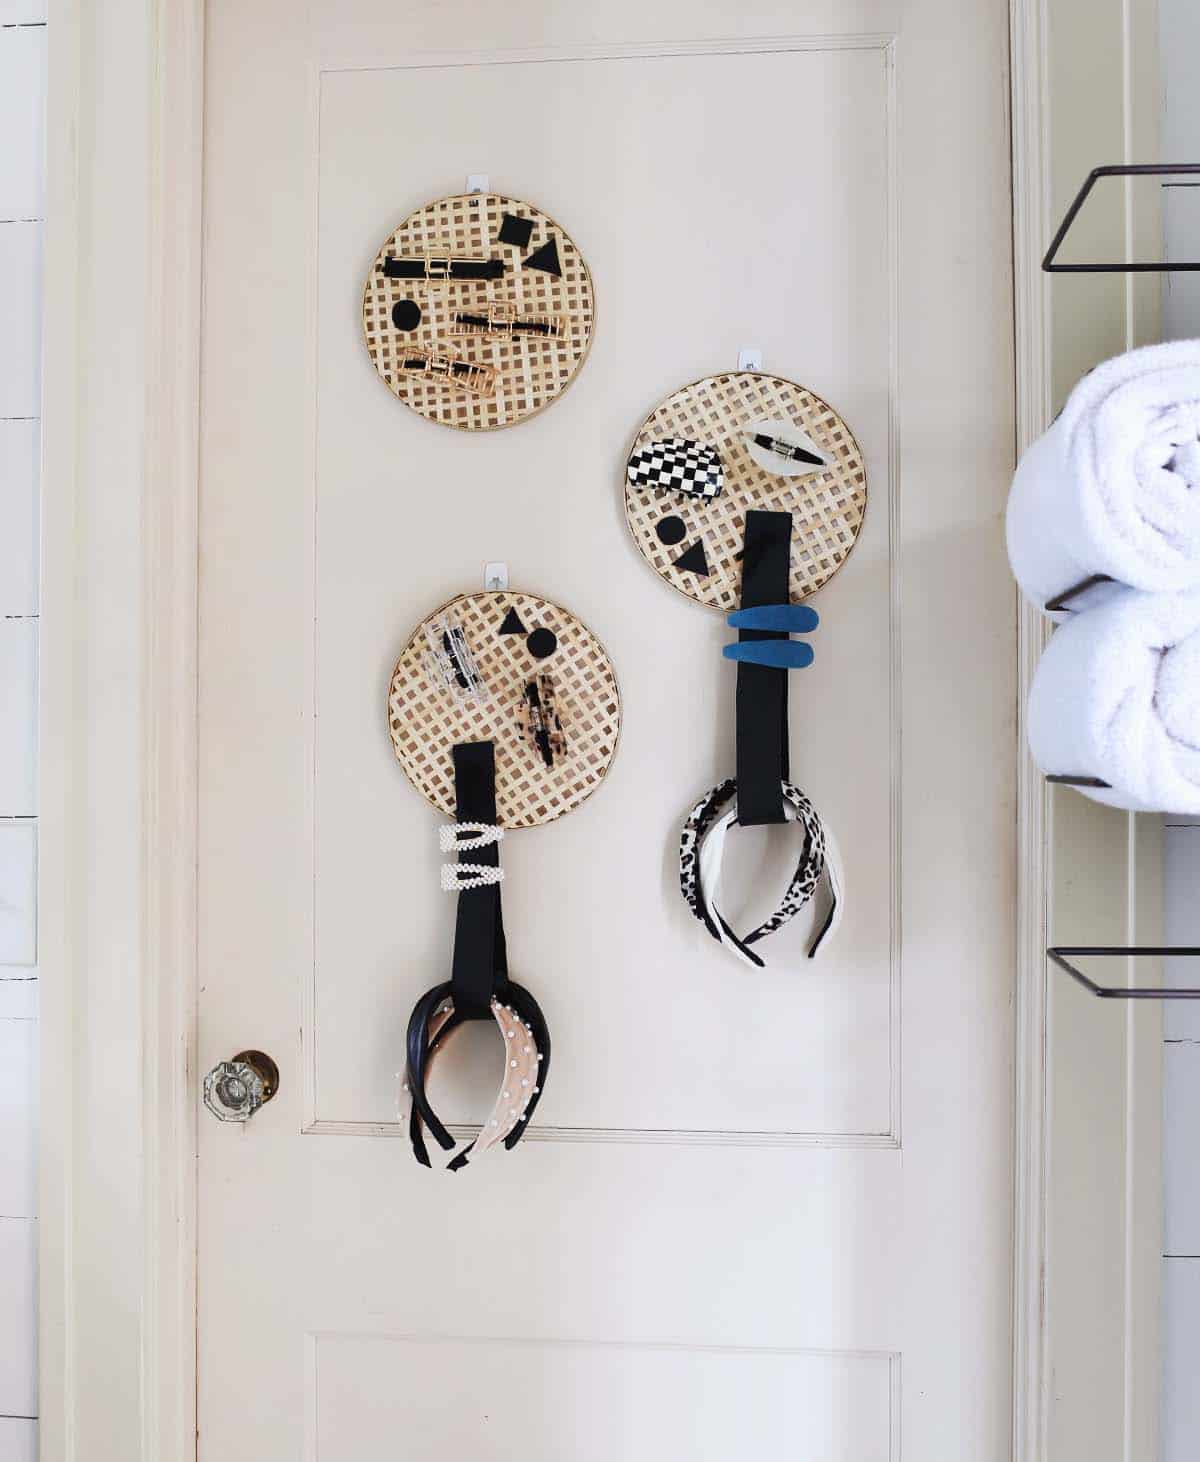
Step one: Plan where your items will go. I plan to clip the clips to the thread and the leather, and the headbands and rulers will be held in place by the longer pieces of leather that hang down.
Step two: Add felt and fabric if needed.
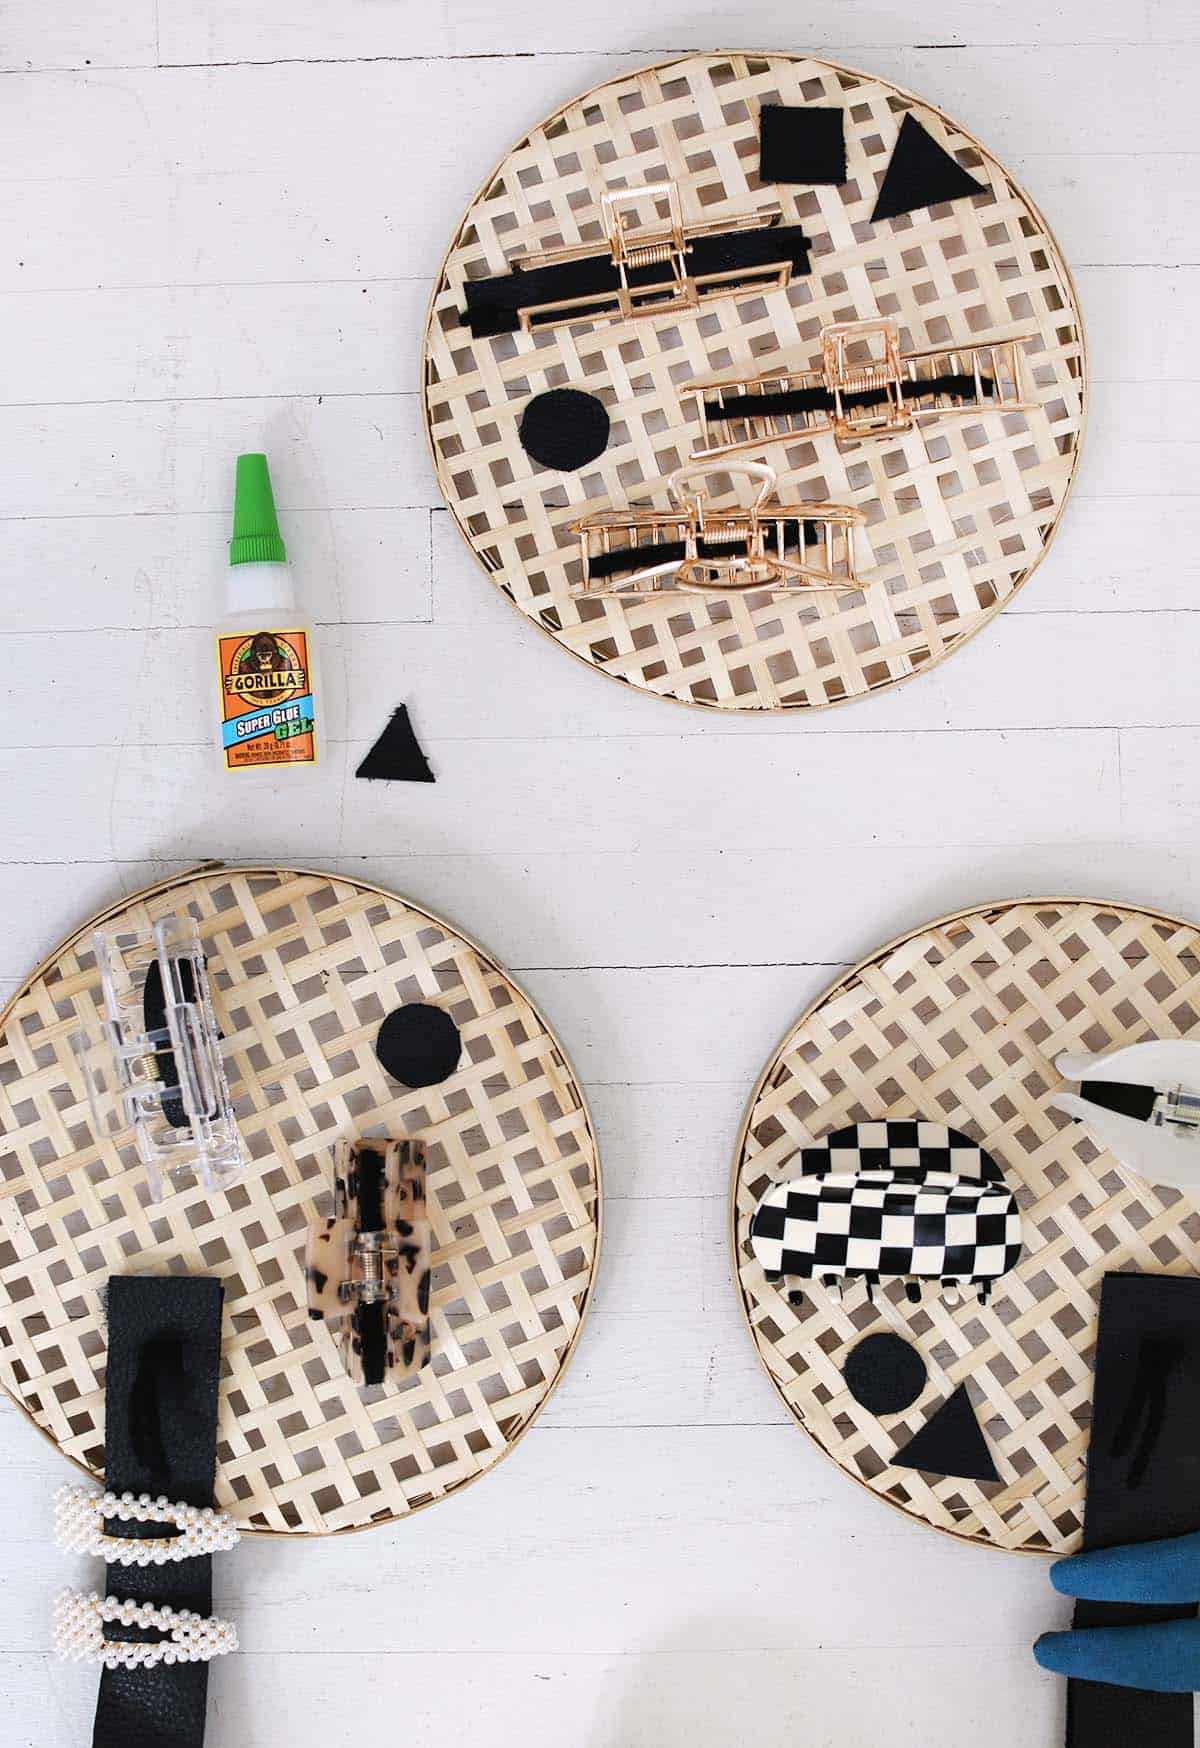
Third step: Minutes ago, I decided to glue on a few pieces of geometry just for the sake of aesthetics. More ideas for decorating these: tassels, other fabric shapes, sewing thread along the hem, etc.
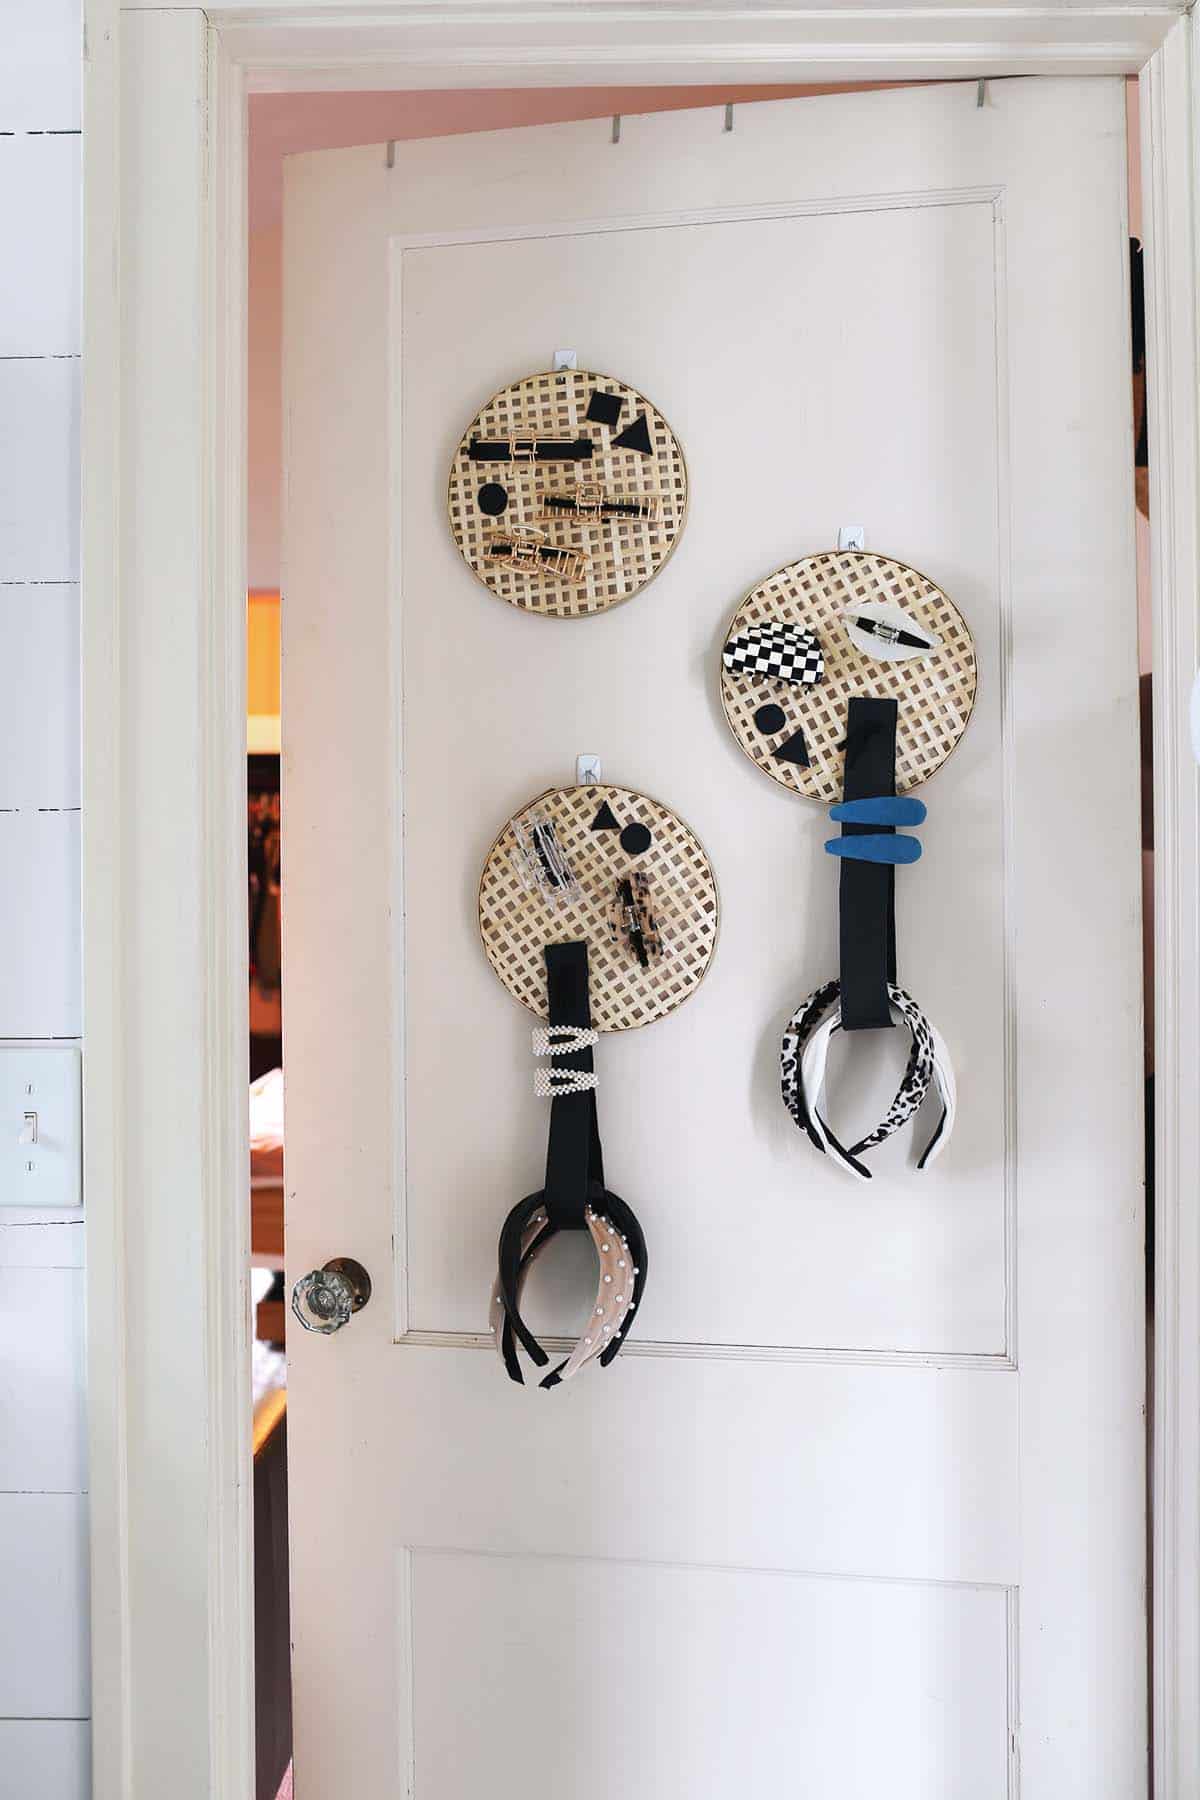
Step four: I used the Command hook to hang these on the back of my bathroom door, since it’s near the vanity where I get ready in the morning. Depending on where you hang these, you can also use nails instead.
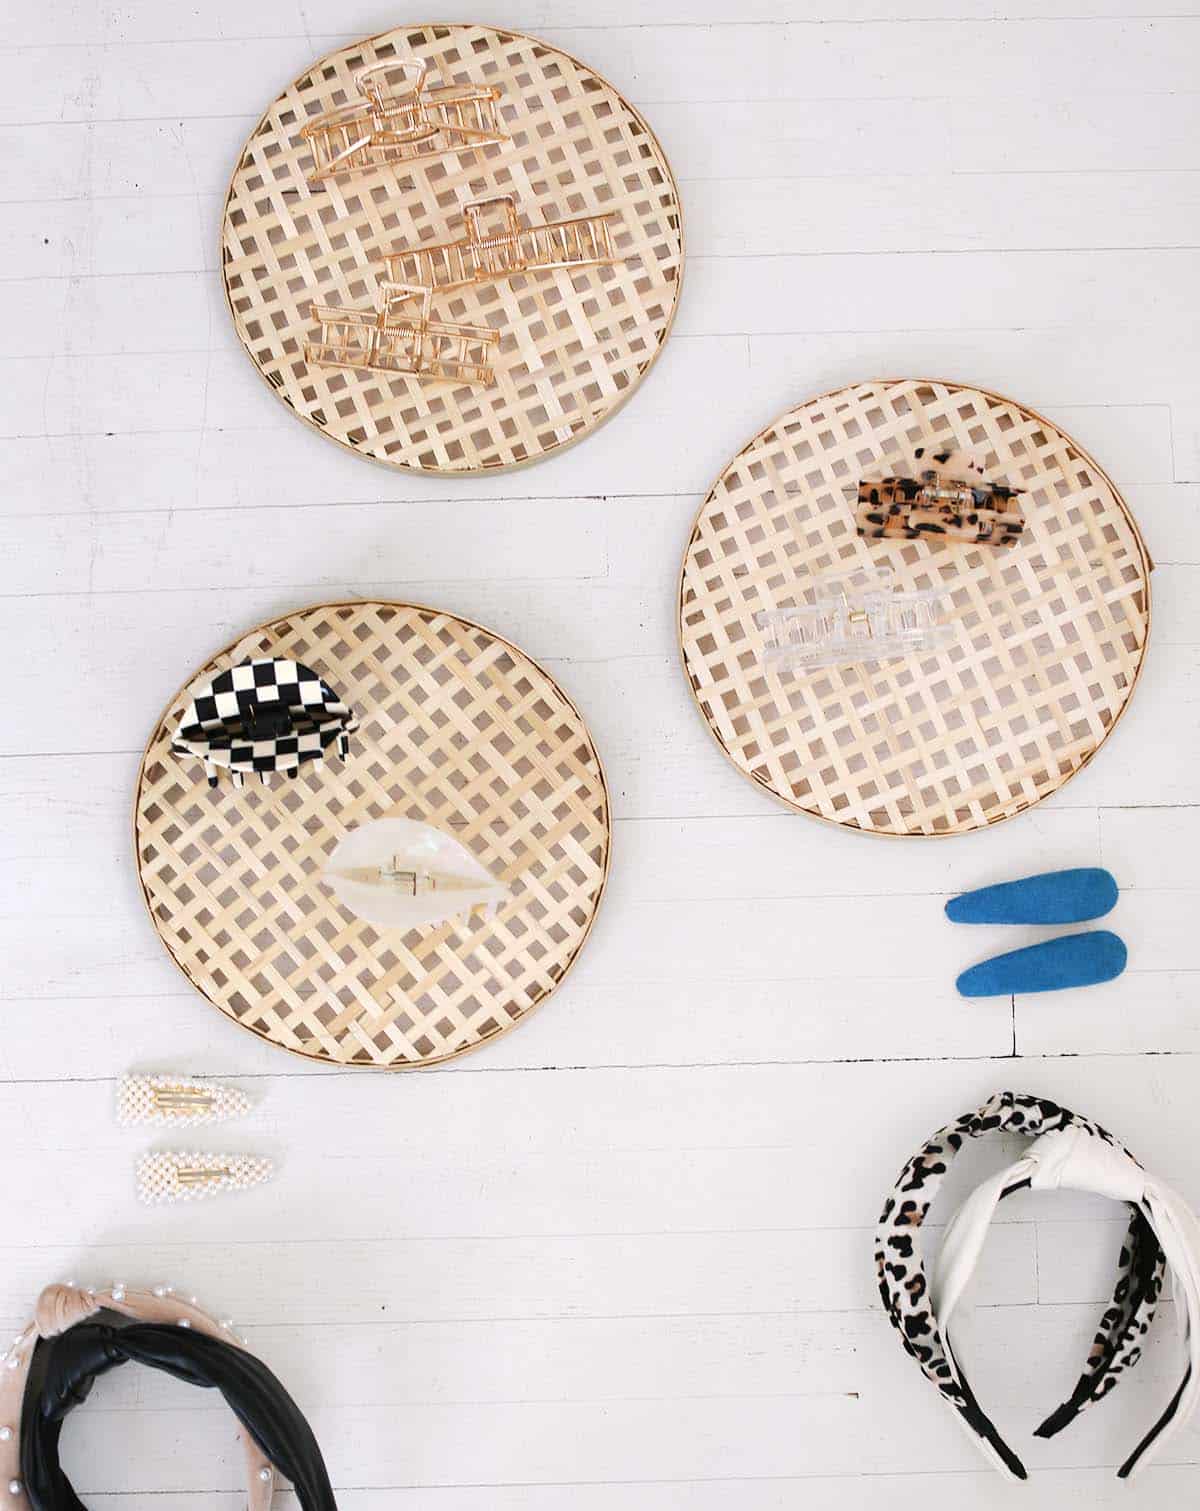
Here are some of my favorite hair accessories: gold clip / pearl hairpin / checkered hairpin / velvet + pearl headband
More DIY hair accessories:
How do you organize your hair accessories? so so. Emma
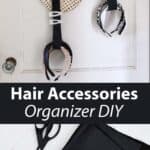
DIY Organizer Hair Accessories
an easy way to organize nail clips, headbands and headbands
- wicker ring
- yarns
- thick fabric (such as felt or leather)
- Adhesive
- Command strip hook
-
Plan where your items will go. I plan to clip the clips to the yarn and leather, then the headbands and headbands will be held in place by the longer pieces of leather that hang down.
-
Add felt and fabric if needed.
-
Minutes ago, I decided to glue on a few pieces of geometry just for the sake of aesthetics. More ideas for decorating these: tassels, other fabric shapes, sewing thread along the hem, etc.
-
I used the Command hook to hang these on the back of my bathroom door, since it’s near the vanity where I get ready in the morning. Depending on where you hang these, you can also use nails instead.
Wicker hoops are sometimes sold as a wall decoration and sometimes as a kitchen item, such as a fruit holder. I linked some in the post, but if you’re frugal, I’ll be sure to check there as well as I often see this type of item when I’m saving.
I used some scraps of black leather that I’ve had in my fabric inventory forever. I used it for a lot of projects, lol. But you don’t have to use leather, you just need something thick that the nail clipper can hold. You can also use all alternative yarns if you wish.