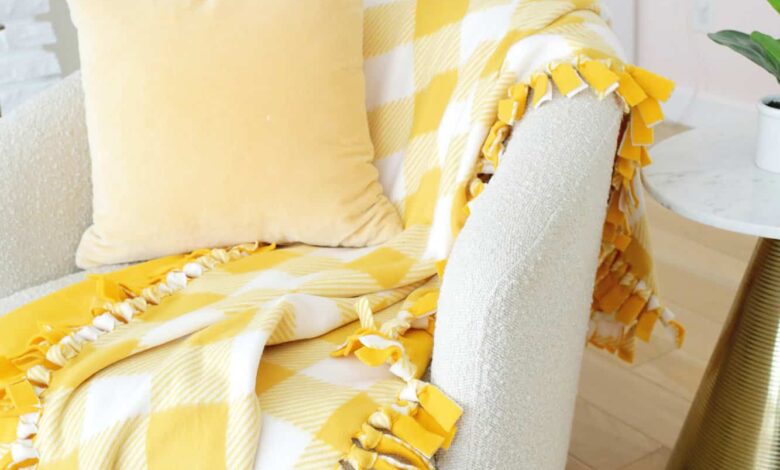
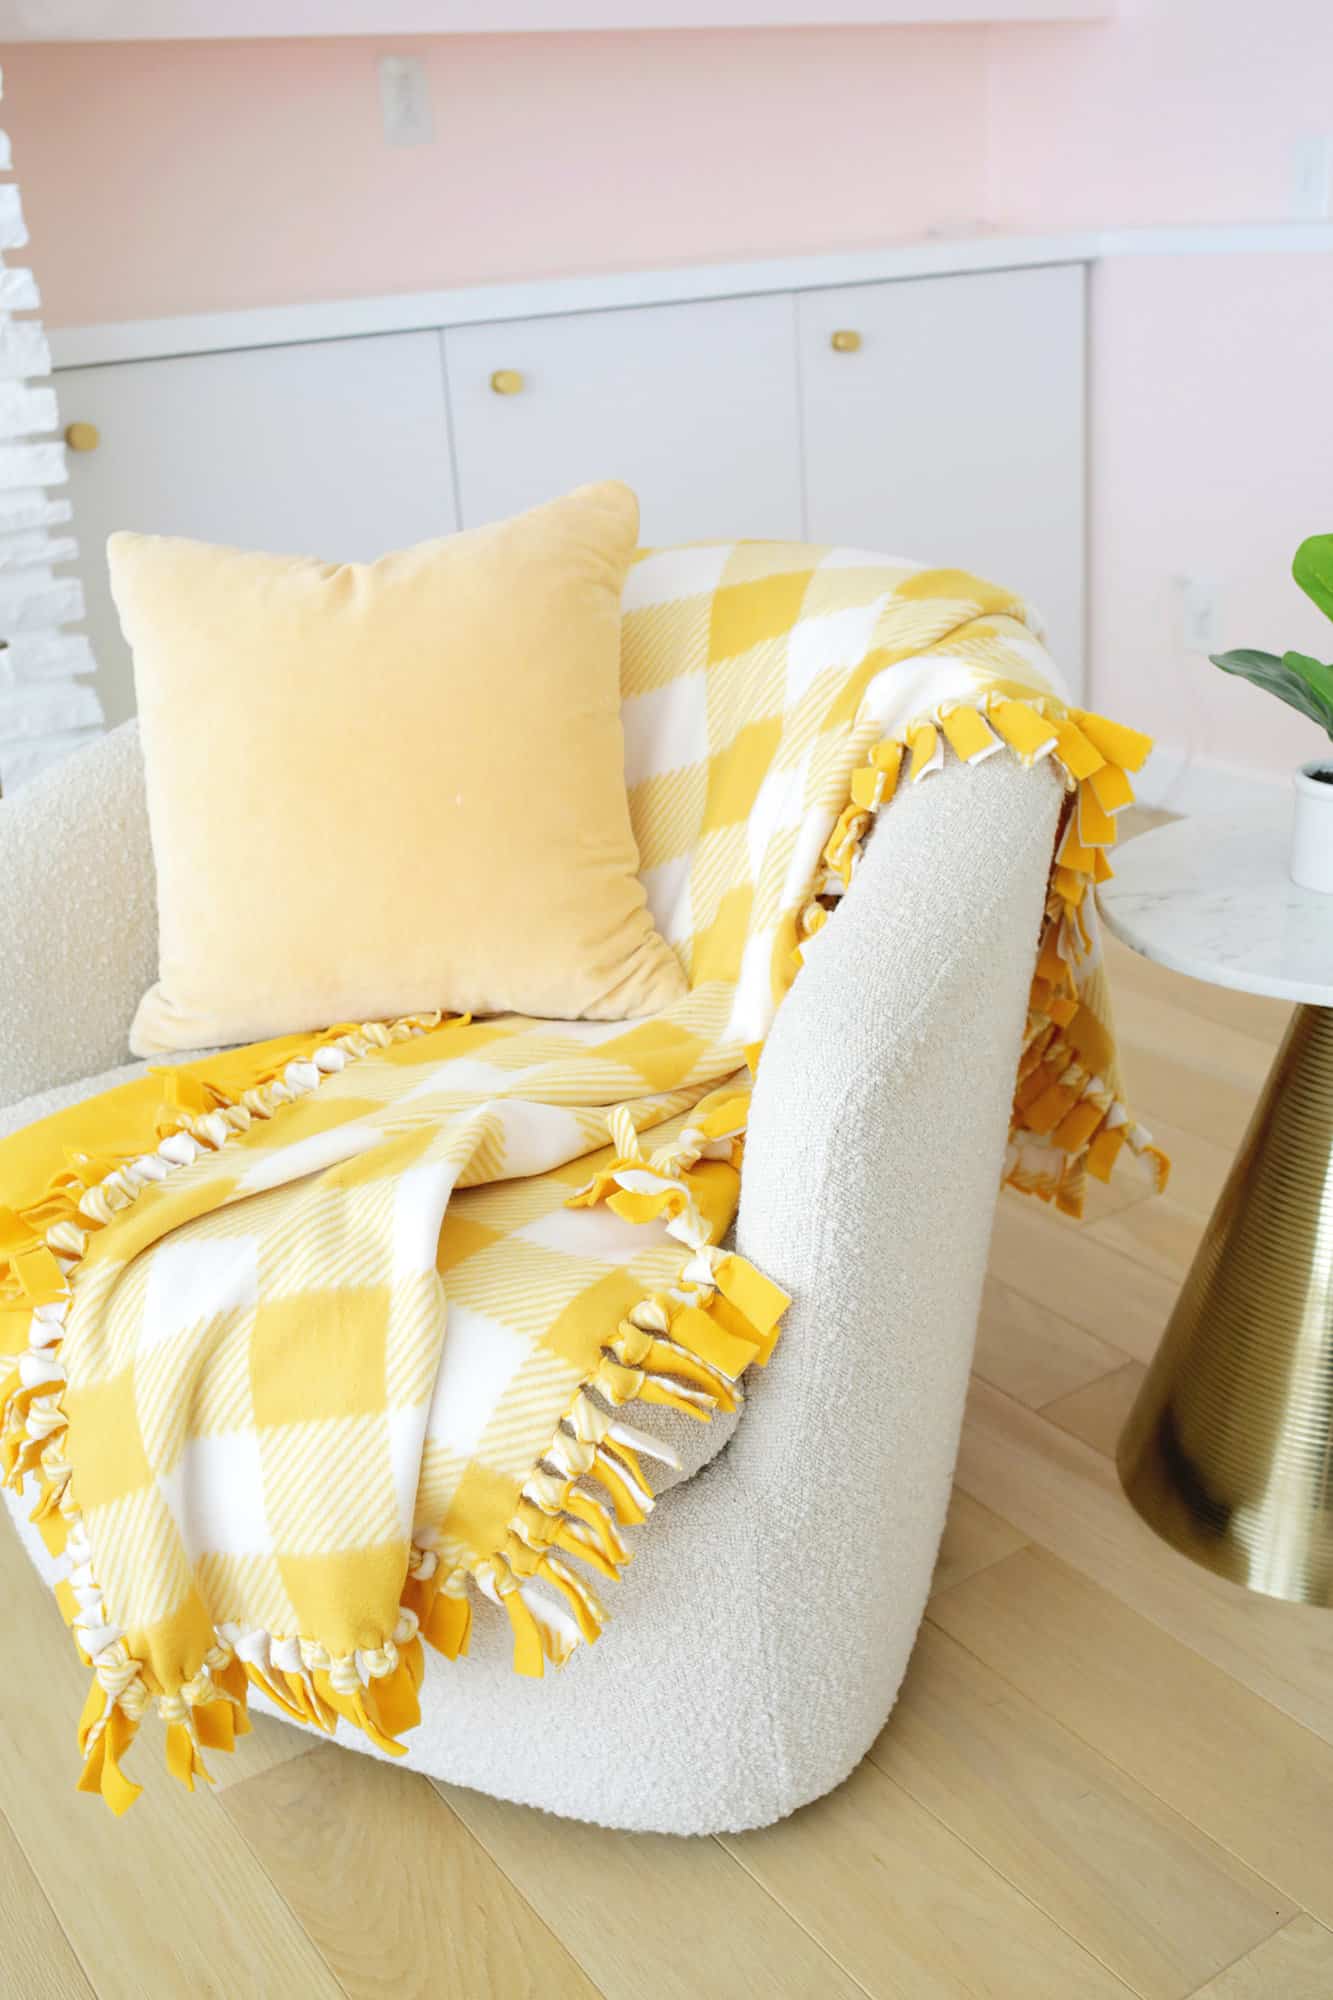
When the temperature starts to drop, a warm blanket is the first thing I go to. When the weather changes, I think sewing an easy seamless fleece blanket will be just the way to start the cold season right.
And this seamless fleece blanket is so easy and fun to create. It would also make a great gift, and you can use fun fabrics for the holidays!
It only takes four steps to go from a pile of fabric to a complete blanket, and I show you how! For this cozy post, we’re partnering with Fiskars — our flagship brand for sewing and fabric crafting projects.
They offer quality products and great crafting tools that you can use in your craft supplies for years to come. We also love that they are convenient to pick up because their supply is readily available at Walmart!
What is a Seamless Fleece Blanket?
Seamless fleece blankets are an easy way to make a quick quilt by placing two layers of fleece fabric together and cutting strips around the sides of the fabric. Tying these strips together in a balloon knot (like you would tie a balloon) will give you a complete quilt edge with no sewing required!
How many yards of fabric do I need for a seamless fleece blanket?
Although the size of the blanket is up to you, you will need at least 1.5 to 2 meters of fleece to make the blanket. You can use a smaller amount for baby blankets, but you’ll probably want 2 yards if you’re making a shared or adult one.
Munition:
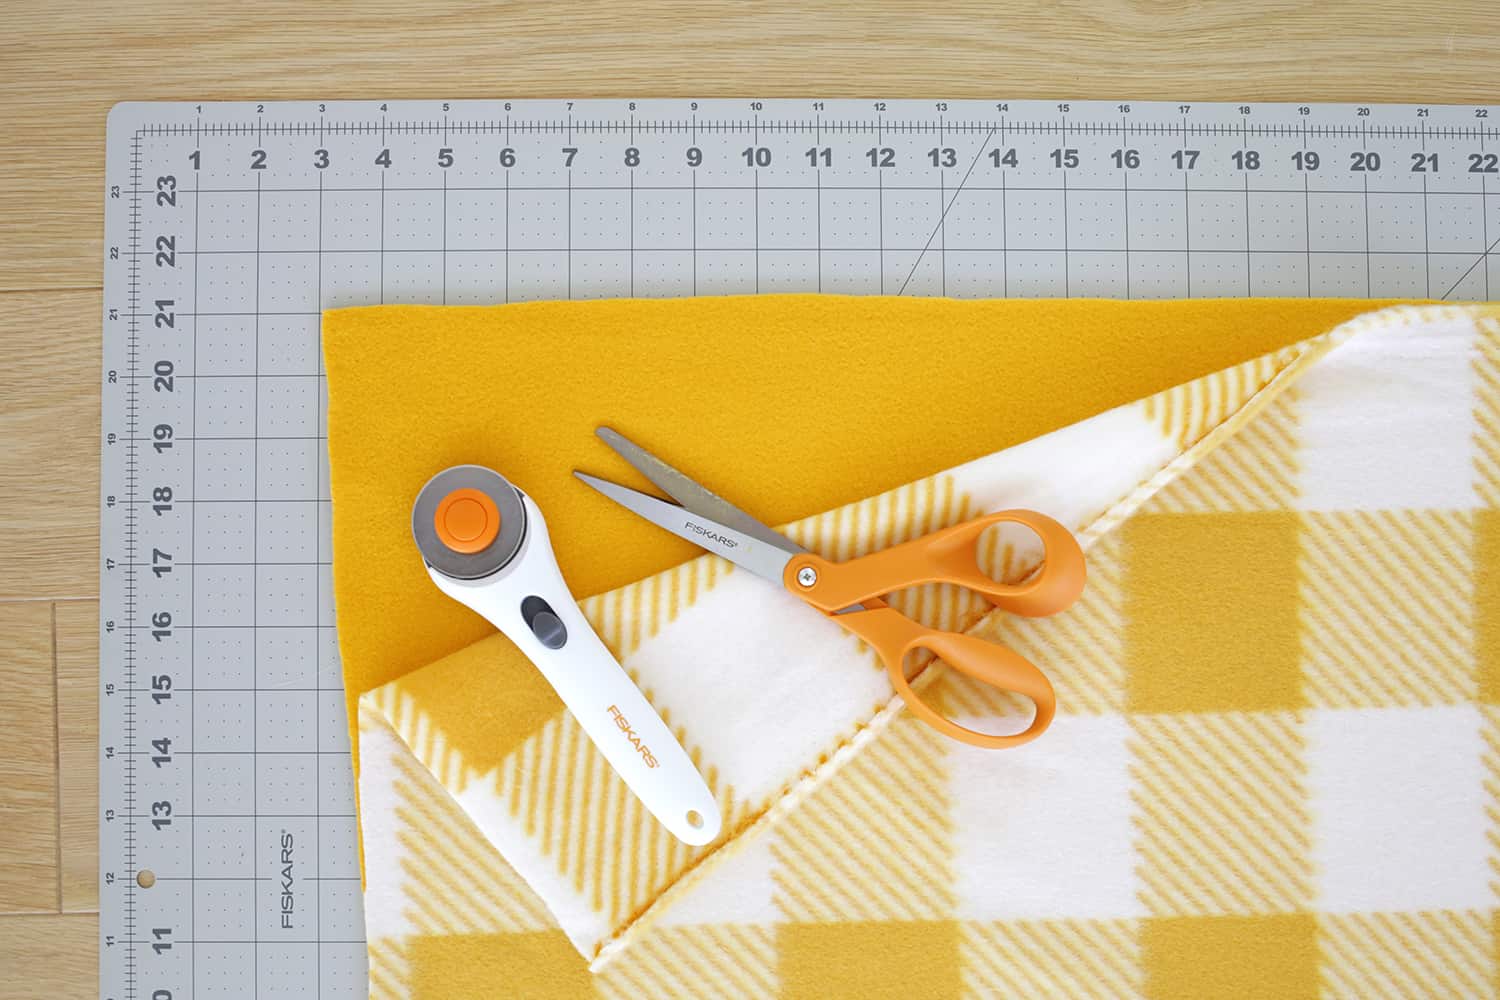
–fabric scissors
-1.5 or 2 yards fleece fabric have two colors/patterns (take the same quantity for each color)
–rotary cutter, fabric rulerand cutting mat (optional but useful and it also included in a set!)
-thin paper or cardboard for pattern cutting (optional)
Here’s a quick video tutorial for making your own seamless fleece blanket, or keep scrolling for text and photo instructions:
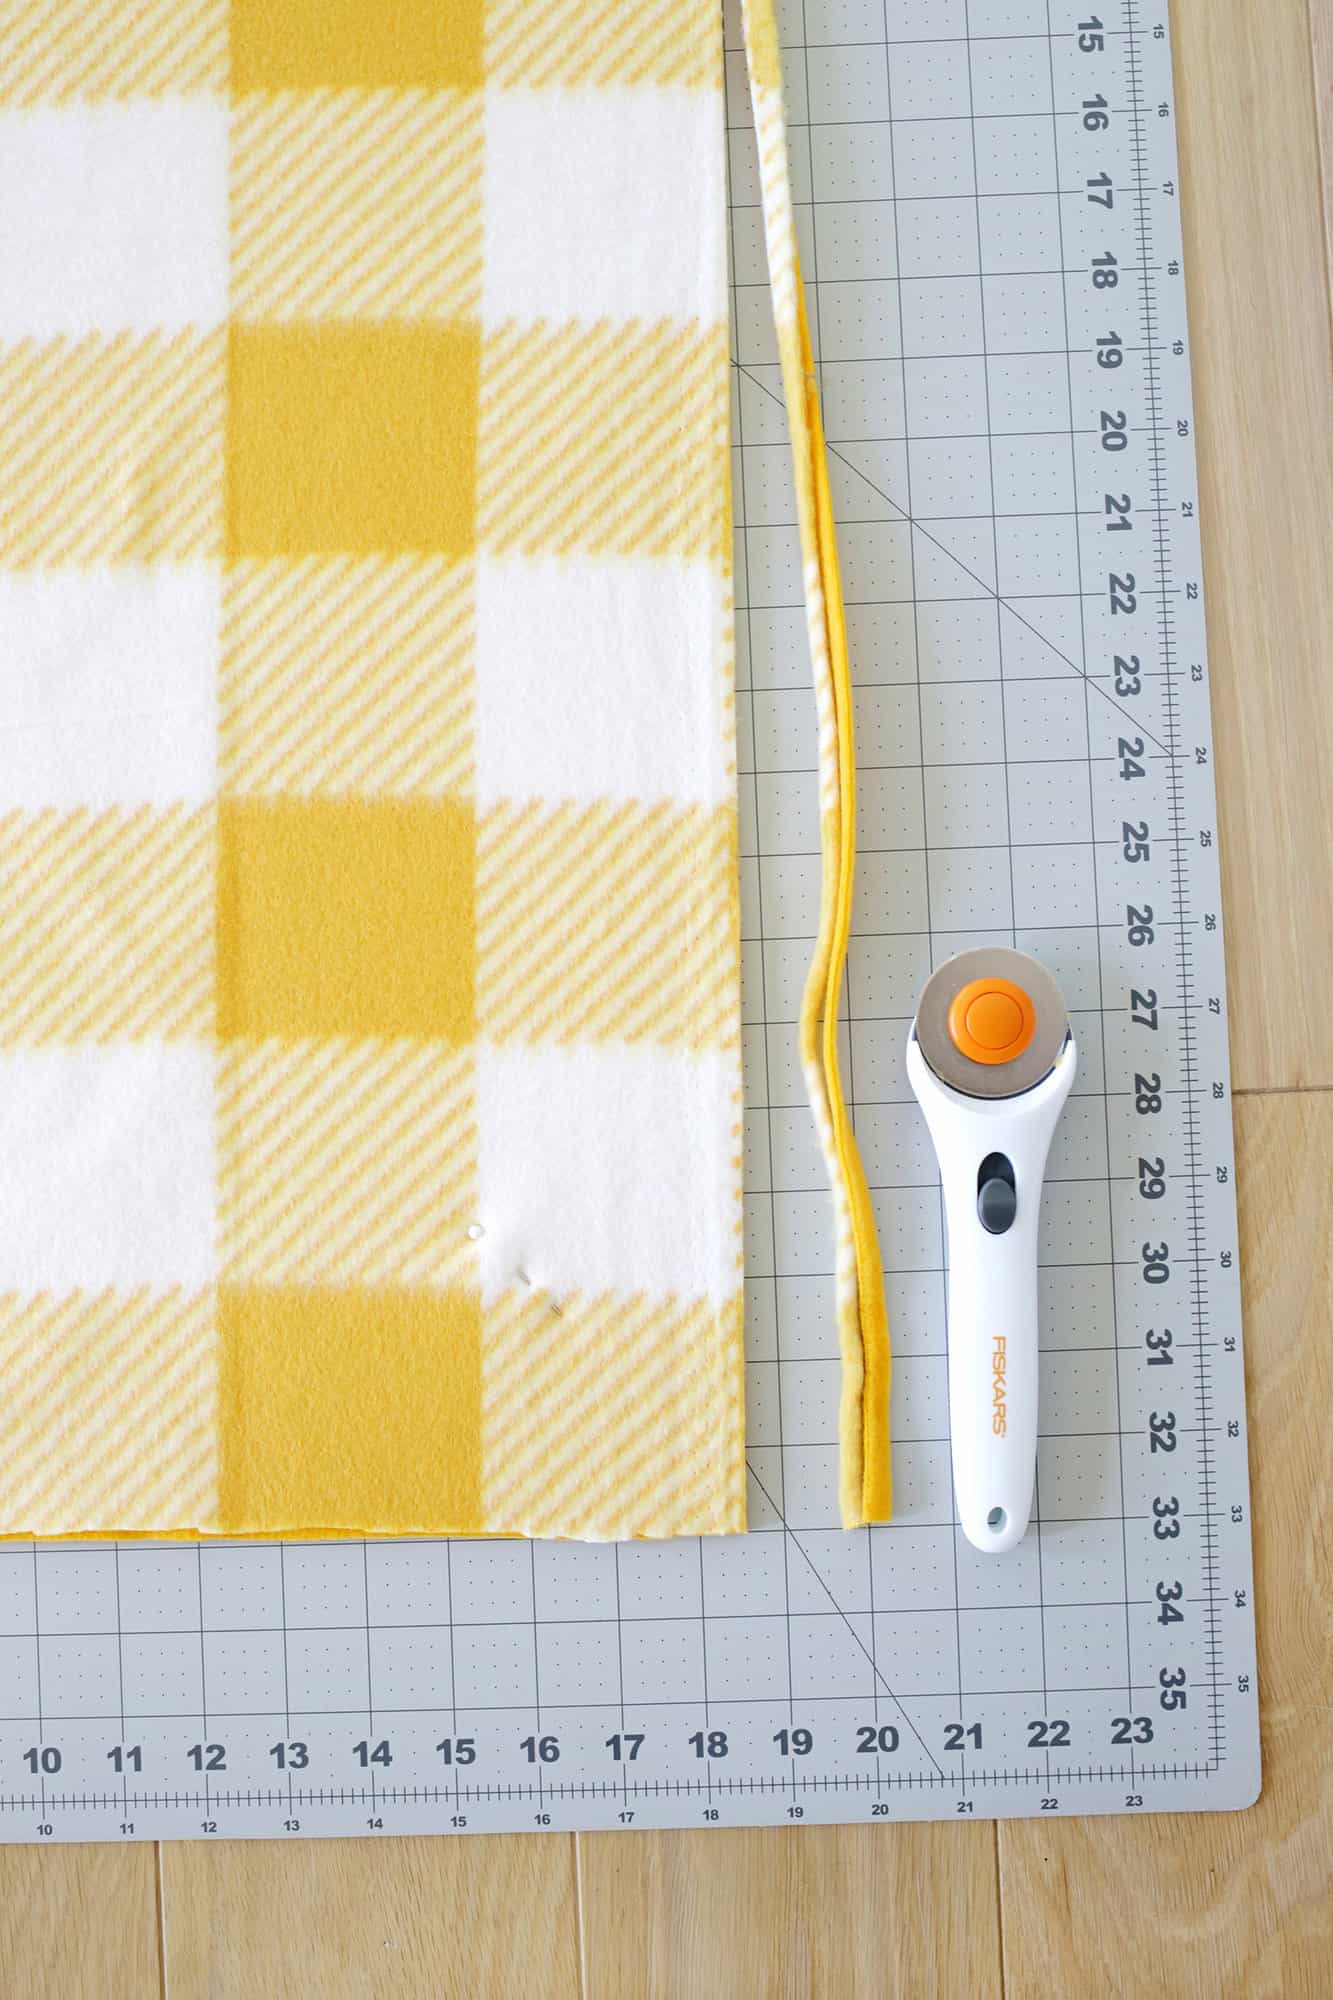
1. Trim your fabric:
Place your two fleece sheets on the floor and line them up as best you can. Use a rotary cutter, fabric ruler and mat (or simply fabric scissors) to cut off any curled ends or edges that are not aligned correctly.
Just hit the eyeballs to get the most uniform overall rectangular shape possible, but once you’re all done, you won’t be able to tell if a cropped area is a bit narrower or a little wider.
Note: If you’re using snow fleece, the right side of the fabric will be smoother and the reverse side more slippery, so place the furry sides facing out when you stack the fabrics together.
Are there any best fleeces for a seamless blanket?
Polar fleece is a popular choice for a seamless blanket. It comes in pill-resistant and non-pill-resistant forms, so if you’re worried about those little pills getting on your fabric after a few washes, choose the anti-pill option.
There are different weights of arctic fleece, but since this blanket is a double layer, thin or medium will be warm enough. Try to choose the same fleece for both sides of your fabric so they wear evenly.
Blizzard fleece is also a great choice for a seamless blanket. The quality isn’t so good, but it’s generally less expensive, so a good choice when on a budget is one worth considering.
Don’t choose fleece that’s too thick for your blankets (those that look like thicker sherpa) as they won’t be as flat and will be harder to tie.
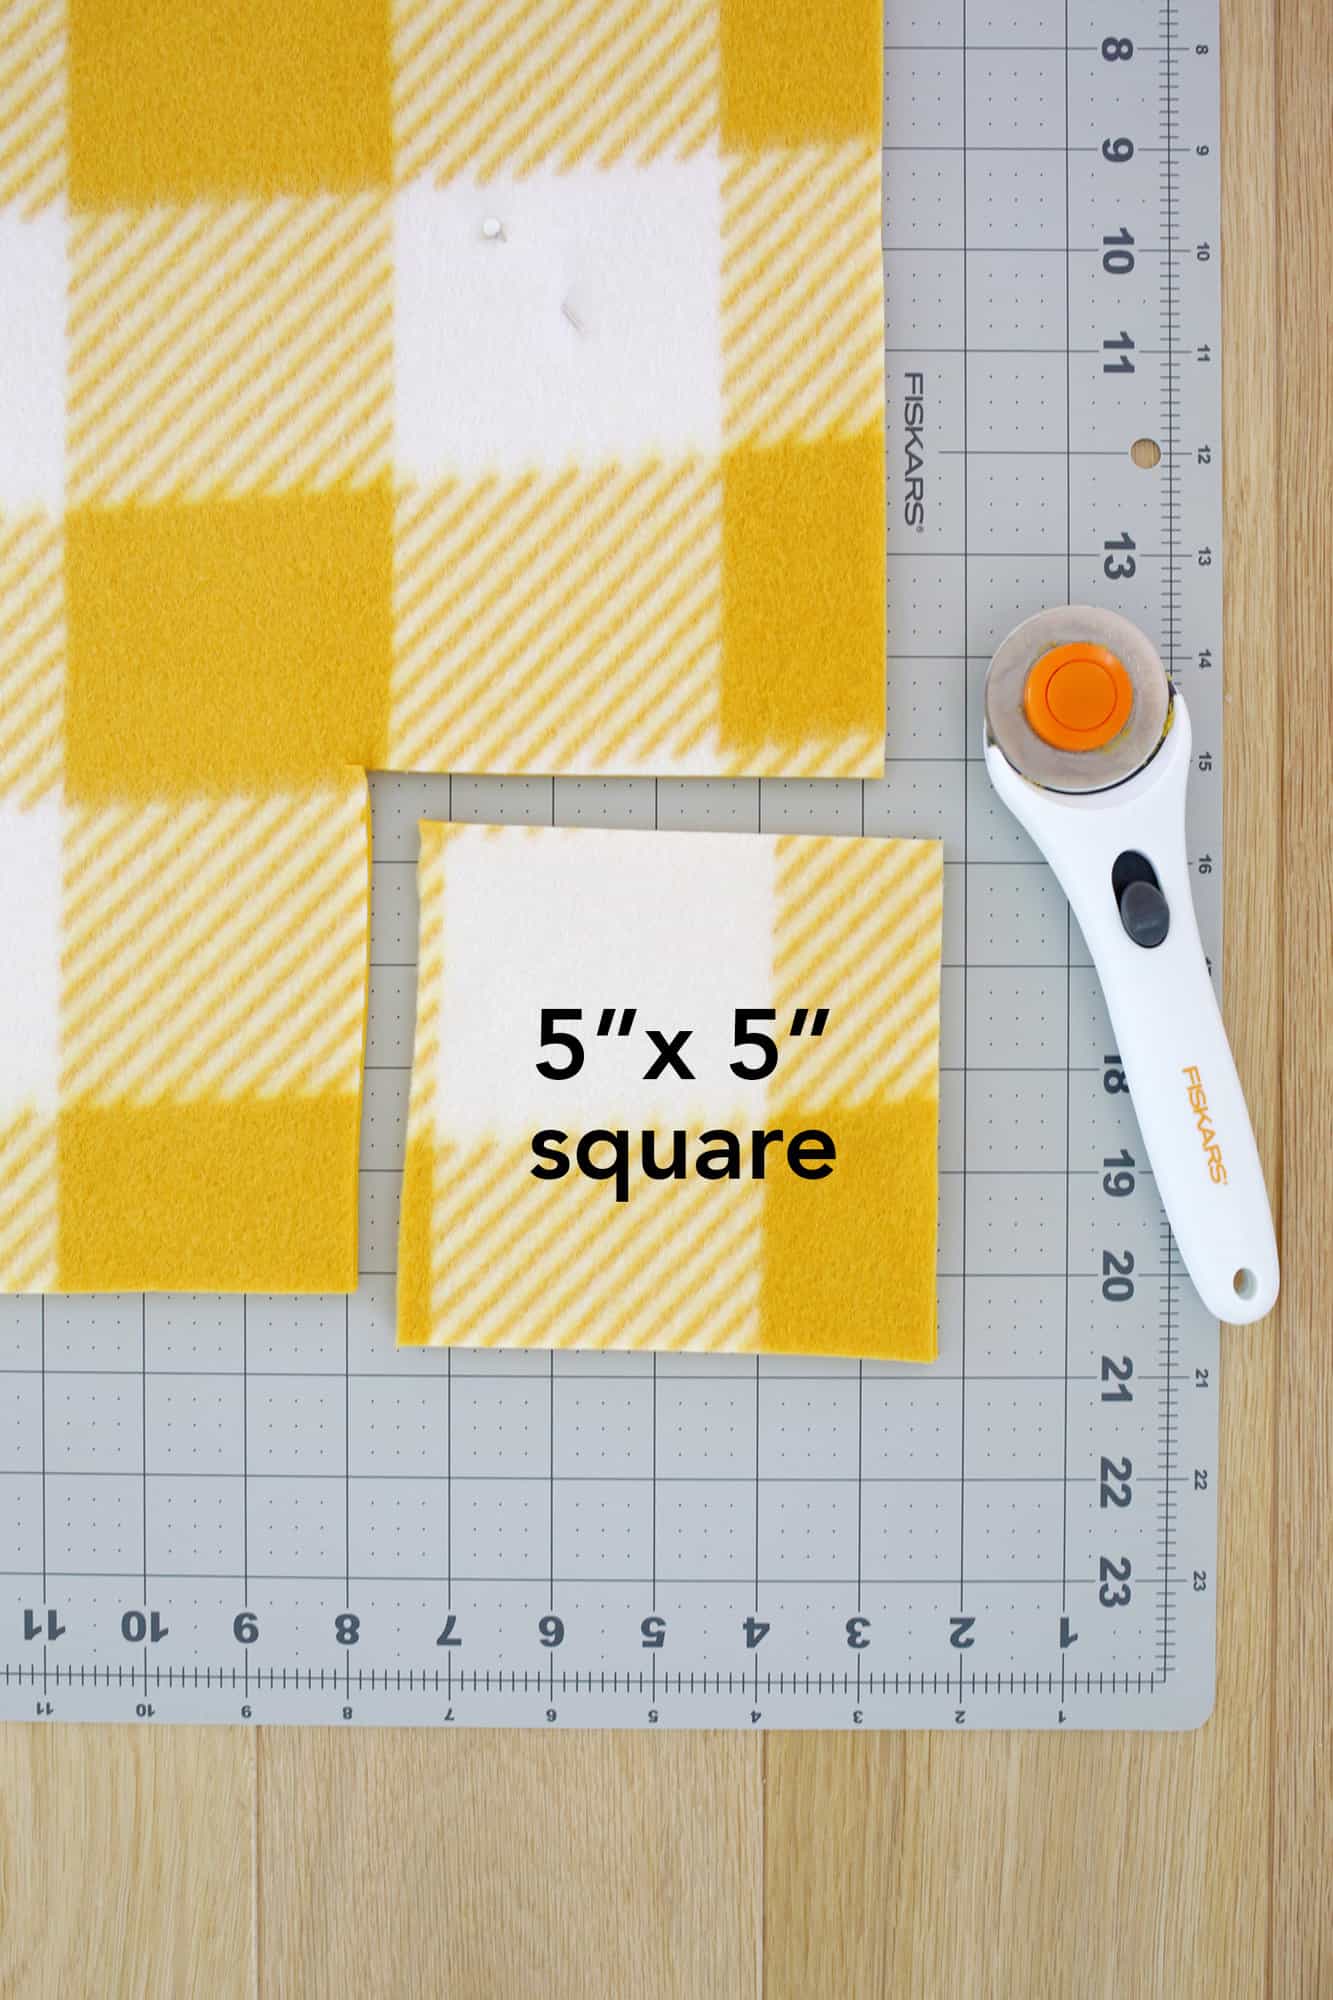
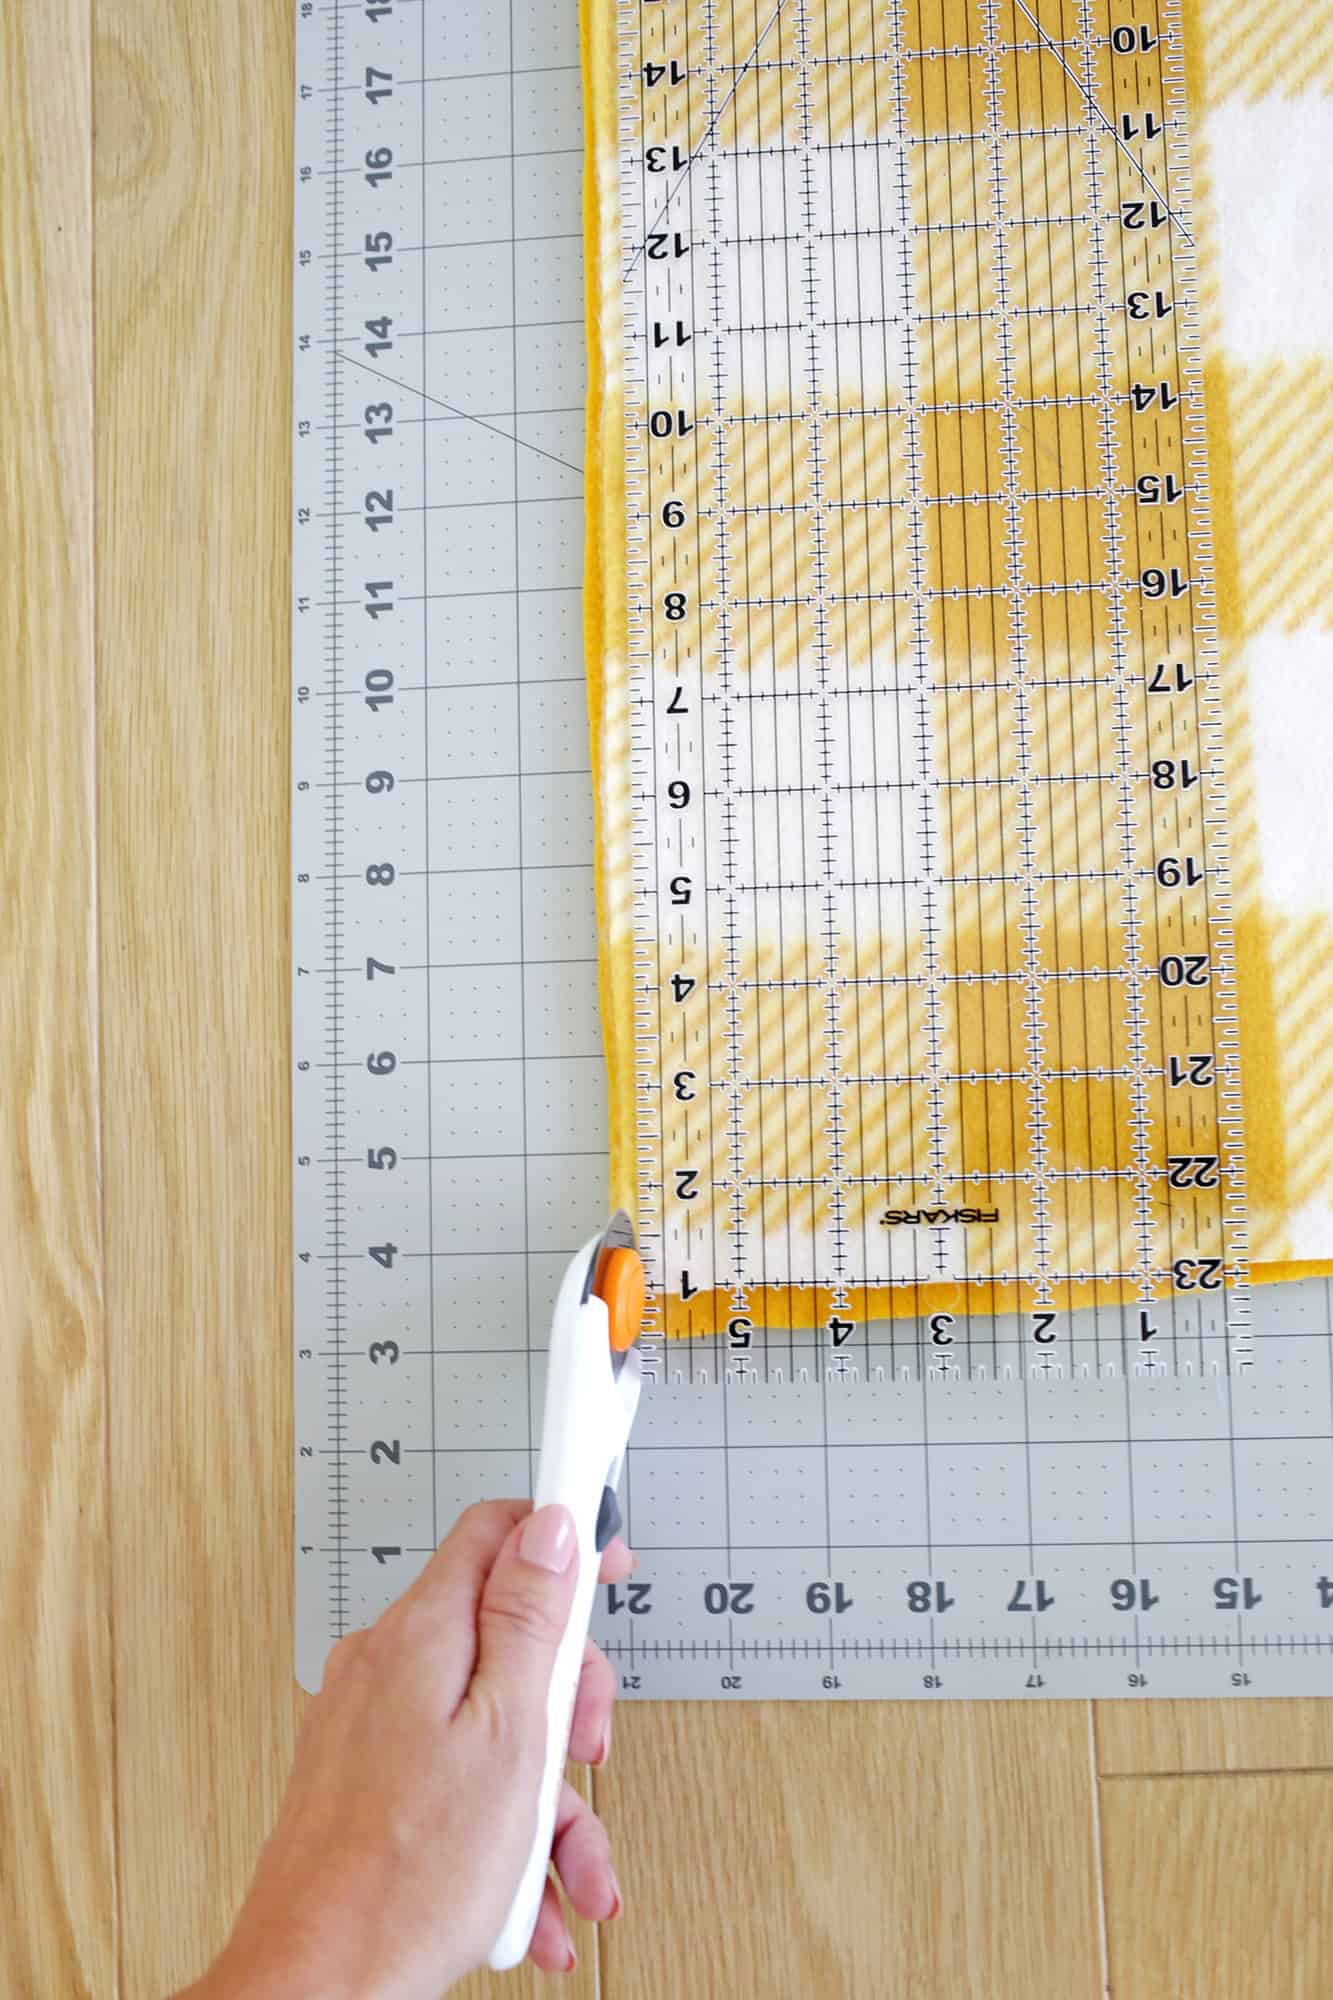
2. Cut the square out of your corners:
On each corner of your quilt, cut a 5″ x 5″ square of fabric with a rotary cutter or fabric shears. The strips that you’ll be cutting next will be 5″ long, so taking this out will remove excess material in the corners so everything looks nice and neat when finished.
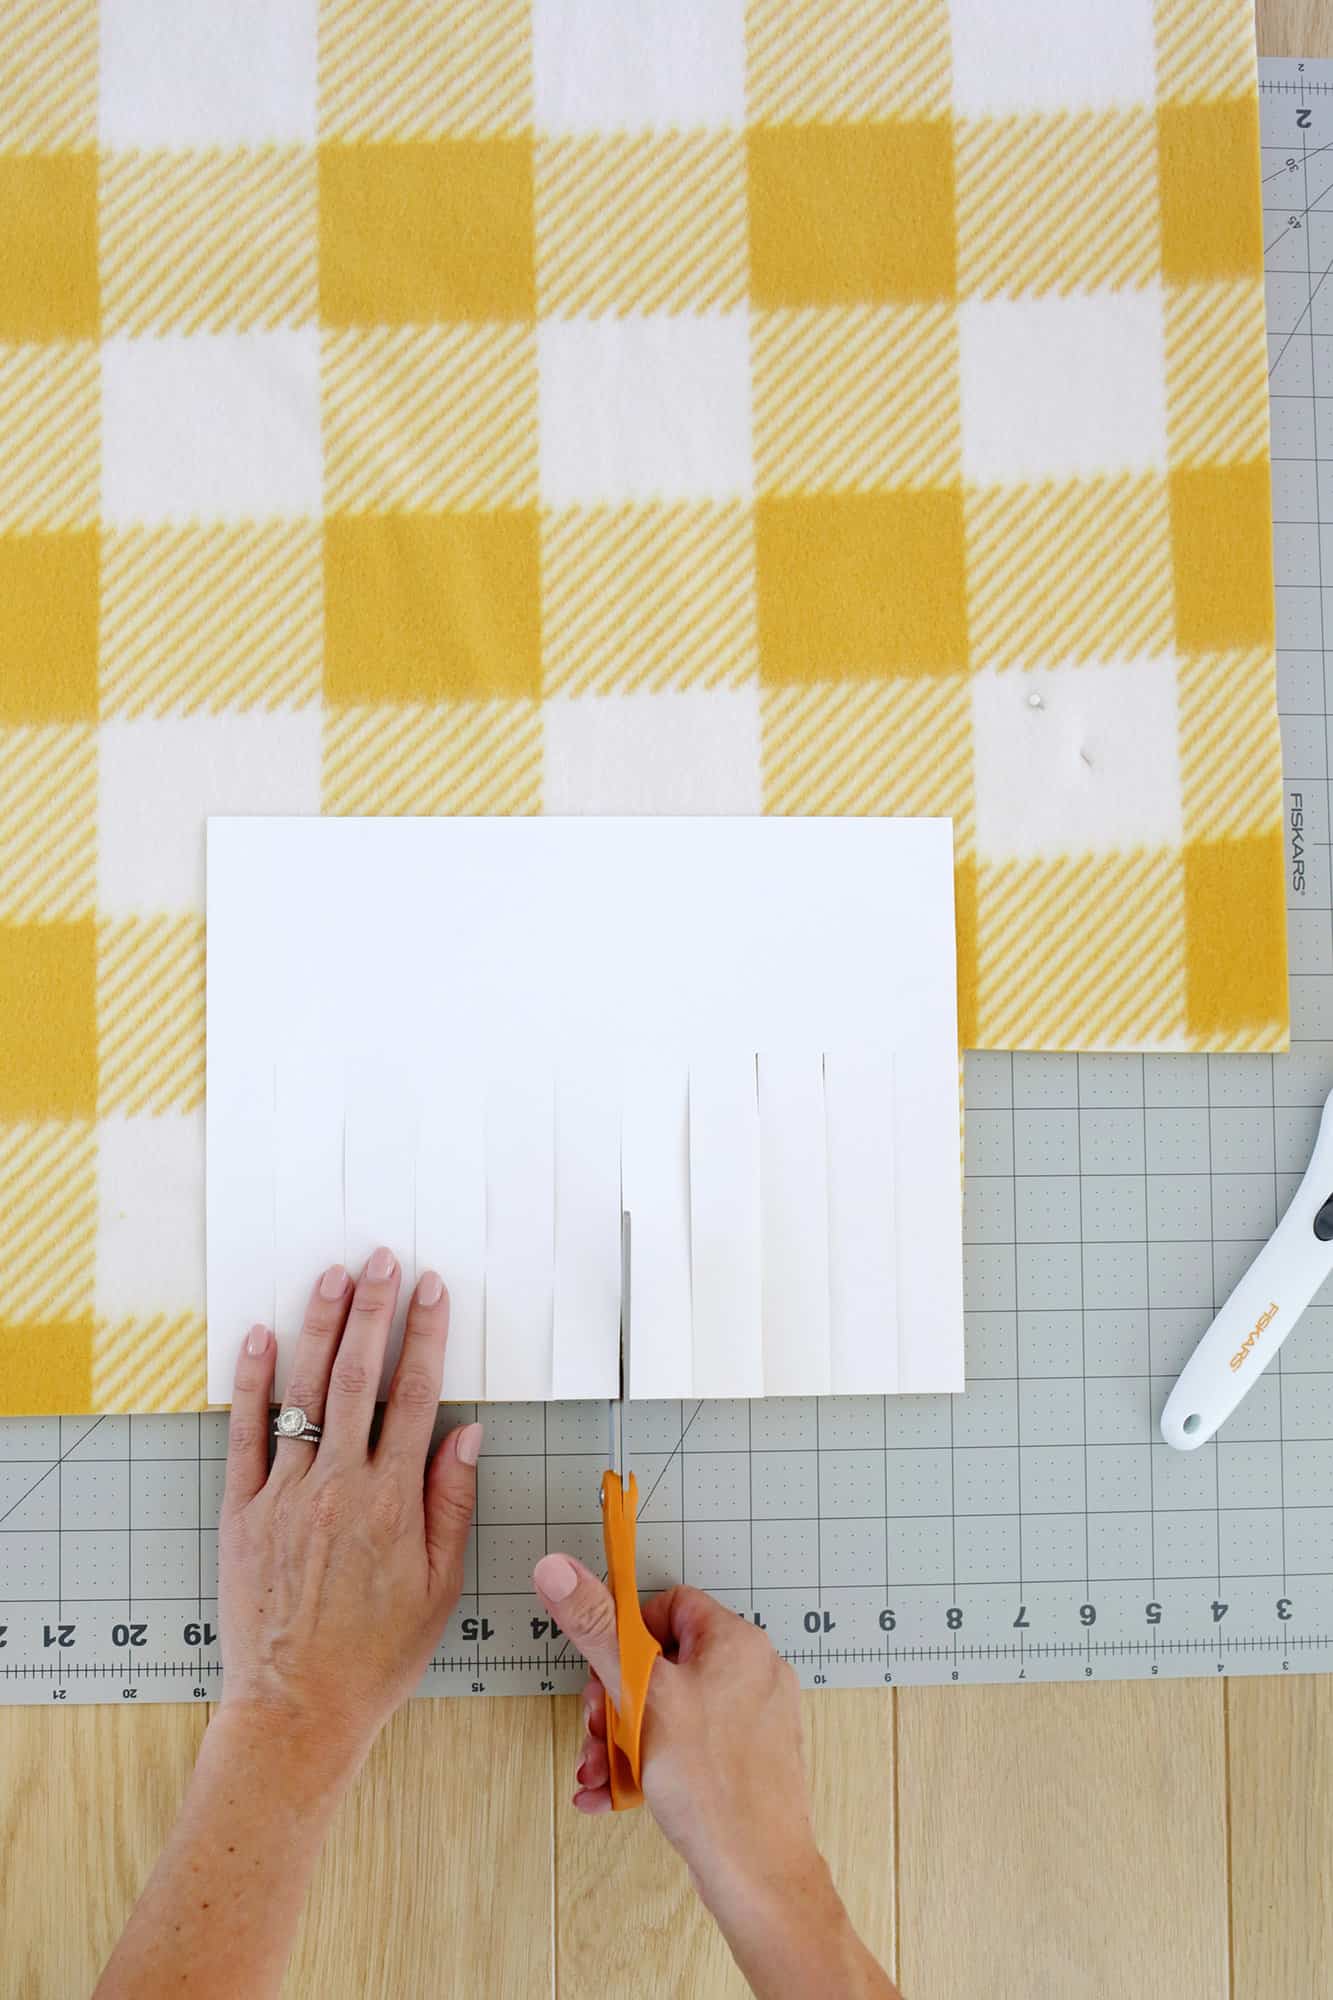
3. Cut your 1″ strips to tie together:
You will now cut strips 1 inch long by 5 inches wide along all sides of your double sided fabric. You can use a rotary cutter and fabric ruler or use fabric scissors to cut.
Some people may prefer to just eyeball the cuts after measuring the first few, or we recommend making a cut pattern like you see above!
Tip: Use a piece of paper (or thin cardboard like from a cereal box) and cut 1″ long 5″ strips to its length. Place the pattern on your fabric and cut along the available cuts to create even bands, moving the pattern down as you move. Easy, and all your cuts will be even!
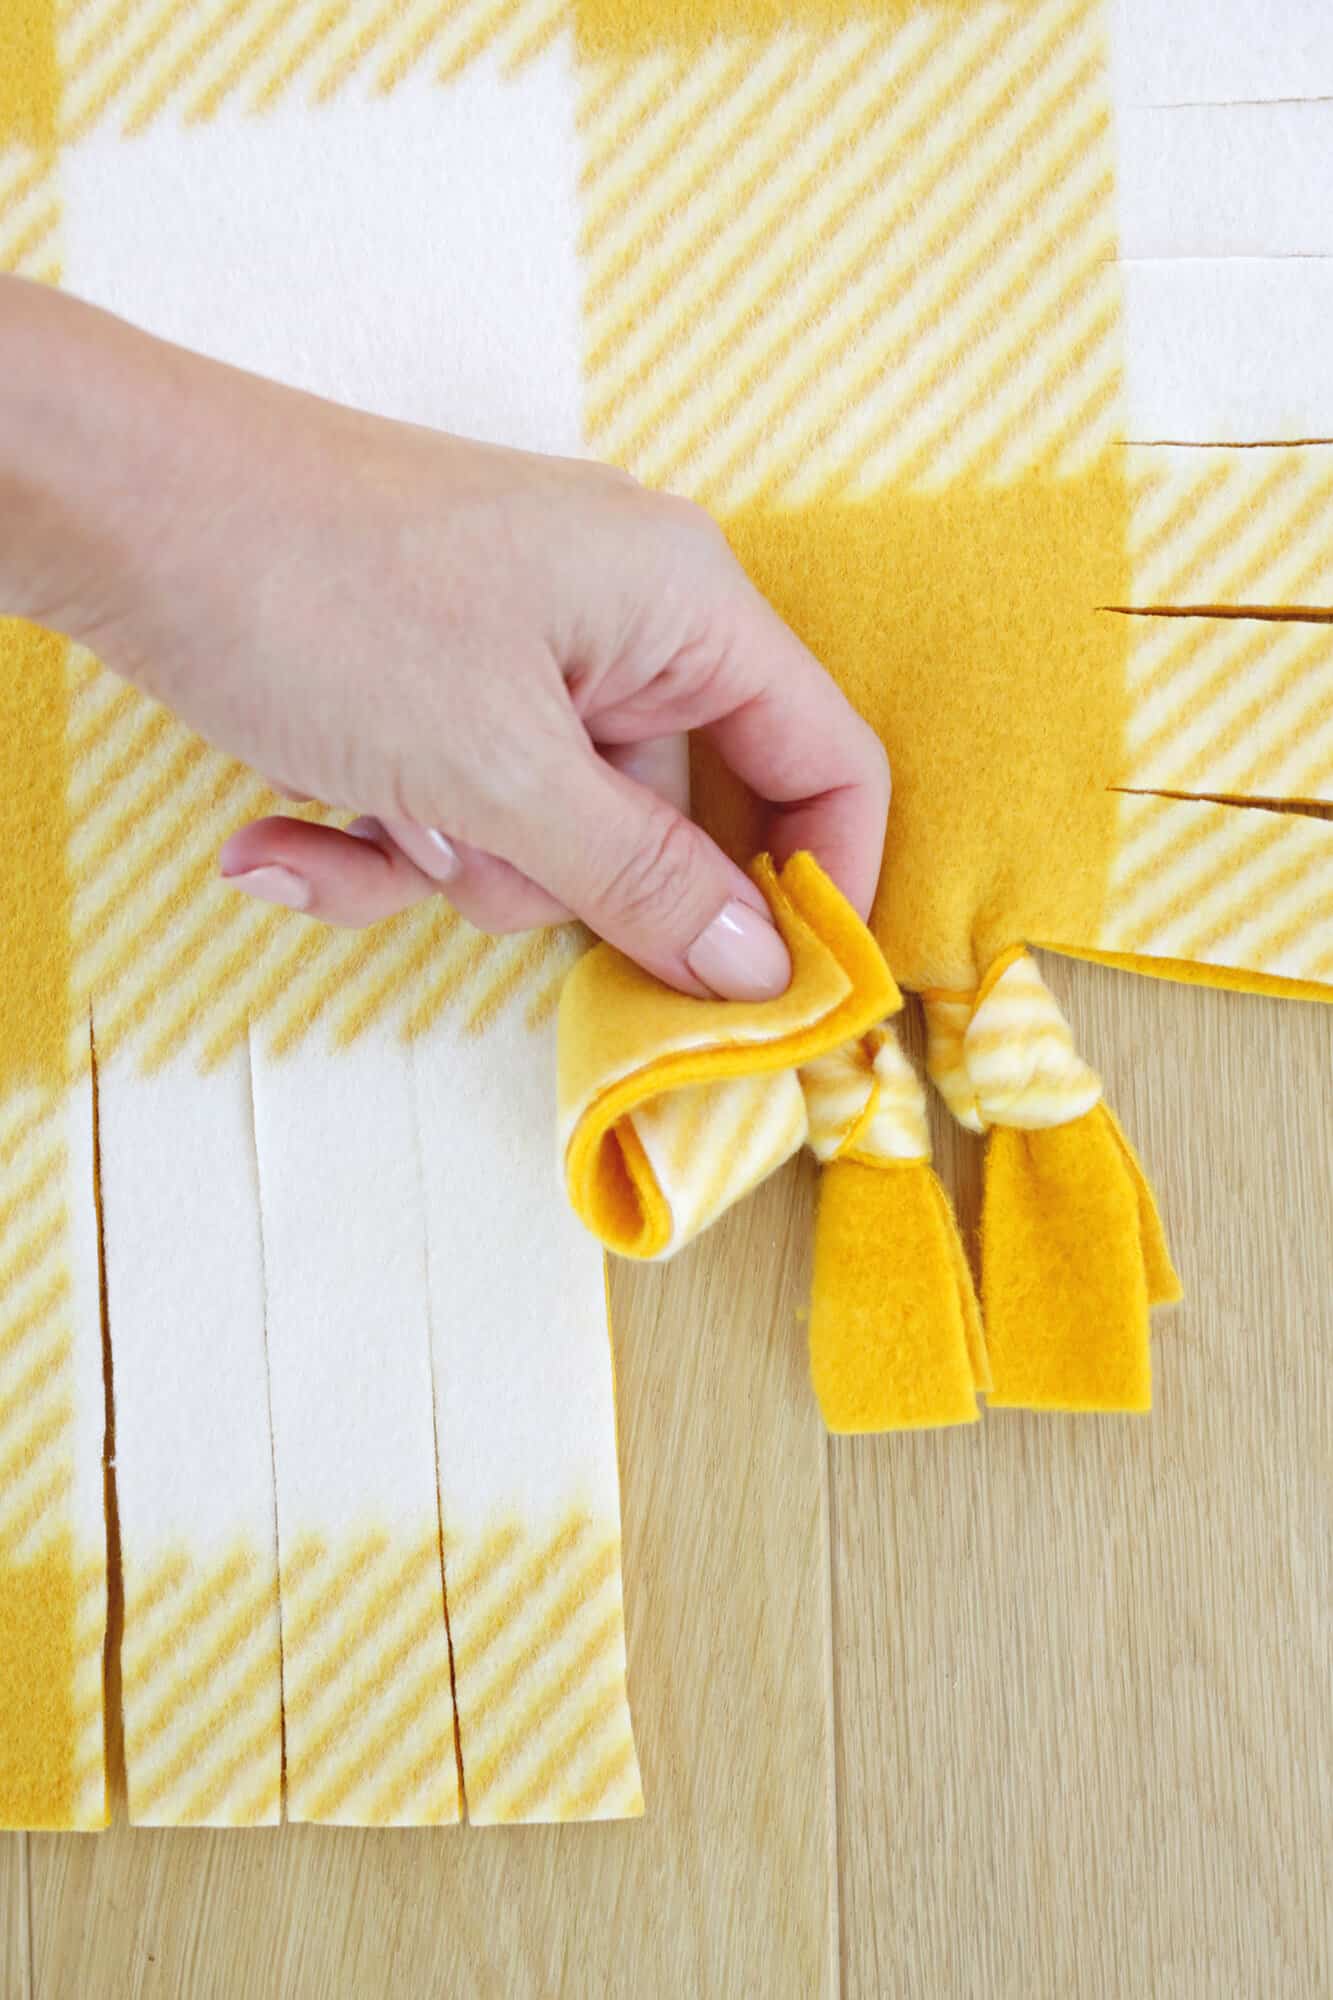
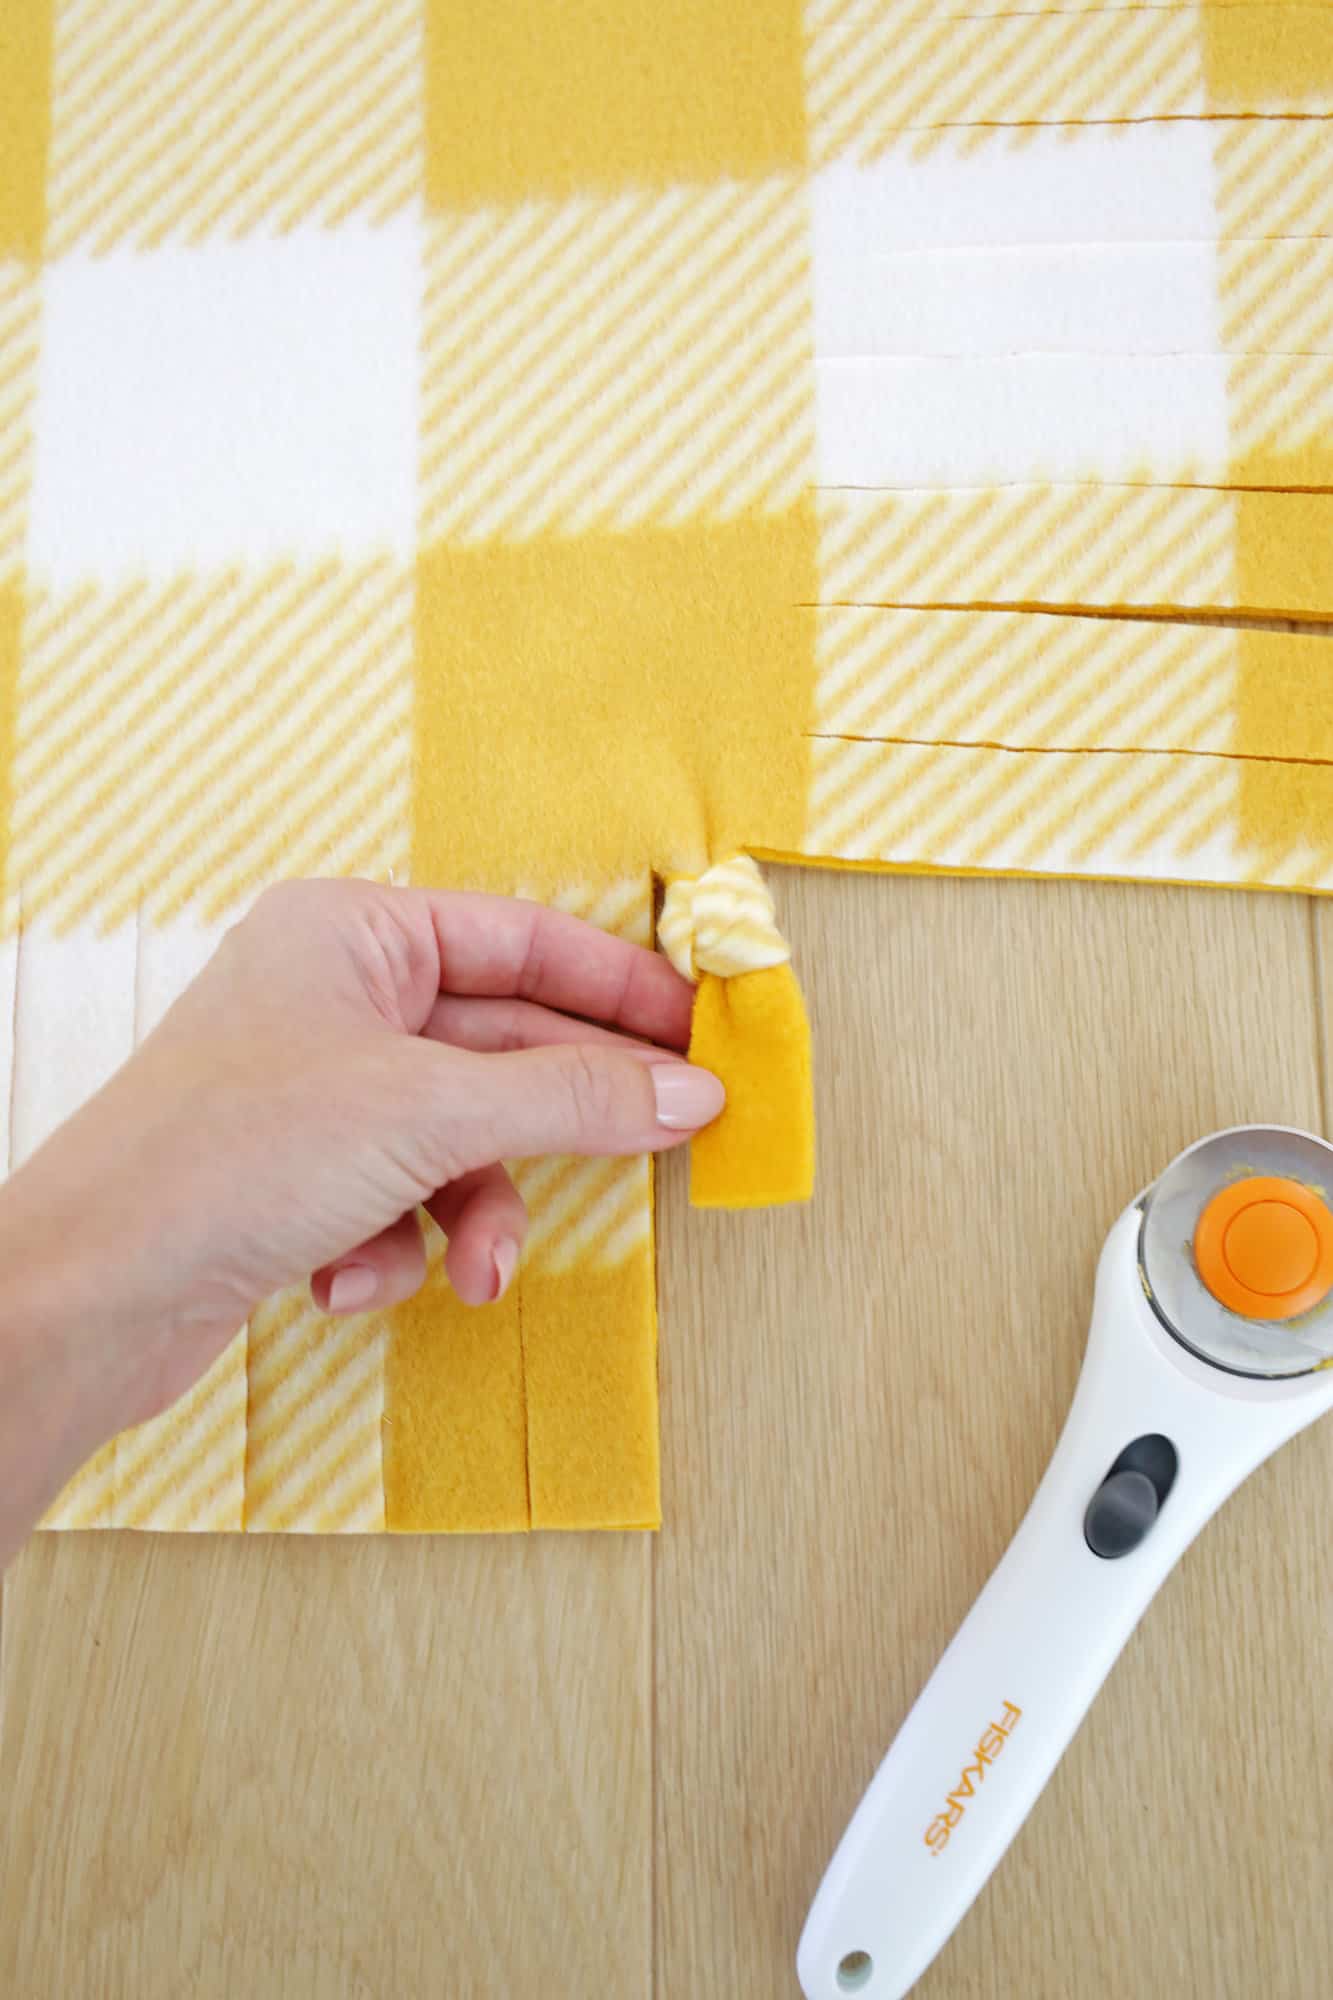
4. Tie your bands:
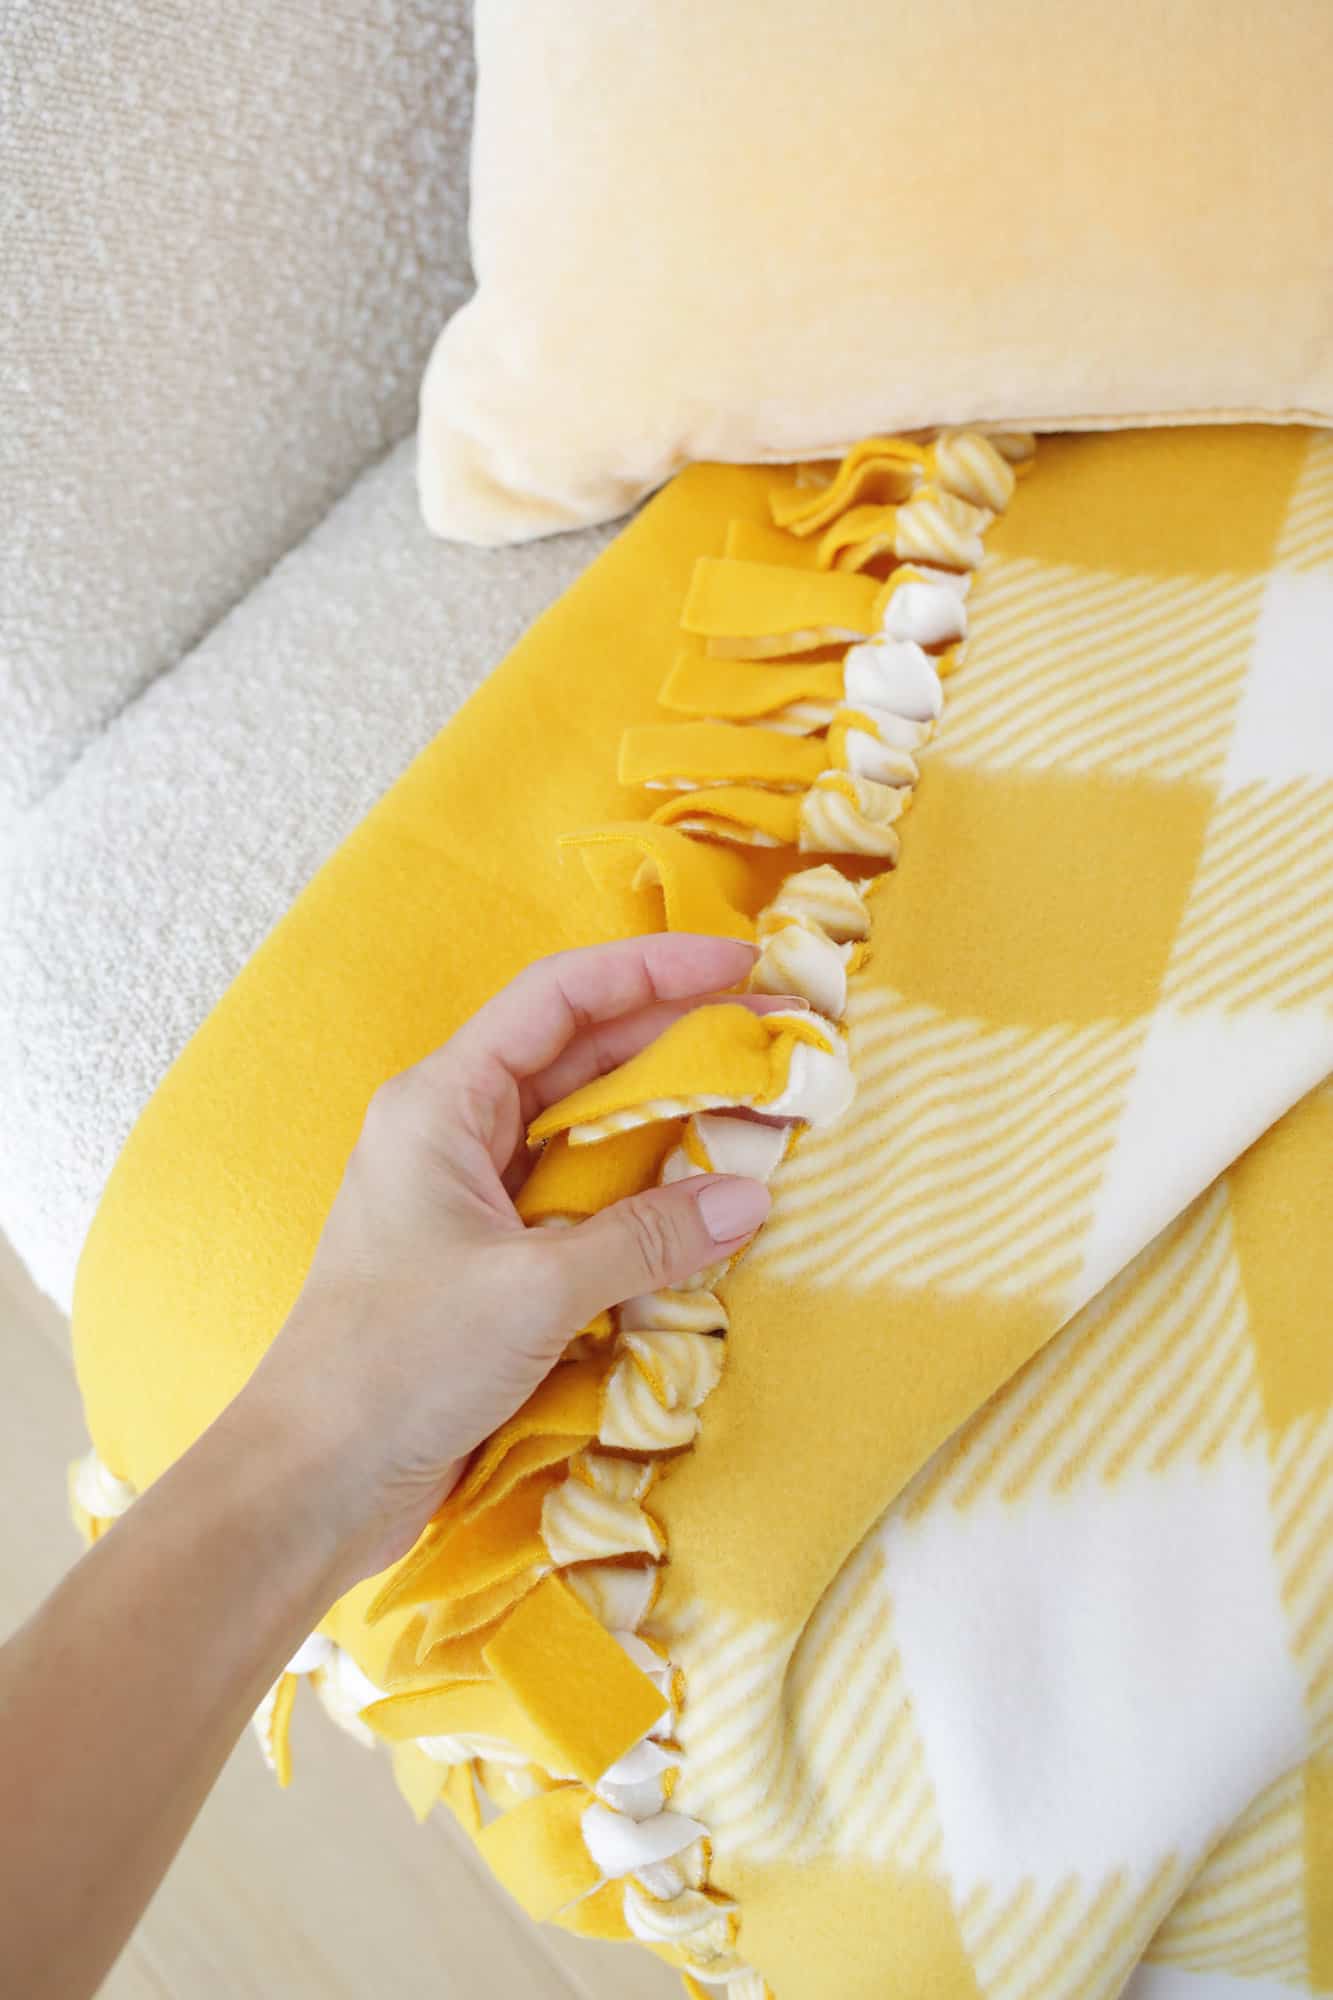
Now it’s time to finish your quilt! Tie each strip the same way you would a balloon (it’s called a balloon knot!) and work your way down each side until you’ve finished tying each string. Once all your knots are tied, your blanket is ready to use or give as a gift!
Some aspects seem harder to bind? You may find that some sides are a little easier to tie than others. This is because the fleece has a weave that makes it a little more stretchy when you pull it one way than the other.
A 5-inch tie is still long enough to tie, even on the nib side, but you’ll find it’s easier to tie on the sides, giving you extra length, and these sides will be a bit quicker.
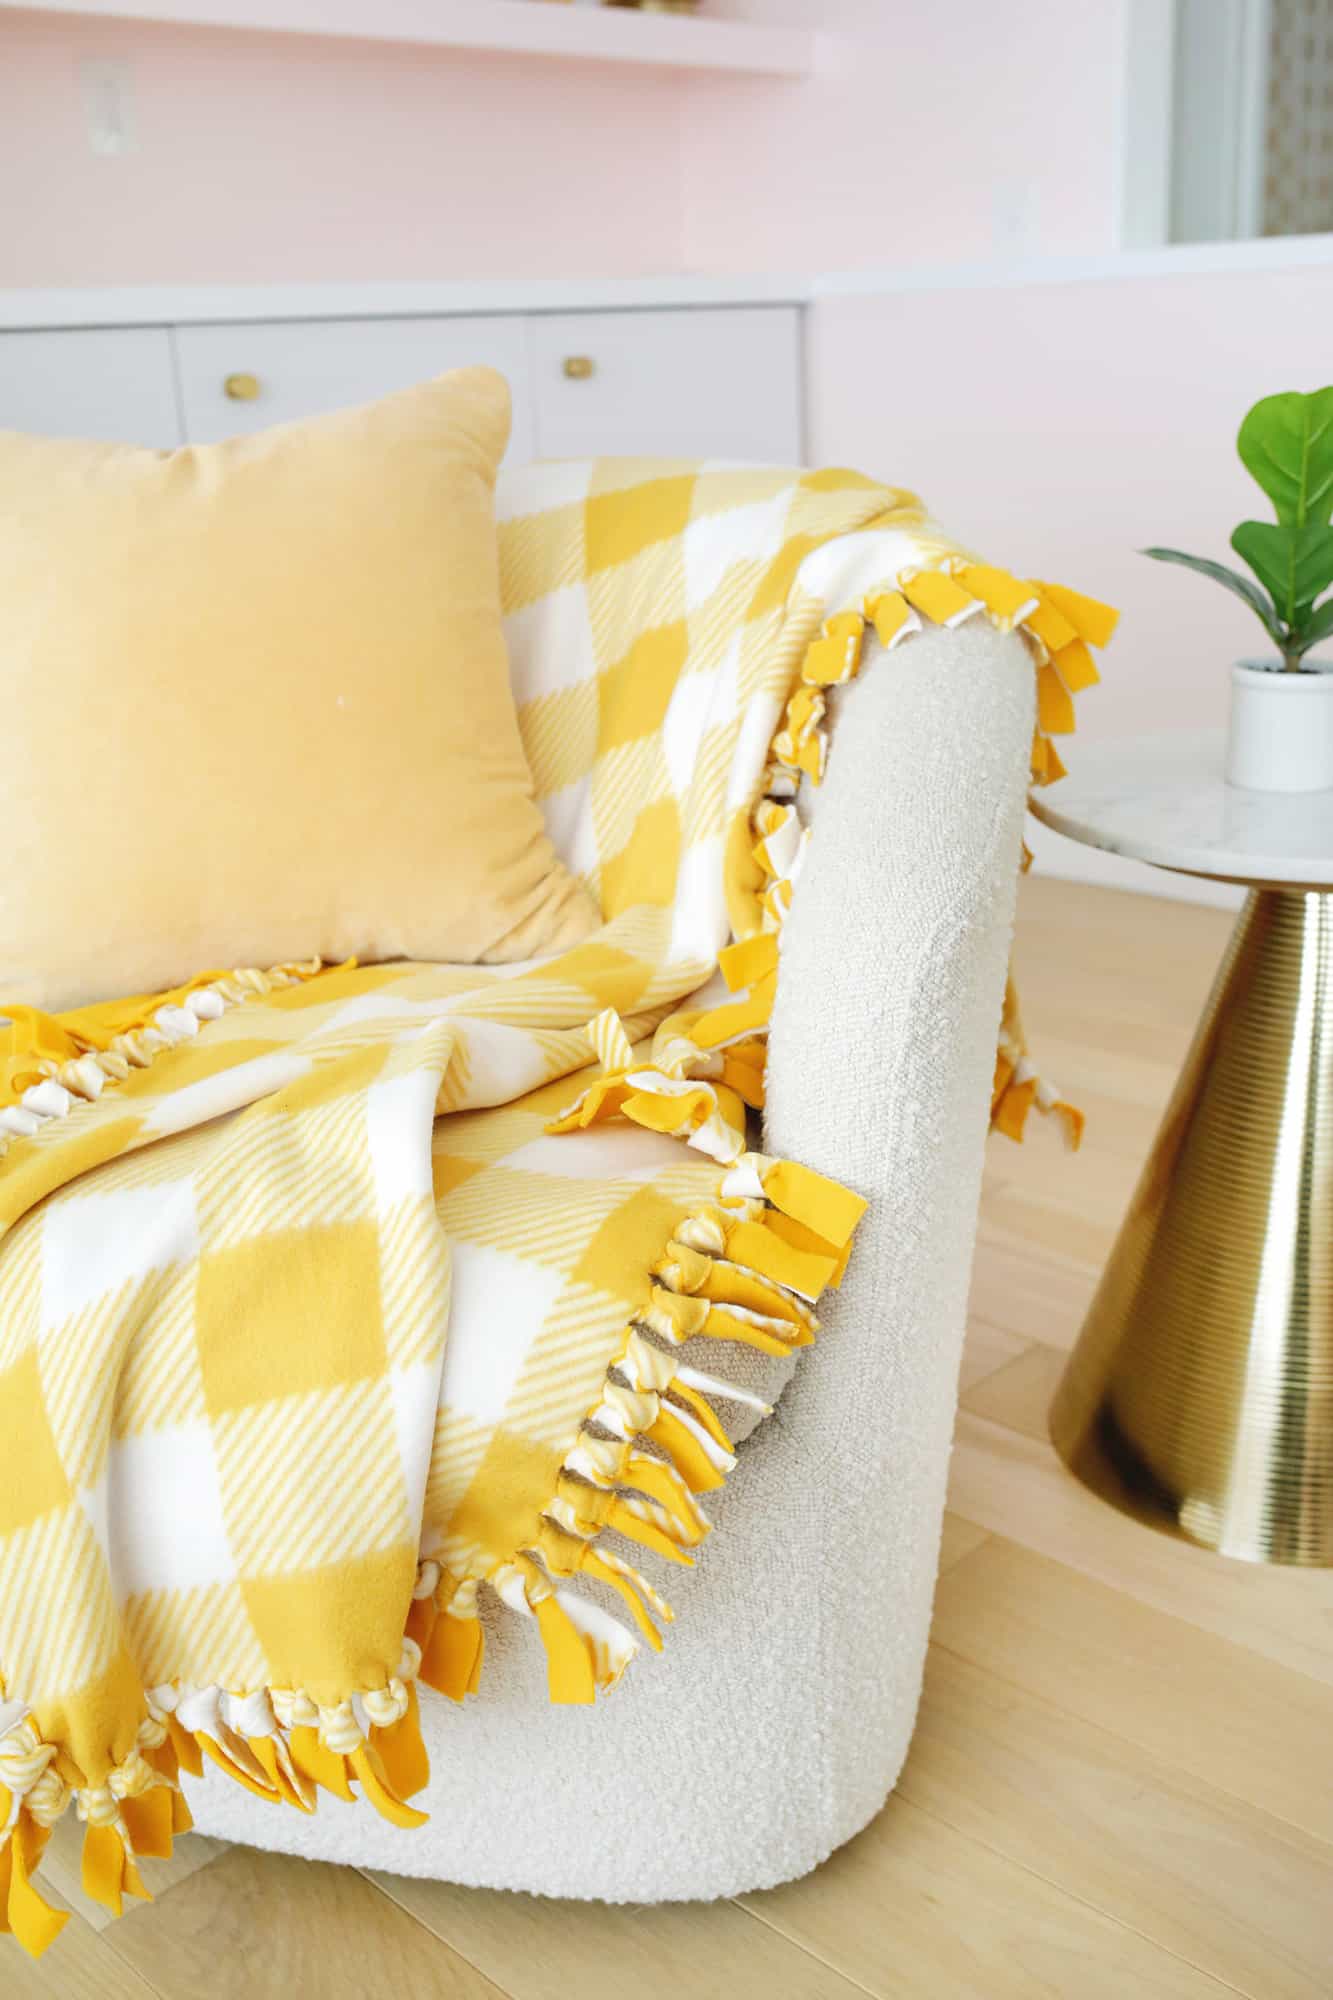
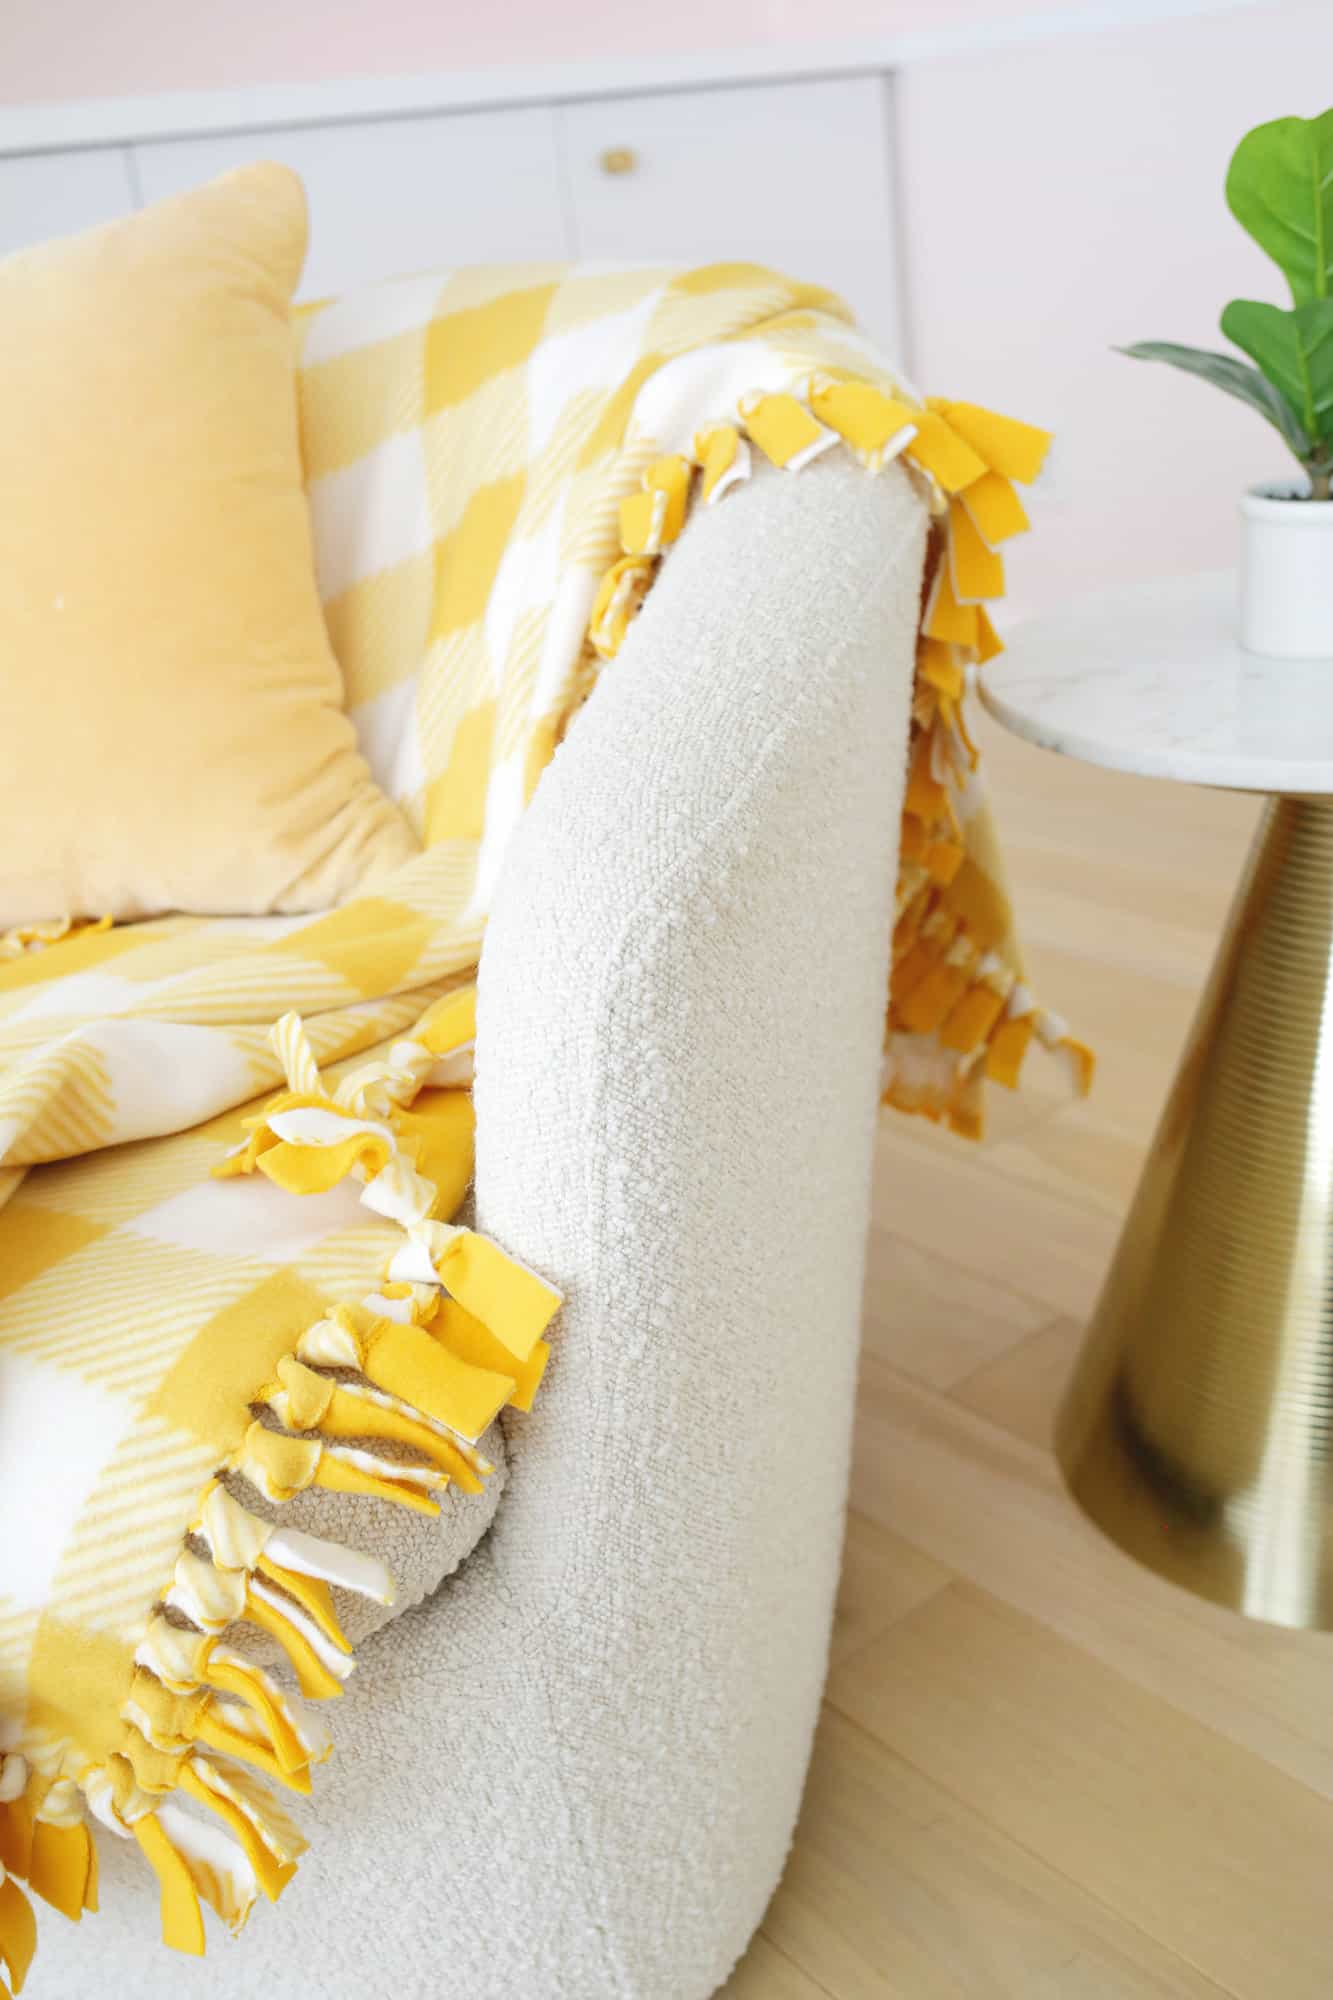
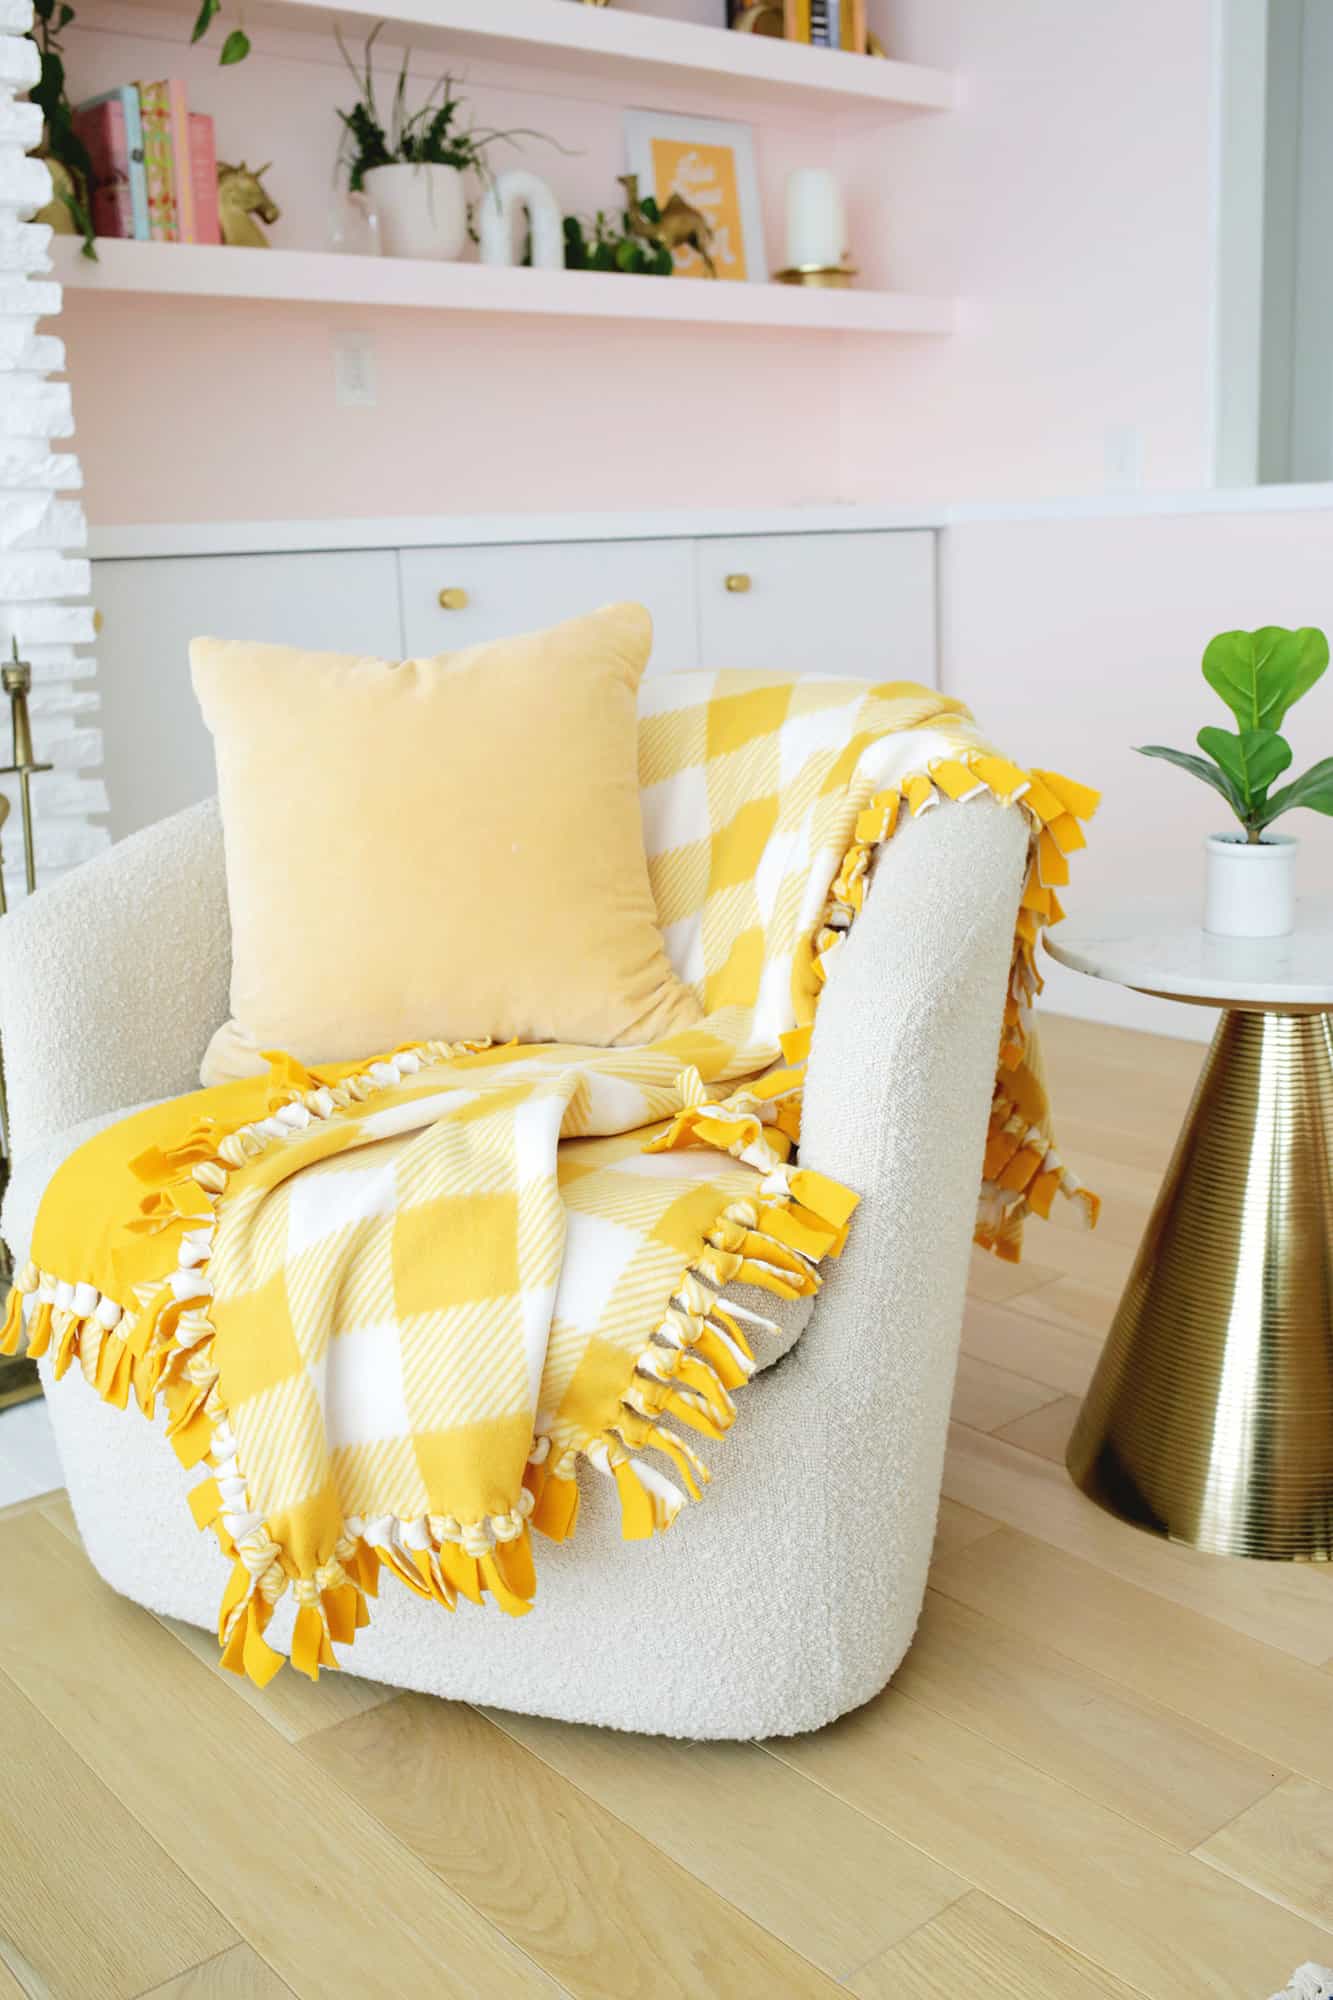
How easy is that? I know fleece blankets can have a lot of personal affection for people because you can make them for friends or family, and they last for years.
This is a great gift option if you want to get a little crafty but want to give something useful (and you can personalize each with your choice of colors and patterns!).
Use awesome tools like Drag Fiskars and a rotary cutter also makes the process a lot easier (having a sharp blade quality helps when making multiple cuts).
I am very pleased with the way my blanket came out! This is a cozy upcoming season for all of us! so so. Laura
Frequently asked questions
How do I wash a seamless fleece blanket?
Wash your fleece blanket in cold water on a gentle and easy-to-clean cycle to keep it looking its best. The gentle cycle is easier on the fibers of the fleece and less soap helps the detergent not stick to your fabric and feels soft.
Do I need to wash my fleece scheme before sewing a seamless fleece blanket?
No! Fleece doesn’t shrink in washing, so you don’t need to pre-wash it before sewing the blanket. The usual purpose of that is to let the fabric shrink before sewing your garment so as not to damage the size later.
For more crafts like this, don’t forget to subscribe!

Get creative ideas for recipes, crafts, decorations and more in your inbox!

Get instructions
Easy way to make a seamless fleece blanket
Guide
1. Trim your fabric
-
Place your two fleece sheets on the floor and line them up as best you can. Use a rotary cutter, fabric ruler and mat (or simply fabric scissors) to cut off any curled ends or edges that are not aligned correctly. Just hit the eyeballs to get the overall rectangular shape as even as possible, but once you’re all done, you won’t be able to tell if a cropped area is a bit narrower or a little wider. .
2. Cut the square out of your corners:
-
On each corner of your quilt, cut a 5″ x 5″ square of fabric with a rotary cutter or fabric shears. The strips that you’ll be cutting next will be 5″ long so this corner scoop will remove excess material in the corners so everything looks nice and neat when finished.
3. Cut your 1″ strips to tie together:
-
You will now cut strips 1 inch long by 5 inches wide along all sides of your double sided fabric. You can use a rotary cutter and fabric ruler or use fabric scissors to cut. Some people may prefer to have their eyeball removed only after the first few measurements, or, we recommend…
-
Tip: Make a cut pattern like you see above! Use a piece of paper (or thin cardboard like from a cereal box) and cut 1″ long 5″ strips to its length. Place the pattern on your fabric and cut along the available cuts to create uniform bands that move the pattern down as you move. Easy and all your cuts will be even!
4. Tie your bands
-
Now it’s time to finish your quilt! Tie each strip the same way you would a balloon (it’s called a balloon knot!) and work your way down each side until you’ve finished tying each string. Once all your knots are tied, your blanket is ready to use or give as a gift!
Note
Some aspects seem harder to bind? You may find that some sides are a little easier to tie than others, and that’s because the fleece has a weave that makes it a little more stretchy when you pull it one way than the other. A 5-inch tie is still long enough to tie, even on the nib side, but you’ll find it’s easier to tie on the sides, giving you extra length, and these sides will be a bit quicker.