

At A Beautiful Mess, we love plants and plant stalls equally here, and adding greenery to your space is one of our favorite ways to liven up any area of your home. your house.
I recently came across a domed plant stand that I love, but I couldn’t make the $70 price tag. I thought it would be interesting to make my own and use supplies to make several stands at a time for a fraction of the cost.
For this DIY I’m using small foam wreath because they’re inexpensive, easy to cut (I used a bread knife) and they can be glued together and painted. These slotted arch plant stands take a few minutes to put together, but the result is also really fun and trendy.
Do you like a DIY plant stand? Try these:

You can see that there are two ways you can make the stand — or flatten it horizontally (that is super easy and quick) or curl, just takes a little more time (but totally worth it).
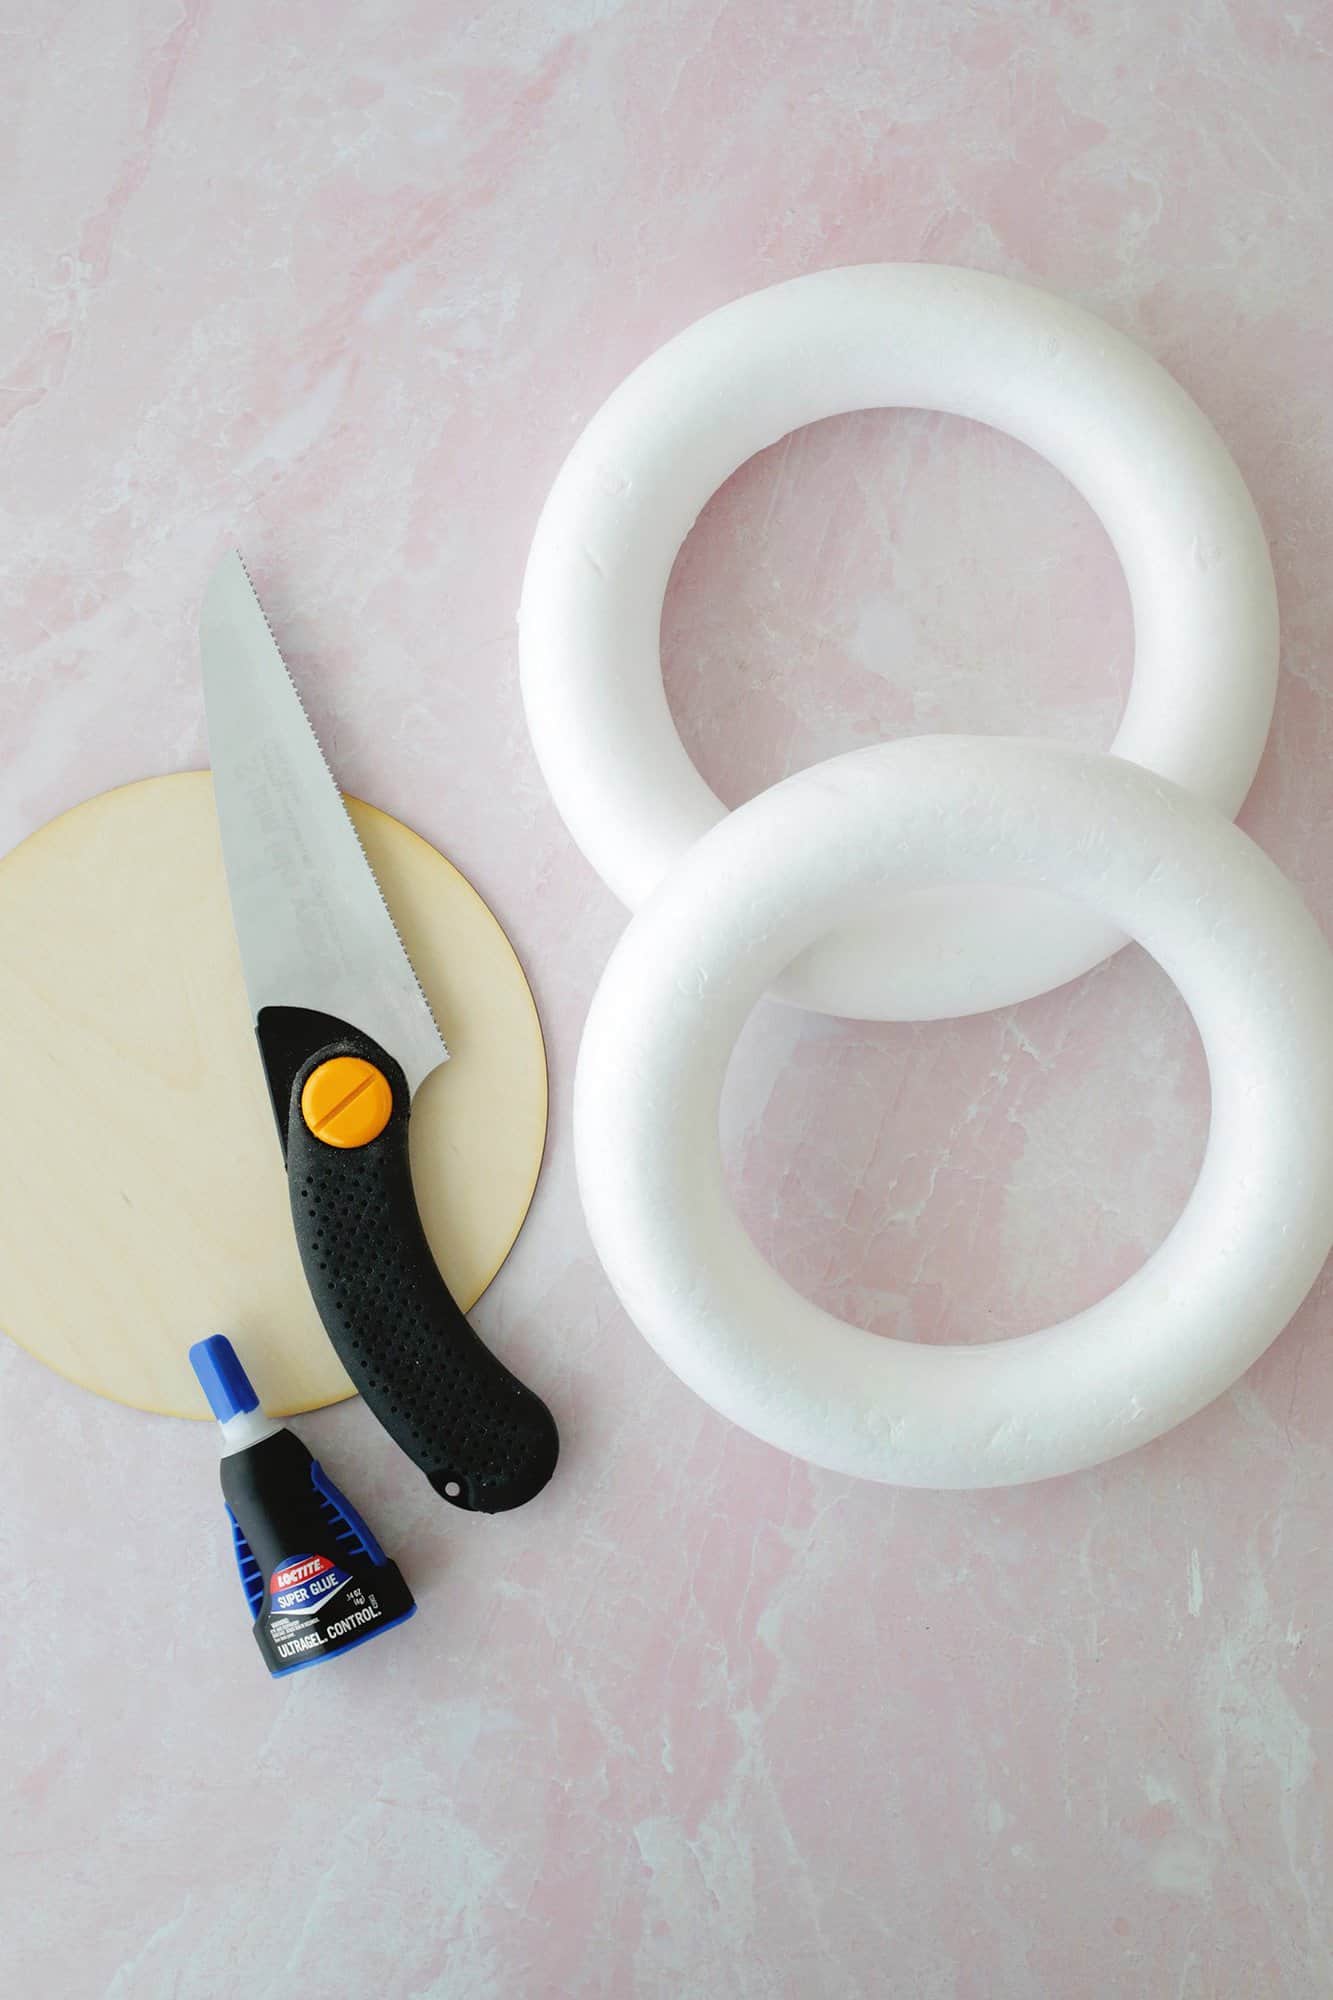
Munition:
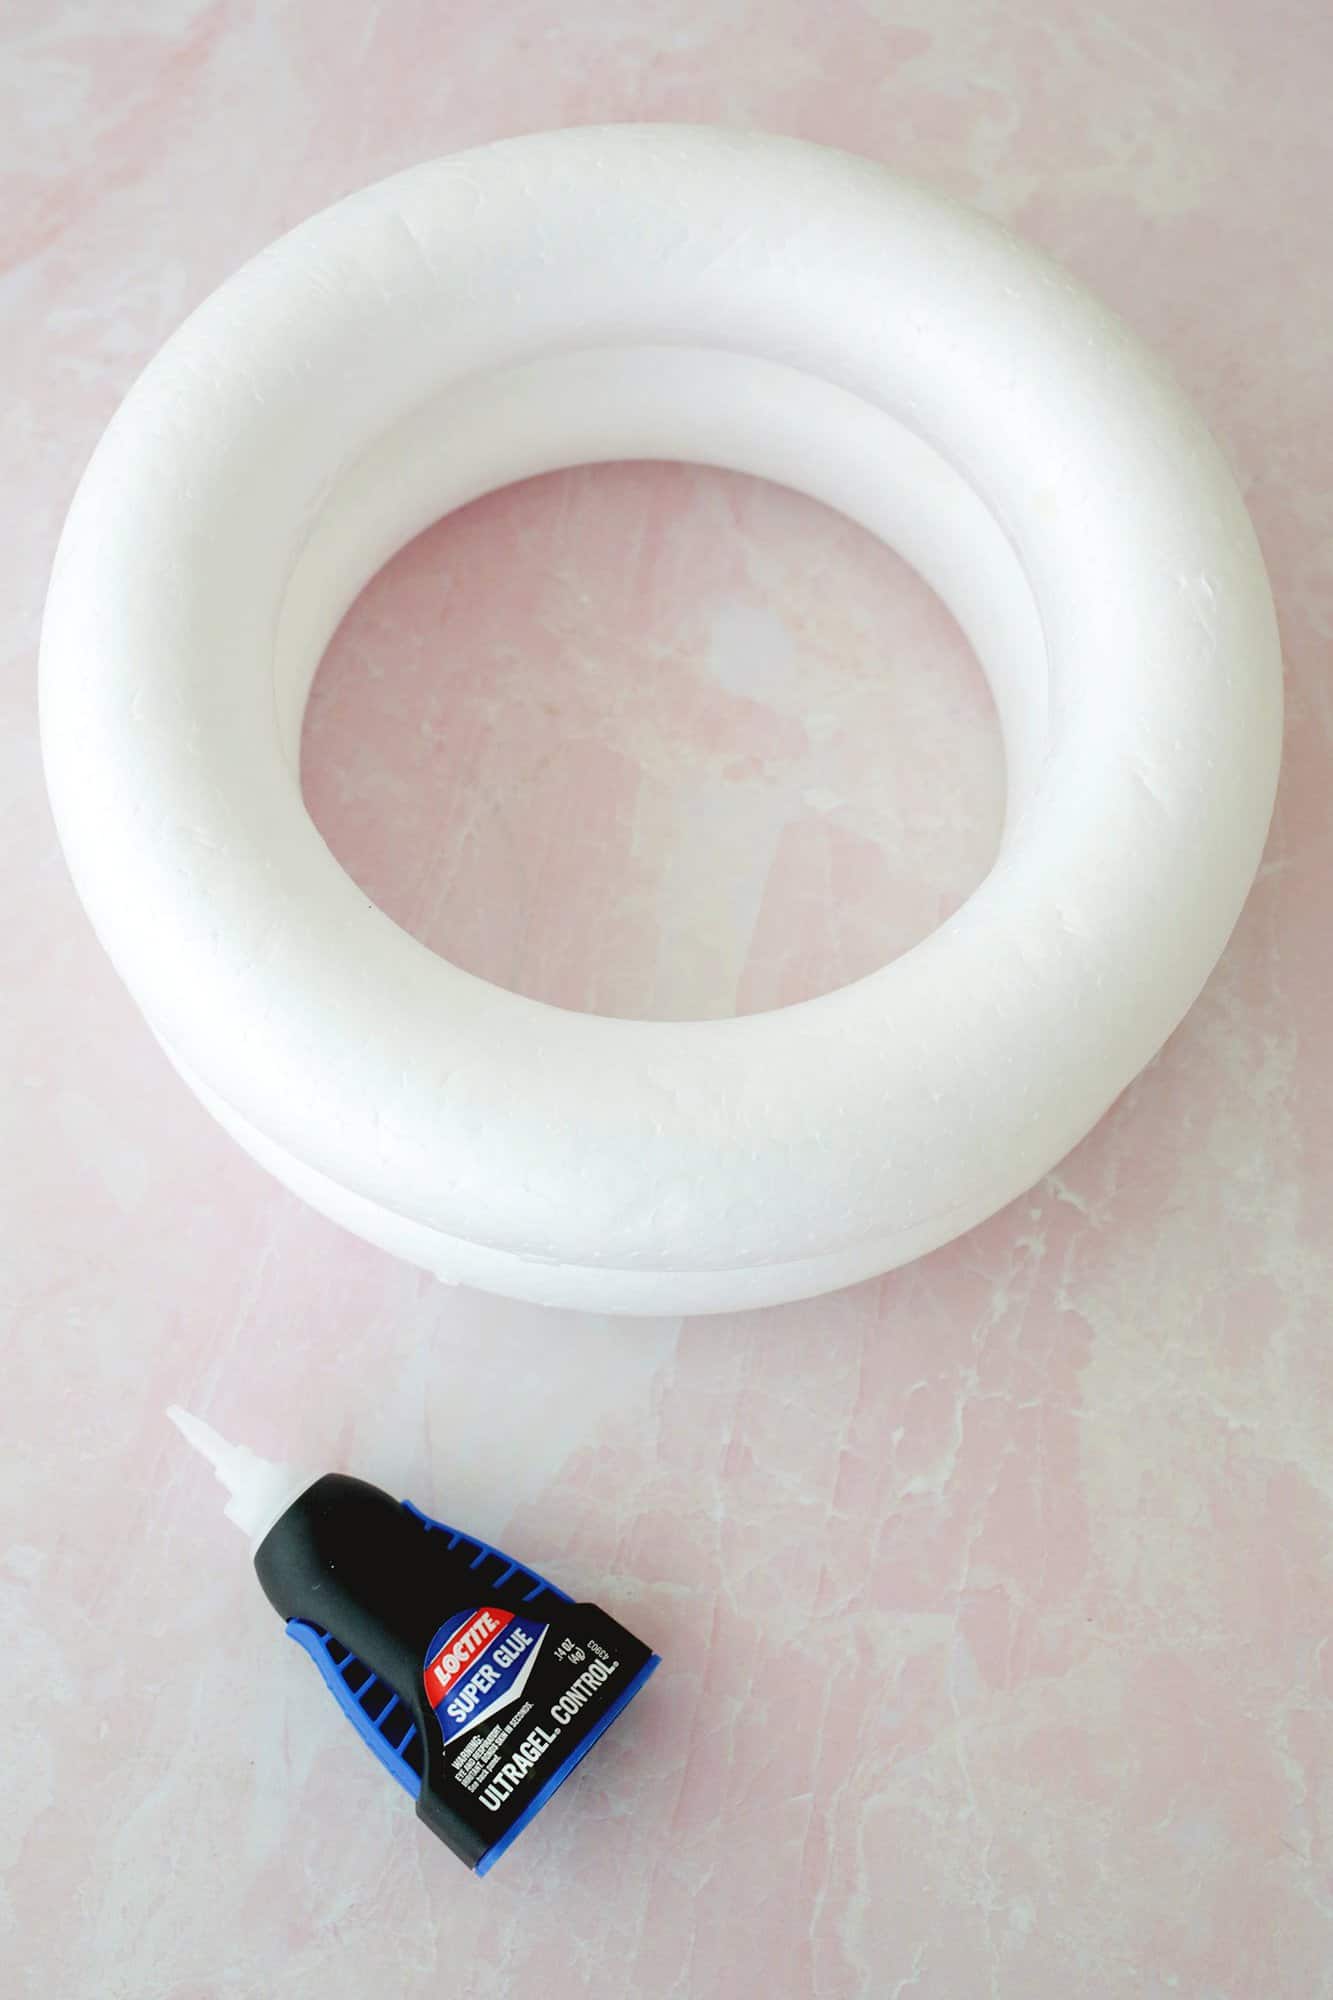
-sponge wreath (I used this 8″ size)
– super glue or hot glue gun
-the wooden circle is a little smaller than yours (I used these 7 inch circles)
-painter’s tape (optional)
– small manual hand saw or bread knife
– spray paint or acrylic paint of your choice
Horizontally slotted stand: To make a rack with horizontal grooves, all you have to do is glue several rings of foam together to make the base. I did two but you can do more to make it taller.
Once they’re attached, glue your wooden circle to the center above and you’re ready to paint!
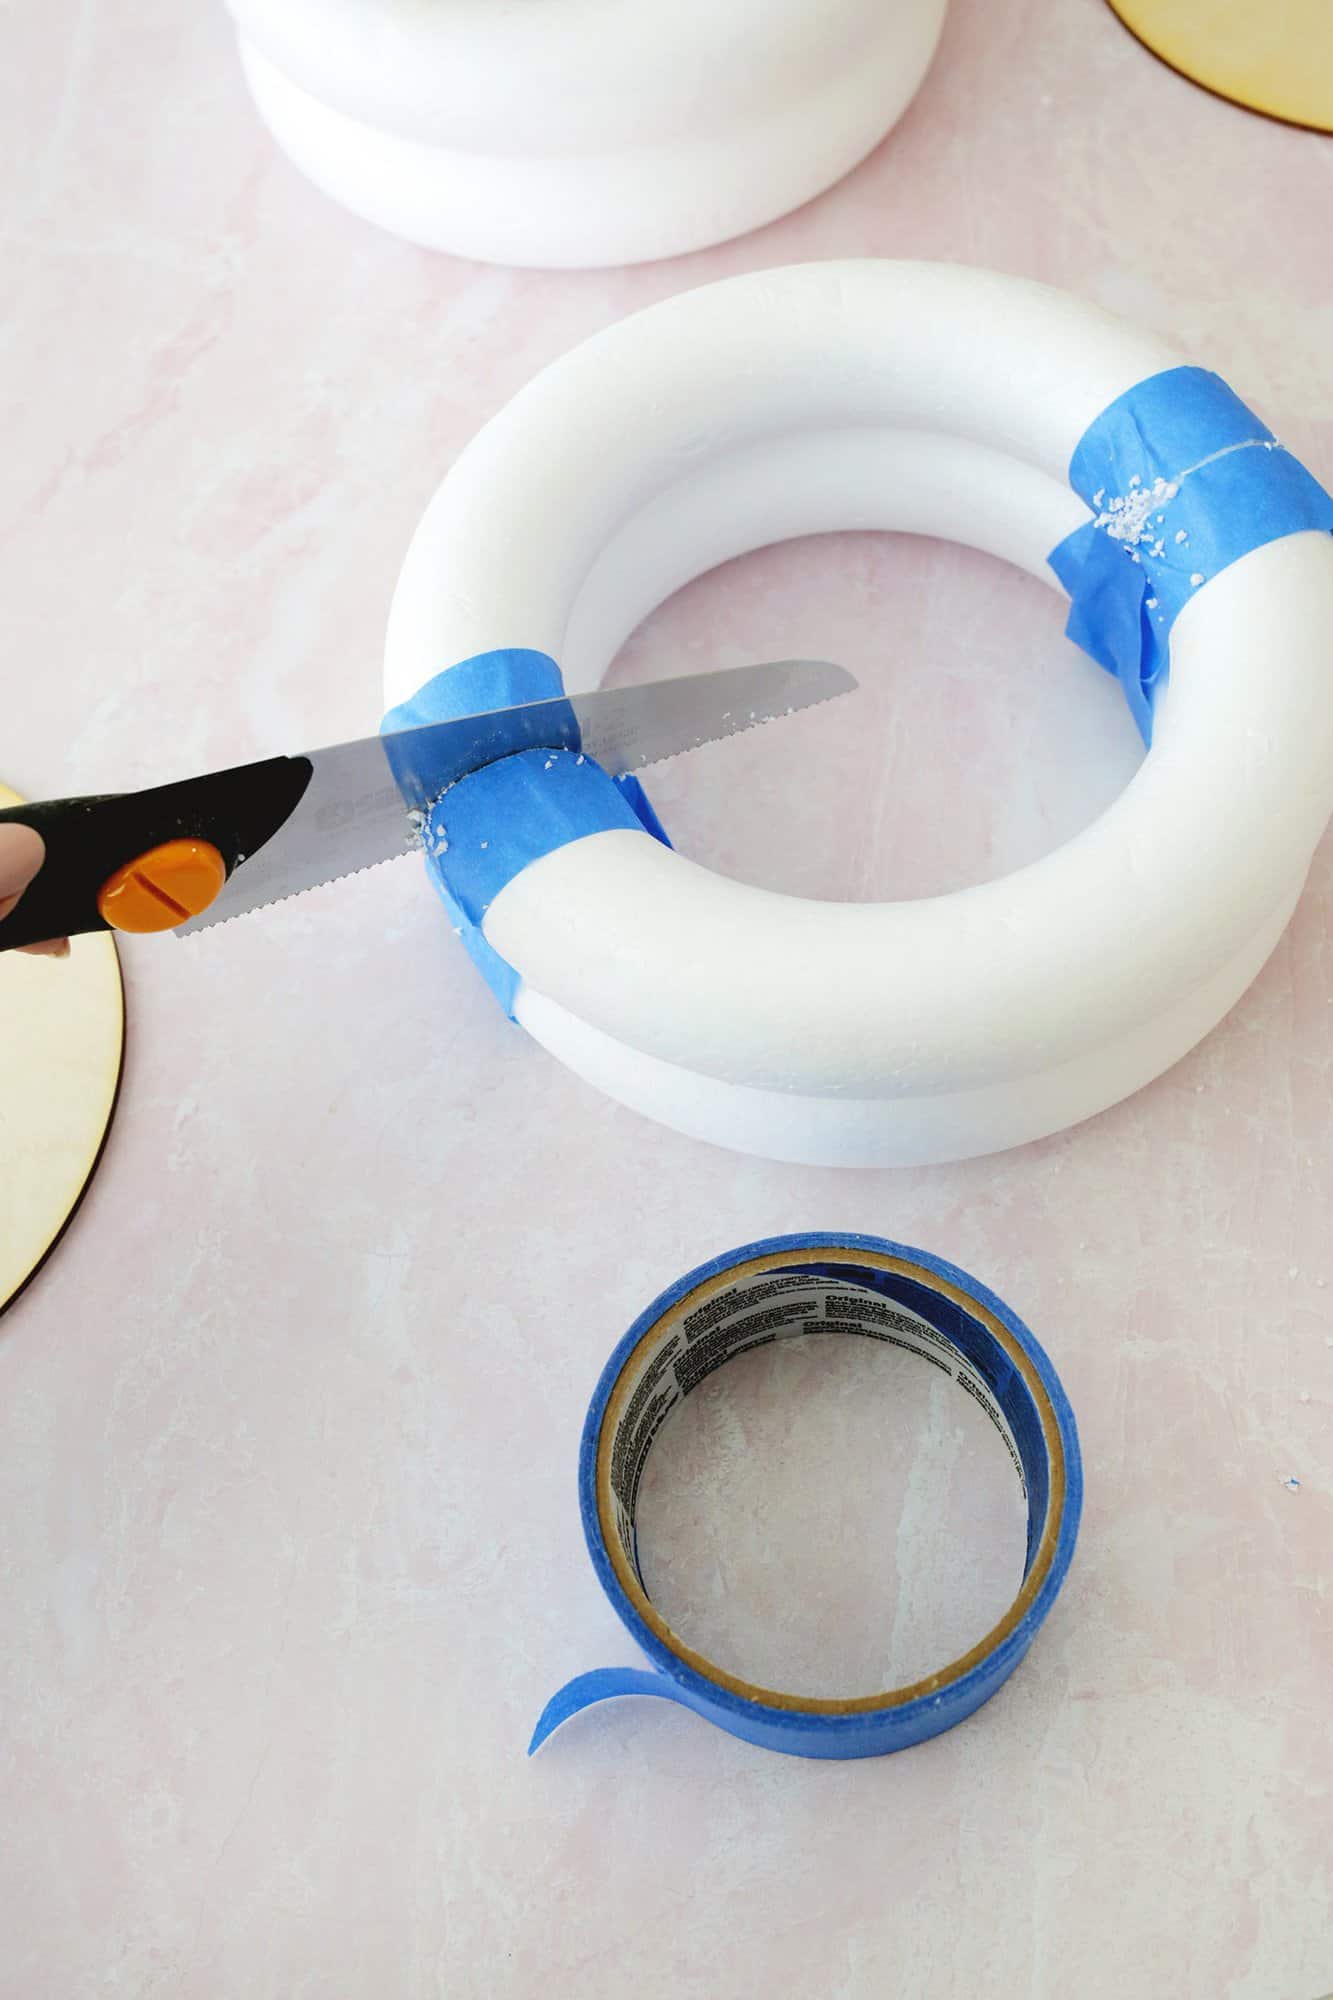
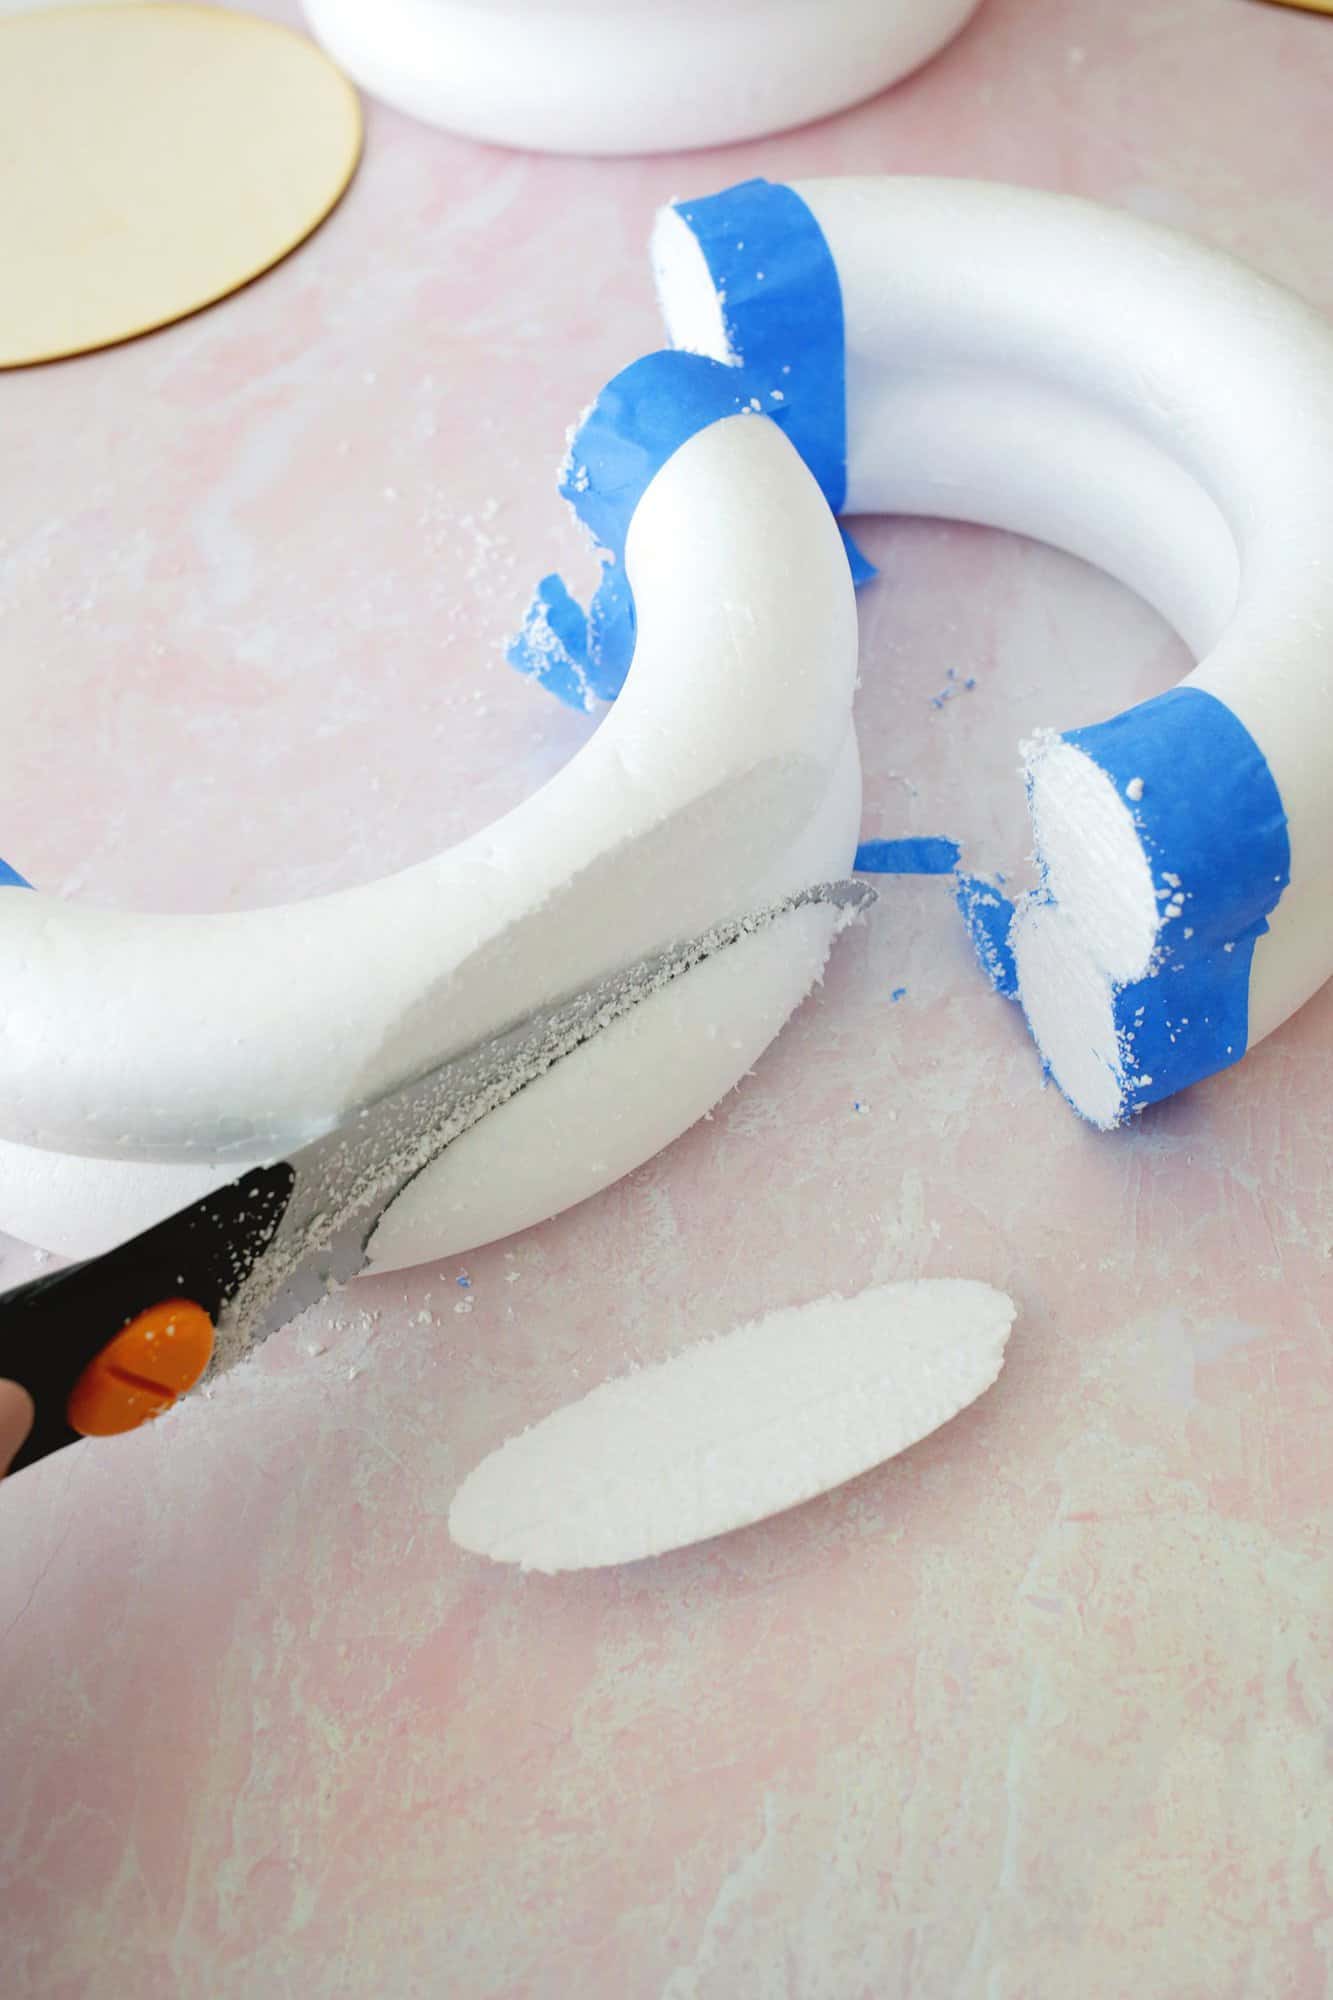
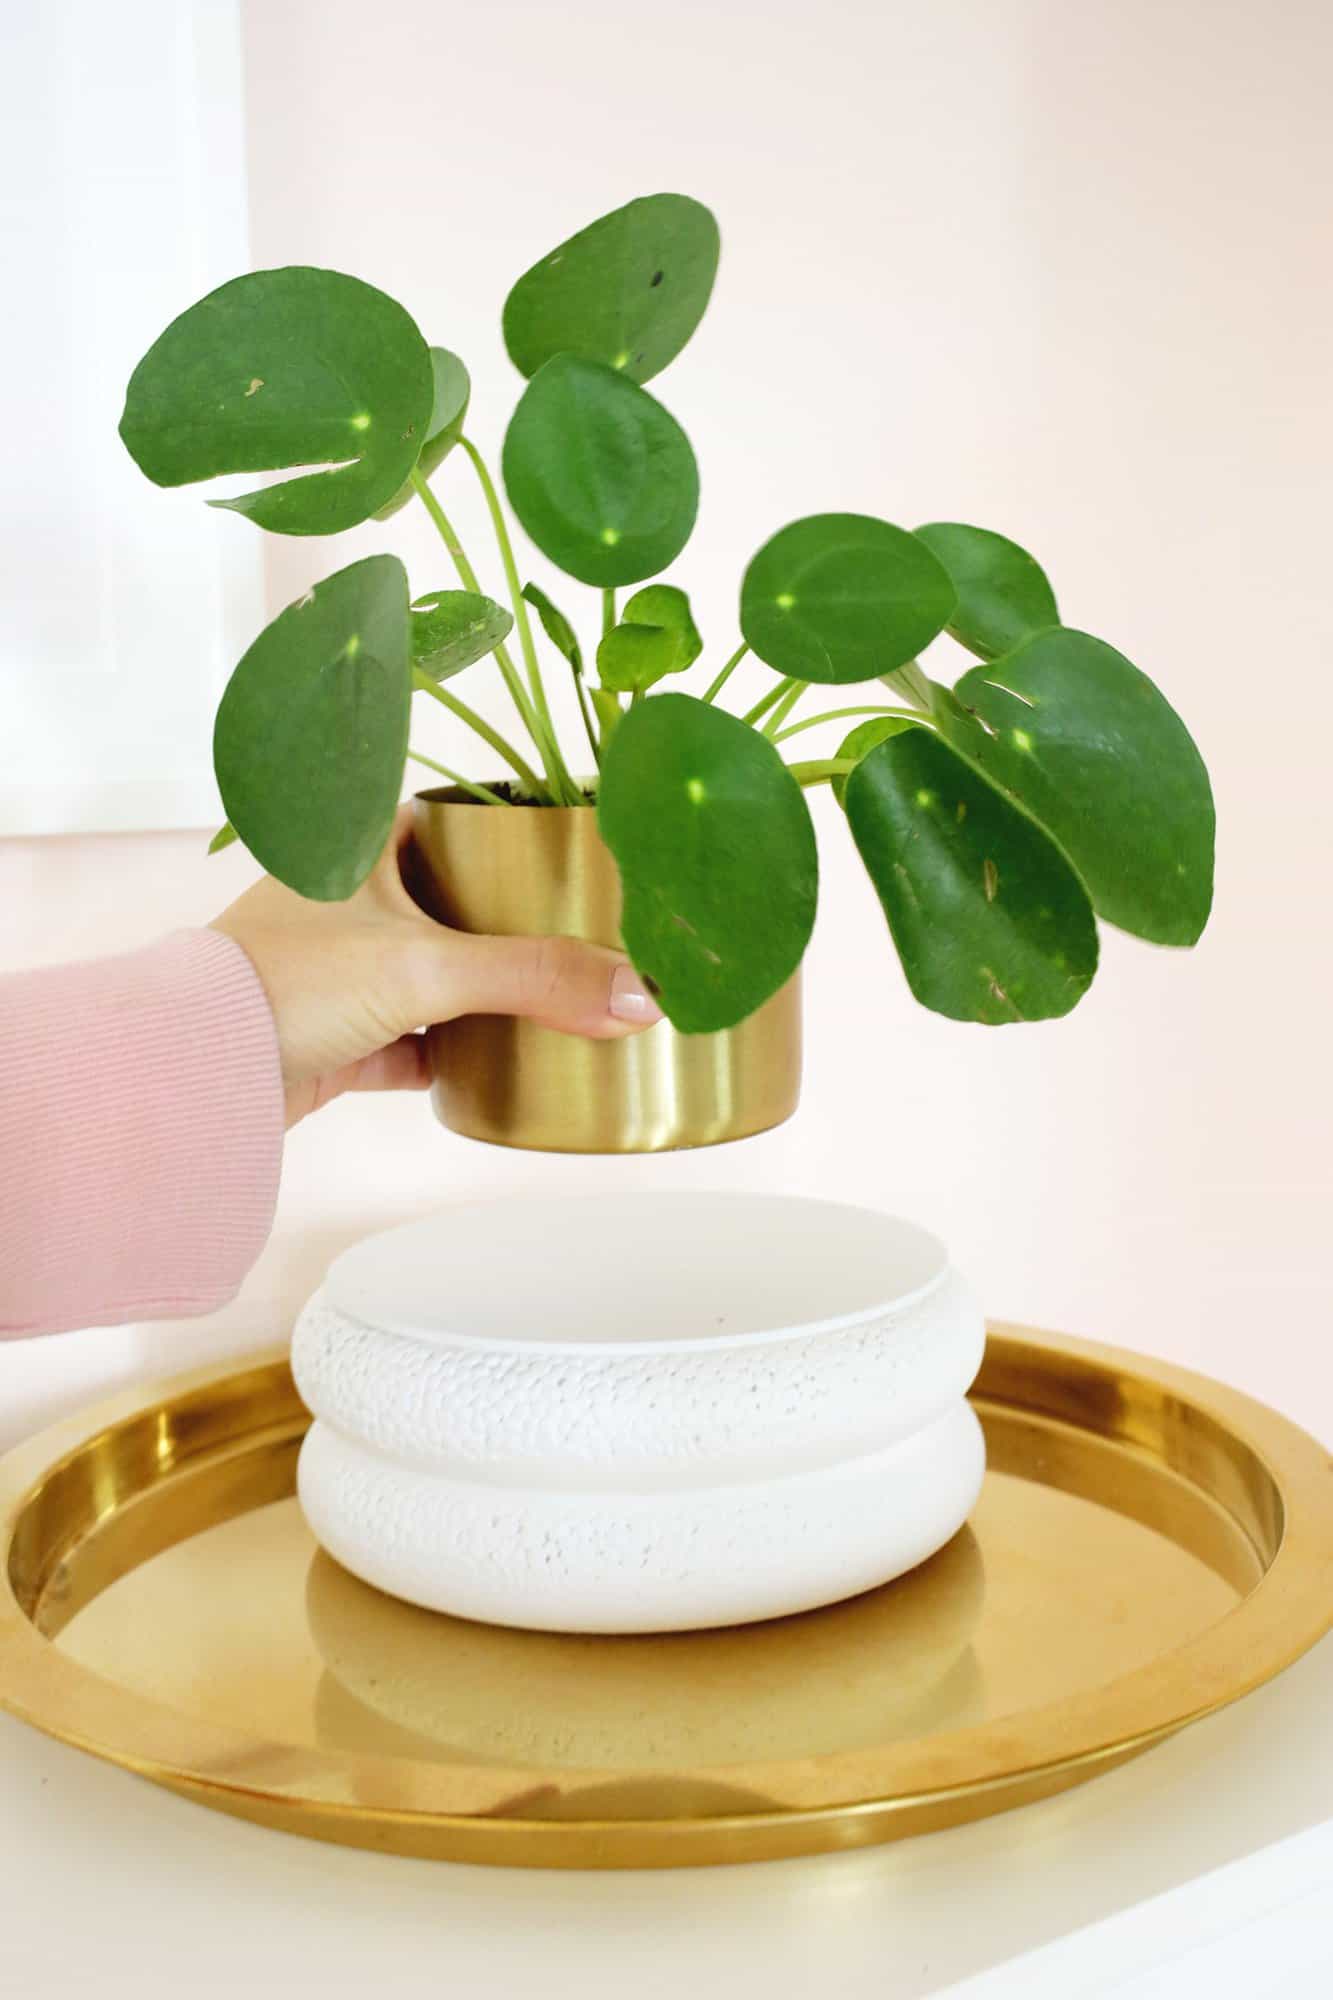
Dome plant stand: For this one, you’ll want to glue your rings together like for the other planter, but then you cut the donut in half with a serrated bread knife or craft saw.
You can stick some painter’s tape around where you plan to cut to keep the edges from tearing like you’ve seen. Doing it this way gives you two bases for the racks. If you only want one, you can cut a ring in half and glue the two halves together.
Once your donuts are cut in half, use a knife or saw again to cut the rounded end of the half circle (cut about 1 inch) so that the top of your wooden circle has a flat place to sit.
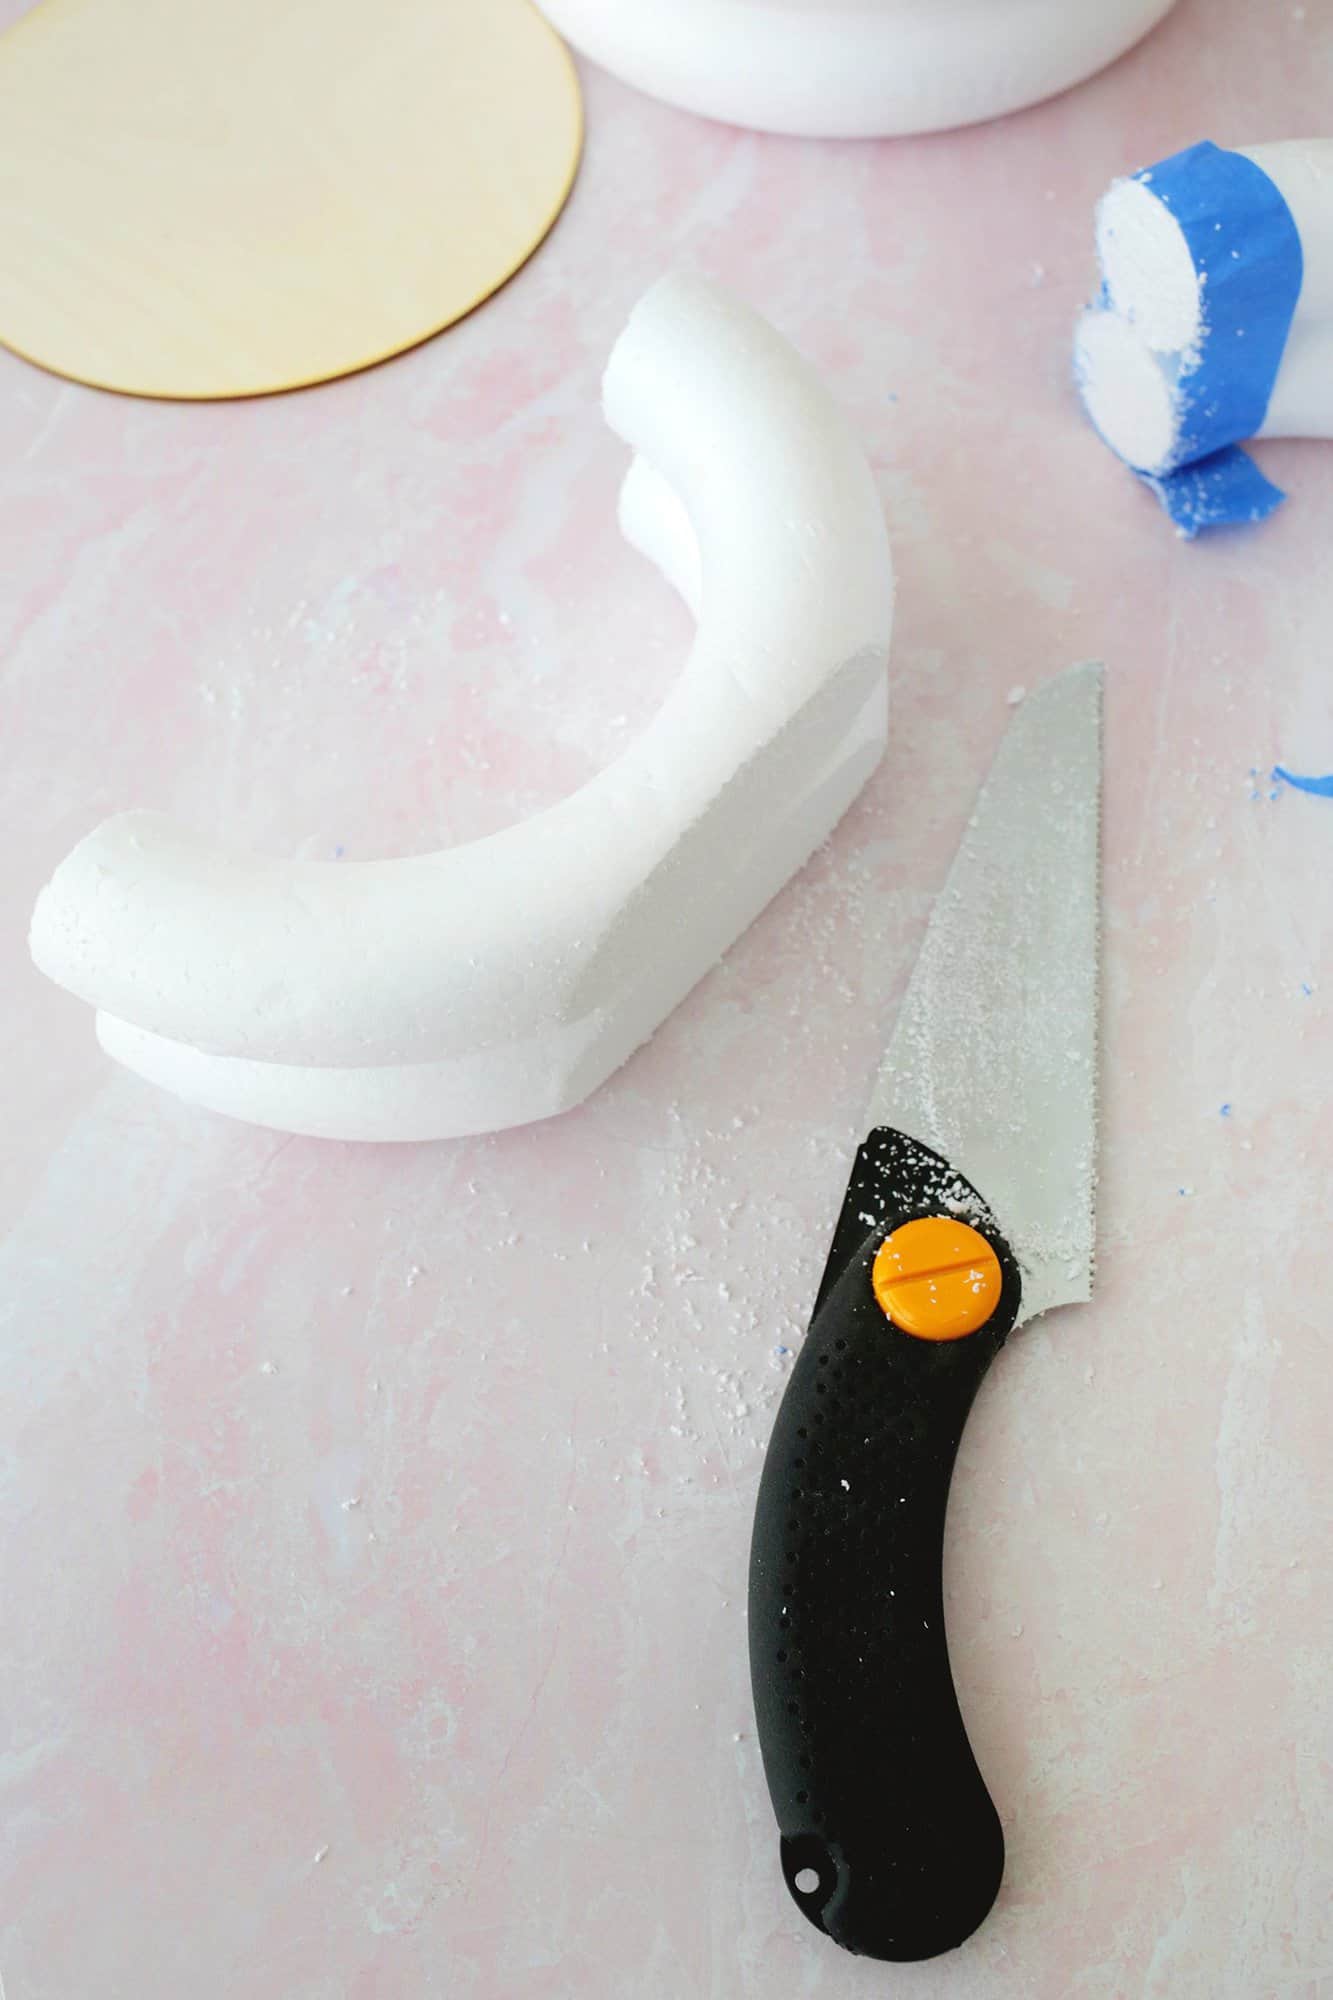
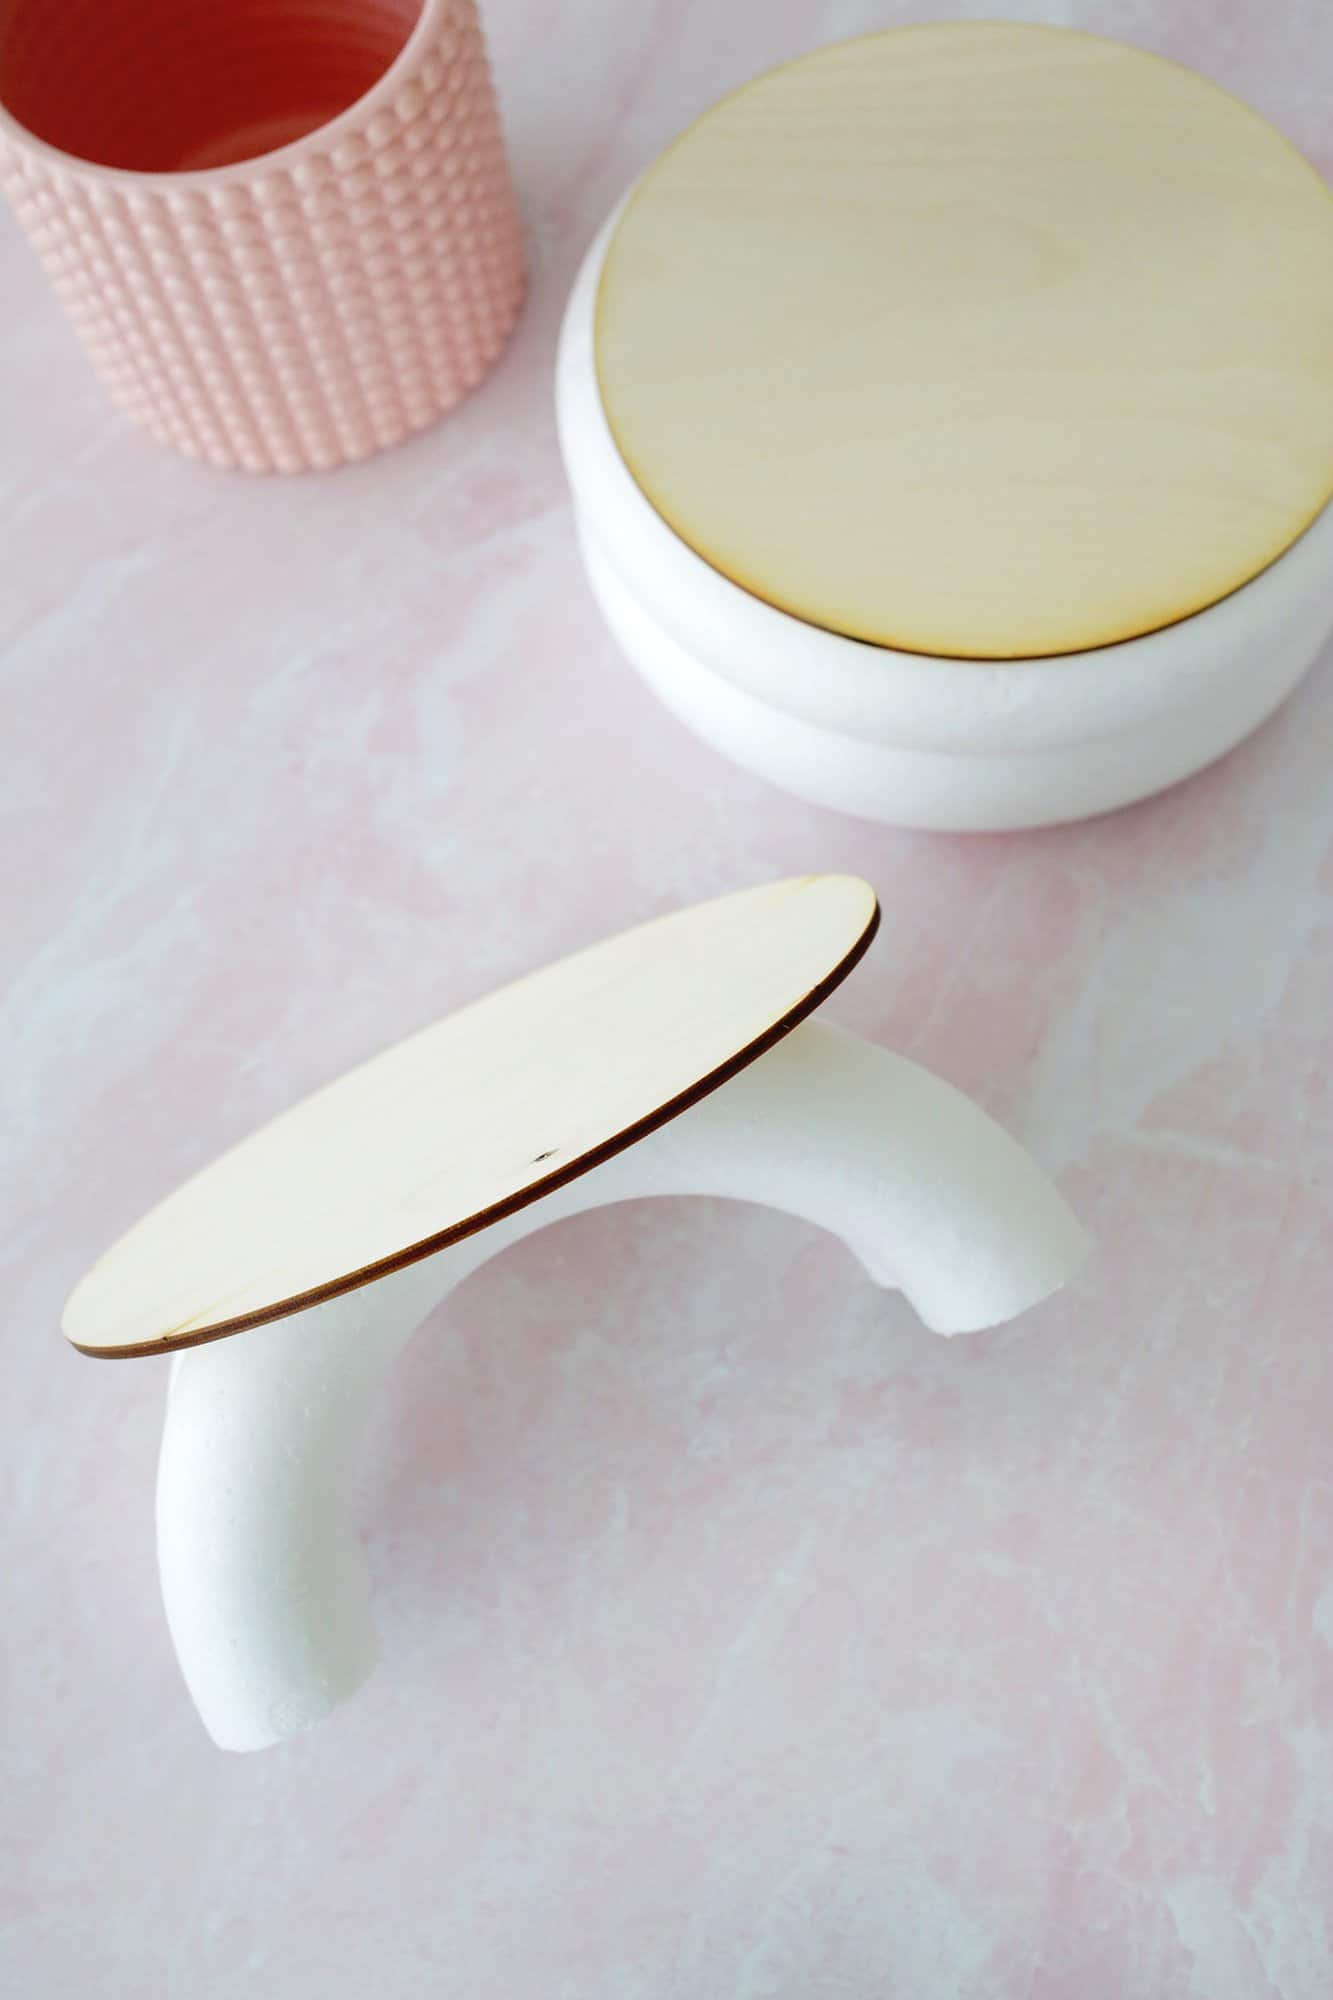
Once you’ve cut the base, center align and glue your wooden circle for the top and let the glue set.
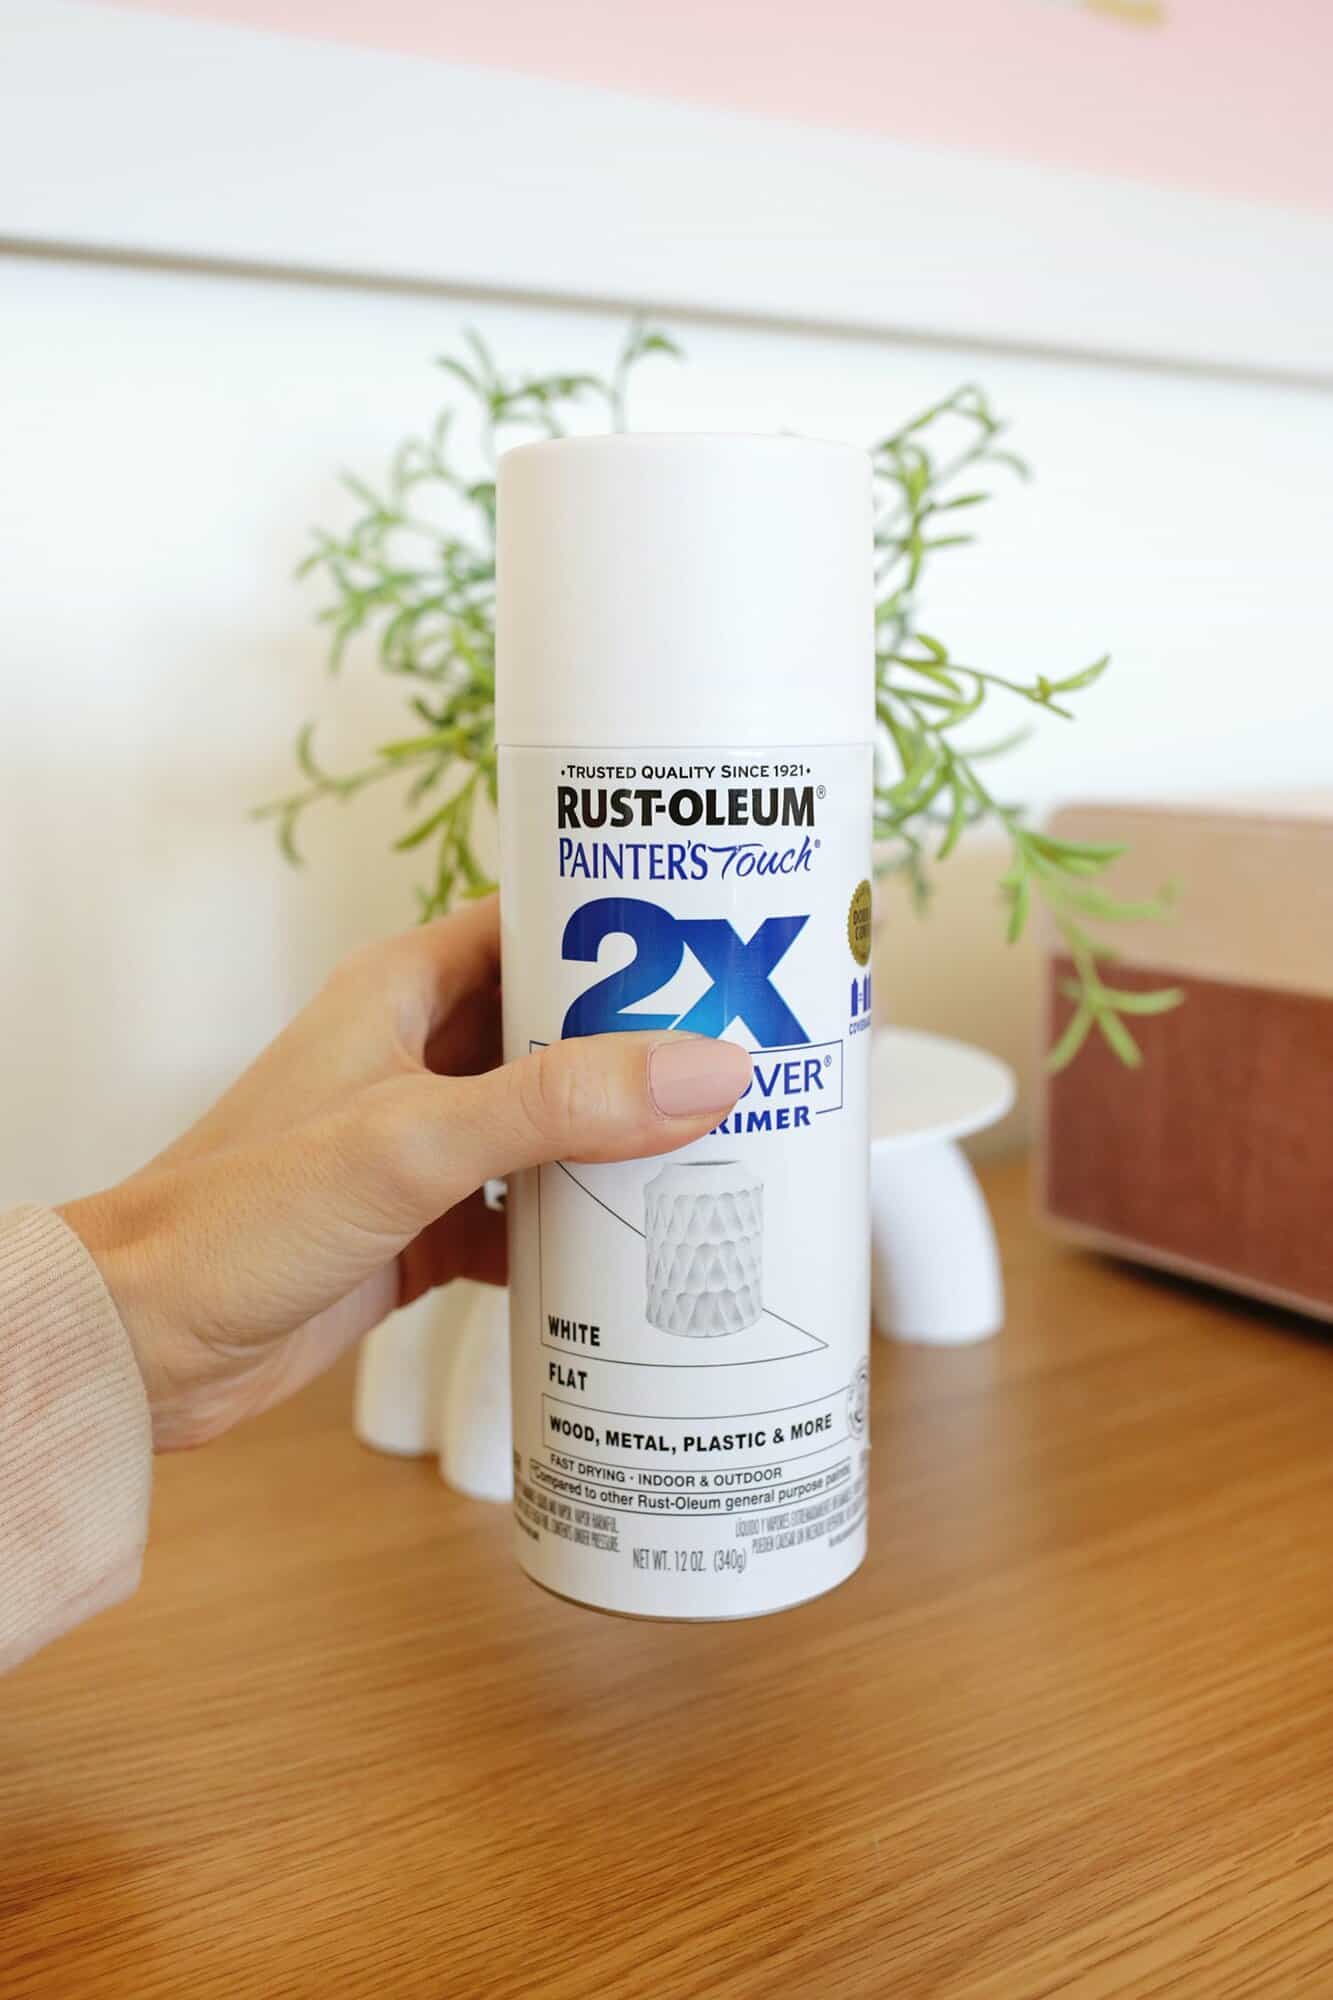
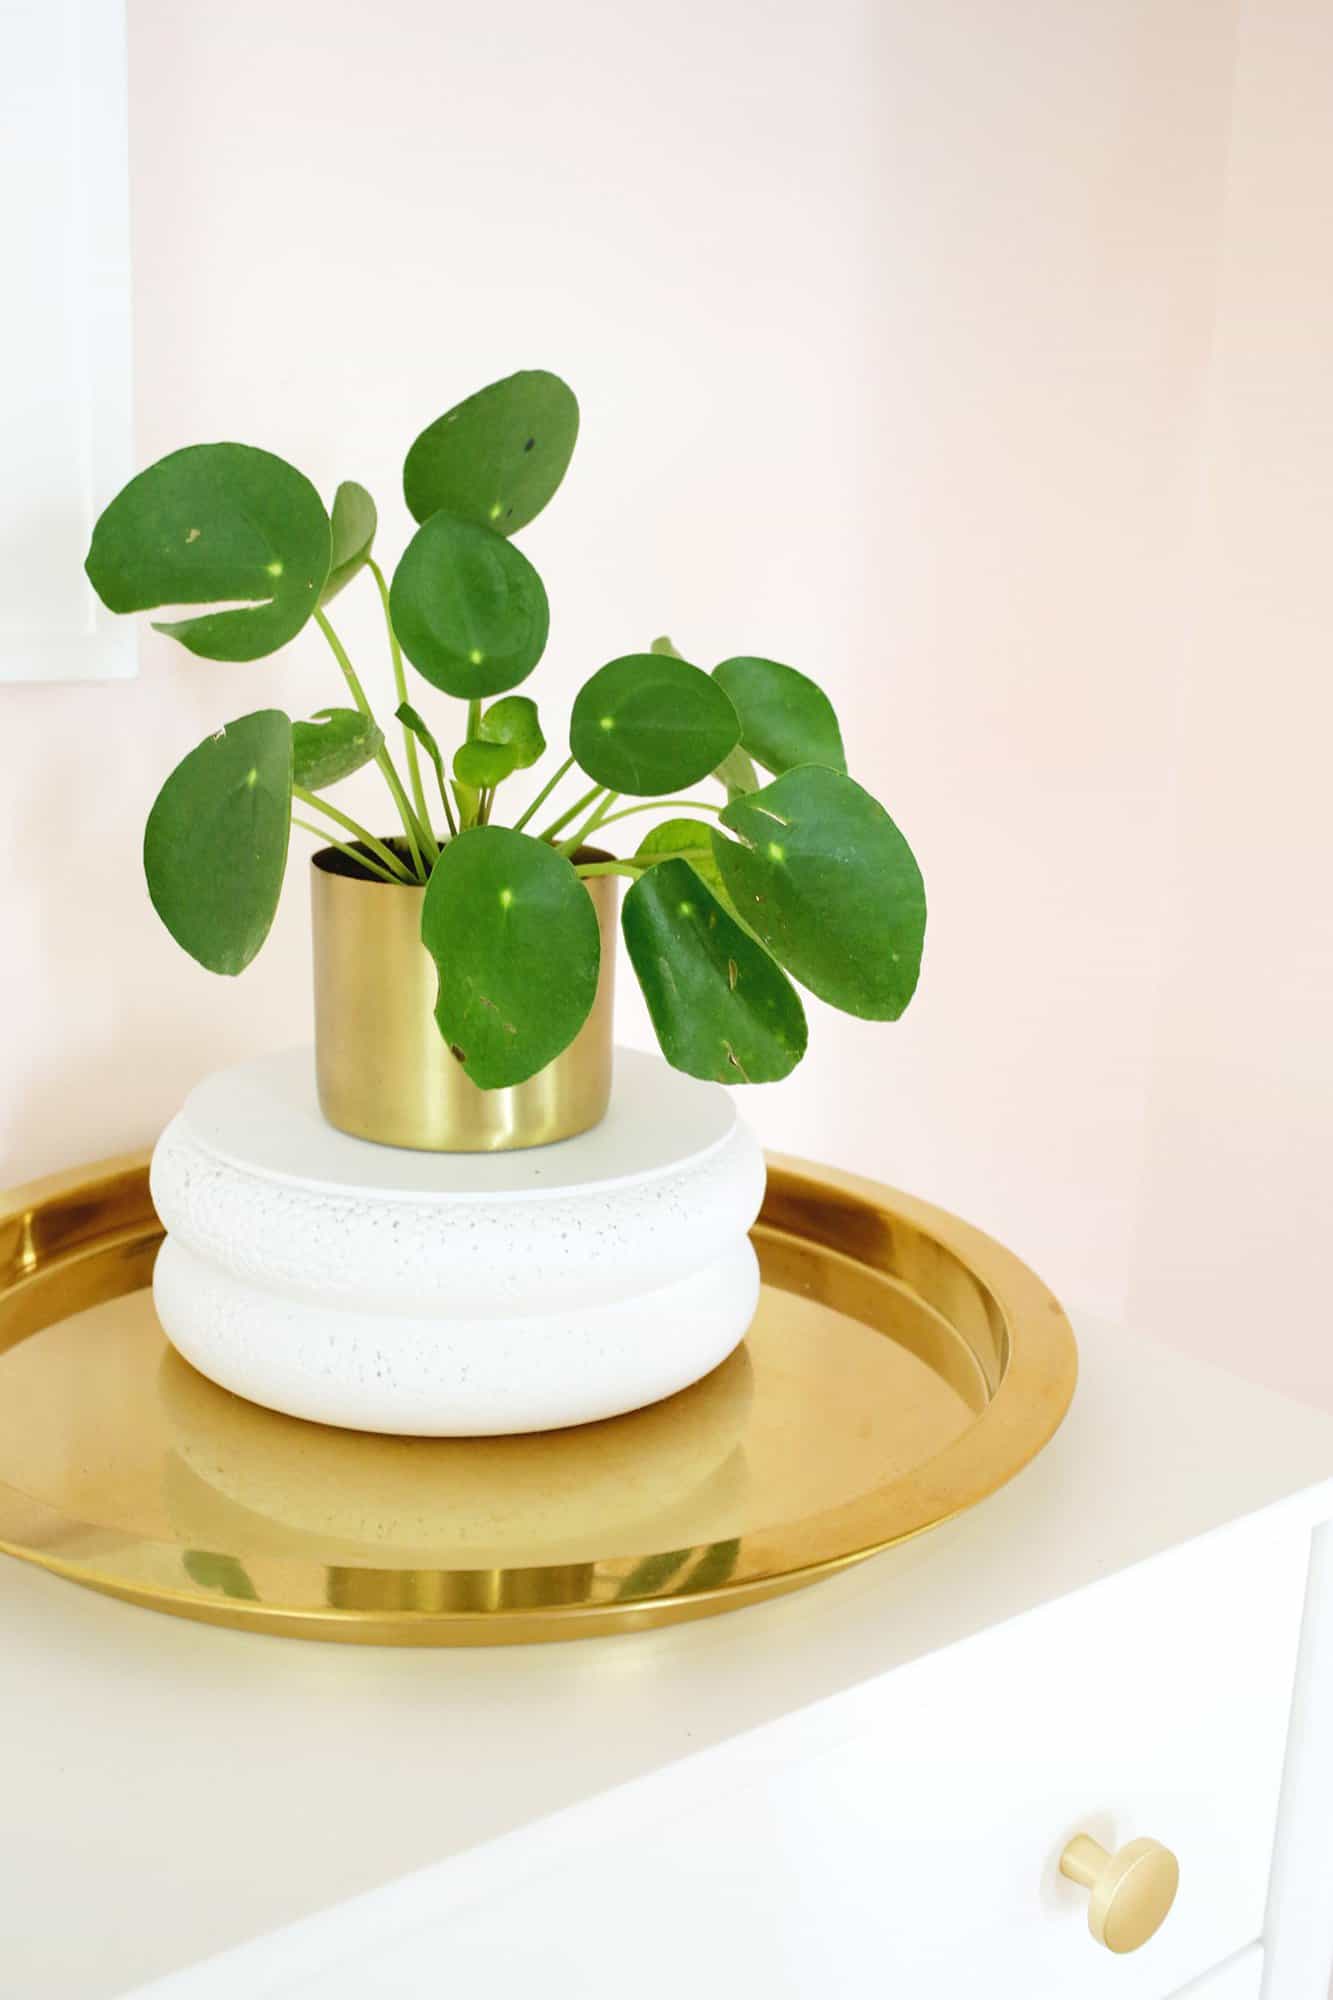
After the glue dries for your base, you can paint your stand! You can use spray paint or acrylic paint for this. I’ve noticed that spray paint tends to enhance the foam’s snakeskin-like texture rather than the acrylic paint that’s been beaten on it, but I like the textured look so I used spray paint for mine.
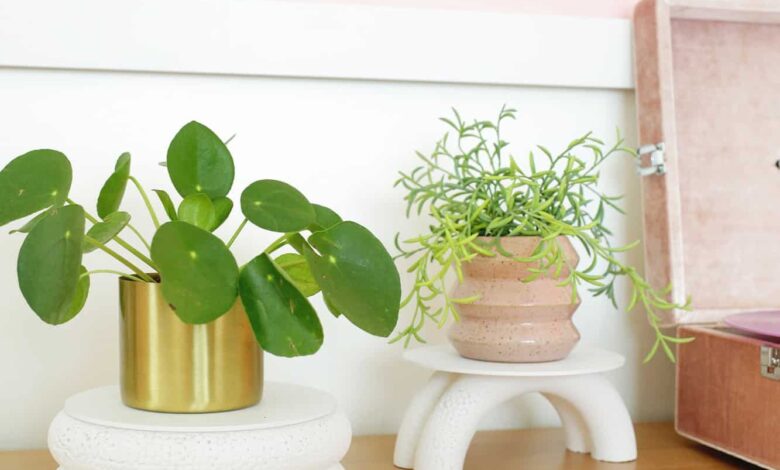
Once the paint dries, add the plants and your stand is ready to go!
Plants too hard to keep alive? Shop The most convincing hypothetical plants or DIY fake living wall!

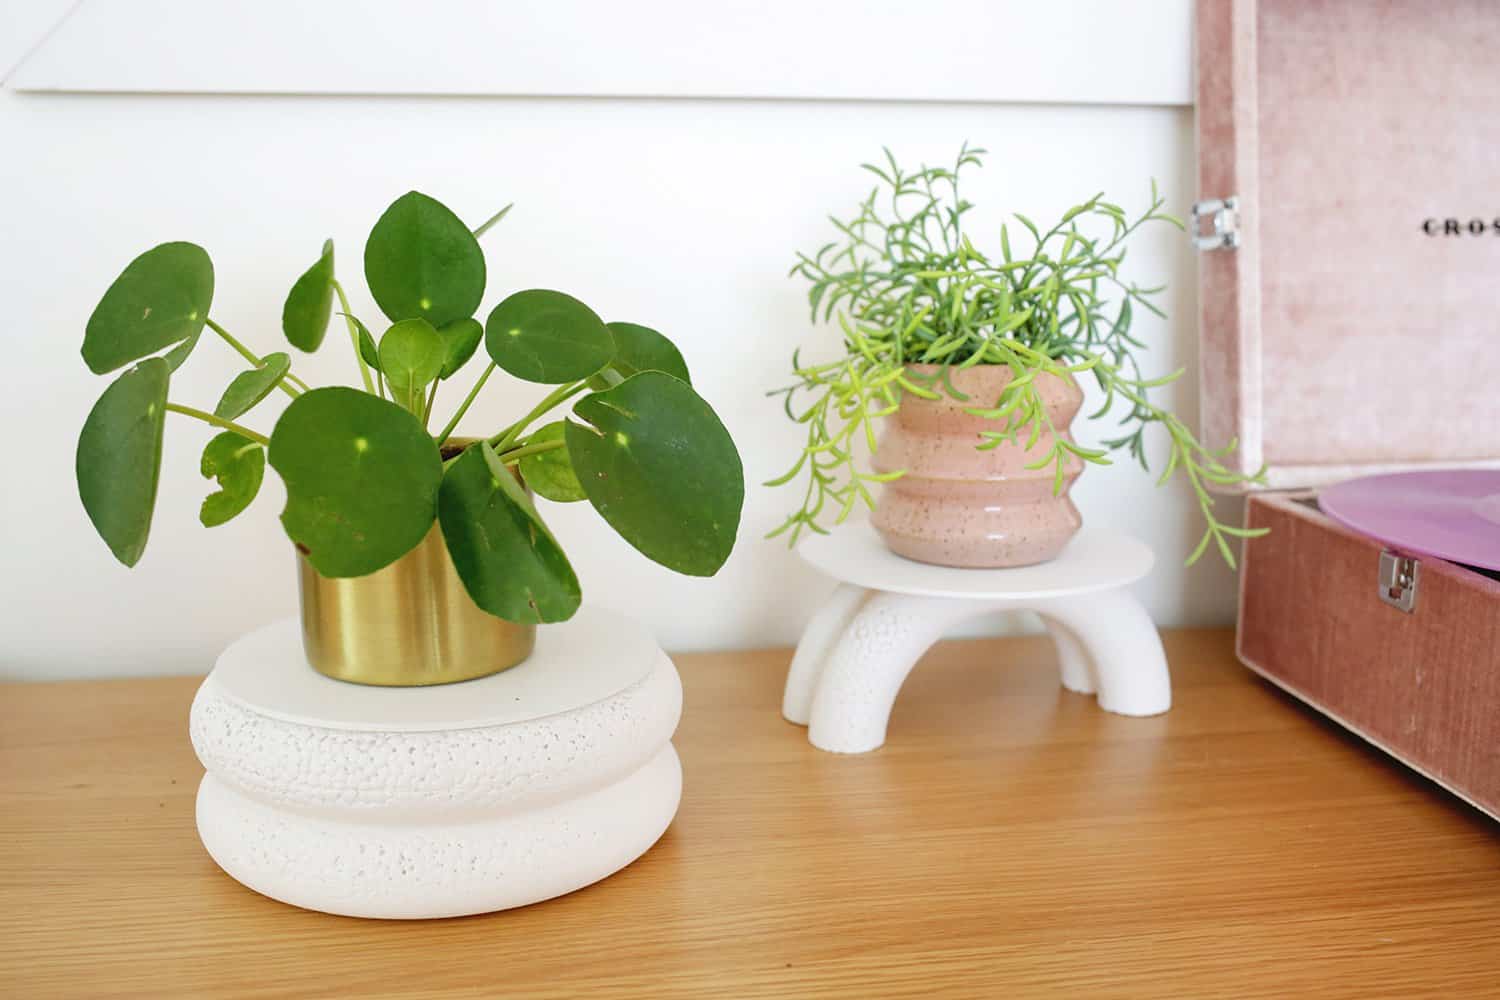
I have to say, I love how these things turn out. They’re super trendy with everything curled and ruched in style and they’re easier on the wallet (and you can get a lot of them at once because they’re quick and easy).
Hope this helps you to add more plants to your home soon! so so. Laura
Love trees? Here are some tips to keep your thumbs green!

Dome Planters Bend Easily (Two Ways!)
Create arched and undulating plant stands using foam wreaths
-
8″
Styrofoam wreath - super glue or hot glue gun
-
7″
the wooden circle is slightly smaller than your wreath -
ice painter
optional -
spray paint
or acrylic paint of your choice
Horizontally slotted stand:
-
To create a horizontal fold, all you have to do is glue several rings of foam together to make the base. I did two but you can do more to make it taller.
Once they’re attached, glue your wooden circle to the center above and you’re ready to paint!
Dome plant stand:
-
For this one, you’ll want to glue your rings together like for the other planter, but then you cut the donut in half with a serrated bread knife or craft saw. You can stick some painter’s tape around where you plan to cut to keep the edges from tearing like you’ve seen.
Once your donuts are cut in half, use a knife or saw again to cut the rounded end of the half circle (cut about 1 inch) so that the top of your wooden circle has a flat place to sit.
-
Once you’ve cut the base, center align and glue your wooden circle for the top and let the glue set.
-
After the glue dries for your base, you can paint your stand! You can use spray paint or acrylic paint for this. I’ve noticed that spray paint tends to enhance the foam’s snakeskin-like texture rather than the acrylic paint that’s been beaten on it, but I like the textured look so I used spray paint for mine.
-
Once the paint dries, add the plants and your stand is ready to go!