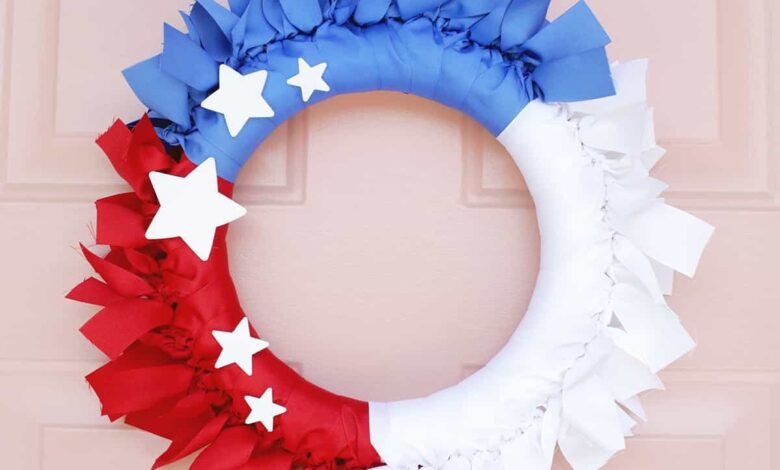
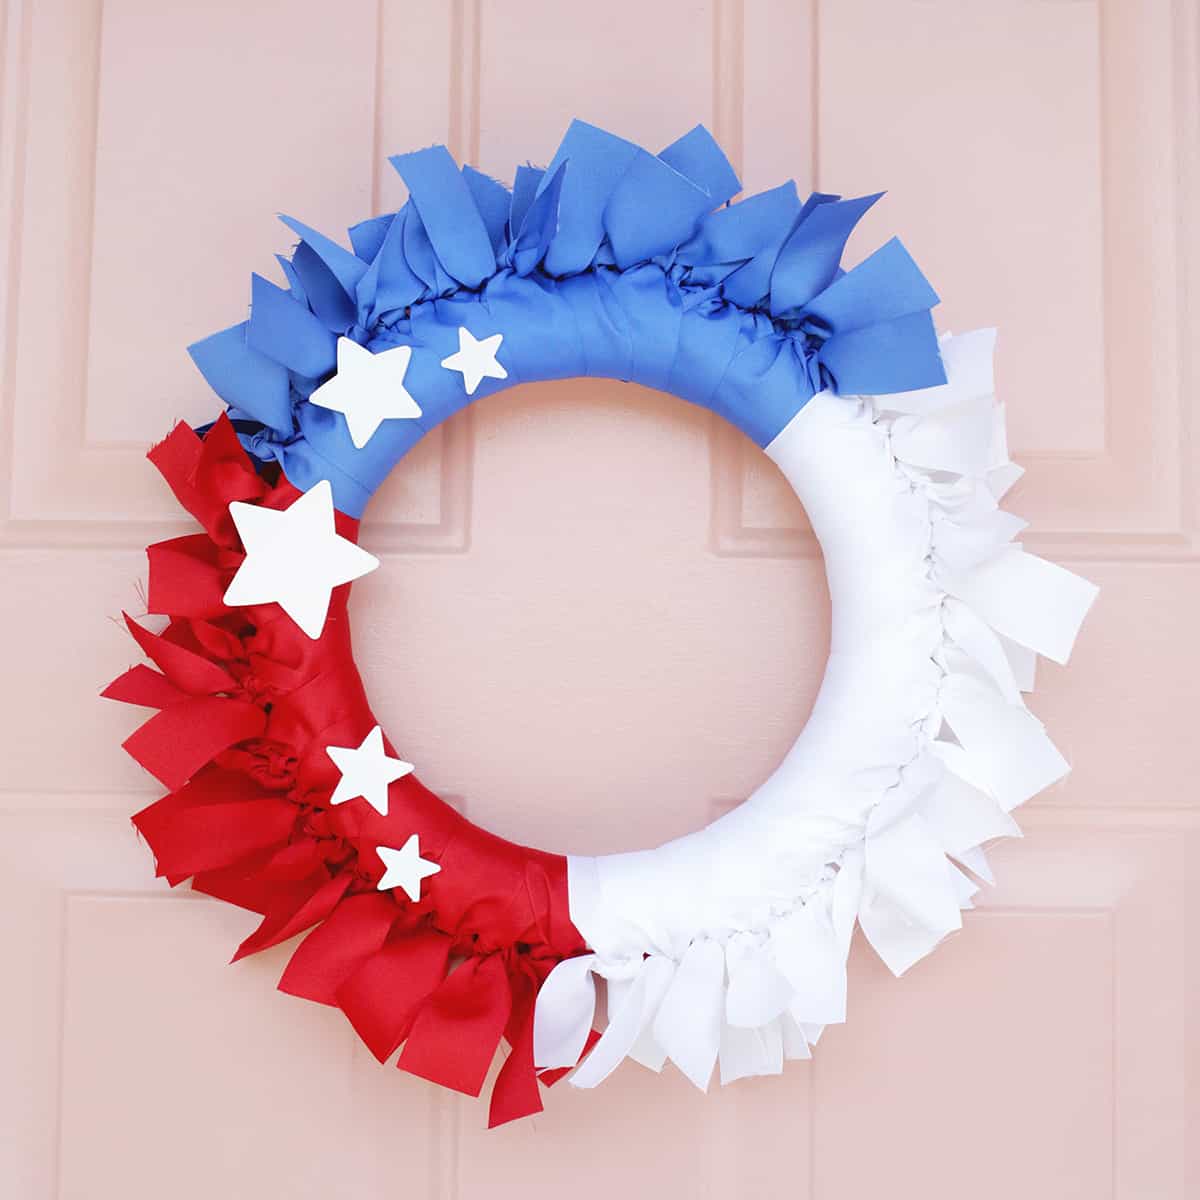

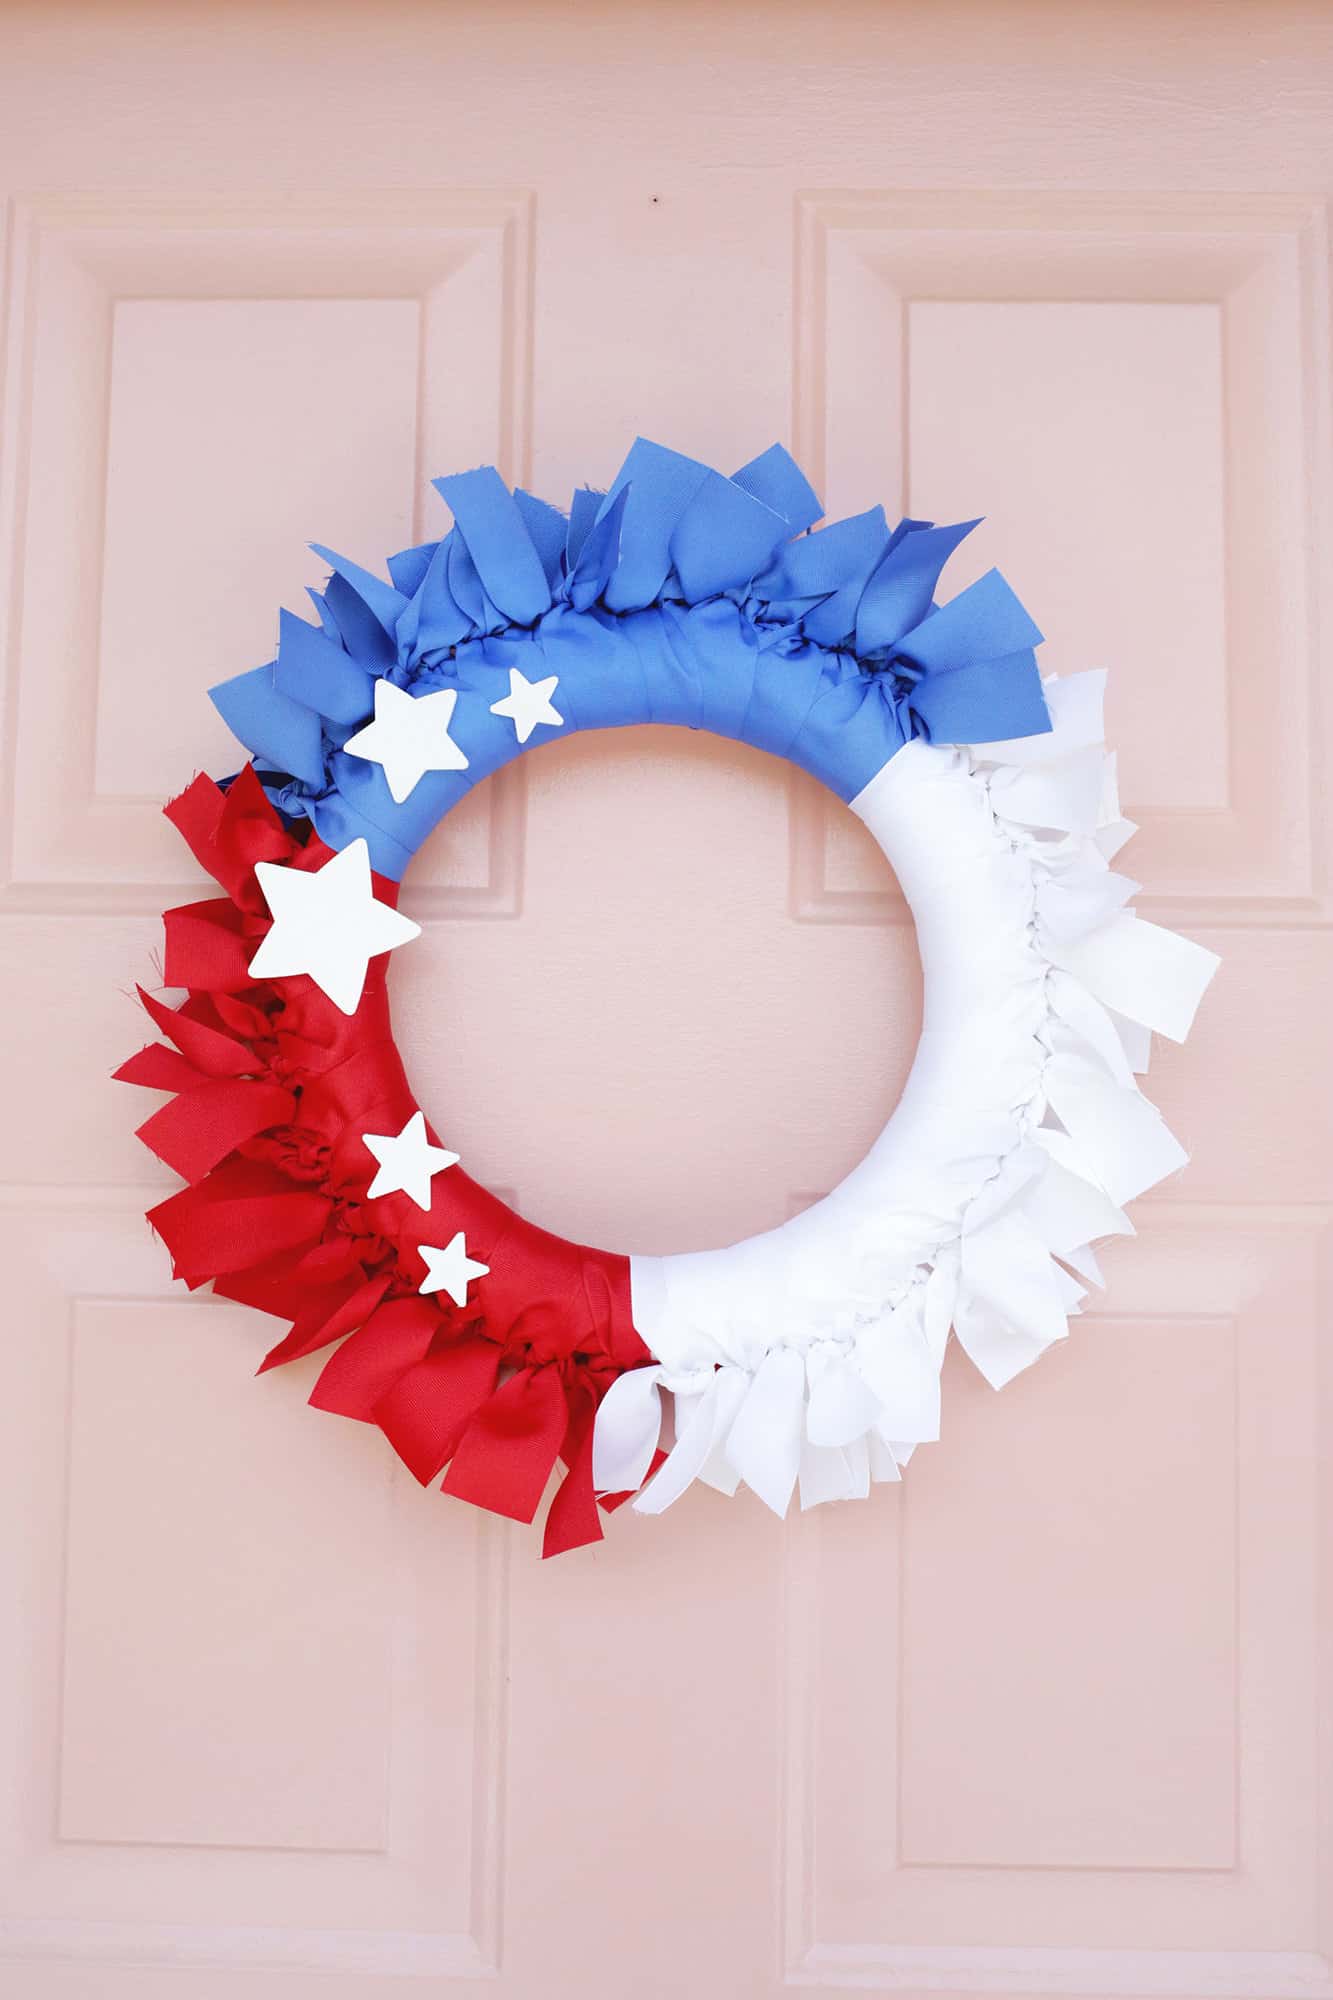
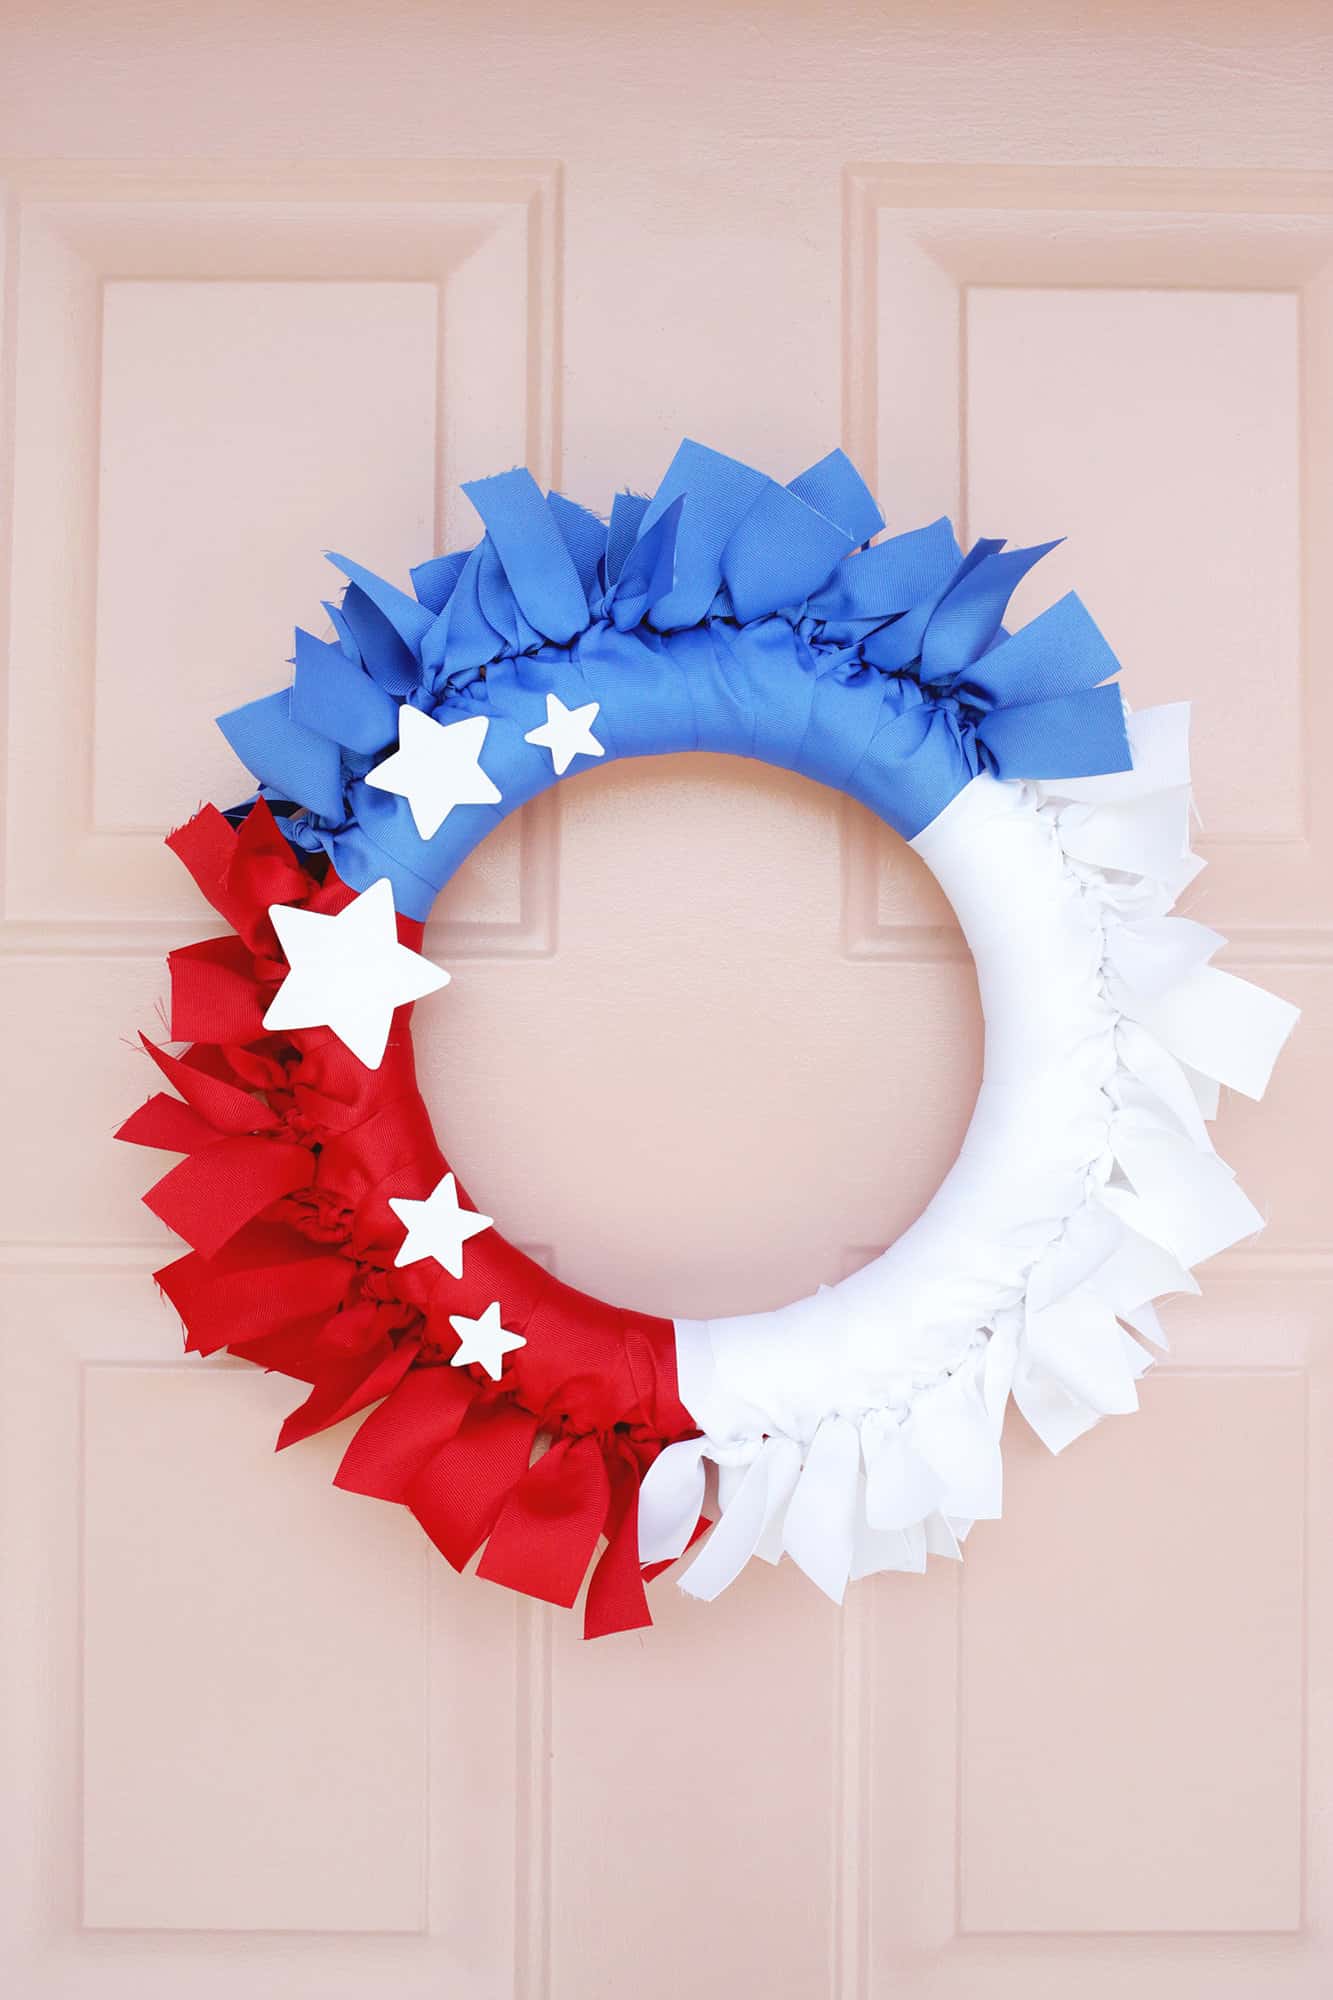
If you’re looking for an easy DIY 4th of July wreath idea to hang on your front door this summer, look no further — the perfect idea is here!
This patriotic wreath is quick to make, doesn’t cost much, and anyone can do it because it’s really easy!
Looking for more July 4 ideas? Payment procedures …
What is a ribbon wreath?
A ribbon wreath is a quick and easy way to make a wreath as you simply cut the ribbons and simply tie them to the wreath frame.
You can customize it with any color you like to reflect the holidays and seasons, and you can also add custom accents to stick on the wreath.
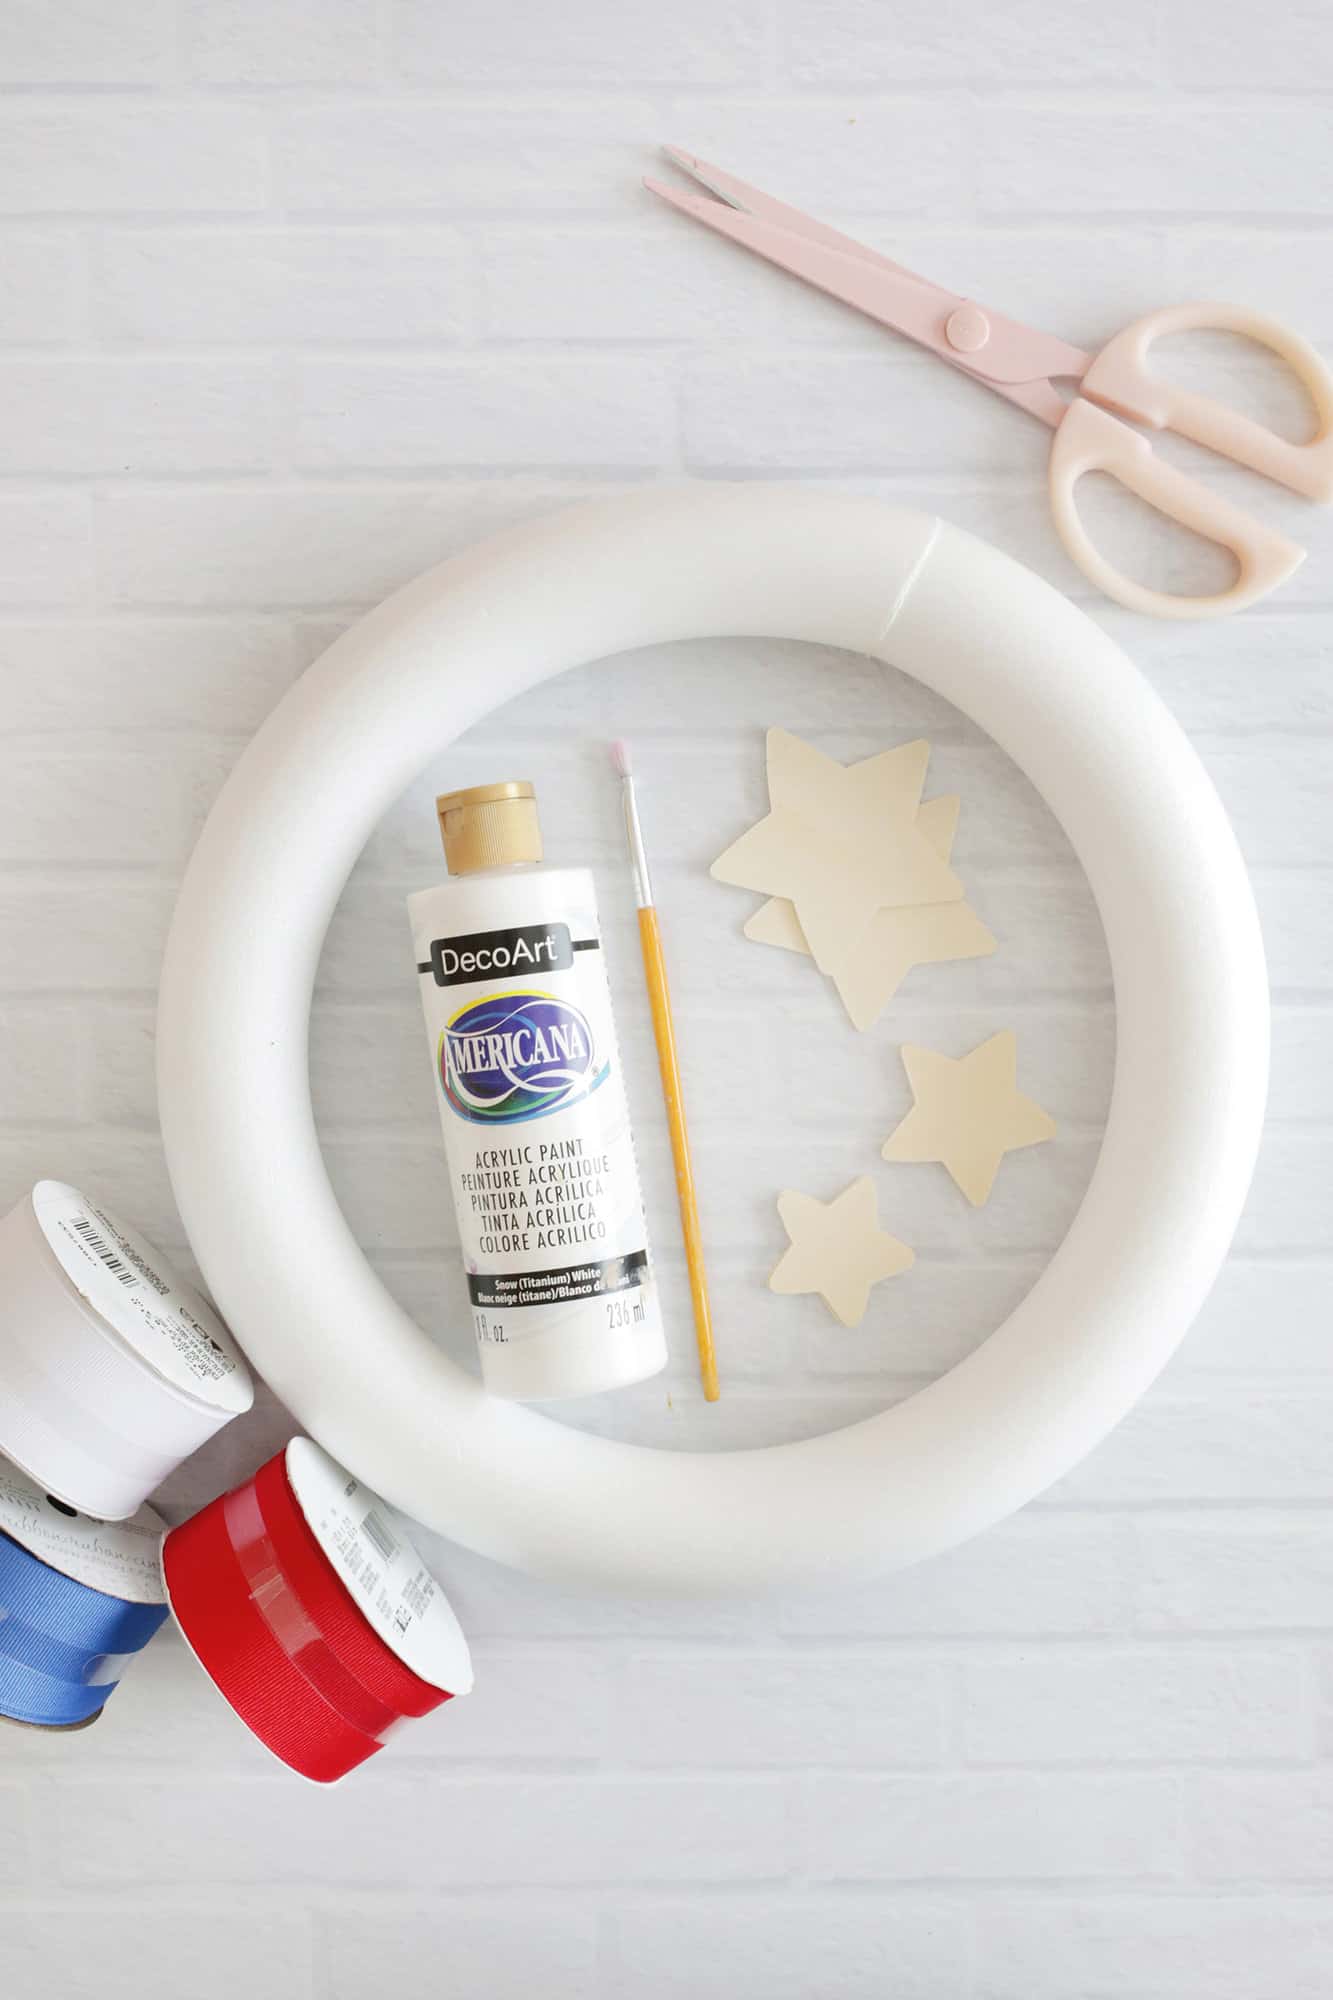
Munition:
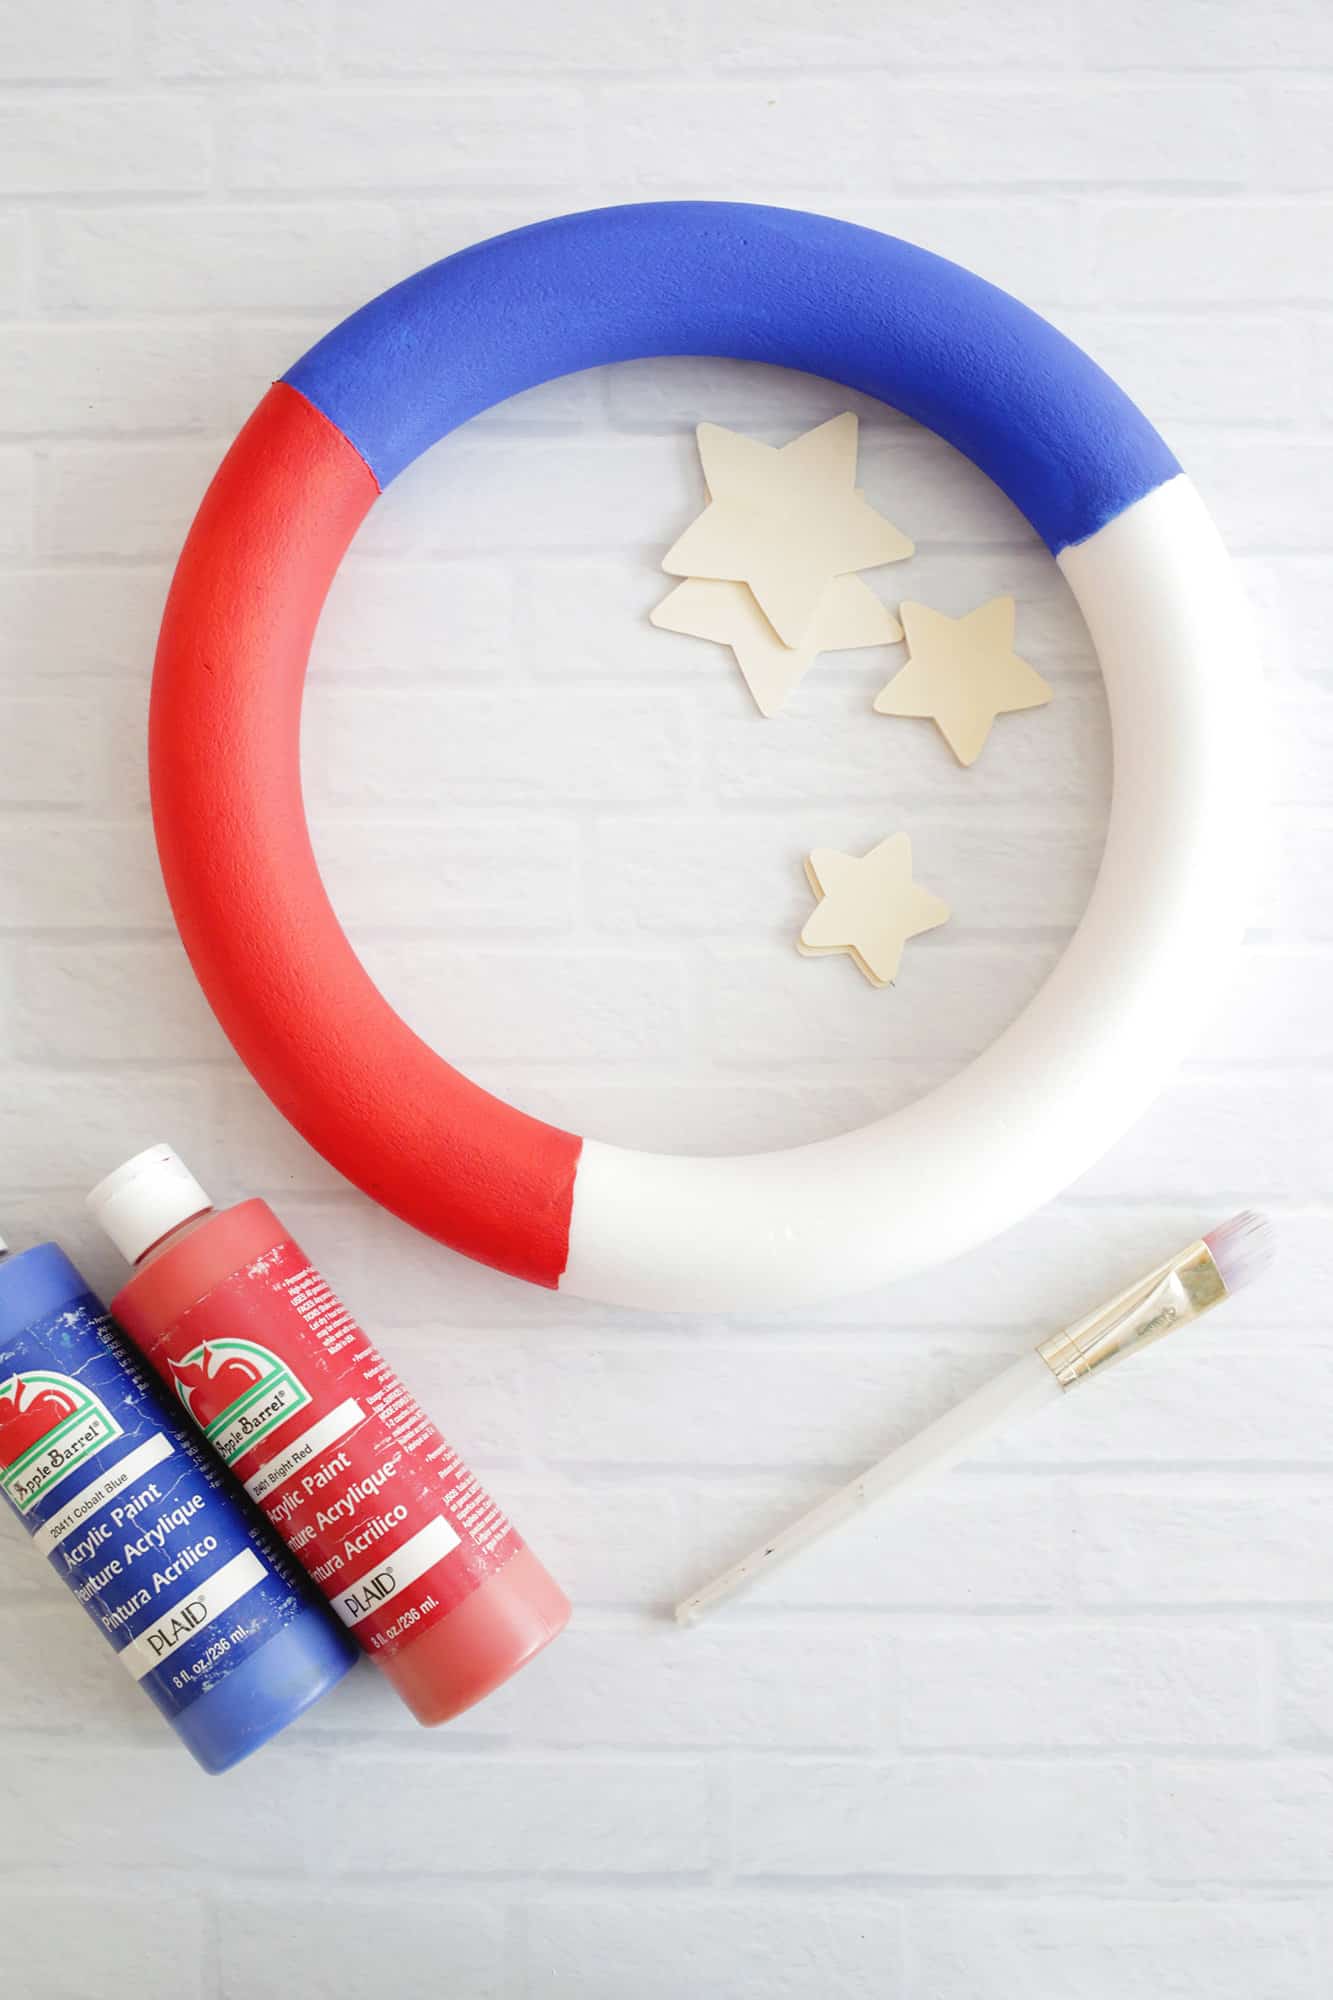
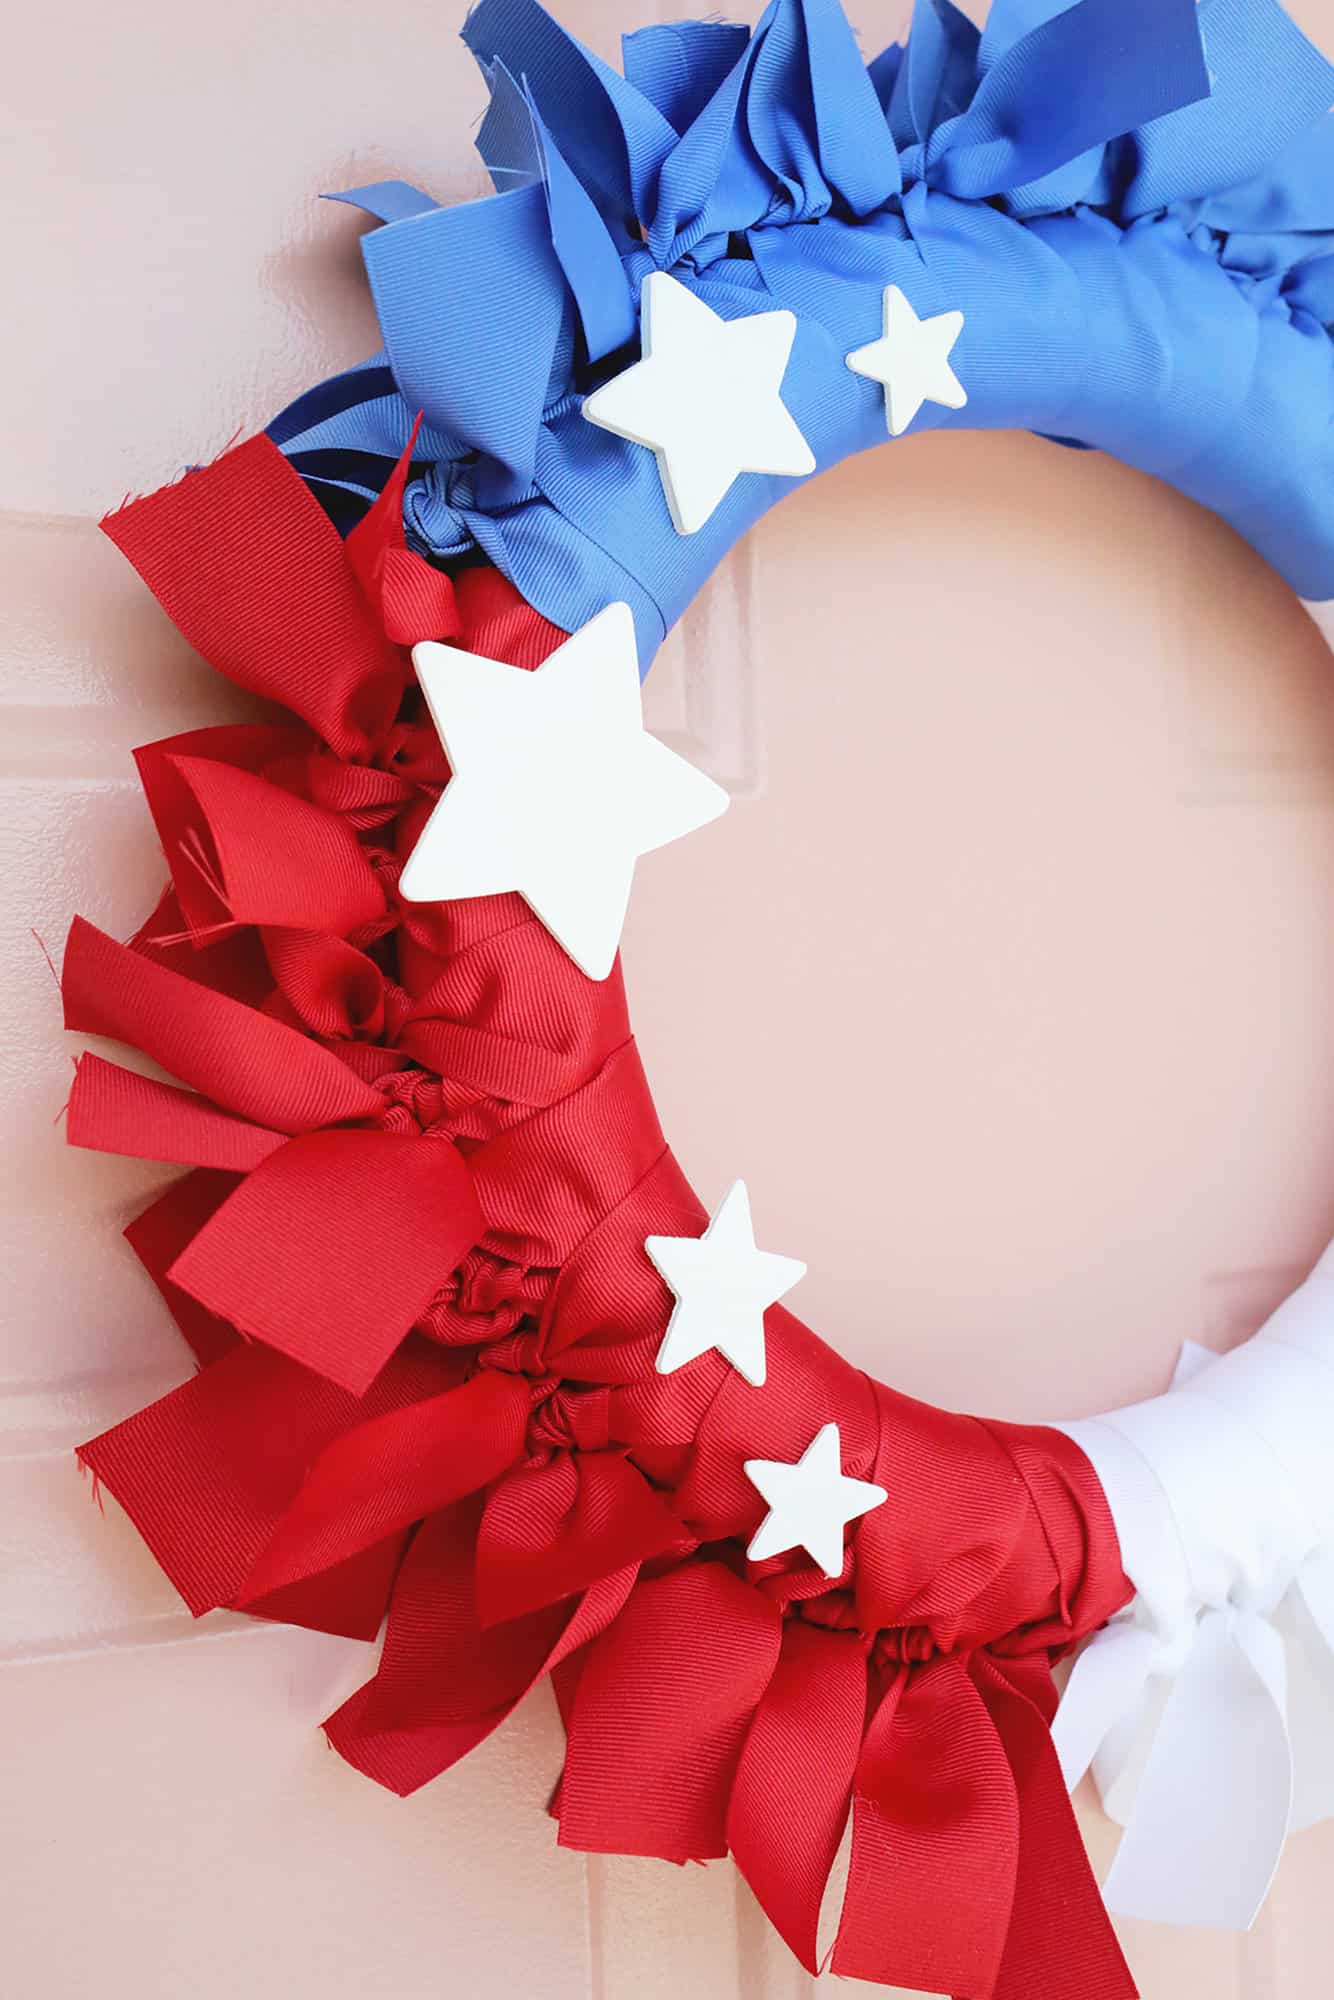
Step 1: Paint your wreath. Divide your garland into three even sections (you can eyeshadow it) and paint them red, white, and blue so you don’t see any gaps between the ribbons when you start tying them.
If your wreath frame is white, you won’t need white paint and you’ll probably need two coats of paint to get more opacity.
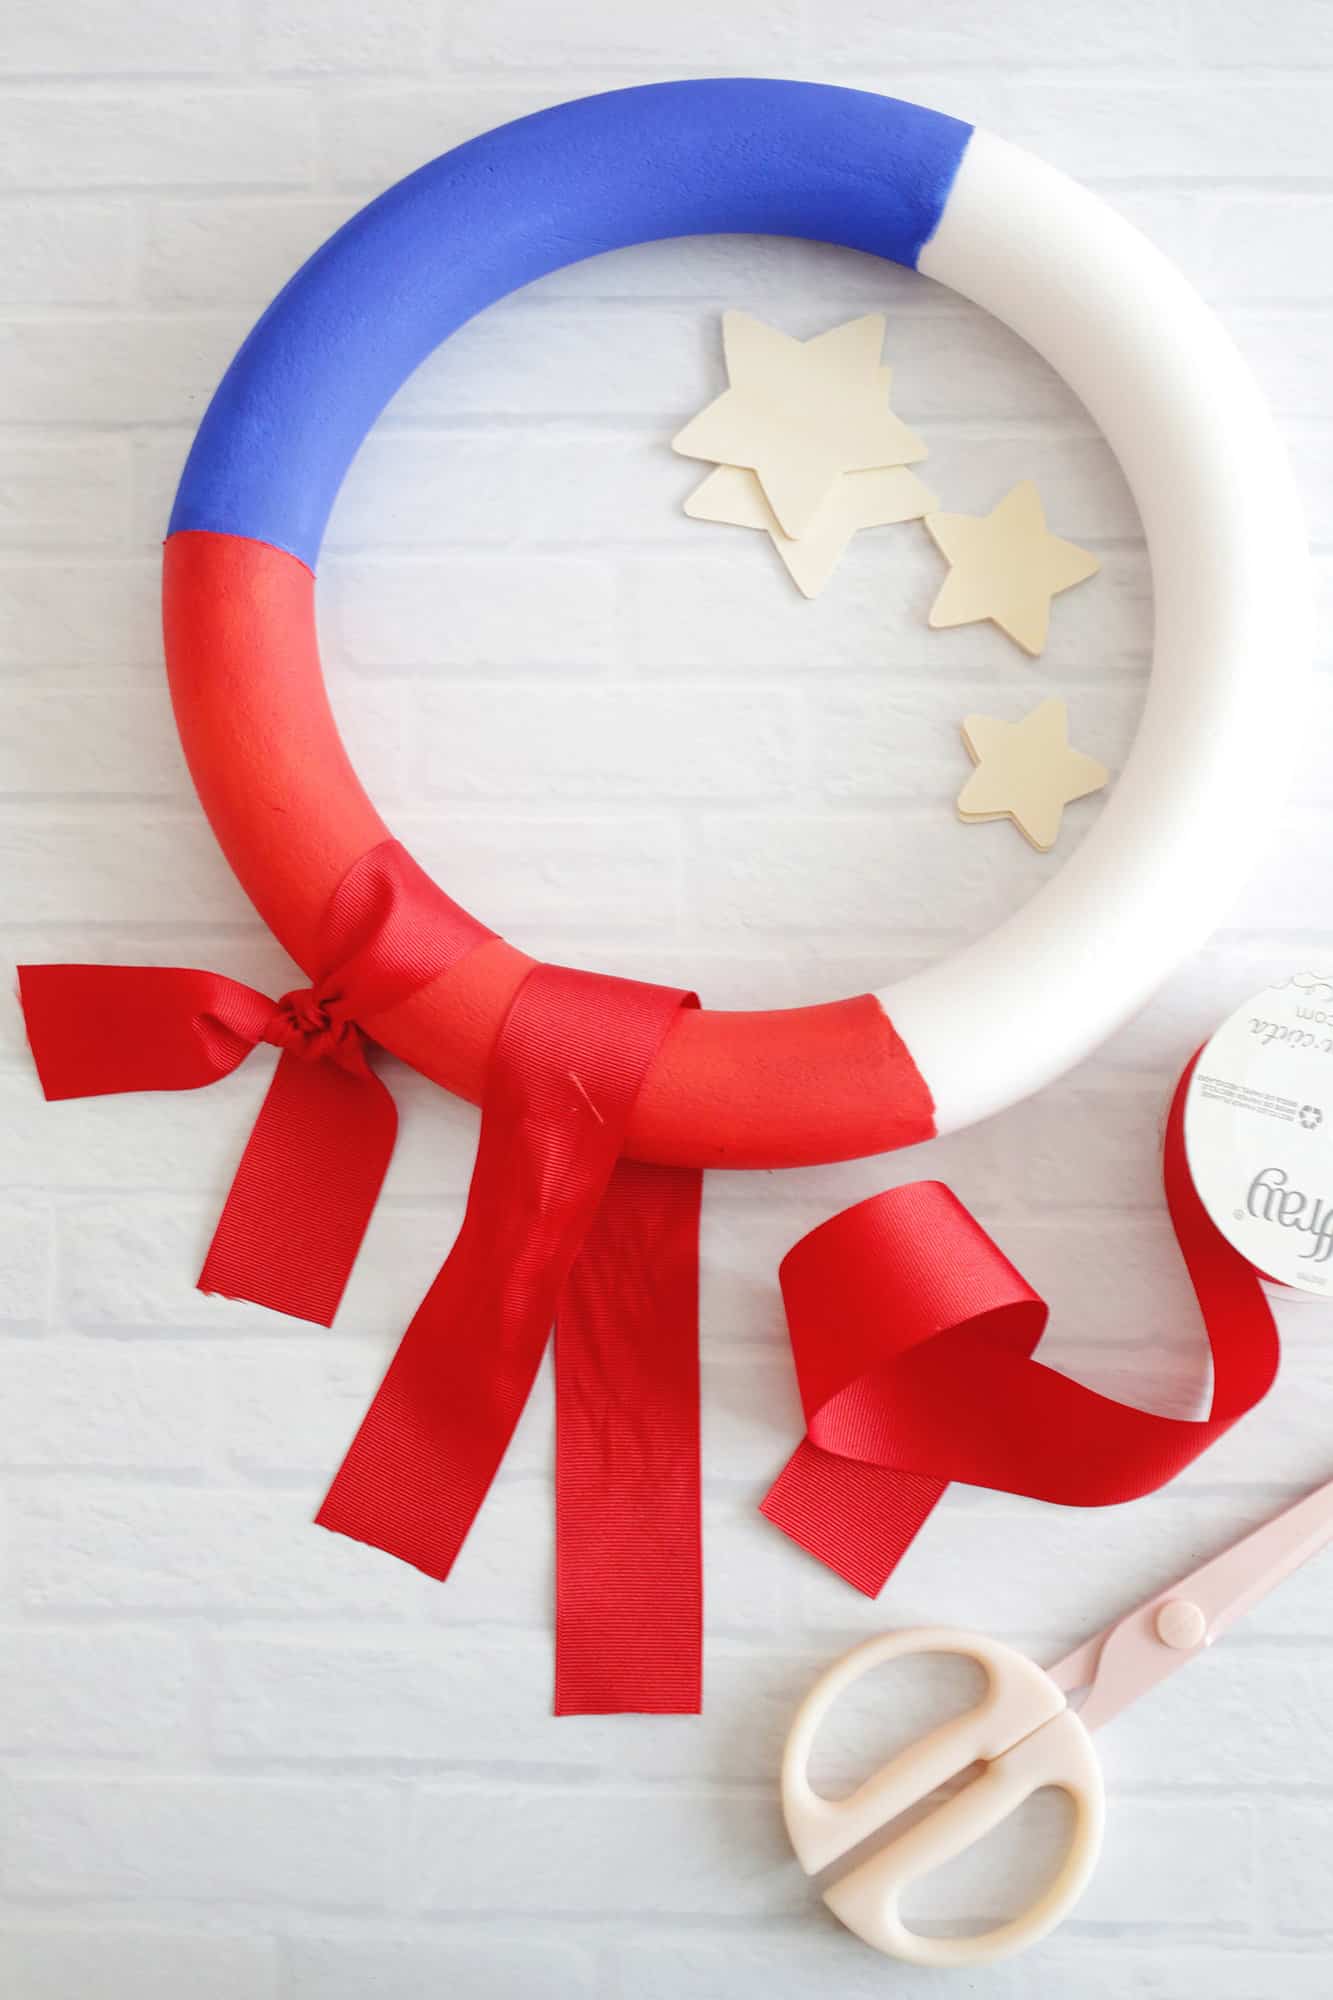
Step 2: Tie your headband with ribbon. Cut your red ribbons into 14-inch lengths and tie them around the frame of your wreath, tying them into a knot on the outer edge of the wreath. Repeat until you tie the ribbon all the way down to the red part.
My ribbon spools are 21′ long and I only use a little more than one per color, so if you want to keep it to a roll, cut them a little shorter or space them out further. a little.
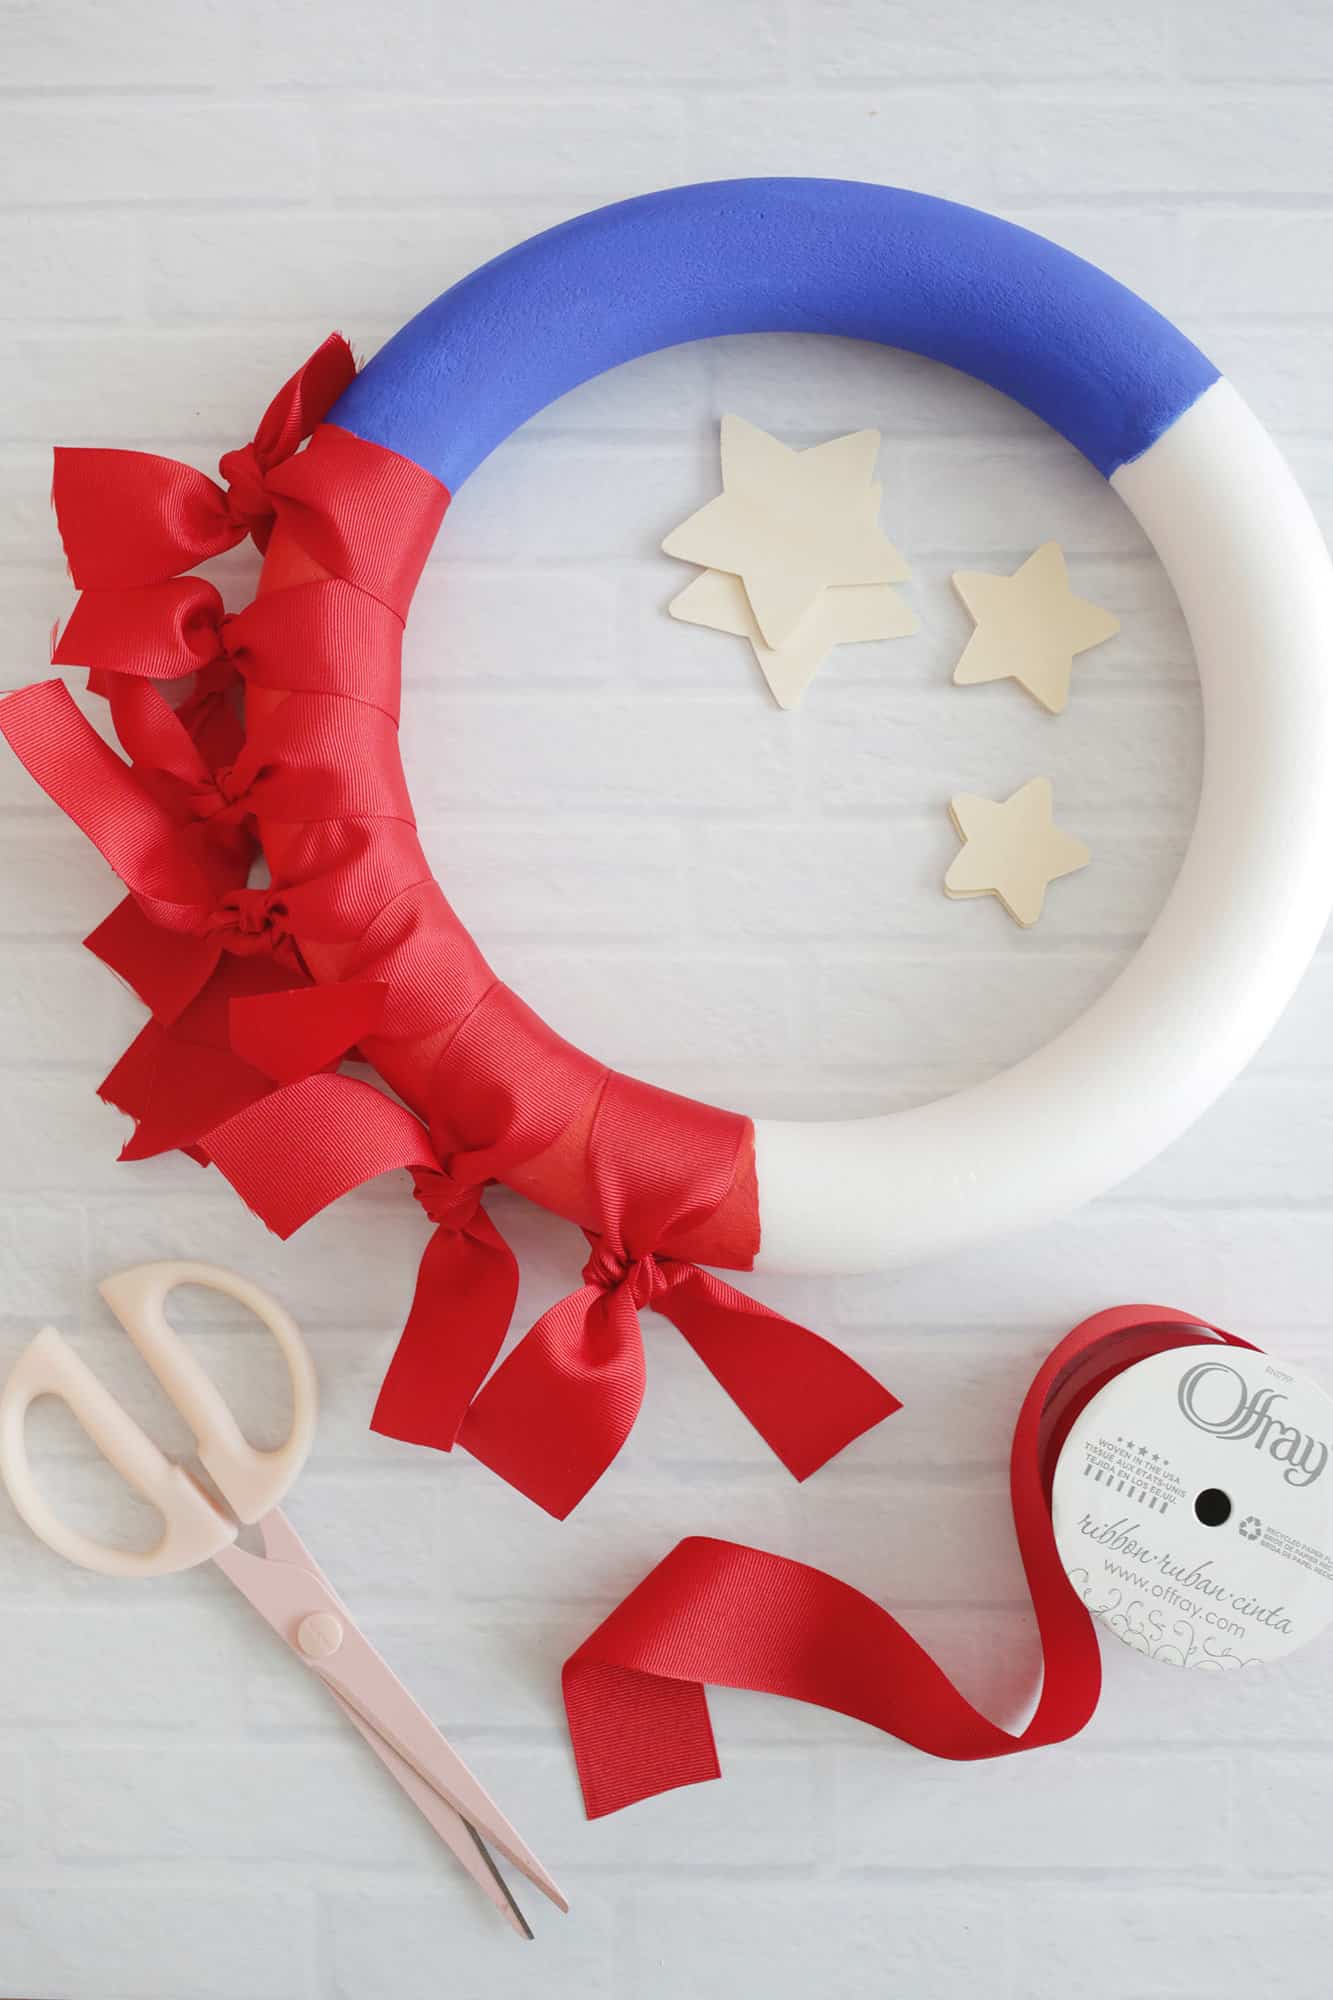
Step 3: Fill in the middle of each ribbon with another. Now that you’ve tied the first loop, cut and tie the second loop of red ribbon to the center of each ribbon so it fills the section and looks fuller.
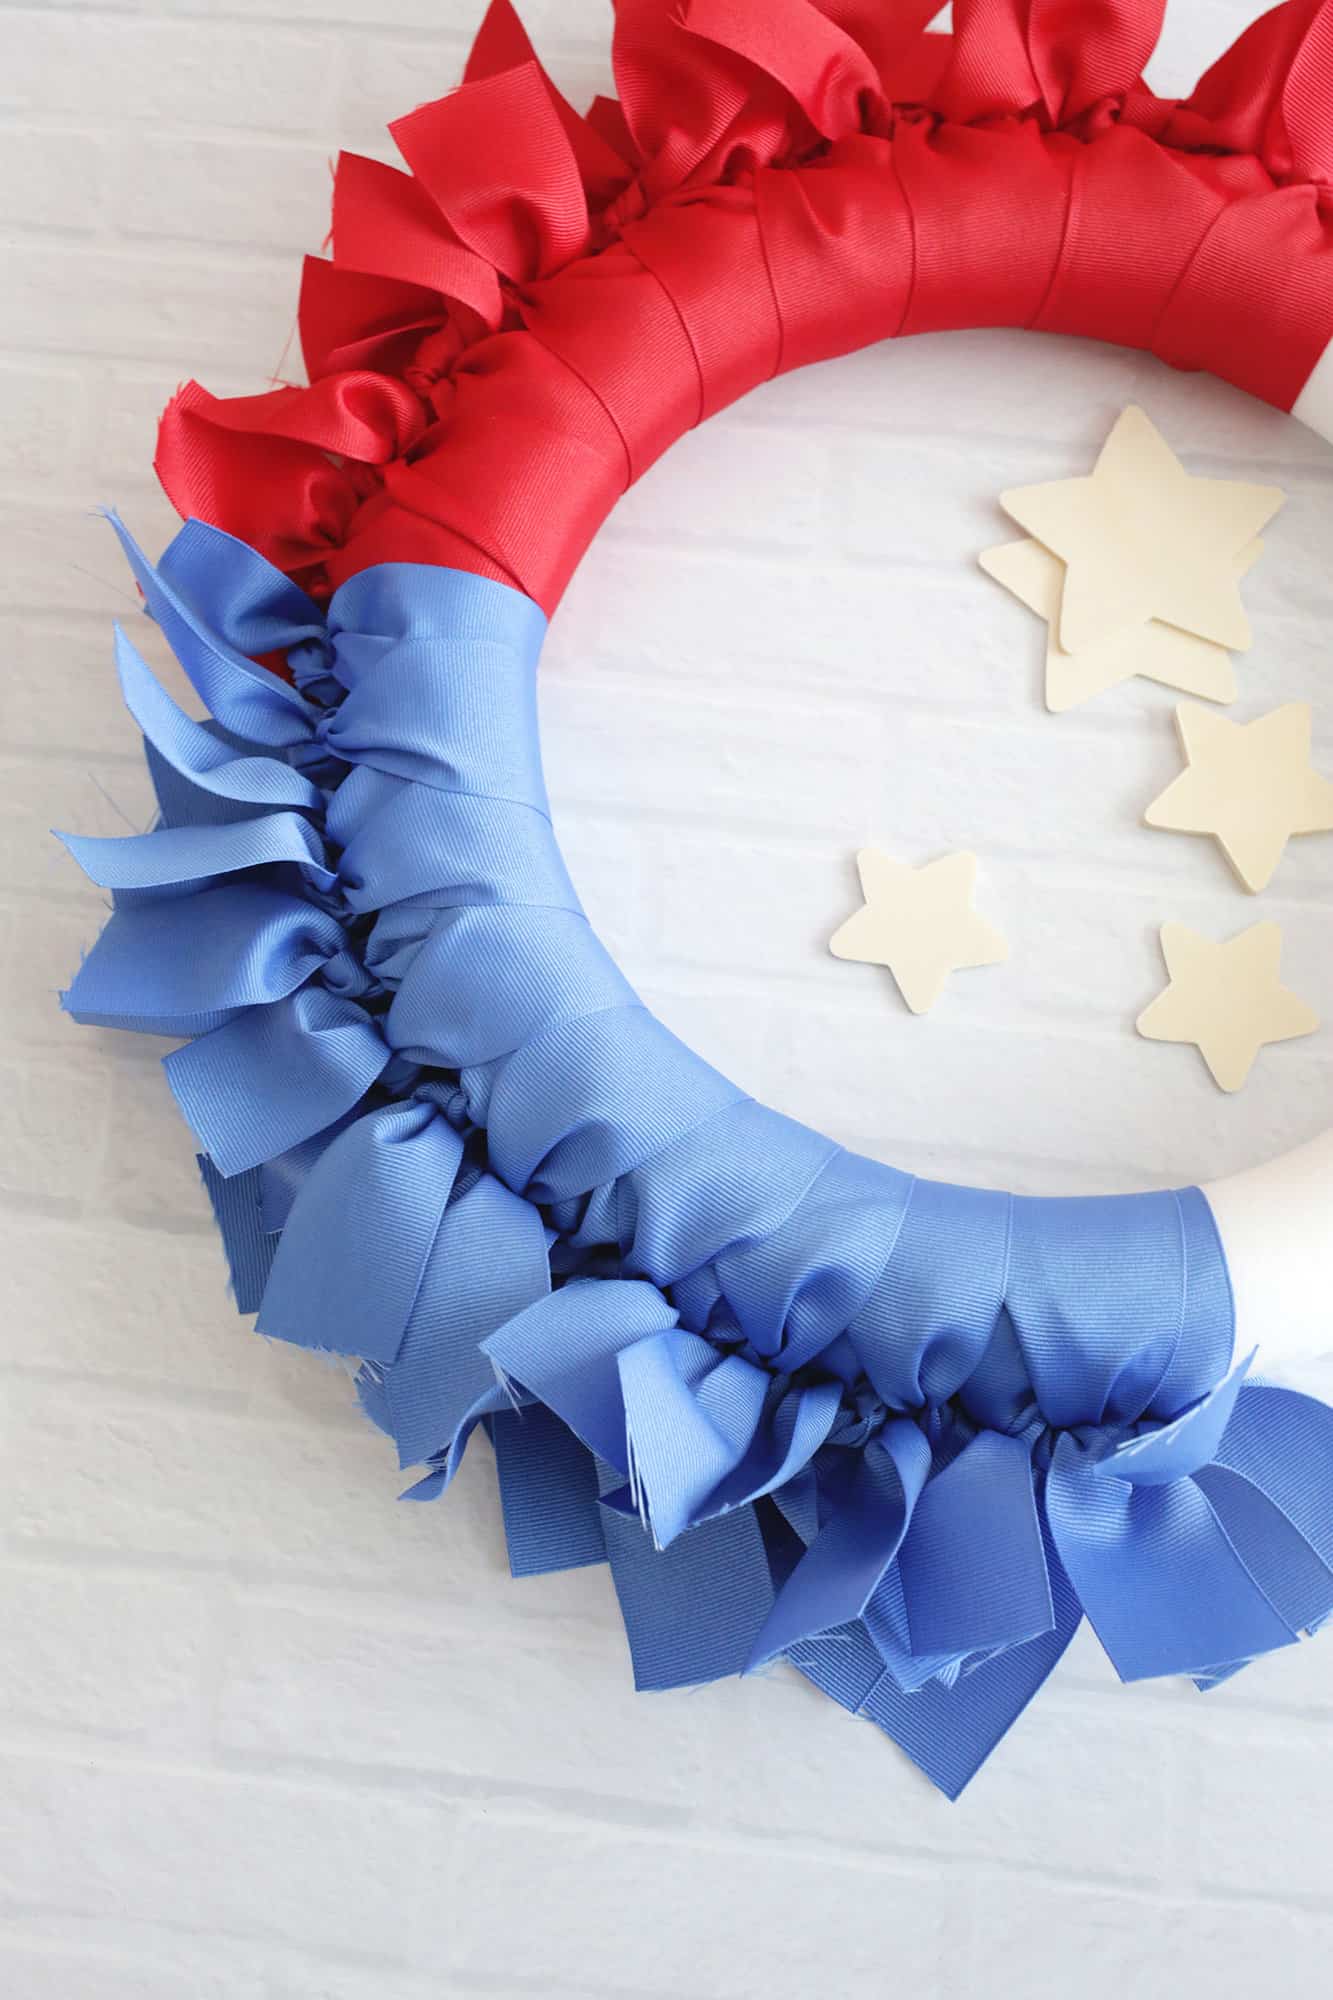
Step 4: Repeat with your blue and white ribbons. Cut more 14-inch ribbons in your white and blue and repeat the process of tying one row just touching each other and then another in the middle of what you did to fill the gap.
Note: You will notice that the grosgrain ribbon tends to fray a bit at the edges after cutting, so if that bothers you you can run some Check Fray Finally, either cut the ribbon at an angle to minimize fraying or use a ribbon that doesn’t fray easily, like the velvet option.

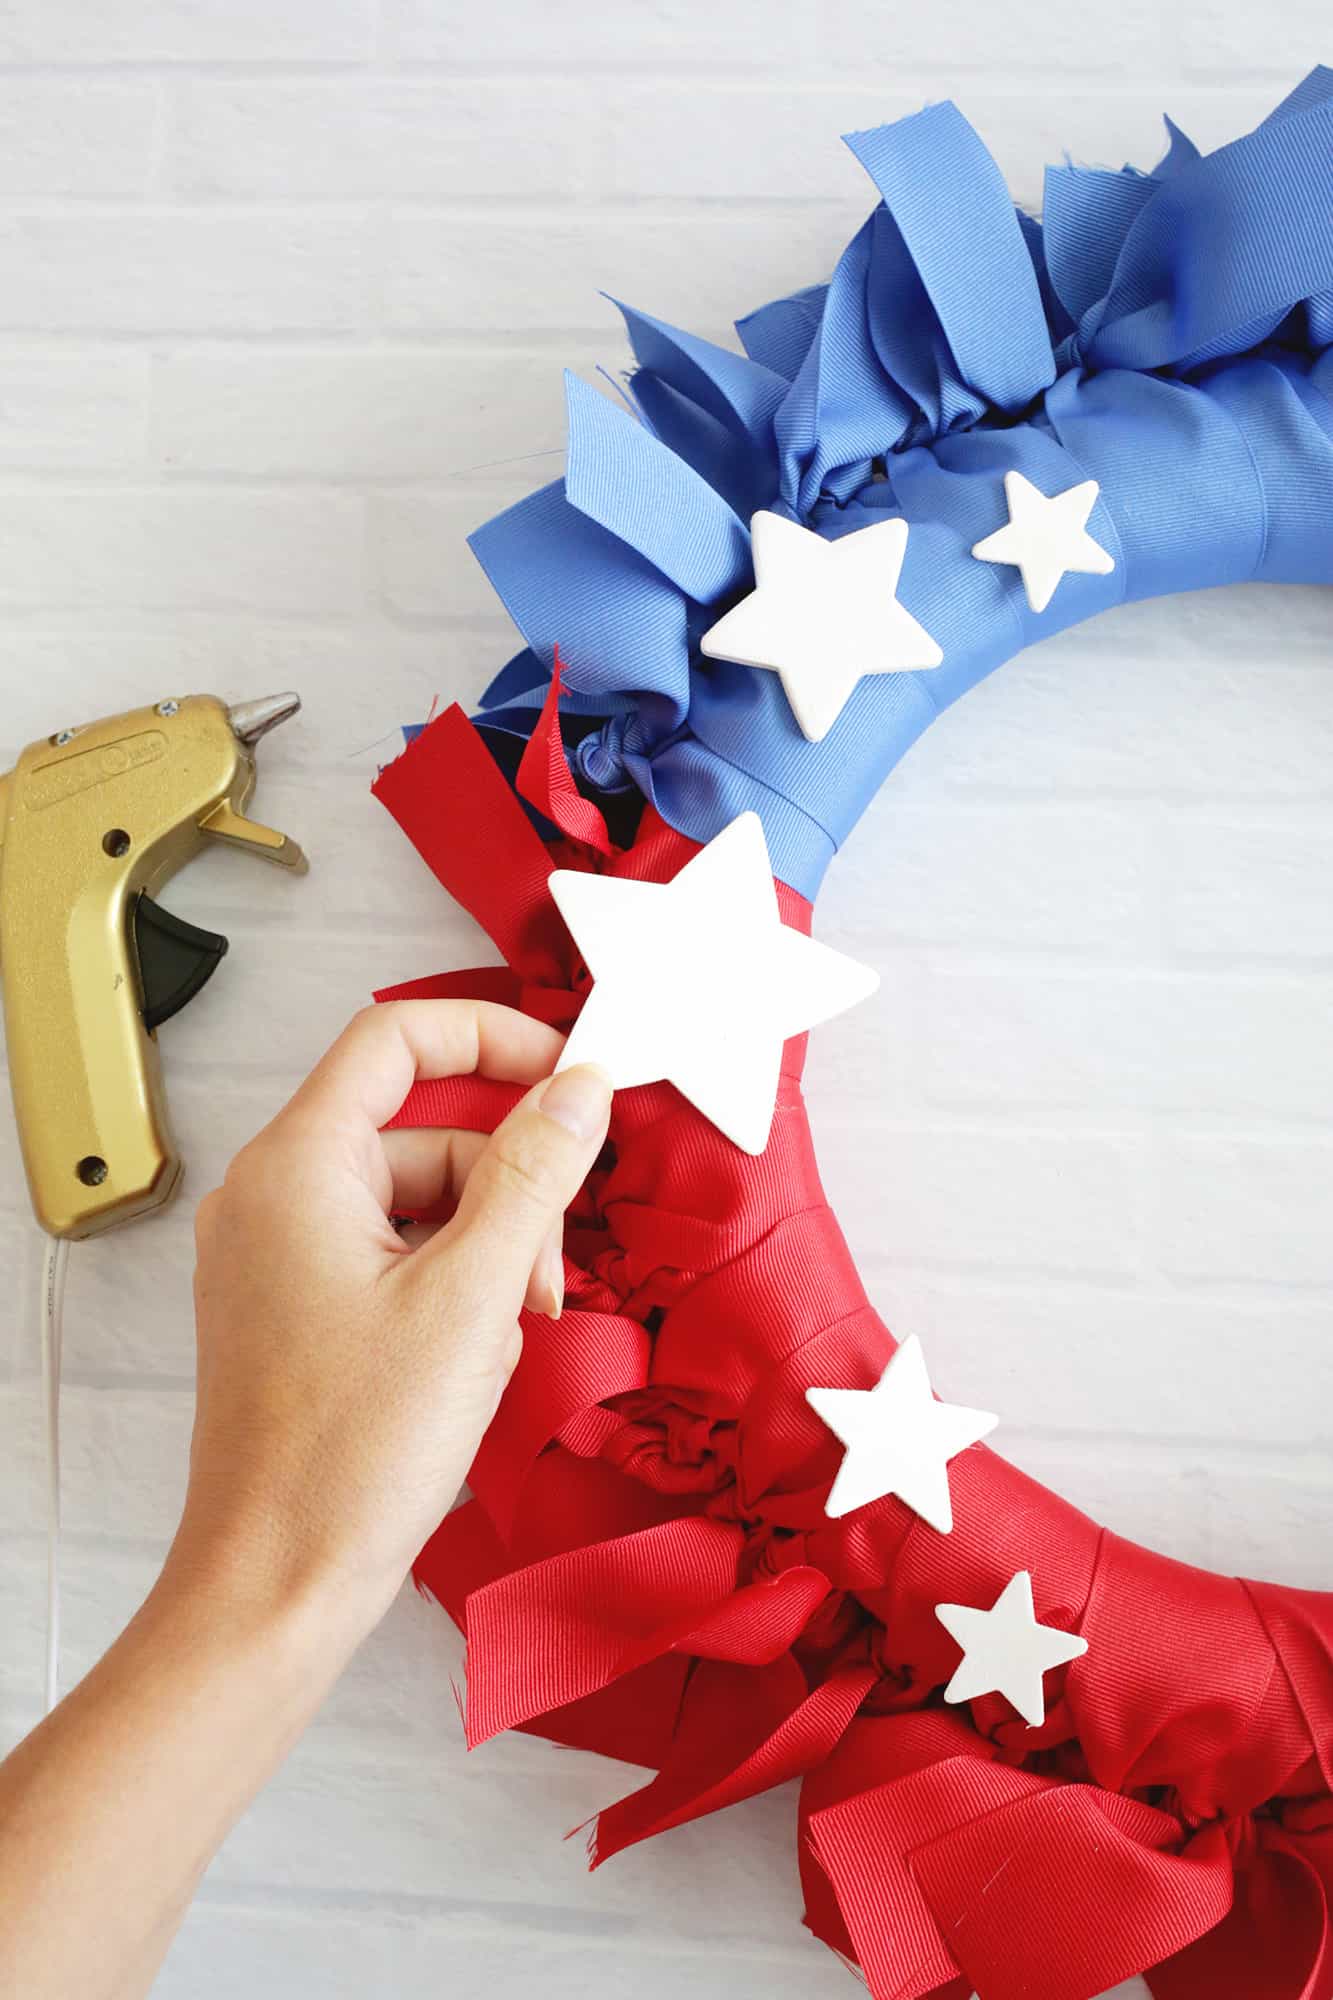
Step 5: Add your white stars! Paint your wooden star accents white and use hot glue to glue them over the red and blue parts of your ribbon garland.
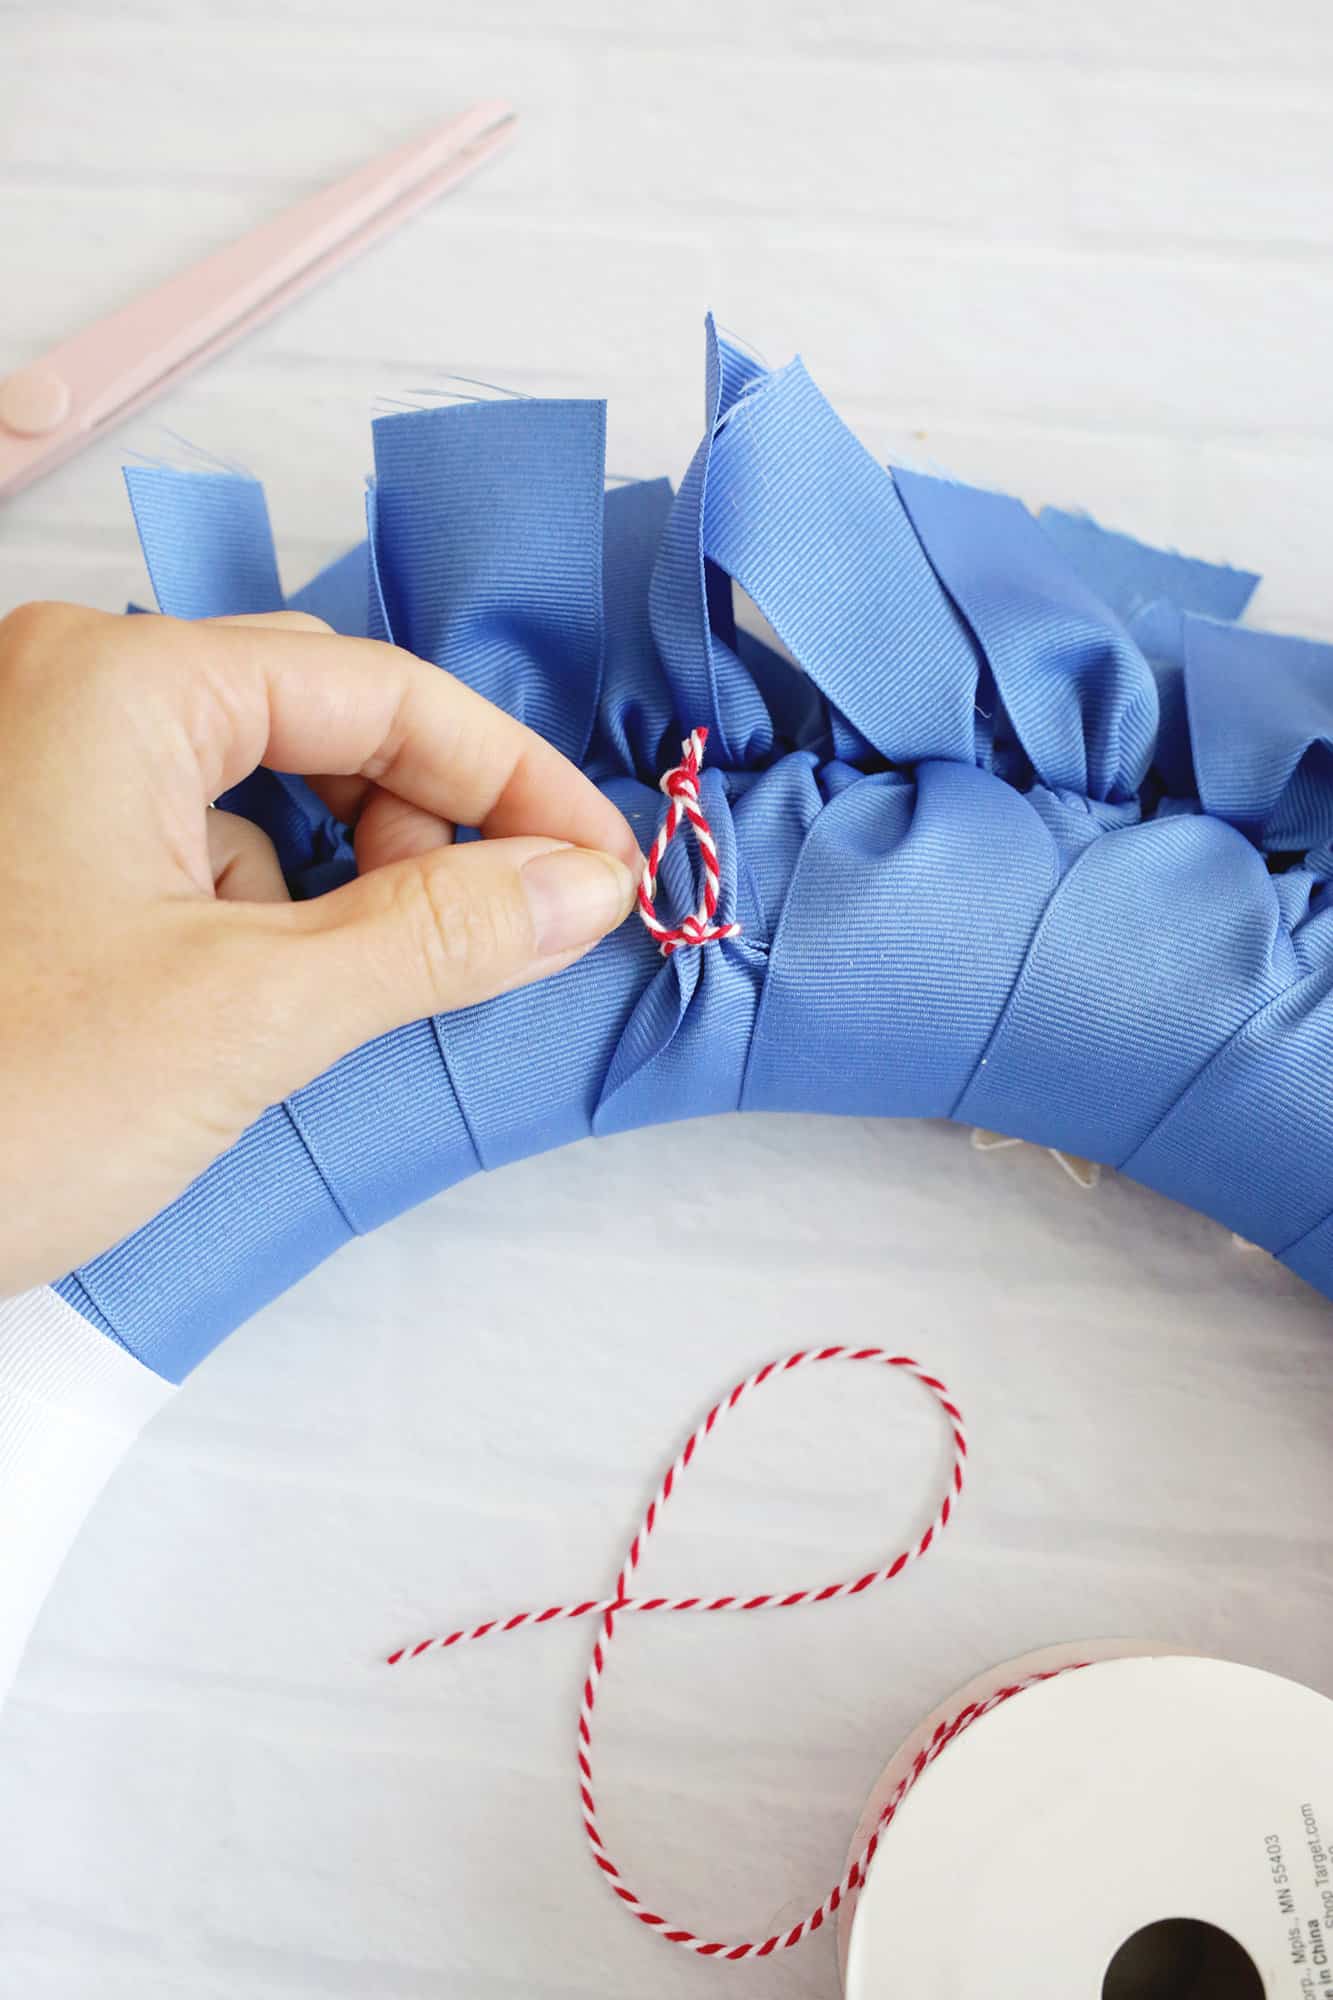
Step 6: Add a hanging loop. Use some twine or wire to thread through the back of the ribbon in the middle in the blue part and tie a loop so you have something to hang your wreath on.
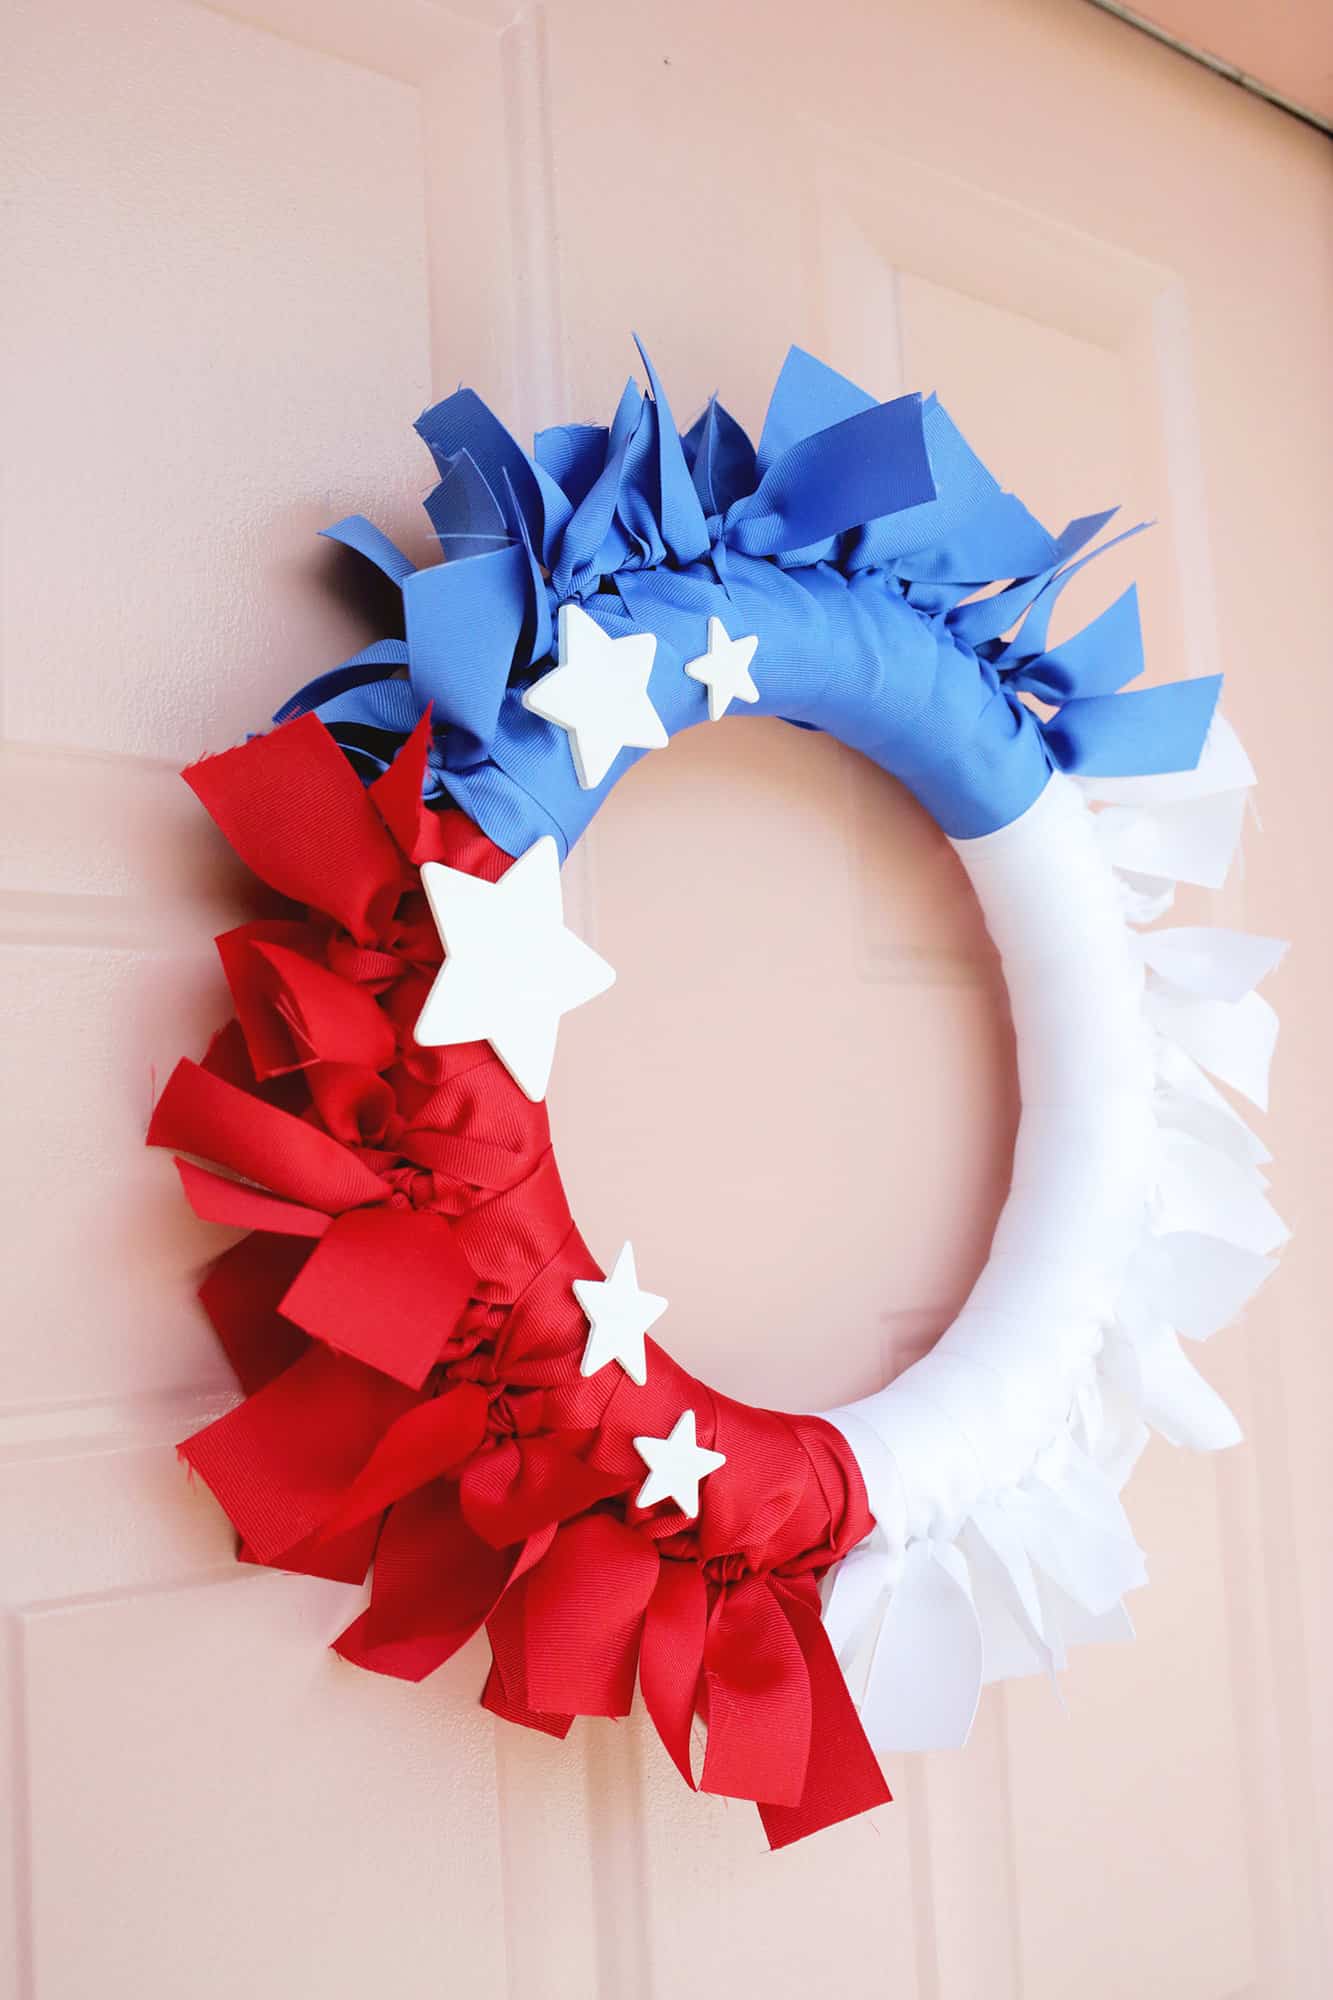
Now your 4th of July wreath is ready to hang!
So cute?! This is the perfect craft to do while you’re watching TV (if you like doing it, check it out 15 crafts you can do while watching TV) or sitting outside on a nice afternoon.
Ribbon wreaths are a quick and easy way to make a holiday wreath, and you can store them easily in a bin along with all your other holiday decorations. so so. Laura
Love a good DIY garland? Payment procedures …
Easy DIY for yourself 4th of July Ribbon Wreath
Easily create a 4th of July wreath with ribbons
-
hot glue gun
-
small paintbrush
-
-scissors
- wreath frame
- red, white and blue acrylic paint
- 1.5 inch red, white and blue ribbon I used grosgrain
- wooden star cut out
- twine or rope for loop
-
Step one: Paint your wreath. Divide your garland into three even sections (you can eyeshadow it) and paint them red, white, and blue so you don’t see any gaps between the ribbons when you start tying them. If your wreath frame is white, you don’t need to paint it white and you will probably need two coats of paint to get more opacity.
-
Step 2: Tie your headband with ribbon. Cut your red ribbons into 14-inch lengths and tie them around the frame of your wreath, tying them into a knot on the outer edge of the wreath. Repeat until you tie the ribbon all the way down to the red part. My ribbon spools are 21′ long and I only use a little more than one per color, so if you want to keep it to a roll, cut them a little shorter or space them out further. a little.
-
Step 3: Fill in the middle of each ribbon with another. Now that you’ve tied the first loop, cut and tie the second loop of red ribbon to the center of each ribbon so it fills the section and looks fuller.
-
Step 4: Repeat with your blue and white ribbons. Cut more 14-inch ribbons in your white and blue and repeat the process of tying one row just touching each other and then another in the middle of what you did to fill the gap.Note: You will notice that the grosgrain ribbon tends to fray a bit at the edges after cutting, so if that bothers you you can run some Fray Check the endings or use a ribbon that doesn’t fray as easily as the velvet option.
-
Step 5: Add your white stars! Paint your wooden star accents white and use hot glue to glue them over the red and blue parts of your ribbon garland.
-
Step 6: Add a hanging loop. Use some twine or wire to thread through the back of the ribbon in the middle in the blue part and tie a loop so you have something to hang your wreath on.Now your 4th of July wreath is ready to hang!