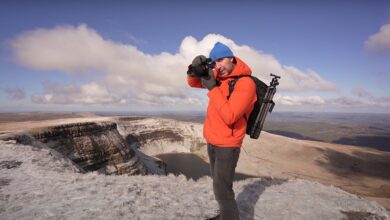
I finally received my DJI Mic after pre-ordering it over a month ago, and at first I was very disappointed. When I did my first test with the DJI Receiver connected to my Canon R5, the sound I recorded was much noisier than what I was used to from my old setup, which I used. Zoom H1 with Rode Lavalier GO. But there is a solution to this problem, and in this article I share it with you.
First things first: this is by no means an exhaustive review of the microphone. I haven’t had it long enough. When I buy a new device, I assure you with a series of initial tests that it works properly and does what I want. If not, I will send it back within the return period. And honestly, that’s what I think I might have to do with DJI Microphone after listening to the first recording. But you will soon learn that, the noise is caused by wrong settings in both the microphone and the camera. DJI mics can provide very good sound quality if used properly.
Record a backup track
The first thing I did to identify the problem was to record a backup directly to one of the transmitters. It’s a handy feature that I’ll be using a lot. The transmitter has a dedicated record button that starts backup recording independent of camera recording. With it, I can record a backup track in addition to the audio going into the camera through the receiver, or I can use it as my stand-alone audio recording solution when filming with a GoPro.
So how did the backup sound recording? I am happy to say that no noise can be heard, which tells me that the noise in my previous recording was introduced somewhere in the transmission chain between transmitter, receiver and camera. You can hear this much improved audio signal in the second part of the featured video.
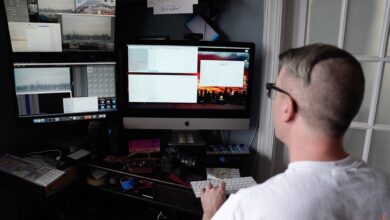
When I opened the backup’s WAV file in DaVinci Resolve, I noticed low audio levels. I had to boost it by more than 16db to align it with the audio I recorded on the camera earlier. Because this backup audio signal is so clean, boosting it in post-production didn’t produce any noise.
It tells me that on my first test, the audio signal must be boosted by an analog amount inside the camera because I didn’t apply any other gain in the DJI Microphone. Since the audio signal entering the camera is already a decoded analog signal, any noise introduced will now increase as the camera boosts the audio signal.
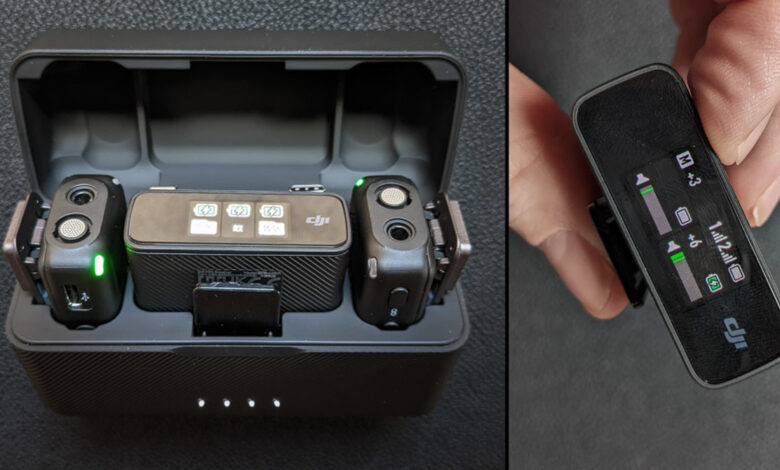
Applying Gain in Transmitter and Receiver
In the DJI Microphone, you can set the gain at both receiver and transmitter independently to values from -12db to +12db. You should adjust the transmitter gain to a value, this results in a strong audio signal with no clipping. On the receiver, there is a level indicator, which helps to fine-tune this setting. You can also enhance the audio signal in the receiver itself by applying an additional gain before it enters the camera. While connecting the microphone to Canon R5 and my Dell XPS, I find that I have to increase the signal significantly to avoid interference.
The further in the audio chain, the more the audio signal is enhanced, the more noise you get. The worst thing you can do is set the sound level in the camera to auto and the level obtained in the DJI Microphone to a low value. The camera then increases the sound level with all the noise generated during the process. That’s what happened in my first test when I set everything to default. You can hear it in the first part of the featured video.
I’m still experimenting with different settings, but what works for me now in an office setup without any background noise are the following:
-
I set the gain in the transmitter to +6db
-
In the receiver I apply +3db
-
I manually control the sound level in the camera and set it to a value of 50% or less
The result is an audio signal with the same strength as in my first test but with much less noise.
Now, I encourage you to take your tests and tweak those settings to suit you. I will also try to improve the sound further by experimenting with the results obtained. But I feel that it is important to share this now so that the information gets out there and you are no longer as confused as I was at first. If you do a lot of movies, this is definitely nothing new to you. But for me, there is still a lot to learn when it comes to audio and video recording.
How to synchronize audio and video
Since the backup recording sounds so good, you may want to always record it in addition to the audio you record on the camera. If you somehow mess up the gain settings and the audio signal is recorded with noisy video or too large a clip, you can change it with a backup.
In modern video editing software, synchronizing audio and video is easy. For example, I wanted to share how it’s done in the free software DaVinci Resolve. Before dragging the video and audio clip to the timeline, select both in DaVinci’s file explorer, right-click one of the files, and select “Automatically Sync Audio – Waveform Based”. It will work perfectly for backup because the audio source is exactly the same as the one in the video file. The only difference is the intensity and noise level.
To avoid confusion when you are shooting multiple video and audio clips, make sure that the date and time settings in both the camera and the DJI Microphone are the same. In DaVinci Resolve, you can order files based on their creation time, which will make it much easier to find the corresponding tracks.
Finally, let’s hear your experience. Do you also have a DJI Microphone or similar microphone? Which setting works best for you?