Many aspiring landscape photographers hit roadblocks when it comes to long exposures and filters. They may seem confusing and overly technical, but the following tips will help you be more clear.
Landscape photography is one of the most fascinating types of photography out there. It has always been easy for people to develop a curiosity about the craft and the images can have an impact on people from different cultures and different walks of life. However, once curiosity is nurtured, landscape photography techniques can be intimidating to many.

As someone who has been talking and sharing about landscape photography for several years now, I find that beginners and casual photographers alike often ask technical questions about landscape photography. Furthermore, a lot of them express frustration or hesitation because they are intimidated by its technical aspects. The majority of people I spoke to encountered roadblocks when it came to filters. Here are some simple tips that will help those who are having trouble understanding the filters and help shorten the learning curve.
1. Remember the basics: What do filters do?
Filters only really do one thing, and if you don’t know what that is, a filter shot can be a shot in the dark for you. ND and GND . filters limit the penetration of light entering your sensor. Different filters have different degrees of light reduction, but the mechanism is pretty much the same. Because of this, the first rule to remember (with some exceptions) is that ND filters are generally not used when there isn’t enough light to begin with.
The goal of using an ND filter for landscape photography is to lengthen the exposure. It’s safe to say that during the day, long exposures outdoors are nearly impossible, and even on low-light days, your exposure may not be as long as you’d like. Filters allow you to increase that possible range. The benefit of using a filter is technically a byproduct of its actual effect. Limiting the light entering the sensor allows you to compensate for exposure with settings to achieve similar brightness, and of course, the expected parameter to be adjusted is the shutter speed. But why should you take a long exposure in the first place?
2. Focus on movement
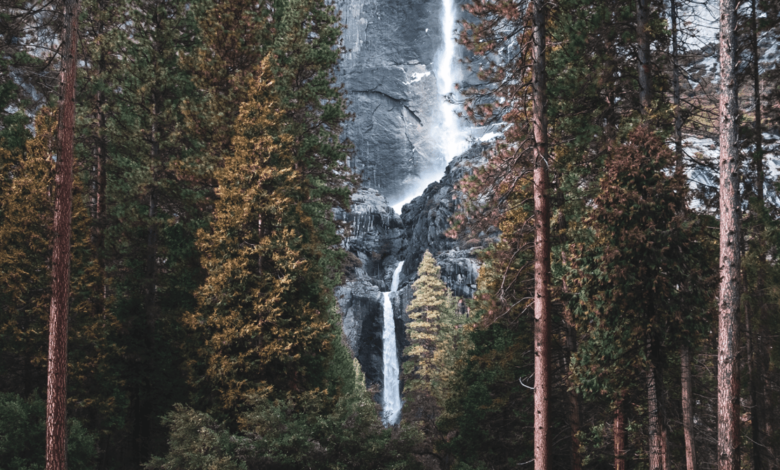
Motion is why we want a long exposure, aside from the obvious reason of a long exposure in the dark to get enough light. Moving elements within the frame can help enhance a composition as long as it is used with the right artistic intent. Moving objects in the frame can show additional textures and enhance contrast in the image. They can also create patterns through motion blur that are invisible with relatively short and fast exposures.
A long exposure is not an absolute requirement for a landscape photo, and doing it unnecessarily when there are no moving elements in the scene will result in a lot of wasted time and effort. strength. Scenes can be beautiful even without any moving elements in the frame and can be captured in just a quick fraction of a second. Understanding the basic reasons for a long exposure will help you distinguish when to use the right technique and when to use a filter.
3. Start simple
Using filters to perform your envisioned image can seem complicated. What better way to tackle it than to simply start? Mastering the use of filters requires complete mastery of exposure. In general, landscape photography is complicated because of the difference in brightness between what’s on the ground and the sky in the background. For you to go the extra mile in using exposure techniques to enhance the aesthetics of your images, it’s important to learn how to fix the problem in its “weakest” form. .
“Blue Hour” is something you’ve probably heard from a lot of landscape photographers. The reason behind this preference for shooting during this time is because it is the time of day when the light in the sky is close to the light on the ground. The easiest way to correct any brightness imbalance is to shoot at the right moment, like striking while the iron is hot. As you get used to achieving this balanced exposure, the moments before and after the blue hour (before sunset and after sunrise) can be a good time to practice adapting to these changes. change in light with your filter.
4. Methodological approach to master
There are many ways to learn how to use filters and master long exposure techniques. Some people simply go the trial-and-error route and learn from the experience. However, as with anything involving the scientific process, a methodical approach offers more assurance in the long run.
The hard part of using filters is deciding which ones to use to get the effect you want. This involves estimating your expected exposure time. This means you can’t simply lengthen the exposure, but also set it to the right length that will give you the effect you want. Filters come in many different variations. Typically, ND filters are available at 3, 6, 10, 12, 15, and 20 stops. Using each allows you to lengthen the exposure in proportion to the number of stops it is applied to. By definition, the “stop” on an ND filter reduces the light entering by half. This means the 3-point ND filter splits the light in total 3 times, resulting in 1/8 of the original light for a fixed amount of time. If you invert that formula, it means that if you have a base exposure, you can simply multiply your shutter speed by doubling it a few times by the number of stops of the ND filter you’re using. use. If your base exposure is second, that means you doubled it by 3 and your resulting shutter speed with a 3-stop ND filter is x 2 x 2 x2, giving you a gap to make a 4 second exposure.
 Getting familiar with this calculation allows you to make a better estimate in the future. It’s not necessary to work with numbers every time, but being guided by them will help improve your process. In addition, various smartphone applications provide calculation tools for this. Some examples are Photopills and the MIOPS mobile app. Either way, being familiar with how the formula works will help you better understand the whole process.
5. There is no perfect formula for a good image
This is a common practice, not just a reality for landscape photography. Many photographers can be quite obsessive when it comes to settings. People share information about their display settings, when in reality most of this information is irrelevant to the other. Unless the lighting environment can be completely replicated, duplicating the settings won’t help. This is even more true in landscape photography as lighting can change in an outdoor scene in just a few seconds. Even in the same position, facing the same direction and using the same device will not yield the same results.

This can also apply to filters. The use of our filters is dictated by the light available on the position and the moving elements in the frame. Both variables can differ significantly in just a few seconds. In another sense, this also means that filter combinations are not strictly formulaic. Many beginner landscape photographers think they have to have every variation of ND and GND filters just in case. However, it is more important to have a versatile set of filters that can give you the results you want. Having a full set of filters is not a bad thing if you can afford it, however, too many options can slow you down.
Landscape photography can be intimidating. The majestic scenery, the physics involved, as well as the technical elements that come into play, all make it seem challenging. However, like any other creative process, mastery takes time, and as you gradually understand the process as you master it, the enjoyment of creating and the physical adventure will overtake. every difficulty.